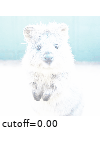
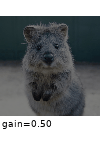
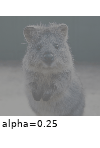
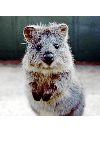
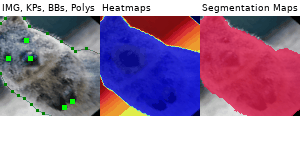
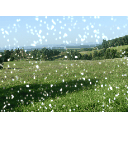
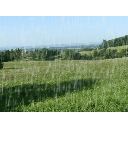
This python library helps you with augmenting images for your machine learning projects. It converts a set of input images into a new, much larger set of slightly altered images.

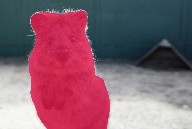
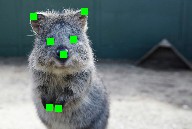
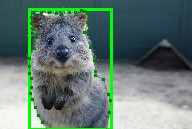
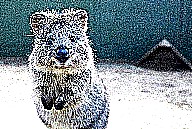
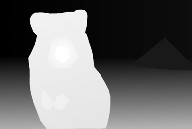
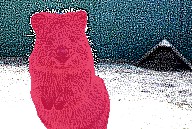
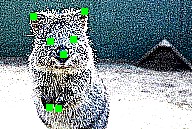
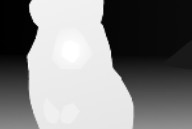
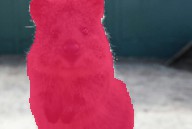
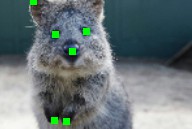
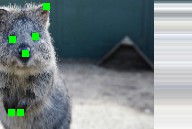
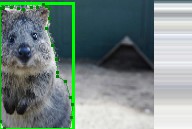
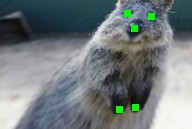
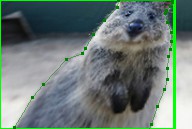
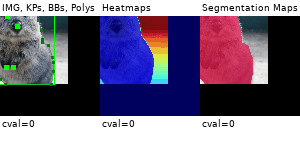
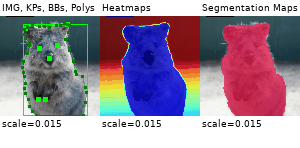
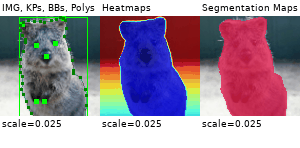
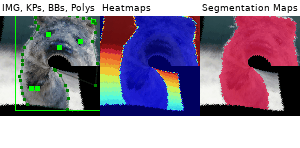
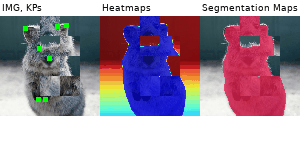
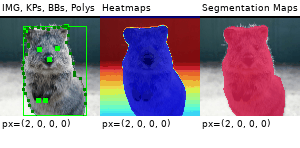
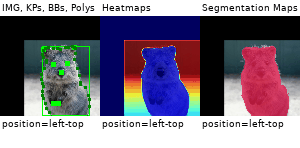
| Image | Heatmaps | Seg. Maps | Keypoints | Bounding Boxes, Polygons |
|
|---|---|---|---|---|---|
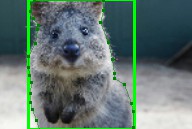
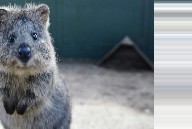
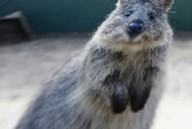
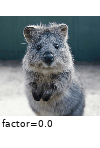
| Original Input | 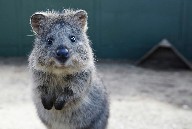 |
 |
 |
 |
 |
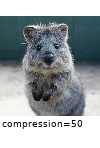
| Gauss. Noise + Contrast + Sharpen |
 |
 |
 |
 |
 |
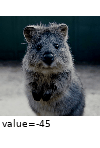
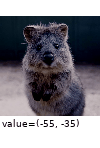
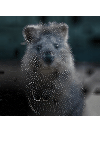
| Affine | 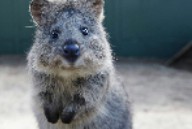 |
 |
 |
 |
 |
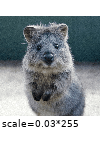
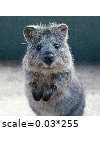
| Crop + Pad |
 |
 |
 |
 |
 |
| Fliplr + Perspective |
 |
 |
 |
 |
 |
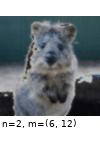
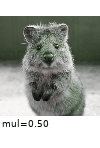
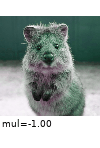
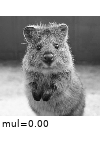
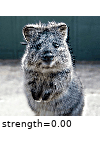
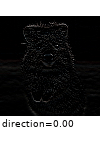
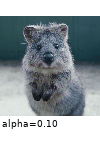
More (strong) example augmentations of one input image:
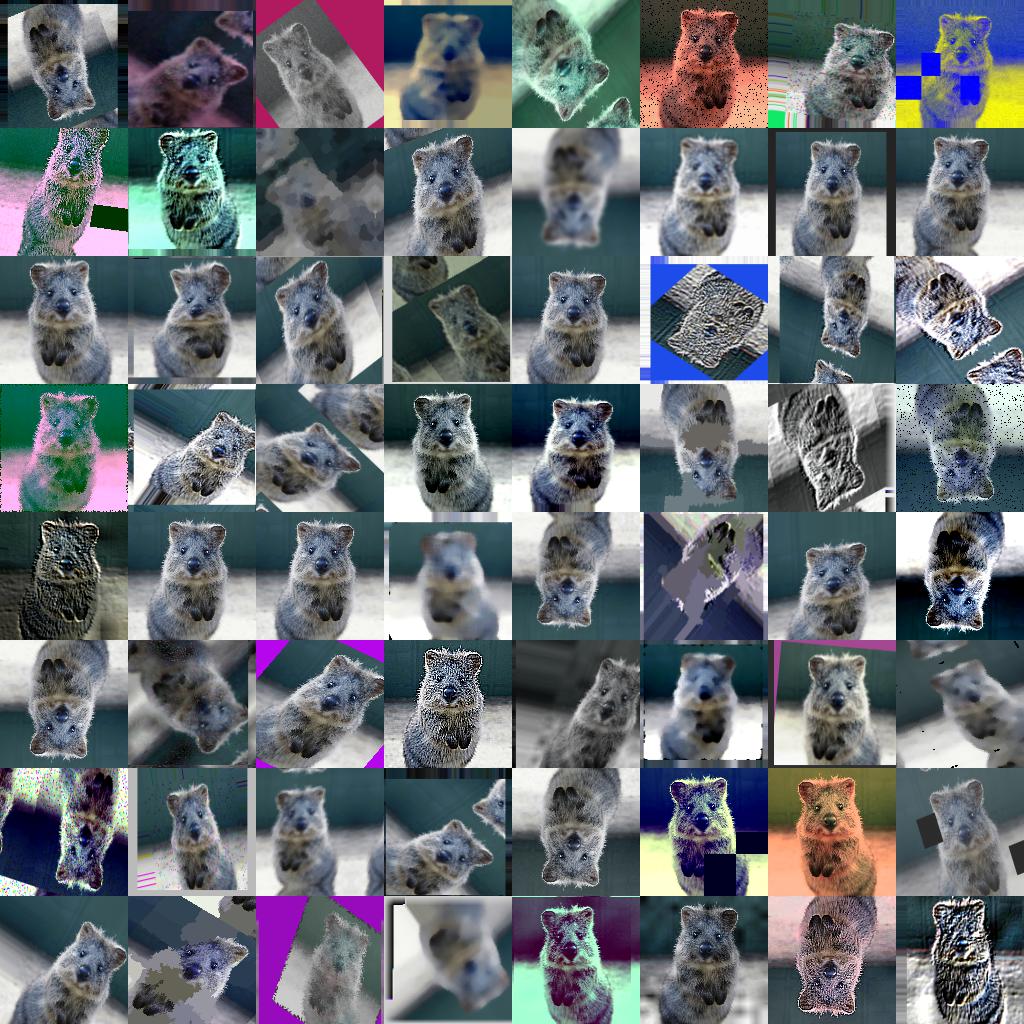
- Many augmentation techniques
- E.g. affine transformations, perspective transformations, contrast changes, gaussian noise, dropout of regions, hue/saturation changes, cropping/padding, blurring, ...
- Optimized for high performance
- Easy to apply augmentations only to some images
- Easy to apply augmentations in random order
- Support for
- Images (full support for uint8, for other dtypes see documentation)
- Heatmaps (float32), Segmentation Maps (int), Masks (bool)
- May be smaller/larger than their corresponding images. No extra lines of code needed for e.g. crop.
- Keypoints/Landmarks (int/float coordinates)
- Bounding Boxes (int/float coordinates)
- Polygons (int/float coordinates)
- Line Strings (int/float coordinates)
- Automatic alignment of sampled random values
- Example: Rotate image and segmentation map on it by the same value sampled from
uniform(-10°, 45°). (0 extra lines of code.)
- Example: Rotate image and segmentation map on it by the same value sampled from
- Probability distributions as parameters
- Example: Rotate images by values sampled from
uniform(-10°, 45°). - Example: Rotate images by values sampled from
ABS(N(0, 20.0))*(1+B(1.0, 1.0))", whereABS(.)is the absolute function,N(.)the gaussian distribution andB(.)the beta distribution.
- Example: Rotate images by values sampled from
- Many helper functions
- Example: Draw heatmaps, segmentation maps, keypoints, bounding boxes, ...
- Example: Scale segmentation maps, average/max pool of images/maps, pad images to aspect ratios (e.g. to square them)
- Example: Convert keypoints to distance maps, extract pixels within bounding boxes from images, clip polygon to the image plane, ...
- Support for augmentation on multiple CPU cores
The library supports python 2.7 and 3.4+.
To install the library in anaconda, perform the following commands:
conda config --add channels conda-forge
conda install imgaug
You can deinstall the library again via conda remove imgaug.
Then install imgaug either via pypi (can lag behind the github version):
pip install imgaugor install the latest version directly from github:
pip install git+https://github.com/aleju/imgaug.gitFor more details, see the install guide
To deinstall the library, just execute pip uninstall imgaug.
Example jupyter notebooks:
- Load and Augment an Image
- Multicore Augmentation
- Augment and work with: Keypoints/Landmarks, Bounding Boxes, Polygons, Line Strings, Heatmaps, Segmentation Maps
More notebooks: imgaug-doc/notebooks.
Example ReadTheDocs pages:
More RTD documentation: imgaug.readthedocs.io.
All documentation related files of this project are hosted in the repository imgaug-doc.
- 0.4.0: Added new augmenters, changed backend to batchwise augmentation, support for numpy 1.18 and python 3.8.
- 0.3.0: Reworked segmentation map augmentation, adapted to numpy 1.17+ random number sampling API, several new augmenters.
- 0.2.9: Added polygon augmentation, added line string augmentation, simplified augmentation interface.
- 0.2.8: Improved performance, dtype support and multicore augmentation.
See changelogs/ for more details.
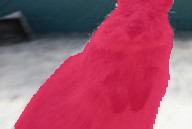
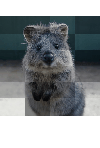
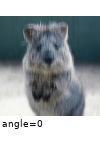
The images below show examples for most augmentation techniques.
Values written in the form (a, b) denote a uniform distribution,
i.e. the value is randomly picked from the interval [a, b].
Line strings are supported by (almost) all augmenters, but are not explicitly
visualized here.


A standard machine learning situation. Train on batches of images and augment each batch via crop, horizontal flip ("Fliplr") and gaussian blur:
import numpy as np
import imgaug.augmenters as iaa

def load_batch(batch_idx):
    # dummy function, implement this
    # Return a numpy array of shape (N, height, width, #channels)
    # or a list of (height, width, #channels) arrays (may have different image
    # sizes).
    # Images should be in RGB for colorspace augmentations.
    # (cv2.imread() returns BGR!)
    # Images should usually be in uint8 with values from 0-255.
    return np.zeros((128, 32, 32, 3), dtype=np.uint8) + (batch_idx % 255)

def train_on_images(images):
    # dummy function, implement this
    pass

# Pipeline:
# (1) Crop images from each side by 1-16px, do not resize the results
#     images back to the input size. Keep them at the cropped size.
# (2) Horizontally flip 50% of the images.
# (3) Blur images using a gaussian kernel with sigma between 0.0 and 3.0.
seq = iaa.Sequential([
    iaa.Crop(px=(1, 16), keep_size=False),
    iaa.Fliplr(0.5),
    iaa.GaussianBlur(sigma=(0, 3.0))
])

for batch_idx in range(100):
    images = load_batch(batch_idx)
    images_aug = seq(images=images)  # done by the library
train_on_images(images_aug)Apply a very heavy augmentation pipeline to images (used to create the image at the very top of this readme):
import numpy as np
import imgaug as ia
import imgaug.augmenters as iaa
# random example images
images = np.random.randint(0, 255, (16, 128, 128, 3), dtype=np.uint8)
# Sometimes(0.5, ...) applies the given augmenter in 50% of all cases,
# e.g. Sometimes(0.5, GaussianBlur(0.3)) would blur roughly every second image.
sometimes = lambda aug: iaa.Sometimes(0.5, aug)
# Define our sequence of augmentation steps that will be applied to every image
# All augmenters with per_channel=0.5 will sample one value _per image_
# in 50% of all cases. In all other cases they will sample new values
# _per channel_.
seq = iaa.Sequential(
[
# apply the following augmenters to most images
iaa.Fliplr(0.5), # horizontally flip 50% of all images
iaa.Flipud(0.2), # vertically flip 20% of all images
# crop images by -5% to 10% of their height/width
sometimes(iaa.CropAndPad(
percent=(-0.05, 0.1),
pad_mode=ia.ALL,
pad_cval=(0, 255)
)),
sometimes(iaa.Affine(
scale={"x": (0.8, 1.2), "y": (0.8, 1.2)}, # scale images to 80-120% of their size, individually per axis
translate_percent={"x": (-0.2, 0.2), "y": (-0.2, 0.2)}, # translate by -20 to +20 percent (per axis)
rotate=(-45, 45), # rotate by -45 to +45 degrees
shear=(-16, 16), # shear by -16 to +16 degrees
order=[0, 1], # use nearest neighbour or bilinear interpolation (fast)
cval=(0, 255), # if mode is constant, use a cval between 0 and 255
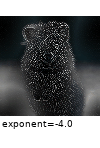
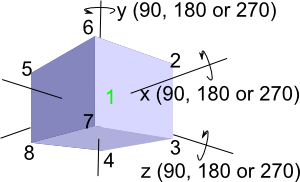
mode=ia.ALL # use any of scikit-image's warping modes (see 2nd image from the top for examples)
)),
# execute 0 to 5 of the following (less important) augmenters per image
# don't execute all of them, as that would often be way too strong
iaa.SomeOf((0, 5),
[
sometimes(iaa.Superpixels(p_replace=(0, 1.0), n_segments=(20, 200))), # convert images into their superpixel representation
iaa.OneOf([
iaa.GaussianBlur((0, 3.0)), # blur images with a sigma between 0 and 3.0
iaa.AverageBlur(k=(2, 7)), # blur image using local means with kernel sizes between 2 and 7
iaa.MedianBlur(k=(3, 11)), # blur image using local medians with kernel sizes between 2 and 7
]),
iaa.Sharpen(alpha=(0, 1.0), lightness=(0.75, 1.5)), # sharpen images
iaa.Emboss(alpha=(0, 1.0), strength=(0, 2.0)), # emboss images
# search either for all edges or for directed edges,
# blend the result with the original image using a blobby mask
iaa.SimplexNoiseAlpha(iaa.OneOf([
iaa.EdgeDetect(alpha=(0.5, 1.0)),
iaa.DirectedEdgeDetect(alpha=(0.5, 1.0), direction=(0.0, 1.0)),
])),
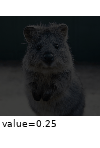
iaa.AdditiveGaussianNoise(loc=0, scale=(0.0, 0.05*255), per_channel=0.5), # add gaussian noise to images
iaa.OneOf([
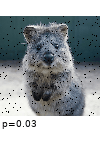
iaa.Dropout((0.01, 0.1), per_channel=0.5), # randomly remove up to 10% of the pixels
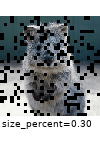
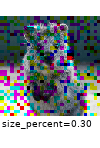
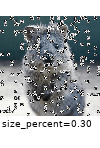
iaa.CoarseDropout((0.03, 0.15), size_percent=(0.02, 0.05), per_channel=0.2),
]),
iaa.Invert(0.05, per_channel=True), # invert color channels
iaa.Add((-10, 10), per_channel=0.5), # change brightness of images (by -10 to 10 of original value)
iaa.AddToHueAndSaturation((-20, 20)), # change hue and saturation
# either change the brightness of the whole image (sometimes
# per channel) or change the brightness of subareas
iaa.OneOf([
iaa.Multiply((0.5, 1.5), per_channel=0.5),
iaa.FrequencyNoiseAlpha(
exponent=(-4, 0),
first=iaa.Multiply((0.5, 1.5), per_channel=True),
second=iaa.LinearContrast((0.5, 2.0))
)
]),
iaa.LinearContrast((0.5, 2.0), per_channel=0.5), # improve or worsen the contrast
iaa.Grayscale(alpha=(0.0, 1.0)),
sometimes(iaa.ElasticTransformation(alpha=(0.5, 3.5), sigma=0.25)), # move pixels locally around (with random strengths)
sometimes(iaa.PiecewiseAffine(scale=(0.01, 0.05))), # sometimes move parts of the image around
sometimes(iaa.PerspectiveTransform(scale=(0.01, 0.1)))
],
random_order=True
)
],
random_order=True
)
images_aug = seq(images=images)Augment images and keypoints/landmarks on the same images:
import numpy as np
import imgaug.augmenters as iaa

images = np.zeros((2, 128, 128, 3), dtype=np.uint8)  # two example images
images[:, 64, 64, :] = 255
points = [
    [(10.5, 20.5)],  # points on first image
    [(50.5, 50.5), (60.5, 60.5), (70.5, 70.5)]  # points on second image
]

seq = iaa.Sequential([
    iaa.AdditiveGaussianNoise(scale=0.05*255),
    iaa.Affine(translate_px={"x": (1, 5)})
])

# augment keypoints and images
images_aug, points_aug = seq(images=images, keypoints=points)

print("Image 1 center", np.argmax(images_aug[0, 64, 64:64+6, 0]))
print("Image 2 center", np.argmax(images_aug[1, 64, 64:64+6, 0]))
print("Points 1", points_aug[0])
print("Points 2", points_aug[1])
Note that all coordinates in imgaug are subpixel-accurate, which is
why x=0.5, y=0.5 denotes the center of the top left pixel.
import numpy as np
import imgaug as ia
import imgaug.augmenters as iaa

images = np.zeros((2, 128, 128, 3), dtype=np.uint8)  # two example images
images[:, 64, 64, :] = 255
bbs = [
    [ia.BoundingBox(x1=10.5, y1=15.5, x2=30.5, y2=50.5)],
    [ia.BoundingBox(x1=10.5, y1=20.5, x2=50.5, y2=50.5),
     ia.BoundingBox(x1=40.5, y1=75.5, x2=70.5, y2=100.5)]
]

seq = iaa.Sequential([
    iaa.AdditiveGaussianNoise(scale=0.05*255),
    iaa.Affine(translate_px={"x": (1, 5)})
])

images_aug, bbs_aug = seq(images=images, bounding_boxes=bbs)import numpy as np
import imgaug as ia
import imgaug.augmenters as iaa
images = np.zeros((2, 128, 128, 3), dtype=np.uint8) # two example images
images[:, 64, 64, :] = 255
polygons = [
[ia.Polygon([(10.5, 10.5), (50.5, 10.5), (50.5, 50.5)])],
[ia.Polygon([(0.0, 64.5), (64.5, 0.0), (128.0, 128.0), (64.5, 128.0)])]
]
seq = iaa.Sequential([
iaa.AdditiveGaussianNoise(scale=0.05*255),
iaa.Affine(translate_px={"x": (1, 5)})
])
images_aug, polygons_aug = seq(images=images, polygons=polygons)LineStrings are similar to polygons, but are not closed, may intersect with themselves and don't have an inner area.
import numpy as np
import imgaug as ia
import imgaug.augmenters as iaa

images = np.zeros((2, 128, 128, 3), dtype=np.uint8)  # two example images
images[:, 64, 64, :] = 255
ls = [
    [ia.LineString([(10.5, 10.5), (50.5, 10.5), (50.5, 50.5)])],
    [ia.LineString([(0.0, 64.5), (64.5, 0.0), (128.0, 128.0), (64.5, 128.0),
                    (128.0, 0.0)])]
]

seq = iaa.Sequential([
    iaa.AdditiveGaussianNoise(scale=0.05*255),
    iaa.Affine(translate_px={"x": (1, 5)})
])

images_aug, ls_aug = seq(images=images, line_strings=ls)Heatmaps are dense float arrays with values between 0.0 and 1.0.
They can be used e.g. when training models to predict facial landmark
locations. Note that the heatmaps here have lower height and width than the
images. imgaug handles that case automatically. The crop pixel amounts will
be halved for the heatmaps.
import numpy as np
import imgaug.augmenters as iaa

# Standard scenario: You have N RGB-images and additionally 21 heatmaps per
# image. You want to augment each image and its heatmaps identically.
images = np.random.randint(0, 255, (16, 128, 128, 3), dtype=np.uint8)
heatmaps = np.random.random(size=(16, 64, 64, 1)).astype(np.float32)

seq = iaa.Sequential([
    iaa.GaussianBlur((0, 3.0)),
    iaa.Affine(translate_px={"x": (-40, 40)}),
    iaa.Crop(px=(0, 10))
])

images_aug, heatmaps_aug = seq(images=images, heatmaps=heatmaps)This is similar to heatmaps, but the dense arrays have dtype int32.
Operations such as resizing will automatically use nearest neighbour
interpolation.
import numpy as np
import imgaug.augmenters as iaa

# Standard scenario: You have N=16 RGB-images and additionally one segmentation
# map per image. You want to augment each image and its heatmaps identically.
images = np.random.randint(0, 255, (16, 128, 128, 3), dtype=np.uint8)
segmaps = np.random.randint(0, 10, size=(16, 64, 64, 1), dtype=np.int32)

seq = iaa.Sequential([
    iaa.GaussianBlur((0, 3.0)),
    iaa.Affine(translate_px={"x": (-40, 40)}),
    iaa.Crop(px=(0, 10))
])

images_aug, segmaps_aug = seq(images=images, segmentation_maps=segmaps)Quickly show example results of your augmentation sequence:
import numpy as np
import imgaug.augmenters as iaa

images = np.random.randint(0, 255, (16, 128, 128, 3), dtype=np.uint8)
seq = iaa.Sequential([iaa.Fliplr(0.5), iaa.GaussianBlur((0, 3.0))])

# Show an image with 8*8 augmented versions of image 0 and 8*8 augmented
# versions of image 1. Identical augmentations will be applied to
# image 0 and 1.
seq.show_grid([images[0], images[1]], cols=8, rows=8)imgaug contains many helper function, among these functions to quickly
visualize augmented non-image results, such as bounding boxes or heatmaps.
import numpy as np
import imgaug as ia

image = np.zeros((64, 64, 3), dtype=np.uint8)

# points
kps = [ia.Keypoint(x=10.5, y=20.5), ia.Keypoint(x=60.5, y=60.5)]
kpsoi = ia.KeypointsOnImage(kps, shape=image.shape)
image_with_kps = kpsoi.draw_on_image(image, size=7, color=(0, 0, 255))
ia.imshow(image_with_kps)

# bbs
bbsoi = ia.BoundingBoxesOnImage([
    ia.BoundingBox(x1=10.5, y1=20.5, x2=50.5, y2=30.5)
], shape=image.shape)
image_with_bbs = bbsoi.draw_on_image(image)
image_with_bbs = ia.BoundingBox(
    x1=50.5, y1=10.5, x2=100.5, y2=16.5
).draw_on_image(image_with_bbs, color=(255, 0, 0), size=3)
ia.imshow(image_with_bbs)

# polygons
psoi = ia.PolygonsOnImage([
    ia.Polygon([(10.5, 20.5), (50.5, 30.5), (10.5, 50.5)])
], shape=image.shape)
image_with_polys = psoi.draw_on_image(
    image, alpha_points=0, alpha_face=0.5, color_lines=(255, 0, 0))
ia.imshow(image_with_polys)

# heatmaps
hms = ia.HeatmapsOnImage(np.random.random(size=(32, 32, 1)).astype(np.float32),
                         shape=image.shape)
image_with_hms = hms.draw_on_image(image)
ia.imshow(image_with_hms)
LineStrings and segmentation maps support similar methods as shown above.
While the interface is adapted towards re-using instances of augmenters many times, you are also free to use them only once. The overhead to instantiate the augmenters each time is usually negligible.
from imgaug import augmenters as iaa
import numpy as np

images = np.random.randint(0, 255, (16, 128, 128, 3), dtype=np.uint8)

# always horizontally flip each input image
images_aug = iaa.Fliplr(1.0)(images=images)

# vertically flip each input image with 90% probability
images_aug = iaa.Flipud(0.9)(images=images)

# blur 50% of all images using a gaussian kernel with a sigma of 3.0
images_aug = iaa.Sometimes(0.5, iaa.GaussianBlur(3.0))(images=images)Images can be augmented in background processes using the
method augment_batches(batches, background=True), where batches is
a list/generator of
imgaug.augmentables.batches.UnnormalizedBatch
or
imgaug.augmentables.batches.Batch.
The following example augments a list of image batches in the background:
import skimage.data
import imgaug as ia
import imgaug.augmenters as iaa
from imgaug.augmentables.batches import UnnormalizedBatch

# Number of batches and batch size for this example
nb_batches = 10
batch_size = 32

# Example augmentation sequence to run in the background
augseq = iaa.Sequential([
    iaa.Fliplr(0.5),
    iaa.CoarseDropout(p=0.1, size_percent=0.1)
])

# For simplicity, we use the same image here many times
astronaut = skimage.data.astronaut()
astronaut = ia.imresize_single_image(astronaut, (64, 64))

# Make batches out of the example image (here: 10 batches, each 32 times
# the example image)
batches = []
for _ in range(nb_batches):
    batches.append(UnnormalizedBatch(images=[astronaut] * batch_size))

# Show the augmented images.
# Note that augment_batches() returns a generator.
for images_aug in augseq.augment_batches(batches, background=True):
    ia.imshow(ia.draw_grid(images_aug.images_aug, cols=8))
If you need more control over the background augmentation, e.g. to set seeds, control the number of used CPU cores or constraint the memory usage, see the corresponding multicore augmentation notebook or the API about Augmenter.pool() and imgaug.multicore.Pool.
Most augmenters support using tuples (a, b) as a shortcut to denote
uniform(a, b) or lists [a, b, c] to denote a set of allowed values from
which one will be picked randomly. If you require more complex probability
distributions (e.g. gaussians, truncated gaussians or poisson distributions)
you can use stochastic parameters from imgaug.parameters:
import numpy as np
from imgaug import augmenters as iaa
from imgaug import parameters as iap

images = np.random.randint(0, 255, (16, 128, 128, 3), dtype=np.uint8)

# Blur by a value sigma which is sampled from a uniform distribution
# of range 10.1 <= x < 13.0.
# The convenience shortcut for this is: GaussianBlur((10.1, 13.0))
blurer = iaa.GaussianBlur(10 + iap.Uniform(0.1, 3.0))
images_aug = blurer(images=images)

# Blur by a value sigma which is sampled from a gaussian distribution
# N(1.0, 0.1), i.e. sample a value that is usually around 1.0.
# Clip the resulting value so that it never gets below 0.1 or above 3.0.
blurer = iaa.GaussianBlur(iap.Clip(iap.Normal(1.0, 0.1), 0.1, 3.0))
images_aug = blurer(images=images)
There are many more probability distributions in the library, e.g. truncated gaussian distribution, poisson distribution or beta distribution.
Apply an augmenter only to specific image channels:
import numpy as np
import imgaug.augmenters as iaa

# fake RGB images
images = np.random.randint(0, 255, (16, 128, 128, 3), dtype=np.uint8)

# add a random value from the range (-30, 30) to the first two channels of
# input images (e.g. to the R and G channels)
aug = iaa.WithChannels(
  channels=[0, 1],
  children=iaa.Add((-30, 30))
)

images_aug = aug(images=images)If this library has helped you during your research, feel free to cite it:
@misc{imgaug,
  author = {Jung, Alexander B.
            and Wada, Kentaro
            and Crall, Jon
            and Tanaka, Satoshi
            and Graving, Jake
            and Reinders, Christoph
            and Yadav, Sarthak
            and Banerjee, Joy
            and Vecsei, Gábor
            and Kraft, Adam
            and Rui, Zheng
            and Borovec, Jirka
            and Vallentin, Christian
            and Zhydenko, Semen
            and Pfeiffer, Kilian
            and Cook, Ben
            and Fernández, Ismael
            and De Rainville, François-Michel
            and Weng, Chi-Hung
            and Ayala-Acevedo, Abner
            and Meudec, Raphael
            and Laporte, Matias
            and others},
  title = {{imgaug}},
  howpublished = {\url{https://github.com/aleju/imgaug}},
  year = {2020},
  note = {Online; accessed 01-Feb-2020}
}


