Code Monkey home page Code Monkey logo

stable-diffusion's Introduction

Stable Diffusion

Stable Diffusion builds upon our previous work with the CompVis group:

High-Resolution Image Synthesis with Latent Diffusion Models
Robin Rombach*, Andreas Blattmann*, Dominik Lorenz, Patrick Esser, Björn Ommer
CVPR '22 Oral | GitHub | arXiv | Project page

txt2img-stable2 Stable Diffusion is a latent text-to-image diffusion model. Thanks to a generous compute donation from Stability AI and support from LAION, we were able to train a Latent Diffusion Model on 512x512 images from a subset of the LAION-5B database. Similar to Google's Imagen, this model uses a frozen CLIP ViT-L/14 text encoder to condition the model on text prompts. With its 860M UNet and 123M text encoder, the model is relatively lightweight and runs on a GPU with at least 10GB VRAM. See this section below and the model card.

News

Requirements

A suitable conda environment named ldm can be created and activated with:

conda env create -f environment.yaml
conda activate ldm

You can also update an existing latent diffusion environment by running

conda install pytorch torchvision -c pytorch
pip install transformers==4.19.2 diffusers invisible-watermark
pip install -e .

Stable Diffusion v1

Stable Diffusion v1 refers to a specific configuration of the model architecture that uses a downsampling-factor 8 autoencoder with an 860M UNet and CLIP ViT-L/14 text encoder for the diffusion model. The model was pretrained on 256x256 images and then finetuned on 512x512 images.

Note: Stable Diffusion v1 is a general text-to-image diffusion model and therefore mirrors biases and (mis-)conceptions that are present in its training data. Details on the training procedure and data, as well as the intended use of the model can be found in the corresponding model card.

The weights are available via the CompVis and Runway organization at Hugging Face under a license which contains specific use-based restrictions to prevent misuse and harm as informed by the model card, but otherwise remains permissive. While commercial use is permitted under the terms of the license, we do not recommend using the provided weights for services or products without additional safety mechanisms and considerations, since there are known limitations and biases of the weights, and research on safe and ethical deployment of general text-to-image models is an ongoing effort. The weights are research artifacts and should be treated as such.

The CreativeML OpenRAIL M license is an Open RAIL M license, adapted from the work that BigScience and the RAIL Initiative are jointly carrying in the area of responsible AI licensing. See also the article about the BLOOM Open RAIL license on which our license is based.

Weights

We currently provide the following checkpoints:

  • sd-v1-1.ckpt: 237k steps at resolution 256x256 on laion2B-en. 194k steps at resolution 512x512 on laion-high-resolution (170M examples from LAION-5B with resolution >= 1024x1024).
  • sd-v1-2.ckpt: Resumed from sd-v1-1.ckpt. 515k steps at resolution 512x512 on laion-aesthetics v2 5+ (a subset of laion2B-en with estimated aesthetics score > 5.0, and additionally filtered to images with an original size >= 512x512, and an estimated watermark probability < 0.5. The watermark estimate is from the LAION-5B metadata, the aesthetics score is estimated using the LAION-Aesthetics Predictor V2).
  • sd-v1-3.ckpt: Resumed from sd-v1-2.ckpt. 195k steps at resolution 512x512 on "laion-aesthetics v2 5+" and 10% dropping of the text-conditioning to improve classifier-free guidance sampling.
  • sd-v1-4.ckpt: Resumed from sd-v1-2.ckpt. 225k steps at resolution 512x512 on "laion-aesthetics v2 5+" and 10% dropping of the text-conditioning to improve classifier-free guidance sampling.
  • sd-v1-5.ckpt: Resumed from sd-v1-2.ckpt. 595k steps at resolution 512x512 on "laion-aesthetics v2 5+" and 10% dropping of the text-conditioning to improve classifier-free guidance sampling.
  • sd-v1-5-inpainting.ckpt: Resumed from sd-v1-5.ckpt. 440k steps of inpainting training at resolution 512x512 on "laion-aesthetics v2 5+" and 10% dropping of the text-conditioning to improve classifier-free guidance sampling. For inpainting, the UNet has 5 additional input channels (4 for the encoded masked-image and 1 for the mask itself) whose weights were zero-initialized after restoring the non-inpainting checkpoint. During training, we generate synthetic masks and in 25% mask everything.

Evaluations with different classifier-free guidance scales (1.5, 2.0, 3.0, 4.0, 5.0, 6.0, 7.0, 8.0) and 50 PLMS sampling steps show the relative improvements of the checkpoints: sd evaluation results

Text-to-Image with Stable Diffusion

txt2img-stable2 txt2img-stable2

Stable Diffusion is a latent diffusion model conditioned on the (non-pooled) text embeddings of a CLIP ViT-L/14 text encoder. We provide a reference script for sampling, but there also exists a diffusers integration, which we expect to see more active community development.

Reference Sampling Script

We provide a reference sampling script, which incorporates

After obtaining the stable-diffusion-v1-*-original weights, link them

mkdir -p models/ldm/stable-diffusion-v1/
ln -s <path/to/model.ckpt> models/ldm/stable-diffusion-v1/model.ckpt 

and sample with

python scripts/txt2img.py --prompt "a photograph of an astronaut riding a horse" --plms 

By default, this uses a guidance scale of --scale 7.5, Katherine Crowson's implementation of the PLMS sampler, and renders images of size 512x512 (which it was trained on) in 50 steps. All supported arguments are listed below (type python scripts/txt2img.py --help).

usage: txt2img.py [-h] [--prompt [PROMPT]] [--outdir [OUTDIR]] [--skip_grid] [--skip_save] [--ddim_steps DDIM_STEPS] [--plms] [--laion400m] [--fixed_code] [--ddim_eta DDIM_ETA]
                  [--n_iter N_ITER] [--H H] [--W W] [--C C] [--f F] [--n_samples N_SAMPLES] [--n_rows N_ROWS] [--scale SCALE] [--from-file FROM_FILE] [--config CONFIG] [--ckpt CKPT]
                  [--seed SEED] [--precision {full,autocast}]

optional arguments:
  -h, --help            show this help message and exit
  --prompt [PROMPT]     the prompt to render
  --outdir [OUTDIR]     dir to write results to
  --skip_grid           do not save a grid, only individual samples. Helpful when evaluating lots of samples
  --skip_save           do not save individual samples. For speed measurements.
  --ddim_steps DDIM_STEPS
                        number of ddim sampling steps
  --plms                use plms sampling
  --laion400m           uses the LAION400M model
  --fixed_code          if enabled, uses the same starting code across samples
  --ddim_eta DDIM_ETA   ddim eta (eta=0.0 corresponds to deterministic sampling
  --n_iter N_ITER       sample this often
  --H H                 image height, in pixel space
  --W W                 image width, in pixel space
  --C C                 latent channels
  --f F                 downsampling factor
  --n_samples N_SAMPLES
                        how many samples to produce for each given prompt. A.k.a. batch size
  --n_rows N_ROWS       rows in the grid (default: n_samples)
  --scale SCALE         unconditional guidance scale: eps = eps(x, empty) + scale * (eps(x, cond) - eps(x, empty))
  --from-file FROM_FILE
                        if specified, load prompts from this file
  --config CONFIG       path to config which constructs model
  --ckpt CKPT           path to checkpoint of model
  --seed SEED           the seed (for reproducible sampling)
  --precision {full,autocast}
                        evaluate at this precision

Note: The inference config for all v1 versions is designed to be used with EMA-only checkpoints. For this reason use_ema=False is set in the configuration, otherwise the code will try to switch from non-EMA to EMA weights. If you want to examine the effect of EMA vs no EMA, we provide "full" checkpoints which contain both types of weights. For these, use_ema=False will load and use the non-EMA weights.

Diffusers Integration

A simple way to download and sample Stable Diffusion is by using the diffusers library:

from diffusers import StableDiffusionPipeline

model_id = "runwayml/stable-diffusion-v1-5"
pipe = StableDiffusionPipeline.from_pretrained(model_id, torch_dtype=torch.float16, revision="fp16")
pipe = pipe.to(device)

prompt = "a photo of an astronaut riding a horse on mars"
image = pipe(prompt).images[0]
    
image.save("astronaut_rides_horse.png")

Image Modification with Stable Diffusion

By using a diffusion-denoising mechanism as first proposed by SDEdit, the model can be used for different tasks such as text-guided image-to-image translation and upscaling. Similar to the txt2img sampling script, we provide a script to perform image modification with Stable Diffusion.

The following describes an example where a rough sketch made in Pinta is converted into a detailed artwork.

python scripts/img2img.py --prompt "A fantasy landscape, trending on artstation" --init-img <path-to-img.jpg> --strength 0.8

Here, strength is a value between 0.0 and 1.0, that controls the amount of noise that is added to the input image. Values that approach 1.0 allow for lots of variations but will also produce images that are not semantically consistent with the input. See the following example.

Input

sketch-in

Outputs

out3 out2

This procedure can, for example, also be used to upscale samples from the base model.

Inpainting with Stable Diffusion

txt2img-stable2

We provide a checkpoint finetuned for inpainting to perform text-based erase & replace functionality.

Quick Start

After creating a suitable environment, download the checkpoint finetuned for inpainting and run

streamlit run scripts/inpaint_st.py -- configs/stable-diffusion/v1-inpainting-inference.yaml <path-to-checkpoint>

for a streamlit demo of the inpainting model. Details on the training procedure and data, as well as the intended use of the model can be found in the corresponding model card.

Diffusers Integration

Another simple way to use the inpainting model is via the diffusers library:

from diffusers import StableDiffusionInpaintPipeline

pipe = StableDiffusionInpaintPipeline.from_pretrained(
    "runwayml/stable-diffusion-inpainting",
    revision="fp16",
    torch_dtype=torch.float16,
)
prompt = "Face of a yellow cat, high resolution, sitting on a park bench"
#image and mask_image should be PIL images.
#The mask structure is white for inpainting and black for keeping as is
image = pipe(prompt=prompt, image=image, mask_image=mask_image).images[0]
image.save("./yellow_cat_on_park_bench.png")

Evaluation

To assess the performance of the inpainting model, we used the same evaluation protocol as in our LDM paper. Since the Stable Diffusion Inpainting Model acccepts a text input, we simply used a fixed prompt of photograph of a beautiful empty scene, highest quality settings.

Model FID LPIPS
Stable Diffusion Inpainting 1.00 0.141 (+- 0.082)
Latent Diffusion Inpainting 1.50 0.137 (+- 0.080)
CoModGAN 1.82 0.15
LaMa 2.21 0.134 (+- 0.080)

Online Demo

If you want to try the model without setting things up locally, you can try the Erase & Replace tool at Runway:

erase-and-replace.mp4

Comments

BibTeX

@misc{rombach2021highresolution,
      title={High-Resolution Image Synthesis with Latent Diffusion Models}, 
      author={Robin Rombach and Andreas Blattmann and Dominik Lorenz and Patrick Esser and Björn Ommer},
      year={2021},
      eprint={2112.10752},
      archivePrefix={arXiv},
      primaryClass={cs.CV}
}

stable-diffusion's People

Contributors

apolinario avatar cpacker avatar owenvincent avatar patrickvonplaten avatar pesser avatar rromb avatar

Stargazers

 avatar  avatar  avatar  avatar  avatar  avatar  avatar  avatar  avatar  avatar  avatar  avatar  avatar  avatar  avatar  avatar  avatar  avatar  avatar  avatar  avatar  avatar  avatar  avatar  avatar  avatar  avatar  avatar  avatar  avatar  avatar  avatar  avatar  avatar  avatar  avatar  avatar  avatar  avatar  avatar  avatar  avatar  avatar  avatar  avatar  avatar  avatar  avatar  avatar  avatar  avatar  avatar  avatar  avatar  avatar  avatar  avatar  avatar  avatar  avatar  avatar  avatar  avatar  avatar  avatar  avatar  avatar  avatar  avatar  avatar  avatar  avatar  avatar  avatar  avatar  avatar  avatar  avatar  avatar  avatar  avatar  avatar  avatar  avatar  avatar  avatar  avatar  avatar  avatar  avatar  avatar  avatar  avatar  avatar  avatar  avatar  avatar  avatar  avatar  avatar

Watchers

 avatar  avatar  avatar  avatar  avatar  avatar  avatar  avatar  avatar  avatar  avatar  avatar  avatar  avatar  avatar  avatar  avatar  avatar  avatar  avatar  avatar  avatar  avatar  avatar  avatar  avatar  avatar  avatar  avatar  avatar  avatar  avatar  avatar  avatar  avatar  avatar  avatar  avatar  avatar  avatar  avatar  avatar  avatar  avatar  avatar  avatar  avatar  avatar  avatar  avatar  avatar  avatar  avatar  avatar  avatar  avatar  avatar  avatar  avatar

stable-diffusion's Issues

Include inpainting training script

I was looking into main.py and found that there is no scope for finetuning inpainting. If you can please add that to the source code it will be great.

Error running inpainting

Thank you for your great work!

I am having an issue with the inpaint pipeline. I get the following error:

Traceback (most recent call last): File "/home/wonder/PycharmProjects/Dreambooth-Stable-Diffusion/test_runwayml.py", line 17, in <module> image = pipe(prompt=prompt, init_image=init_image, mask_image=mask_image).images[0] File "/home/wonder/anaconda3/envs/ldm/lib/python3.8/site-packages/torch/autograd/grad_mode.py", line 27, in decorate_context return func(*args, **kwargs) File "/home/wonder/anaconda3/envs/ldm/lib/python3.8/site-packages/diffusers/pipelines/stable_diffusion/pipeline_stable_diffusion_inpaint.py", line 371, in __call__ noise_pred = self.unet(latent_model_input, t, encoder_hidden_states=text_embeddings).sample File "/home/wonder/anaconda3/envs/ldm/lib/python3.8/site-packages/torch/nn/modules/module.py", line 1130, in _call_impl return forward_call(*input, **kwargs) File "/home/wonder/anaconda3/envs/ldm/lib/python3.8/site-packages/diffusers/models/unet_2d_condition.py", line 290, in forward sample = self.conv_in(sample) File "/home/wonder/anaconda3/envs/ldm/lib/python3.8/site-packages/torch/nn/modules/module.py", line 1130, in _call_impl return forward_call(*input, **kwargs) File "/home/wonder/anaconda3/envs/ldm/lib/python3.8/site-packages/torch/nn/modules/conv.py", line 457, in forward return self._conv_forward(input, self.weight, self.bias) File "/home/wonder/anaconda3/envs/ldm/lib/python3.8/site-packages/torch/nn/modules/conv.py", line 453, in _conv_forward return F.conv2d(input, weight, bias, self.stride, RuntimeError: Given groups=1, weight of size [320, 9, 3, 3], expected input[2, 4, 64, 64] to have 9 channels, but got 4 channels instead

I loaded my init_image and mask_image as PIL images and used the diffusers StableDiffusionInpaintPipeline, as shown in the example.
Does anyone know what I'm doing wrong?

ERROR: CUDA out of memory

Hello, I have this error when I run it: RuntimeError: CUDA out of memory. Tried to allocate 58.00 MiB (GPU 0; 6.00 GiB total capacity; 5.19 GiB already allocated; 0 bytes free; 5.29 GiB reserved in total by PyTorch) If reserved memory is >> allocated memory try setting max_split_size_mb to avoid fragmentation. See documentation for Memory Management and PYTORCH_CUDA_ALLOC_CONF

AttributeError: module 'ldm.models.diffusion.ddpm' has no attribute 'LatentInpaintDiffusion'

File "E:\Anaconda\envs\stable-diffusion\lib\site-packages\streamlit\legacy_caching\caching.py", line 557, in get_or_create_cached_value
return_value = func(*args, **kwargs)
File "scripts\inpaint_st.py", line 58, in initialize_model
model = instantiate_from_config(config.model)
File "f:\code\stable-diffusion\src\taming-transformers\main.py", line 119, in instantiate_from_config
return get_obj_from_str(config["target"])(**config.get("params", dict()))
File "f:\code\stable-diffusion\src\taming-transformers\main.py", line 22, in get_obj_from_str
return getattr(importlib.import_module(module, package=None), cls)
AttributeError: module 'ldm.models.diffusion.ddpm' has no attribute 'LatentInpaintDiffusion'

Code for inpainting not consistent

Hi, I believe the code for inpainting is not consistent between this repo / Huggingface Space / Hugginface Pipeline. And particularly, what confuses me most is the difference between image preprocessing pipelines.

Can anybody explain to me why inpaint_st.py does not contain any mysterious constant 0.18215 in it, while both Huggingface Pipeline code and Huggingface have it? I attached the code below. Thanks a lot.

image

image

Error running scripts/inptaint.py (no streamlit)

Hi, I'm trying to inpaint without streamlit using the scripts/inpaint.py but i get this error

Traceback (most recent call last):
  File "scripts/inpaint.py", line 83, in <module>
    c = model.cond_stage_model.encode(batch["masked_image"])
  File "/home/ariel/repos/stable_inpaint/ldm/modules/encoders/modules.py", line 162, in encode
    return self(text)
  File "/opt/conda/lib/python3.7/site-packages/torch/nn/modules/module.py", line 1110, in _call_impl
    return forward_call(*input, **kwargs)
  File "/home/ariel/repos/stable_inpaint/ldm/modules/encoders/modules.py", line 154, in forward
    return_overflowing_tokens=False, padding="max_length", return_tensors="pt")
  File "/opt/conda/lib/python3.7/site-packages/transformers/tokenization_utils_base.py", line 2452, in __call__
    "text input must of type `str` (single example), `List[str]` (batch or single pretokenized example) "
ValueError: text input must of type `str` (single example), `List[str]` (batch or single pretokenized example) or `List[List[str]]` (batch of pretokenized examples).

Looking at the scripts/inpaint_st.pt i see some differences (For instance the inpatinting.py have no prompt used).
I think the line

c = model.cond_stage_model.encode(batch["masked_image"])
should be
c = model.get_first_stage_encoding(model.encode_first_stage(batch["masked_image"]))

but it gives other errors. Can you check if scripts/inpaint.pt works as should be?

Bad Inpainting

Runway Inpainting in colab and HuggingFace works worse than on the site. During generation, the entire picture is distorted, even the area that was not selected. This leads to deformation of the face for example. 1- original, 2- HF, 3 - site
original
HF
Site

when I freeze some layer in UNet I saw the following error.

I add some code in ddpm to freeze crossattention layer
like following:

       if without_crossattn:                                                                                                                                                                                                                                                       
            for m in self.modules():                                                                                                                                                                                                                                                
                if isinstance(m, CrossAttention):                                                                                                                                                                                                                                   
                    for para in m.parameters():                                                                                                                                                                                                                                     
                        para.requires_grad=False   

and I face the following error.
One of the differentiated Tensors does not require grad error

Inpainting as object removal

First of all thanks for the great work. I have a question related to the inpainting with SD. If I want to remove an object completely from the scene, what text prompt should I use? An empty text, or some text describing the background? Thanks!

Is there a small model.

Hi, thanks for the amazing work with stable diffusion.
I was adding some modifications, but was running out of memory, so I was wondering if there was a small model that could be used instead of the standard one?

Demo for Stable Diffusion Inpainting takes about 2 minutes per image

After running this code

from diffusers import StableDiffusionInpaintPipeline

pipe = StableDiffusionInpaintPipeline.from_pretrained(
    "runwayml/stable-diffusion-inpainting",
    revision="fp16",
    torch_dtype=torch.float16,
)
prompt = "Face of a yellow cat, high resolution, sitting on a park bench"
#image and mask_image should be PIL images.
#The mask structure is white for inpainting and black for keeping as is
image = pipe(prompt=prompt, image=image, mask_image=mask_image).images[0]
image.save("./yellow_cat_on_park_bench.png")

it takes about 2 minutes for me to process one image.
May I ask any ways to process image in-painting with Stable Diffusion much faster (at least less than 30 seconds)?

inpainting in mask area are filled with black

I tried to remove vessels from cta scans which have labels.But the vessels's areas are filled with black pixels.What can i do to make mask areas smooth compared to nearby
this is the output image
image

cannot import name 'CLIPTextModelWithProjection' from 'transformers' by running python scripts/txt2img.py --prompt "a photograph of an astronaut riding a horse" --plms

I installd using
conda env create -f environment.yaml
conda activate ldm

The installation was successful. All the packages' ware installed.
after it I started the command

python scripts/txt2img.py --prompt "a photograph of an astronaut riding a horse" --plms

and got the error:

(ldm) K:\ImageAI\stable-diffusion>python scripts/txt2img.py --prompt "a photograph of an astronaut riding a horse" --plms Traceback (most recent call last): File "scripts/txt2img.py", line 21, in <module> from diffusers.pipelines.stable_diffusion.safety_checker import StableDiffusionSafetyChecker File "K:\anaconda\envs\ldm\lib\site-packages\diffusers\__init__.py", line 38, in <module> from .models import ( File "K:\anaconda\envs\ldm\lib\site-packages\diffusers\models\__init__.py", line 20, in <module> from .autoencoder_asym_kl import AsymmetricAutoencoderKL File "K:\anaconda\envs\ldm\lib\site-packages\diffusers\models\autoencoder_asym_kl.py", line 21, in <module> from .autoencoder_kl import AutoencoderKLOutput File "K:\anaconda\envs\ldm\lib\site-packages\diffusers\models\autoencoder_kl.py", line 21, in <module> from ..loaders import FromOriginalVAEMixin File "K:\anaconda\envs\ldm\lib\site-packages\diffusers\loaders.py", line 45, in <module> from transformers import CLIPTextModel, CLIPTextModelWithProjection, PreTrainedModel, PreTrainedTokenizer ImportError: cannot import name 'CLIPTextModelWithProjection' from 'transformers' (K:\anaconda\envs\ldm\lib\site-packages\transformers\__init__.py)

How to fix it?

fine tuning

hi

please guide me to fine tune stable diffusion inpainting with my own dataset of objects

Does runwayml SD inpainting only work on square sized images?

I have inpainting working on square images (512x512).

But if I try to do inpainting on landscape and portrait sized images (512x320 and 384x512 respectively (ie divided by 8)) I get:

RuntimeError: Sizes of tensors must match except in dimension 1. Expected size 64 but got size 40 for tensor number 2 in the list.

RuntimeError: Sizes of tensors must match except in dimension 1. Expected size 64 but got size 48 for tensor number 2 in the list.

Does runwayml's diffusers inpainting only work on square images? (and if so, should maybe mention that in the documentation somewhere unless I missed it) Thanks!

scale factor

Hello, excuse me. I would like to ask about using the Celeba dataset for my autoencoder kl model that I trained myself .As I want to train 128*128 resolution autoencoderkl model and I am using scale_factor. Is it normal for scale factor to be approximately 0.44 when using factor? I still cannot achieve the Fid mentioned in the paper when training LDM with this autoencoderkl.
Looking forward to your reply, thank you

How to use drop conditioning during training?

Hi!

Most of the SD checkpoints mention "dropping of the text-conditioning to improve classifier-free guidance sampling." However, I couldn't find the config parameter that does this nor the code that does this. I would appreciate it if you would point to it.

Also, do you drop conditioning for a whole batch in 10% of the cases or do you drop 10% of examples in the batch?

Lama Cleaner add runway-sd1.5-inpainting support

Thank you for open-sourcing your code and pre-training model. I maintain an inpainting tool Lama Cleaner that allows anyone to easily use the SOTA inpainting model.

example-0.24.0.mp4

It's really easy to install and start to use sd1.5 inpainting model. First, accepting the terms to access runwayml/stable-diffusion-inpainting model, and
get an access token from here huggingface access token.

pip install lama-cleaner
# Models will be downloaded at first time used
lama-cleaner --model=sd1.5 --hf_access_token=hf_you_hugging_face_access_token
# Lama Cleaner is now running at http://localhost:8080

Different from RUNWAY

Thanks for the contribution of the author.

When I use the same image and mask at runway and this project respectively, I got very different results.
prompt:
Face of a yellow cat, high resolution, sitting on a park bench
image:
desk
mask
desk_mask
Results of runway:
desk_runway
Results of github:
desk_github
It seem like prompt does not work.

I tested another example and got similar results.
prompt:
Face of a yellow cat, high resolution, sitting on a park bench
Image:
dog
mask:
dog_v2
Result:
00008

What should I do to make prompt work?

issue while running intallation

RuntimeError: Couldn't install torch.
Command: "C:\Users\Megha Sai\stable diffusion\stable-diffusion-webui\venv\Scripts\python.exe" -m pip install torch==1.12.1+cu113 torchvision==0.13.1+cu113 --extra-index-url https://download.pytorch.org/whl/cu113
Error code: 1
stdout: Looking in indexes: https://pypi.org/simple, https://download.pytorch.org/whl/cu113

stderr: ERROR: Could not find a version that satisfies the requirement torch==1.12.1+cu113 (from versions: none)
ERROR: No matching distribution found for torch==1.12.1+cu113

Result variation from stable diffusion model, thanks

Dear all, I am quite new to stable diffusion, and just tried the code. However, when I was using the same script to create an image, I got different images when running the script again. Is it a parameter that can be set to create identical image with the same script and same prompt? Thanks a lot.

Some Lycoris Downloaded at CivitAI doesn't work when using load_lora_weights

I have this python code using stable diffusion 1.5

!pip install -U git+https://github.com/huggingface/diffusers
!pip install -q transformers accelerate
!pip install omegaconf
!pip install safetensors

from diffusers import StableDiffusionPipeline, DPMSolverMultistepScheduler
from diffusers.models import AutoencoderKL
import torch

vae = AutoencoderKL.from_pretrained(
    "stabilityai/sd-vae-ft-mse",
    torch_dtype=torch.float16,
)
pipe = StableDiffusionPipeline.from_pretrained(
     '/content/drive/MyDrive/majicmix-alpha',
     safety_checker=None,
     torch_dtype=torch.float16,
     vae=vae
)
pipe.load_lora_weights(".", weight_name="/content/drive/MyDrive/loras/XXX.safetensors")
pipe.fuse_lora(lora_scale=0.25)

But when running the code at Google Colab, at line where pipe.load_lora_weights() is called, there is this error:

---------------------------------------------------------------------------
ValueError                                Traceback (most recent call last)
[<ipython-input-2-500e695671dc>](https://localhost:8080/#) in <cell line: 21>()
     19 pipe.load_lora_weights(".", weight_name="/content/drive/MyDrive/loras/Male body tattoo.safetensors")
     20 pipe.fuse_lora(lora_scale=0.25)
---> 21 pipe.load_lora_weights(".", weight_name="/content/drive/MyDrive/loras/BetterCocks2.safetensors")
     22 pipe.fuse_lora(lora_scale=0.25)
     23 pipe.scheduler = DPMSolverMultistepScheduler.from_config(

2 frames
[/usr/local/lib/python3.10/dist-packages/diffusers/loaders.py](https://localhost:8080/#) in _convert_kohya_lora_to_diffusers(cls, state_dict)
   2212 
   2213         if len(state_dict) > 0:
-> 2214             raise ValueError(
   2215                 f"The following keys have not been correctly be renamed: \n\n {', '.join(state_dict.keys())}"
   2216             )

ValueError: The following keys have not been correctly be renamed: 

 lora_te_text_model_encoder_layers_0_mlp_fc1.alpha, lora_te_text_model_encoder_layers_0_mlp_fc1.hada_w1_a, lora_te_text_model_encoder_layers_0_mlp_fc1.hada_w1_b, lora_te_text_model_encoder_layers_0_mlp_fc1.hada_w2_a, lora_te_text_model_encoder_layers_0_mlp_fc1.hada_w2_b, lora_te_text_model_encoder_layers_0_mlp_fc2.alpha, lora_te_text_model_encoder_layers_0_mlp_fc2.hada_w1_a, lora_te_text_model_encoder_layers_0_mlp_fc2.hada_w1_b, lora_te_text_model_encoder_layers_0_mlp_fc2.hada_w2_a, lora_te_text_model_encoder_layers_0_mlp_fc2.hada_w2_b, lora_te_text_model_encoder_layers_0_self_attn_k_proj.alpha, lora_te_text_model_encoder_layers_0_self_attn_k_proj.hada_w1_a, lora_te_text_model_encoder_layers_0_self_attn_k_proj.hada_w1_b, lora_te_text_model_encoder_layers_0_self_attn_k_proj.hada_w2_a, lora_te_text_model_encoder_layers_0_self_attn_k_proj.hada_w2_b, lora_te_text_model_encoder_layers_0_self_attn_out_proj.alpha, lora_te_text_model_encoder_layers_0_self_attn_out_proj.hada_w1_a, lora_te_text_model_encoder_layers_0_self_attn_out_proj.hada_w1_b, lora_te_text_model_encoder_layers_0_self_attn_out_proj.hada_w2_a, lora_te_text_model_encoder_layers_0_self_attn_out_proj.hada_w2_b, lora_te_text_model_encoder_layers_0_self_attn_q_proj.alpha, lora_te_text_model_encoder_layers_0_self_attn_q_proj.hada_w1_a, lora_te_text_model_encoder_layers_0_self_attn_q_proj.hada_w1_b, lora_te_text_model_encoder_layers_0_self_attn_q_proj.hada_w2_a, lora_te_text_model_encoder_layers_0_self_attn_q_proj.hada_w2...

I have used some Lycoris downloaded at CivitAI with no problems but this one just doesn't work.
For the Lycoris, I downloaded it here (WARNING, EXPLICIT IMAGES ON LINK) Safetensor Lycoris. As I mentioned, the lycoris for version 1 and 2 on that link works. But for version 2, for some reason, I am getting that error.

Webui install could not find Torch?

venv "D:\AIG\stable-diffusion-webui\venv\Scripts\Python.exe"
Python 3.11.0 (main, Oct 24 2022, 18:26:48) [MSC v.1933 64 bit (AMD64)]
Commit hash: 737eb28faca8be2bb996ee0930ec77d1f7ebd939
Installing torch and torchvision
Traceback (most recent call last):
File "D:\AIG\stable-diffusion-webui\launch.py", line 205, in
prepare_enviroment()
File "D:\AIG\stable-diffusion-webui\launch.py", line 148, in prepare_enviroment
run(f'"{python}" -m {torch_command}', "Installing torch and torchvision", "Couldn't install torch")
File "D:\AIG\stable-diffusion-webui\launch.py", line 33, in run
raise RuntimeError(message)
RuntimeError: Couldn't install torch.
Command: "D:\AIG\stable-diffusion-webui\venv\Scripts\python.exe" -m pip install torch==1.12.1+cu113 torchvision==0.13.1+cu113 --extra-index-url https://download.pytorch.org/whl/cu113
Error code: 1
stdout: Looking in indexes: https://pypi.org/simple, https://download.pytorch.org/whl/cu113

stderr: ERROR: Could not find a version that satisfies the requirement torch==1.12.1+cu113 (from versions: none)
ERROR: No matching distribution found for torch==1.12.1+cu113

RuntimeError: "LayerNormKernelImpl" not implemented for 'Half' when trying inpaining

I wanted to use the boilerplate of the inpainting module
I downloaded the checkpoint for inpainting

from diffusers import StableDiffusionInpaintPipeline
import torch
from PIL import Image

pipe = StableDiffusionInpaintPipeline.from_pretrained(
    "runwayml/stable-diffusion-inpainting",
    revision="fp16",
    torch_dtype=torch.float16,
)
prompt = "Face of a yellow cat, high resolution, sitting on a park bench"
#image and mask_image should be PIL images.
#The mask structure is white for inpainting and black for keeping as is

image_input = Image.open("img1.png")
image_mask = Image.open("mask.png")

image = pipe(prompt=prompt, image=image_input, mask_image=image_mask).images[0]
image.save("./yellow_cat_on_park_bench.png")

And got :

Fetching 15 files: 100%|█████████████████████████████████████████████████████████████████████████████████████████████████████████████████████████
██████████████████████████████████████████████████████████████████████████████████████████████████████████████████| 15/15 [00:00<00:00, 3746.92it/s]
Traceback (most recent call last):
  File "inpainting_example.py", line 17, in <module>
    image = pipe(prompt=prompt, image=image_input, mask_image=image_mask).images[0]
  File "G:\Anaconda3\envs\ldm\lib\site-packages\torch\autograd\grad_mode.py", line 27, in decorate_context
    return func(*args, **kwargs)
  File "G:\Anaconda3\envs\ldm\lib\site-packages\diffusers\pipelines\stable_diffusion\pipeline_stable_diffusion_inpaint.py", line 649, in __call__

    text_embeddings = self._encode_prompt(
  File "G:\Anaconda3\envs\ldm\lib\site-packages\diffusers\pipelines\stable_diffusion\pipeline_stable_diffusion_inpaint.py", line 384, in _encode_prompt
    text_embeddings = self.text_encoder(
  File "G:\Anaconda3\envs\ldm\lib\site-packages\torch\nn\modules\module.py", line 1110, in _call_impl
    return forward_call(*input, **kwargs)
  File "G:\Anaconda3\envs\ldm\lib\site-packages\transformers\models\clip\modeling_clip.py", line 722, in forward
    return self.text_model(
  File "G:\Anaconda3\envs\ldm\lib\site-packages\torch\nn\modules\module.py", line 1110, in _call_impl
    return forward_call(*input, **kwargs)
  File "G:\Anaconda3\envs\ldm\lib\site-packages\transformers\models\clip\modeling_clip.py", line 643, in forward
    encoder_outputs = self.encoder(
  File "G:\Anaconda3\envs\ldm\lib\site-packages\torch\nn\modules\module.py", line 1110, in _call_impl
    return forward_call(*input, **kwargs)
  File "G:\Anaconda3\envs\ldm\lib\site-packages\transformers\models\clip\modeling_clip.py", line 574, in forward
    layer_outputs = encoder_layer(
  File "G:\Anaconda3\envs\ldm\lib\site-packages\torch\nn\modules\module.py", line 1110, in _call_impl
    return forward_call(*input, **kwargs)
  File "G:\Anaconda3\envs\ldm\lib\site-packages\transformers\models\clip\modeling_clip.py", line 316, in forward
    hidden_states = self.layer_norm1(hidden_states)
  File "G:\Anaconda3\envs\ldm\lib\site-packages\torch\nn\modules\module.py", line 1110, in _call_impl
    return forward_call(*input, **kwargs)
  File "G:\Anaconda3\envs\ldm\lib\site-packages\torch\nn\modules\normalization.py", line 189, in forward
    return F.layer_norm(
  File "G:\Anaconda3\envs\ldm\lib\site-packages\torch\nn\functional.py", line 2486, in layer_norm
    return torch.layer_norm(input, normalized_shape, weight, bias, eps, torch.backends.cudnn.enabled)
RuntimeError: "LayerNormKernelImpl" not implemented for 'Half'

I'm running this script with conda on windows 10 with an RTX2070 Super

Tutorial series for how to use Stable Diffusion both on Google Colab and on your PC with Web UI interface

?

?

about the classifier-free guidance sampling code ?

in the paper , the latex is
image
image

so i think the code

def get_model_output(x, t):
            if unconditional_conditioning is None or unconditional_guidance_scale == 1.:
                e_t = self.model.apply_model(x, t, c)
            else:
                x_in = torch.cat([x] * 2)
                t_in = torch.cat([t] * 2)
                c_in = torch.cat([unconditional_conditioning, c])
                e_t_uncond, e_t = self.model.apply_model(x_in, t_in, c_in).chunk(2)
                e_t = e_t_uncond + unconditional_guidance_scale * (e_t - e_t_uncond)
            if score_corrector is not None:
                assert self.model.parameterization == "eps"
                e_t = score_corrector.modify_score(self.model, e_t, x, t, c, **corrector_kwargs)

            return e_t

from plms.py line 179
e_t = e_t_uncond + unconditional_guidance_scale * (e_t - e_t_uncond)

from my point , it should be
e_t = e_t + unconditional_guidance_scale * (e_t - e_t_uncond)

can you tell me why?

Can the inpainting model be used for txt2img?

I am busy porting the inpainting functionality into the InvokeAI distribution. One question that I have is whether the inpainting model can also be used for pure txt2img or img2img. Since both the inpainting model and standard 1.5 share the common crossattention model, it would be nice not to have to switch back and forth between them when the user wishes to do txt2img vs inpainting.

Thanks in advance.

SDXL - 43+ Stable Diffusion Tutorials, Automatic1111 Web UI and Google Colab Guides, NMKD GUI, RunPod, DreamBooth - LoRA & Textual Inversion Training, Model Injection, CivitAI & Hugging Face Custom Models, Txt2Img, Img2Img, Video To Animation, Batch Processing, AI Upscaling

Hello dear Runway, i am fan of your great work. I hope you let this thread stay to help newcomers. This is not an issue thread. Thank you.

image Hits Twitter Follow Furkan Gözükara

YouTube Channel Patreon Furkan Gözükara LinkedIn

Expert-Level Tutorials on Stable Diffusion: Master Advanced Techniques and Strategies

Greetings everyone. I am Dr. Furkan Gözükara. I am an Assistant Professor in Software Engineering department of a private university (have PhD in Computer Engineering). My professional programming skill is unfortunately C# not Python :)

My linkedin : https://www.linkedin.com/in/furkangozukara

Our channel address if you like to subscribe : https://www.youtube.com/@SECourses

Our discord to get more help : https://discord.com/servers/software-engineering-courses-secourses-772774097734074388

I am keeping this list up-to-date. I got upcoming new awesome video ideas. Trying to find time to do that.

I am open to any criticism you have. I am constantly trying to improve the quality of my tutorial guide videos. Please leave comments with both your suggestions and what you would like to see in future videos.

All videos have manually fixed subtitles and properly prepared video chapters. You can watch with these perfect subtitles or look for the chapters you are interested in.

Since my profession is teaching, I usually do not skip any of the important parts. Therefore, you may find my videos a little bit longer.

Playlist link on YouTube: Stable Diffusion Tutorials, Automatic1111 Web UI & Google Colab Guides, DreamBooth, Textual Inversion / Embedding, LoRA, AI Upscaling, Video to Anime

1.) Automatic1111 Web UI - PC - Free

How To Install Python, Setup Virtual Environment VENV, Set Default Python System Path & Install Git

image

2.) Automatic1111 Web UI - PC - Free

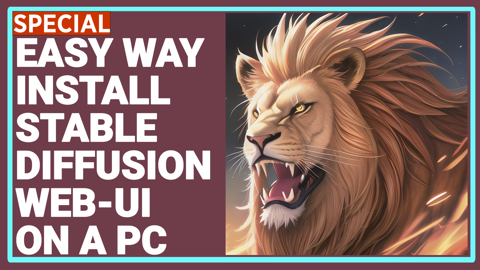
Easiest Way to Install & Run Stable Diffusion Web UI on PC by Using Open Source Automatic Installer

image

3.) Automatic1111 Web UI - PC - Free

How to use Stable Diffusion V2.1 and Different Models in the Web UI - SD 1.5 vs 2.1 vs Anything V3

image

4.) Automatic1111 Web UI - PC - Free

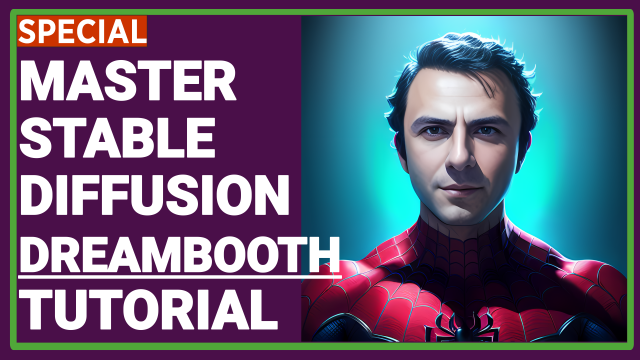
Zero To Hero Stable Diffusion DreamBooth Tutorial By Using Automatic1111 Web UI - Ultra Detailed

image

5.) Automatic1111 Web UI - PC - Free

DreamBooth Got Buffed - 22 January Update - Much Better Success Train Stable Diffusion Models Web UI

image

6.) Automatic1111 Web UI - PC - Free

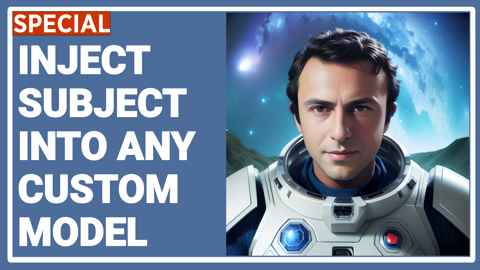
How to Inject Your Trained Subject e.g. Your Face Into Any Custom Stable Diffusion Model By Web UI

image

7.) Automatic1111 Web UI - PC - Free

How To Do Stable Diffusion LORA Training By Using Web UI On Different Models - Tested SD 1.5, SD 2.1

image

8.) Automatic1111 Web UI - PC - Free

8 GB LoRA Training - Fix CUDA & xformers For DreamBooth and Textual Inversion in Automatic1111 SD UI

image

9.) Automatic1111 Web UI - PC - Free

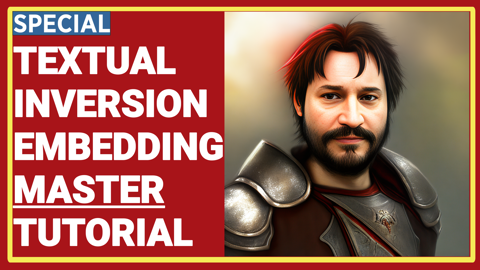
How To Do Stable Diffusion Textual Inversion (TI) / Text Embeddings By Automatic1111 Web UI Tutorial

image

10.) Automatic1111 Web UI - PC - Free

How To Generate Stunning Epic Text By Stable Diffusion AI - No Photoshop - For Free - Depth-To-Image

image

11.) Python Code - Hugging Face Diffusers Script - PC - Free

How to Run and Convert Stable Diffusion Diffusers (.bin Weights) & Dreambooth Models to CKPT File

image

12.) NMKD Stable Diffusion GUI - Open Source - PC - Free

Forget Photoshop - How To Transform Images With Text Prompts using InstructPix2Pix Model in NMKD GUI

image

13.) Google Colab Free - Cloud - No PC Is Required

Transform Your Selfie into a Stunning AI Avatar with Stable Diffusion - Better than Lensa for Free

image

14.) Google Colab Free - Cloud - No PC Is Required

Stable Diffusion Google Colab, Continue, Directory, Transfer, Clone, Custom Models, CKPT SafeTensors

image

15.) Automatic1111 Web UI - PC - Free

Become A Stable Diffusion Prompt Master By Using DAAM - Attention Heatmap For Each Used Token - Word

image

16.) Python Script - Gradio Based - ControlNet - PC - Free

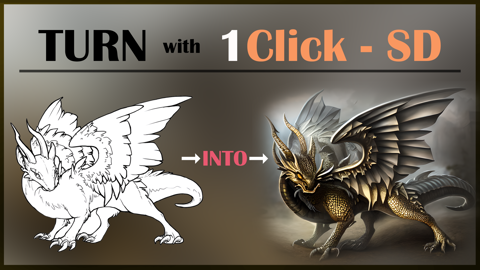
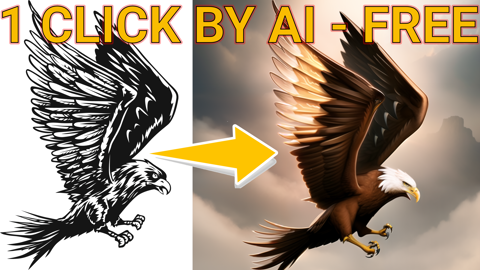
Transform Your Sketches into Masterpieces with Stable Diffusion ControlNet AI - How To Use Tutorial

image

17.) Automatic1111 Web UI - PC - Free

Sketches into Epic Art with 1 Click: A Guide to Stable Diffusion ControlNet in Automatic1111 Web UI

image

18.) RunPod - Automatic1111 Web UI - Cloud - Paid - No PC Is Required

Ultimate RunPod Tutorial For Stable Diffusion - Automatic1111 - Data Transfers, Extensions, CivitAI

image

19.) RunPod - Automatic1111 Web UI - Cloud - Paid - No PC Is Required

How To Install DreamBooth & Automatic1111 On RunPod & Latest Libraries - 2x Speed Up - cudDNN - CUDA

image

20.) Automatic1111 Web UI - PC - Free

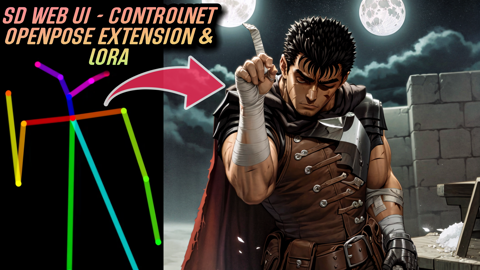
Fantastic New ControlNet OpenPose Editor Extension & Image Mixing - Stable Diffusion Web UI Tutorial

image

21.) Automatic1111 Web UI - PC - Free

Automatic1111 Stable Diffusion DreamBooth Guide: Optimal Classification Images Count Comparison Test

image

22.) Automatic1111 Web UI - PC - Free

Epic Web UI DreamBooth Update - New Best Settings - 10 Stable Diffusion Training Compared on RunPods

image

23.) Automatic1111 Web UI - PC - Free

New Style Transfer Extension, ControlNet of Automatic1111 Stable Diffusion T2I-Adapter Color Control

image

24.) Automatic1111 Web UI - PC - Free

Generate Text Arts & Fantastic Logos By Using ControlNet Stable Diffusion Web UI For Free Tutorial

image

25.) Automatic1111 Web UI - PC - Free

How To Install New DREAMBOOTH & Torch 2 On Automatic1111 Web UI PC For Epic Performance Gains Guide

image

26.) Automatic1111 Web UI - PC - Free

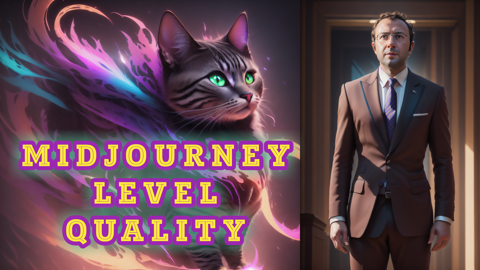
Training Midjourney Level Style And Yourself Into The SD 1.5 Model via DreamBooth Stable Diffusion

image

27.) Automatic1111 Web UI - PC - Free

Video To Anime - Generate An EPIC Animation From Your Phone Recording By Using Stable Diffusion AI

image

28.) Python Script - Jupyter Based - PC - Free

Midjourney Level NEW Open Source Kandinsky 2.1 Beats Stable Diffusion - Installation And Usage Guide

image

29.) Automatic1111 Web UI - PC - Free

RTX 3090 vs RTX 3060 Ultimate Showdown for Stable Diffusion, ML, AI & Video Rendering Performance

image

30.) Kohya Web UI - Automatic1111 Web UI - PC - Free

Generate Studio Quality Realistic Photos By Kohya LoRA Stable Diffusion Training - Full Tutorial

image

31.) Kaggle NoteBook - Free

DeepFloyd IF By Stability AI - Is It Stable Diffusion XL or Version 3? We Review and Show How To Use

image

32.) Python Script - Automatic1111 Web UI - PC - Free

How To Find Best Stable Diffusion Generated Images By Using DeepFace AI - DreamBooth / LoRA Training

image

33.) Kohya Web UI - RunPod - Paid

How To Install And Use Kohya LoRA GUI / Web UI on RunPod IO With Stable Diffusion & Automatic1111

image

34.) PC - Google Colab - Free

Mind-Blowing Deepfake Tutorial: Turn Anyone into Your Favorite Movie Star! PC & Google Colab - roop

image

35.) Automatic1111 Web UI - PC - Free

Stable Diffusion Now Has The Photoshop Generative Fill Feature With ControlNet Extension - Tutorial

image

36.) Automatic1111 Web UI - PC - Free

Human Cropping Script & 4K+ Resolution Class / Reg Images For Stable Diffusion DreamBooth / LoRA

image

37.) Automatic1111 Web UI - PC - Free

Stable Diffusion 2 NEW Image Post Processing Scripts And Best Class / Regularization Images Datasets

image

38.) Automatic1111 Web UI - PC - Free

How To Use Roop DeepFake On RunPod Step By Step Tutorial With Custom Made Auto Installer Script

image

39.) RunPod - Automatic1111 Web UI - Cloud - Paid - No PC Is Required

How To Install DreamBooth & Automatic1111 On RunPod & Latest Libraries - 2x Speed Up - cudDNN - CUDA

image

40.) Automatic1111 Web UI - PC - Free + RunPod

Zero to Hero ControlNet Tutorial: Stable Diffusion Web UI Extension | Complete Feature Guide

image

41.) Automatic1111 Web UI - PC - Free + RunPod

The END of Photography - Use AI to Make Your Own Studio Photos, FREE Via DreamBooth Training

image

42.) Google Colab - Gradio - Free

How To Use Stable Diffusion XL (SDXL 0.9) On Google Colab For Free

image

43.) Local - PC - Free - Gradio

Stable Diffusion XL (SDXL) Locally On Your PC - 8GB VRAM - Easy Tutorial With Automatic Installer

image

RuntimeError: expected scalar type Half but found Float

from diffusers import StableDiffusionPipeline

model_id = "runwayml/stable-diffusion-v1-5"
pipe = StableDiffusionPipeline.from_pretrained(model_id, torch_dtype=torch.float16, revision="fp16")
pipe = pipe.to(device)

prompt = "a photo of an astronaut riding a horse on mars"
image = pipe(prompt).images[0]

transformers/models/clip/modeling_clip.py:257 in forward

ImportError: cannot import name 'SAFE_WEIGHTS_NAME'

when running with demo script, raise the error:
ImportError: cannot import name 'SAFE_WEIGHTS_NAME' from 'transformers.utils' (/root/anaconda3/envs/ldm/lib/python3.8/site-packages/transformers/utils/init.py)

the env is set up by README

Recommend Projects

  • React photo React

    A declarative, efficient, and flexible JavaScript library for building user interfaces.

  • Vue.js photo Vue.js

    🖖 Vue.js is a progressive, incrementally-adoptable JavaScript framework for building UI on the web.

  • Typescript photo Typescript

    TypeScript is a superset of JavaScript that compiles to clean JavaScript output.

  • TensorFlow photo TensorFlow

    An Open Source Machine Learning Framework for Everyone

  • Django photo Django

    The Web framework for perfectionists with deadlines.

  • D3 photo D3

    Bring data to life with SVG, Canvas and HTML. 📊📈🎉

Recommend Topics

  • javascript

    JavaScript (JS) is a lightweight interpreted programming language with first-class functions.

  • web

    Some thing interesting about web. New door for the world.

  • server

    A server is a program made to process requests and deliver data to clients.

  • Machine learning

    Machine learning is a way of modeling and interpreting data that allows a piece of software to respond intelligently.

  • Game

    Some thing interesting about game, make everyone happy.

Recommend Org

  • Facebook photo Facebook

    We are working to build community through open source technology. NB: members must have two-factor auth.

  • Microsoft photo Microsoft

    Open source projects and samples from Microsoft.

  • Google photo Google

    Google ❤️ Open Source for everyone.

  • D3 photo D3

    Data-Driven Documents codes.