Code Monkey home page Code Monkey logo

2dasl's Introduction

Our 2D-Assisted Self-supervised Learning (2DASL) is available at: https://arxiv.org/abs/1903.09359

This project is created by Tu Xiaoguang ([email protected]) and Luo Yao ([email protected]). Any questions pls open issues for our project, we will reply quickly.

To facility the research in the community of 3D face reconstruction and 3D face alignment, we release our source code, including the pytorch code for testing (training code will be available upon the acceptance of our paper), the matlab code for 3D plot, 3D face rendering and evaluation.

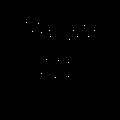
Landmark detection (left: only 68 landmarks are plotted to show), 3D face reconstruction (middle) and Dense face alignment (right)
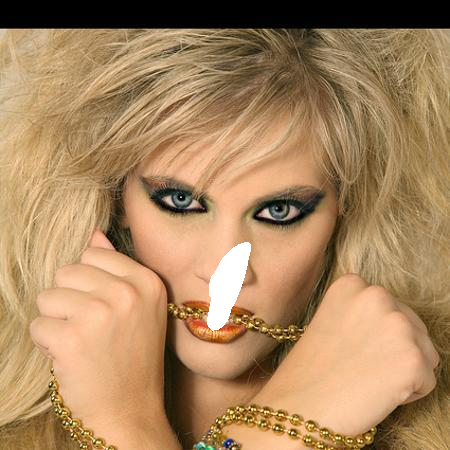
Face swapping

Facial expression retargeting

Visual results

3D face reconstruction & face alignment

Comparison with AFLW2000-3D groundth (Green: landmarks predicted by our 2DASL. Red: ground truth of AFLW2000-3D)

Evaluation results (face alignment)

Performance comparison on AFLW2000-3D (68 2D landmarks) and AFLW-LFPA (34 2D visible landmarks). The NME (%) for faces with different yaw angles are reported.

Error Distribution Curves (EDC) of face alignment results on AFLW2000-3D.

Evaluation results (3d face reconstruction)

Comparisons on AFLW2000-3D

We add the matlab evaluation code with the metric Normalized Mean Error (NME) in the folder "evaluation", including:

  1. We compare the results of our 2DASL with PRNet on the sparse 68 key points on both 2D&3D coordinates.
  2. We compare the results of our 2DASL with 3DDFA on all points for the task of dense alignment (both 2D and 3D coordinates) and 3D face recnostruction.
  3. The Iterative Closest Point (ICP) algorithm, which is used to find the nearest points between two 3D models is included in our code.

Usage: Download the "visualize.rar" package at: https://pan.baidu.com/s/1jazeore9M_4khk50Dz_Jlg using the password: "o7ji".

We add our test code in the folders "models" and "test_codes", including:

  1. The 2DASL models for stage1 and stage2, in the folder "models".
  2. The test code to obtain 3D vertex for ALFW2000-3D images.
  3. The code to plot 2D facial landmarks.

Usage: python-3.6.6, pytorch-0.4.1. Just run the script "main_visualize_plot_4chls.py" in the folder "test_codes".

We add our 3D face rendering code in the folder "3D_results_plot", including:

  1. The code for 3D face rendering, i.e., drawing 3d reconstruction mask.
  2. The code for plotting dense face alignment.
  3. The code for writing .obj file, the .obj files could be opend by the software meshlab.

Usage: Download the "visualize.rar" package at: https://pan.baidu.com/s/1M0sg3eqrtzxxMJqmAzczRw using the password: "h26t". Or download the package here: https://drive.google.com/file/d/1414VE7oiusKxeyx0LYZOv042c8DfhFPf/view?usp=sharing Putting the package under the folder "3D_results_plot", extracting it and then run the script "test_good_byXgtu.m".

Acknowledgement

Thanks for the authors of 3DDFA and PRNet for making their excellent works publicly available.

Additional example

// xgtu-lmks_res

Citation

If you find our code is useful for your research, pls cite our work:

@article{tu2019joint,
  title={Joint 3D Face Reconstruction and Dense Face Alignment from A Single Image with 2D-Assisted Self-Supervised Learning},
  author={Tu, Xiaoguang and Zhao, Jian and Jiang, Zihang and Luo, Yao and Xie, Mei and Zhao, Yang and He, Linxiao and Ma, Zheng and Feng, Jiashi},
  journal={arXiv preprint arXiv:1903.09359},
  year={2019}
}

2dasl's People

Contributors

xgtu avatar

Stargazers

 avatar  avatar  avatar  avatar  avatar  avatar  avatar  avatar  avatar  avatar  avatar  avatar  avatar  avatar  avatar  avatar  avatar  avatar  avatar  avatar  avatar  avatar  avatar  avatar  avatar  avatar  avatar  avatar  avatar  avatar  avatar  avatar  avatar  avatar  avatar  avatar  avatar  avatar  avatar  avatar  avatar  avatar  avatar  avatar  avatar  avatar  avatar  avatar  avatar  avatar  avatar  avatar  avatar  avatar  avatar  avatar  avatar  avatar  avatar  avatar  avatar  avatar  avatar  avatar  avatar  avatar  avatar  avatar  avatar  avatar  avatar  avatar  avatar  avatar  avatar  avatar  avatar  avatar  avatar  avatar  avatar  avatar  avatar  avatar  avatar  avatar  avatar  avatar  avatar  avatar  avatar  avatar  avatar  avatar  avatar  avatar  avatar  avatar  avatar  avatar

Watchers

 avatar  avatar  avatar  avatar  avatar  avatar  avatar  avatar  avatar  avatar  avatar  avatar  avatar  avatar  avatar  avatar  avatar  avatar  avatar  avatar  avatar  avatar  avatar  avatar  avatar  avatar  avatar  avatar  avatar  avatar  avatar

2dasl's Issues

How can I reproduce your smooth demo?

Thank you so much for sharing your code!
I'm confused how can I reproduce your demo(so smooth!), and what makes the 3D face reconstruction so smooth?
Did you smooth 3Dlandmarks from 3DDFA?
Thanks!

training code

Could you please publicize the training code? We are not sure about the training details such as how to get the mean and std of parameters and how to set the super parameters about the net. Thanks a lot!

bad result!!!!!

我参照3DDFA更改了测试代码,结果很差,
lmkscache
这是第4通道lmks的可视化,应该没有问题,crop方式对齐3ddfa
cache
这是最终的vertex结果,白色部分是vertex,问题可能出在什么地方呢,model不是最终版本或者其他和3ddfa不同的细节之处?期待回复!!

测试main文件如下:
from utils import *

ckpt_path = 'models/2DASL_checkpoint_epoch_allParams_stage2.pth.tar'
ckpt = torch.load(ckpt_path, map_location=lambda storage, loc: storage)['res_state_dict']
state_dict = {}
for key, value in ckpt.items():
if key.startswith('module'):
state_dict[key[7:]] = value
else:
state_dict[key] = value
model = resnet50(pretrained=False, num_classes=62)
model.load_state_dict(state_dict)
transform = transforms.Compose([
ToTensorGjz(),
NormalizeGjz(mean=127.5, std=128)
])

img_path = 'test.jpg'
img = cv2.imread(img_path, cv2.IMREAD_COLOR)
lmks = get_face_lmks(img)

roi_box = parse_roi_box_from_landmark(lmks.T.copy())
img_crop = crop_img(img, roi_box)
lmks_crop = crop_lmks(roi_box, lmks)

lmks_crop = fit_lmks(lmks_crop, img_crop.shape[:2])
lmks_crop[lmks_crop>119] = 119
img_crop = cv2.resize(img_crop, dsize=(120, 120), interpolation=cv2.INTER_LINEAR)

lmks_map = get_18lmks_map(lmks_crop)
lmks_map = lmks_map[:,:,np.newaxis]

lmks_map = torch.from_numpy(lmks_map).unsqueeze(0).permute(0,3,1,2)

input = transform(img_crop).unsqueeze(0)
input = torch.cat([input, lmks_map], dim=1)

with torch.no_grad():
param = model(input)
param = param.squeeze().cpu().numpy().flatten().astype(np.float32)
dense = get_dense_from_param(param, roi_box)
print(dense.T)
show_lmks(img, dense.T)
cv2.imwrite('cache.png', img)

Unable to generate mtl file with writeobjs.m

Hi @XgTu , Thanks for sharing the code.

I am able to successfully run the project however the obtained obj's are just white meshes. The material file for each obj is not getting generated.

  1. In the writeobj.m function i am guessing options argument has to be called properly.

  2. Should we write texture .jpg to the mtl file (i.e any connection between options.nm_file is texture jpg?) but in this project we are not writing generating any texture file.

Can you please tell me if i am wrong and how to create mtl files?

Thank you.

No visualize.rar

There is no visualize.rar file for google drive :(

Could you please upload it once more?

Question about backward pass.

Hi, i recently read your paper, but i have a little confusion about the backward pass. In your paper, you show that you backward pass your predicted 2d landmarks to output x^2d, do you means that you replace x2d with x^2d to generate 2d FLMs and keep the input image unchanged and restart forward training? If i am understanding it in a wrong way, could you please describe the backward pass with more details?

3D NME

Hello,thanks for your open source code!
I'm getting start to follow the work of PRN, but I cannot really reimplement their work yet.
I've read your paper on arxiv and noticed that you compared 2DASL with PRN in experiment part.
So I hope you can help me with some problems about the NME metrics.

Do reimplement PRN and get the results or you just evaluate their model?
How do you calculate 3D NME and do you have any idea about how do PRN calculate 3D NME?

(I evaluated the model provided in their github on AFLW2000-3D.
The 2D NME is alright.
But I come up with some problem when calculating 3D NME.

I use exactly the same normalization factor (bounding box size) and calculate the mean L2 distance between ground truth and predicted results.
But the 68 kpt 3D NME I got is around 6.0%, which is much higher than PRN paper's 4.4% and similar to 6.12% in your paper.

I've tried to refer to the evaluation code of 3DDFA but it seems that they didn't evaluate 3D coordinates.)

run on live Webcam or single image?

Hi @XgTu, and thank you very much for making this code available!

How can i run it live on a Webcam, or a single image? Is there any similar code I can look at to get started?

Specifically I need to return the 3d landmarks from an image, or video.

Like this GIF:

55405030-cb3b7f80-558b-11e9-9553-e1858db0e198

How can i replicate this result from a webcam?

Thanks!

How to convert 53K vertices to 43K. (for PRNet evaluation)

Hi @XgTu , Thank you for the source codes you released. I'm just wondering how did you compare your method with PRNet or actually how did you evaluate PRNet on AFLW2000 dataset? Coz the PRNet's outputs have 43K vertices while your model's outputs and AFLW2000 ground truth have 53K vertices.
How did you reduce the groundtruth vertices to 43K?
I realized that there is a "exp_base_reduce.mat" file which can produce ground truth with 39K vertices. Where did you get this .mat file and how can reproduce it with 43K vertices?
Thank you in advance for your clarification.

training code

Hi,thanks for your great work!Will you release your training code?

Where did you get the 68 landmarks annotation of AFLW dataset?

As far as I know, AFLW only has annotation of 21 landmarks. Where did you get the annotation of 68 landmarks in test_codes/test.configs/AFLW_GT_pts68.npy?

Moreover, how to use AFLW_GT_pts68.npy and AFLW_GT_pts21.npy, since they do not align with the original image either the croped image.

By the way, AFLW has 21123 images. Why does your test_codes/test.data/AFLW_GT_crop only have 21080 images? Did you remove some images?

Testing code for predictions.

Hi,

I am kind of new to pytorch, did anyone know which script should I run in order to predict 2D or 3D landmarks for a given facial image? or should I write a new testing code and use the model such as "2DASL_checkpoint_epoch_allParams_stage2.pth.tar" for this task?

Thanks a lot!

How to achieve dense face alignment?

Hello, I am very happy to see your work, I want to achieve a dense alignment of the face, like the following
image
But I didn't see how to implement this step in your code, and your code is based on Matlab, not Python. Can you provide a Python implementation? This will help understand the meaning of each step, thank you

How can I use this code to generate depth map?

I am writing a network for face anti-spoofing which use depth map for auxiliary supervision. I see some works use PRNet to generate depth map, but I want to generate it through a 3DMM based way. I found this excellent work and I want to know that whether my idea could be available

License

Please add the MIT license because you use the code in 3DDFA, which is under the MIT license.

about training data

How do I get a file like 2DASL \ test_codes \ test.data \ detect_testData_1998.txt during training, in other words, how is this file generated ?

How to plot the 3d face in picture

Good job!
I have a simple question to ask. How can I to plot the 3D face reconstruction in the picture, just like the example which had been show? This question puzzled me for a long time, I'm looking forward to your reply.

Error in downloading the the "visualize.rar" package

Hi @XgTu , I'm facing the error "Sorry, the file you have requested does not exist.
Make sure that you have the correct URL and the file exists." when I want to download the the "visualize.rar" package from google drive. and I can't use baidu as well.

Recommend Projects

  • React photo React

    A declarative, efficient, and flexible JavaScript library for building user interfaces.

  • Vue.js photo Vue.js

    🖖 Vue.js is a progressive, incrementally-adoptable JavaScript framework for building UI on the web.

  • Typescript photo Typescript

    TypeScript is a superset of JavaScript that compiles to clean JavaScript output.

  • TensorFlow photo TensorFlow

    An Open Source Machine Learning Framework for Everyone

  • Django photo Django

    The Web framework for perfectionists with deadlines.

  • D3 photo D3

    Bring data to life with SVG, Canvas and HTML. 📊📈🎉

Recommend Topics

  • javascript

    JavaScript (JS) is a lightweight interpreted programming language with first-class functions.

  • web

    Some thing interesting about web. New door for the world.

  • server

    A server is a program made to process requests and deliver data to clients.

  • Machine learning

    Machine learning is a way of modeling and interpreting data that allows a piece of software to respond intelligently.

  • Game

    Some thing interesting about game, make everyone happy.

Recommend Org

  • Facebook photo Facebook

    We are working to build community through open source technology. NB: members must have two-factor auth.

  • Microsoft photo Microsoft

    Open source projects and samples from Microsoft.

  • Google photo Google

    Google ❤️ Open Source for everyone.

  • D3 photo D3

    Data-Driven Documents codes.