Continuous Integration (CI) - is the practice of merging all developer working copies to a shared mainline several times a day. A complementary practice to CI is that before submitting work, each programmer must do a complete build and run (and pass) all unit tests. Integration tests are usually run automatically on a CI server (Jenkins/Drone/CercleCI) when it detects a new commit.
Continuous Delivery (CD) - It aims at building, testing, and releasing software with greater speed and frequency. Delivery team -> Version Control -> Build & unit tests -> Automated acceptance tests (e2e) -> UAT -> Release (Deployment, DevOps)

Drone is a modern CI/CD platform built with a containers-first architecture. It enables you to conveniently set up projects to automatically build, test, and deploy as you make changes to your code. It's open source, highly configurable (every build step is executed by a container!) and has a lot of plugins available. Drone is built using Go and utilizes Docker. It can be run inside a container itself with very little configuration.
Pipelines are configured using a special YAML file that you check-in to your git repository. The syntax is designed to be easy to read and expressive so that anyone using the repository can understand the continuous delivery process.
---
kind: pipeline
name: default

steps:
- name: backend
  image: golang
  commands:
  - go build
  - go test

- name: frontend
  image: node
  commands:
  - npm install
  - npm test

...
Drone consists of two main parts: Server, and Agent(s). For single server/machine you just need drone server to do all the works for you. If you are running Drone in multi-server mode you will need to install one or more agents.
Drone Server is a master part, a central piece which serves user interface and exposes API. An agent (worker part) is a small daemon that is installed on a server instance, and it pulls jobs from Drone Server, executes them and pushes the results back. You can scale the system by adding more agents, so it can handle more jobs.
Interesting to notice, Drone Agent only runs a single job at the time. So, if you want to run multiple jobs simultaneously you should set up more than one agent. This approach helps to keep things simple and improve fault tolerance. For example, if an agent fails it only affects a single job.
Another interesting thing to know, Drone Agent is completely stateless. It’s designed to be able to fetch everything it needs for a build from somewhere else: docker registry, git repository, remote storage etc. It means spinning up a new agent is very fast and does not require any special provisioning or preparation.
There is also drone-cli, it provides command line interface to Drone Server API, as well as some other useful commands.
The idea behind Drone’s build process is very simple, but yet incredibly flexible. Every step in the build runs inside a container, which uses an image (plugins) with tools required to execute the step. These containers share a workspace volume, so things you build in one step are available in the next.
For example, a typical pipeline for Go project would be:
- Create git container, execute
git cloneto checkout source code to the workspace. - Create golang container, execute
go testandgo buildto run tests and build executable. - Create docker container, execute
docker buildanddocker pushto build docker image. - Create kubectl container, execute
kubectl applyto deploy the project to the kubernetes cluster.
You are free to use any docker image in build steps, including 3rd party docker registries. Anything you can put in the container can be used during a build. You can use existing applications or write your own.
Important to mention, there is no shared storage between builds, workspace destroyed after the build is complete, containers for steps are destroyed after each step. Instead, if you want to share some files between builds, you can use remote storage (eq. Google Cloud Storage or AWS S3) and additional steps in your pipeline to fetch or push data.
- We can build all jobs within a single file called
.drone.yml. It is easy as CI configuration will be like any other source code repos which make it easy to share and backup. Only a few settings like secrets will be stored in encrypted format. - We don’t need to maintain the server as every job will be started in a new environment where all the dependencies will be installed by default.
- Debugging is very easy as it shows all the execution details of individual step/job.
- Hundreds of community plugins are available to automate tasks and integrate with third party systems. See a partial list of plugins at the Plugin Marketplace or create your own.
- Drone server runs as a container under docker and it can access host machine Docker socket and volume.
- Very easy to setup and use.
- It supports parallelism.
- Very less documents/helps and community support.
| Jenkins | Drone |
|---|---|
| Builds are configured using Jenkins UI and all settings of the jobs are stored on the Jenkins file system in Jenkins server which makes it difficult to share configuration details with team or organization. By cloning Github or other source repositories can’t copy info stored in Jenkins. | We can build all jobs within a single file called .drone.yml. It is easy as CI configuration will be like any other source code repos which make it easy to share and backup. Only a few settings like secrets will be stored in encrypted format. |
| DevOps person or team need to maintain the Jenkins server by installing all dependencies and debug if any issues are there. | We don’t need to maintain the server as every job will be started in a new environment where all the dependencies will be installed by default. |
| Debugging will be a little bit difficult in Jenkins. | Debugging is very easy as it shows all the execution details of individual step/job. |
| It doesn't have built-in support for Docker, the user needs to install and make it available in the built environment. | Drone server runs as a container under docker and it can access host machine Docker socket and volume. |
| We can run multiple jobs or tests at a time using multi-threading but it may cause issues related to database and file systems which will be difficult to debug. | It has the inbuilt facility to support parallelism which can be done by changing project settings - using multiple containers at once. |
We need to setup public URL for exposing our local web server and it will help us to create webhook for Github.
Please download and install ngrok. Move ngrok to any folder from where you can use/refer it.
Run ./ngrok authtoken <YOUR_AUTH_TOKEN> command from that folder. Add the path of the folder in .zshrc file so that you can run ngrok command from anywhere.
export PATH="/Volumes/Macintosh HD/Users/nazmulbasher/Public":$PATH
Now run the following command to setup public URL for exposing your local web server:
ngrok http 8090
Here we will use GitHub and single-machine mode to run the Drone server. Please go to OAuth Apps under Developer settings. Now register a new OAuth application by filling the form:
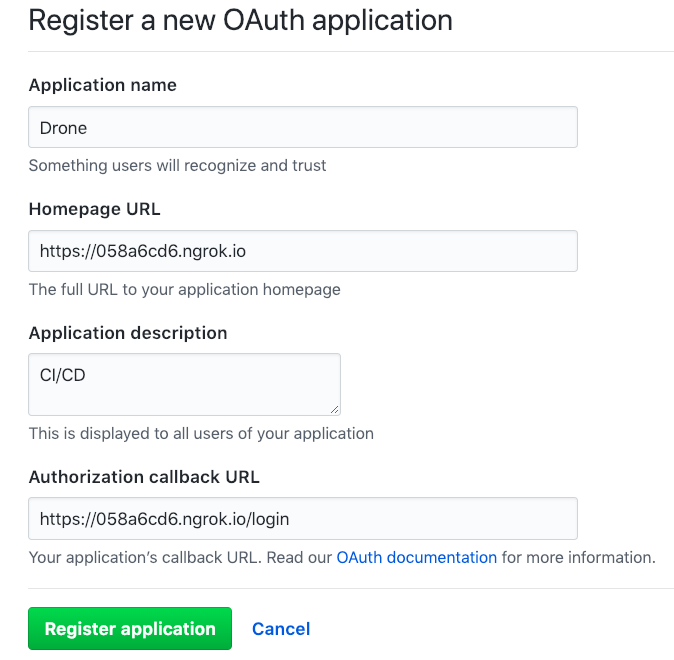
After clicking Register application, you will see the details for your new application. The two items we need are the Client ID and the Client Secret:
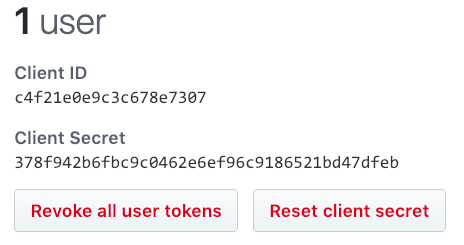
The Client ID and Secret are used to authorize access to GitHub resources.
Pull Drone server which is a distributed lightweight Docker image.
docker pull drone/drone:1.0.0-rc.1
Create a folder to hold the sqlite database for drone:
mkdir -p /Volumes/MyComputer/projects/htdocs/drone.io/drone
The server container can be started with the below command. The container is configured through environment variables. For a full list of configuration parameters, please see the configuration reference.
docker run \
  --volume=/var/run/docker.sock:/var/run/docker.sock \
  --volume=/Volumes/MyComputer/projects/htdocs/drone.io/drone:/data \
  --env=DRONE_GITHUB_SERVER=https://github.com \
  --env=DRONE_GITHUB_CLIENT_ID=c4f21e0e9c3c678e7307 \
  --env=DRONE_GITHUB_CLIENT_SECRET=378f942b6fbc9c0462e6ef96c9186521bd47dfeb \
  --env=DRONE_RUNNER_CAPACITY=2 \
  --env=DRONE_SERVER_HOST=058a6cd6.ngrok.io \
  --env=DRONE_SERVER_PROTO=https \
  --env=DRONE_TLS_AUTOCERT=true \
  --env=DRONE_USER_CREATE=username:nazmulb,admin:true \
  --publish=8090:80 \
  --publish=443:443 \
  --restart=always \
  --detach=true \
  --name=drone \
  drone/drone:1.0.0-rc.1
You have to set volume, DRONE_GITHUB_CLIENT_ID, DRONE_GITHUB_CLIENT_SECRET, DRONE_SERVER_HOST and publish. I have changed port to 8090 for publishing.
You also have to create an Admin user by setting DRONE_USER_CREATE to enable or disable trusted mode for a repository. If trusted mode is enabled, the repository pipelines have access to privileged capabilities, including the ability to start privileged containers and mount host machine volumes. It will help you to deploy your repo image as a container in your local host machine.
Drone looks for a special .drone.yml file in the root of your repository for the pipeline definition. This file will help you to configure a build pipeline for your repository.
I have a node-microservice sample project repo, I am going to use this repo for this setup.
Add a very simple step in .drone.yml in the root of your repository and commit the change to the node-microservice repo. We will add more steps later to have full CI/CD process.
.drone.yml
kind: pipeline
name: default

steps:
- name: test
  image: node:9.8.0
  commands:
  - npm install
  - npm test
Now we're ready to set up Drone with the GitHub account. Open your web browser and navigate to: https://058a6cd6.ngrok.io. You will be asked to login (if not) into your GitHub and need to give the permission to sync your repos in the Drone server.

This is the main dashboard for Drone, you can see the most recent repositories in your GitHub account, and expand the list by clicking "Show all repositories". If all of your repos do not appear, simply click "SYNC" in the upper right hand corner.
Please click "ACTIVATE" node-microservice repo where you have .drone.yml to activate.
If you activate the repo, Dorne will create a webhook automatically, please check it from your repo.
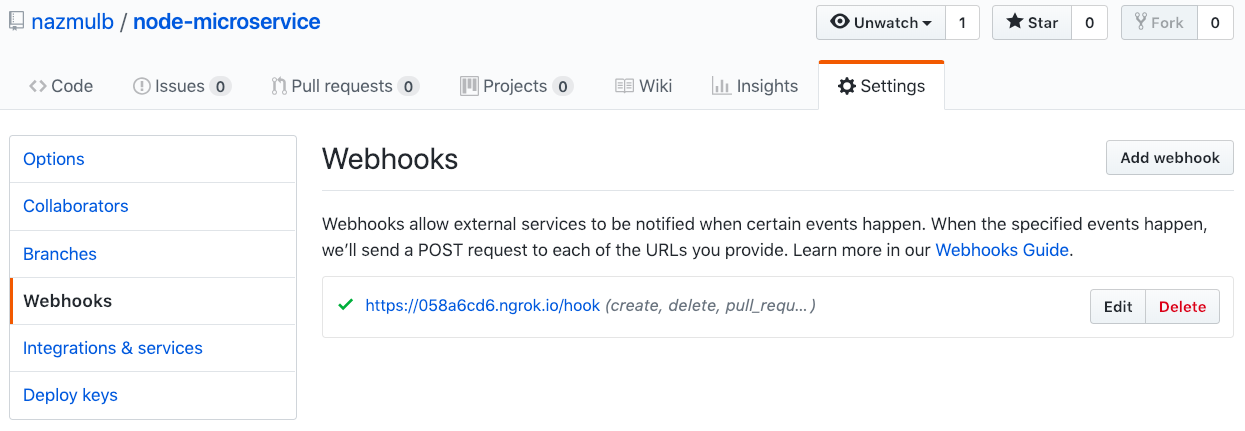
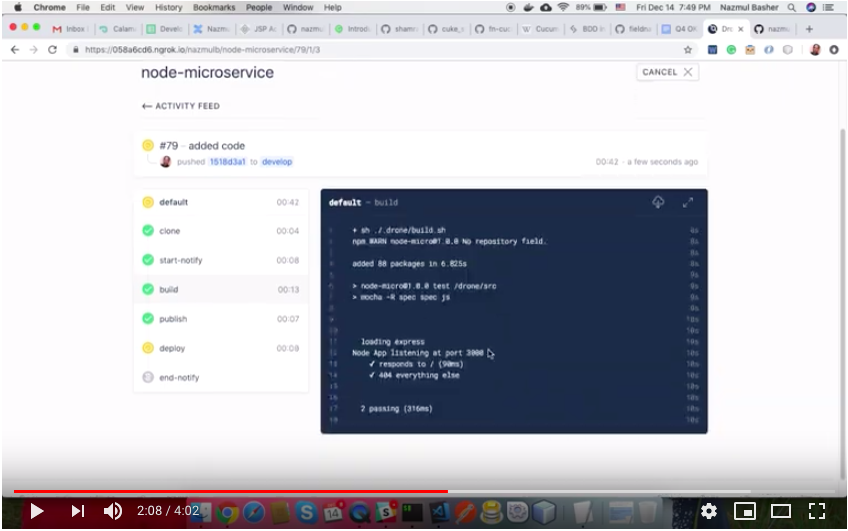
If I change any file from node-microservice repo and push that change then I can see the build progress from the drone server https://058a6cd6.ngrok.io
To setup all the steps for CI/CD pipeline we need to use different plugins of drone. See a partial list of plugins at the Plugin Marketplace or create your own.
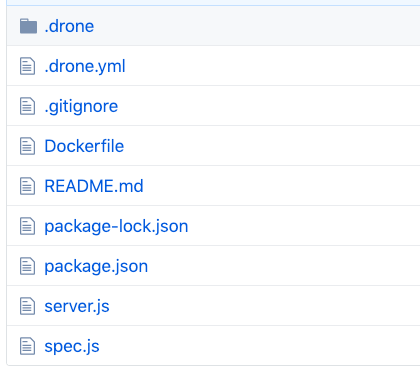
Please add a folder .drone in the root of the repo. Add two shell script files (build.sh & deploy.sh) under the .drone folder.
mkdir .drone && cd .drone
touch build.sh && touch deploy.sh
Add the commends to build in build.sh file:
#!/bin/bash
set -e

npm install
npm test
Add the commends to deploy in deploy.sh file:
deploy.sh
#!/bin/bash
set -e

docker pull nazmulb/node-microservice
docker run --rm -d -p 7777:3000 --name nazmul_node_micro nazmulb/node-microservice
At the end we will prepare the below steps of .drone.yml for full CI/CD pipeline:
kind: pipeline
name: default

steps:
- name: start-notify
  image: plugins/slack
  settings:
    webhook: https://hooks.slack.com/services/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
    channel: cicd
    template: >
        Build {{build.number}} of {{build.branch}} started. {{build.link}}
- name: build
  image: node:9.8.0
  commands:
  - sh ./.drone/build.sh
- name: publish
  image: plugins/docker
  settings:
    repo: nazmulb/node-microservice
    auto_tag: true
    username:
      from_secret: docker_username
    password:
      from_secret: docker_password
- name: deploy
  image: docker
  commands:
  - sh ./.drone/deploy.sh
  volumes:
  - name: docker
    path: /var/run/docker.sock
- name: end-notify
  image: plugins/slack
  settings:
    webhook: https://hooks.slack.com/services/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
    channel: cicd
    template: >
      {{#success build.status}}
        Build {{build.number}} of {{build.branch}} successful. {{build.link}}
      {{else}}
        Build {{build.number}} of {{build.branch}} failed. Please fix!. {{build.link}}
      {{/success}}
volumes:
- name: docker
  host:
    path: /var/run/docker.sock
Let's me explain each step by using different plugins of drone:
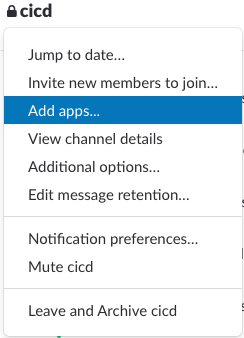
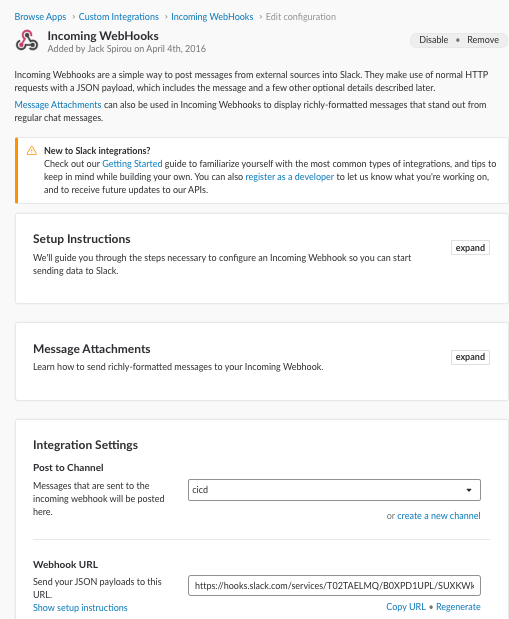
- I am using slack plugin to send slack message for notifying the start and end of the build process. Frist, I created a new channel (e.g.
cicd) in Slack. Then from Slack, I added Drone app and set a webhook for Drone.
-
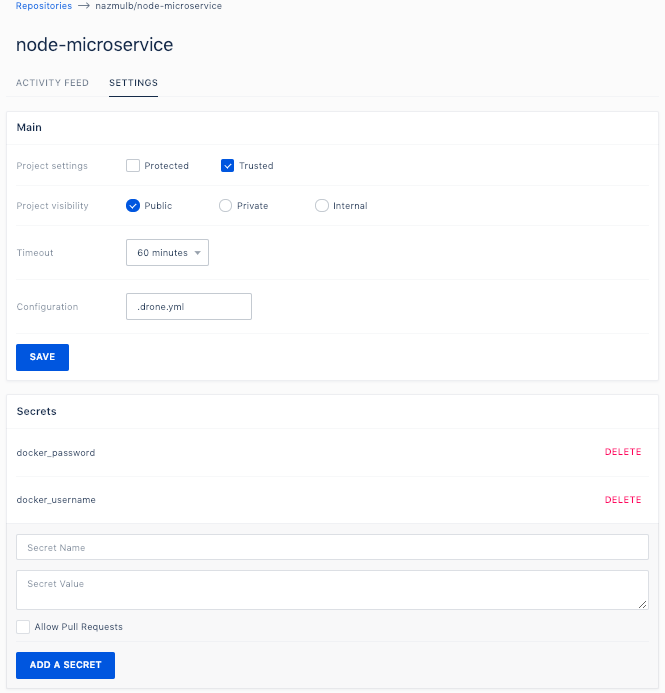
docker plugin will help you to publish your image to docker hub. We need to save docker username and password under Drone secret. You can do it from Drone repository settings.
-
You need docker image to deploy the repo as container in your local host machine. And you also need to mount host machine volumes and to do it you have to go to the repository settings and set the Project settings as Trusted.
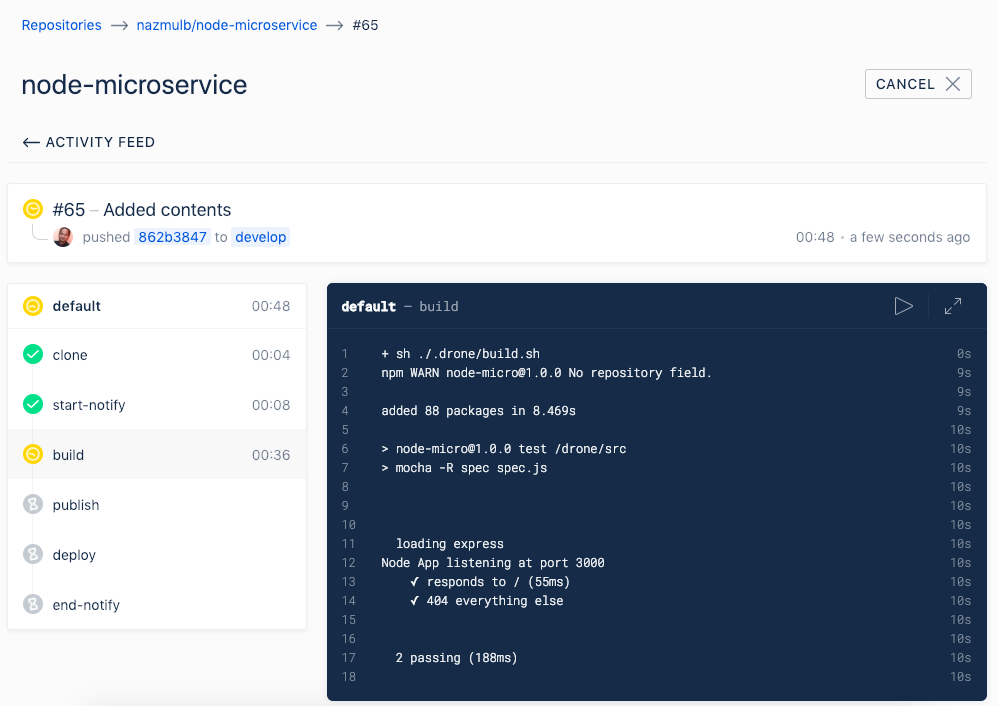
Now If I change any file from node-microservice repo and push that change then I can see the full CI/CD process steps from the drone server https://058a6cd6.ngrok.io
When all the steps are being done you will get your service up and running. You can browse it using http://localhost:7777
The Drone command line tools are used to interact with the Drone from the command line, and provides important utilities for managing users and repository settings.
brew tap drone/drone
brew install drone
The command line tools interact with the server using REST endpoints. You will need to provide the CLI tools with the server addresses and your personal authorization token. You can find your authorization token in your Drone account settings (https://058a6cd6.ngrok.io/account).
Add the following in .zshrc file:
export DRONE_SERVER=https://058a6cd6.ngrok.io
export DRONE_TOKEN=a9xIbVvuyChw9v6s8IoRZK57TUlD0cQQ
This subcommand executes a local build:
drone exec default
To activate a repo from CLI:
drone repo enable nazmulb/node-microservice
To deactivate:
drone repo disable nazmulb/node-microservice
This subcommand prints the named repository details:
drone repo info octocat/hello-world
Enjoy :)