
Amazon Elastic Kubernetes Service (Amazon EKS) is a managed Kubernetes service that makes it easy for you to run Kubernetes on AWS and on-premises. Amazon EKS lets you create, update, scale, and terminate nodes for your cluster with a single command. These nodes can also leverage Amazon EC2 Spot Instances to reduce costs.
Terraform is an open-source IaC software tool that provides a consistent command line interface (CLI) workflow to manage hundreds of cloud services.
- AWS Account(Free Tier)
- AWS CLI
- Terraform
- Kubectl
- VScode
Let's get started.
Warning!!! You might incur costs in your AWS account by doing this
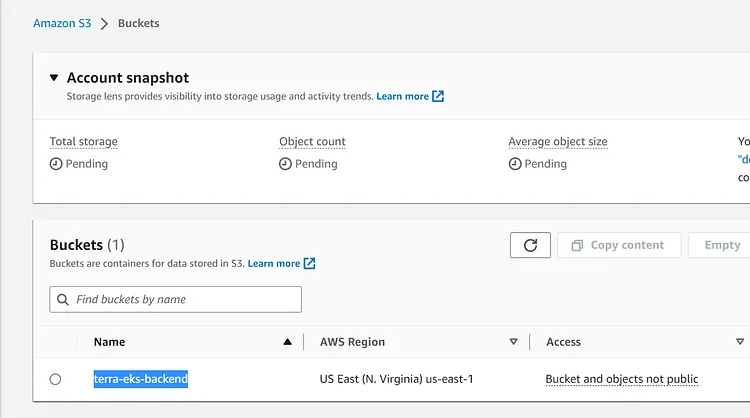
Head to your AWS account and navigate to the S3 section. This is where we will store our tf.state file as it is considered best practice to keep our state file in a Remote Location. The primary purpose of Terraform state is to store bindings between objects in a remote system and resources declared in your configuration and I am going to keep mine in Amazon S3.
Create an S3 Bucket. You can choose whatever name suits your purpose, I am naming mine terra-eks-backend. You can provision your bucket in any region that suits your purpose but I am provisioning mine in the us-east-1.

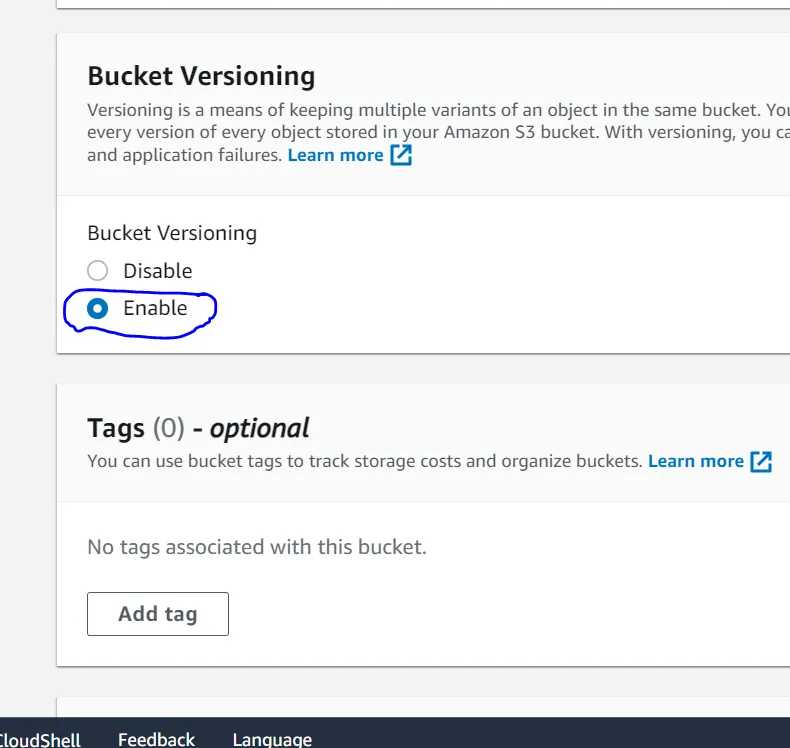
It is highly recommended that you enable Bucket Versioning on the S3 bucket to allow for state recovery in the case of accidental deletions and human error.
To make my tf.state file consistent I am going to enable State-Locking. File locking is a data management feature that allows only one user or process access to a file at any given time. It restricts other users from changing the file while it is being used by another user or process. In other to achieve this I need to create a Dynamo DB Table so let's head to Dynamo DB in our AWS account and create a Dynamo DB table

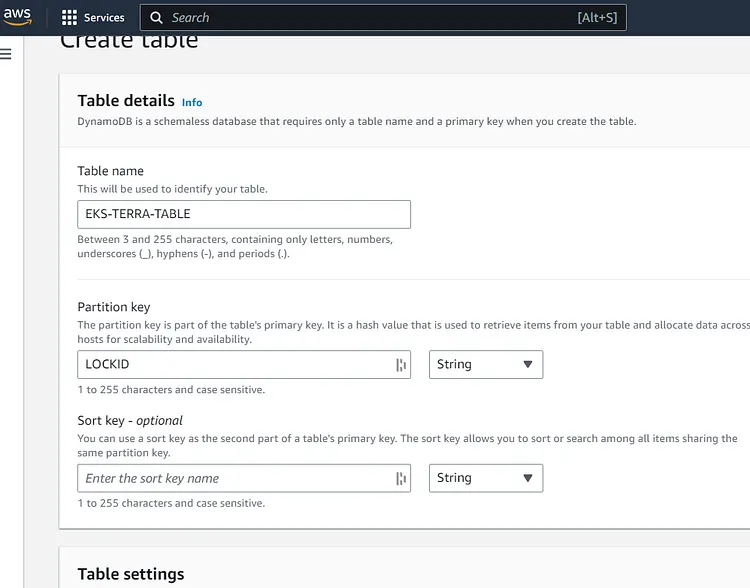
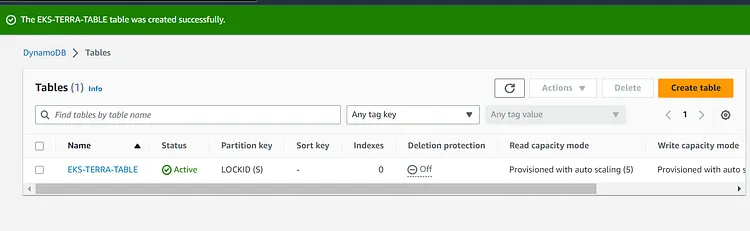
You can choose any name for your DynamoDB Table but it is important to note that the partition key is case sensitive. I named the Partition Key LOCKID because this will enable Dynamo DB to lock and release the file. Scroll down the page and click on Create Table
eks-backend-terra.tf
terraform {
  backend "s3" {
    bucket = "BUCKET_NAME"
    key    = "backend/FILE_NAME_TO_STORE_STATE.tfstate"
    region = "us-east-1"
    dynamodb_table = "dynamoDB_TABLE_NAME"
  }
}
Provider.tf
Name of provider AWS
Our source will be defined as hashicorp/aws. This is a short abbreviation for registry.terraform.io/hashicorp/aws
The version is set to ~>4.66.1
Region is us-east-1
terraform {
  required_providers {
    aws = {
      source  = "hashicorp/aws"
      version = "4.66.1"
    }
  }
}

provider "aws" {
  region = "us-east-1"
}
Vpc.tf
resource "aws_vpc" "main" {
  cidr_block = "10.0.0.0/16"

  tags = {
    Name = "PC-VPC"
  }
}
The vpc.tf contains codes to create a new Vpc. The CIDR block is 10.0.0.0/16 and I have tagged the name of the VPC as PC-VPC
subnets.tf
resource "aws_subnet" "public-1" {
  vpc_id                  = aws_vpc.main.id
  cidr_block              = "10.0.1.0/24"
  availability_zone       = "us-east-1a"
  map_public_ip_on_launch = true

  tags = {
    Name = "public-sub-1"
  }
}

resource "aws_subnet" "public-2" {
  vpc_id                  = aws_vpc.main.id
  cidr_block              = "10.0.2.0/24"
  availability_zone       = "us-east-1b"
  map_public_ip_on_launch = true

  tags = {
    Name = "public-sub-2"
  }
}
EKS requires a minimum of two subnets to function so this is creating two public subnets in two availability zones namely us-east-1a and us-east-1b respectively. I have also set map public IP on launch = true. This will assign our subnets with public IPV4 addresses. I have given the CIDR range of 10.0.1.0/24 to public-1 and 10.0.2.0/24 to public-2.
Internetgw.tf
resource "aws_internet_gateway" "gw" {
  vpc_id = aws_vpc.main.id

  tags = {
    Name = "main"
  }
}
This will create and attach the internet gateway to the Vpc created
Rout.tf
resource "aws_route_table" "rtb" {
  vpc_id = aws_vpc.main.id

  route {
    cidr_block = "0.0.0.0/0"
    gateway_id = aws_internet_gateway.gw.id
  }

  tags = {
    Name = "MyRoute"
  }
}

resource "aws_route_table_association" "a-1" {
  subnet_id      = aws_subnet.public-1.id
  route_table_id = aws_route_table.rtb.id
}

resource "aws_route_table_association" "a-2" {
  subnet_id      = aws_subnet.public-2.id
  route_table_id = aws_route_table.rtb.id
}
This will create the Route table. The route table has been associated with the two subnets (public-1,public-2). An internet gateway id has also been associated with the Route table and the Vpc id has been assigned to the Route table.
Sg.tf
resource "aws_security_group" "allow_tls" {
  name        = "allow_tls"
  description = "Allow TLS inbound traffic"
  vpc_id      = aws_vpc.main.id

  ingress {
    description = "TLS from VPC"
    from_port   = 22
    to_port     = 22
    protocol    = "tcp"
    cidr_blocks = ["0.0.0.0/0"]
  }

  egress {
    from_port   = 0
    to_port     = 0
    protocol    = "-1"
    cidr_blocks = ["0.0.0.0/0"]
  }

  tags = {
    Name = "allow_tls"
  }
}
This will create the security group attached to the created Vpc with both ingress and egress rules. Ingress rules allow incoming(inbound) connection with our Vpc while egress rule allows outgoing (outbound) connection.
iam_role.tf
resource "aws_iam_role" "master" {
  name = "ed-eks-master"

  assume_role_policy = <<POLICY
{
  "Version": "2012-10-17",
  "Statement": [
    {
      "Effect": "Allow",
      "Principal": {
        "Service": "eks.amazonaws.com"
      },
      "Action": "sts:AssumeRole"
    }
  ]
}
POLICY
}

resource "aws_iam_role_policy_attachment" "AmazonEKSClusterPolicy" {
  policy_arn = "arn:aws:iam::aws:policy/AmazonEKSClusterPolicy"
  role       = aws_iam_role.master.name
}

resource "aws_iam_role_policy_attachment" "AmazonEKSServicePolicy" {
  policy_arn = "arn:aws:iam::aws:policy/AmazonEKSServicePolicy"
  role       = aws_iam_role.master.name
}

resource "aws_iam_role_policy_attachment" "AmazonEKSVPCResourceController" {
  policy_arn = "arn:aws:iam::aws:policy/AmazonEKSVPCResourceController"
  role       = aws_iam_role.master.name
}

resource "aws_iam_role" "worker" {
  name = "ed-eks-worker"

  assume_role_policy = <<POLICY
{
  "Version": "2012-10-17",
  "Statement": [
    {
      "Effect": "Allow",
      "Principal": {
        "Service": "ec2.amazonaws.com"
      },
      "Action": "sts:AssumeRole"
    }
  ]
}
POLICY
}

resource "aws_iam_policy" "autoscaler" {
  name   = "ed-eks-autoscaler-policy"
  policy = <<EOF
{
  "Version": "2012-10-17",
  "Statement": [
    {
      "Action": [
        "autoscaling:DescribeAutoScalingGroups",
        "autoscaling:DescribeAutoScalingInstances",
        "autoscaling:DescribeTags",
        "autoscaling:DescribeLaunchConfigurations",
        "autoscaling:SetDesiredCapacity",
        "autoscaling:TerminateInstanceInAutoScalingGroup",
        "ec2:DescribeLaunchTemplateVersions"
      ],
      "Effect": "Allow",
      "Resource": "*"
    }
  ]
}
EOF

}

resource "aws_iam_role_policy_attachment" "AmazonEKSWorkerNodePolicy" {
  policy_arn = "arn:aws:iam::aws:policy/AmazonEKSWorkerNodePolicy"
  role       = aws_iam_role.worker.name
}

resource "aws_iam_role_policy_attachment" "AmazonEKS_CNI_Policy" {
  policy_arn = "arn:aws:iam::aws:policy/AmazonEKS_CNI_Policy"
  role       = aws_iam_role.worker.name
}

resource "aws_iam_role_policy_attachment" "AmazonSSMManagedInstanceCore" {
  policy_arn = "arn:aws:iam::aws:policy/AmazonSSMManagedInstanceCore"
  role       = aws_iam_role.worker.name
}

resource "aws_iam_role_policy_attachment" "AmazonEC2ContainerRegistryReadOnly" {
  policy_arn = "arn:aws:iam::aws:policy/AmazonEC2ContainerRegistryReadOnly"
  role       = aws_iam_role.worker.name
}

resource "aws_iam_role_policy_attachment" "x-ray" {
  policy_arn = "arn:aws:iam::aws:policy/AWSXRayDaemonWriteAccess"
  role       = aws_iam_role.worker.name
}
resource "aws_iam_role_policy_attachment" "s3" {
  policy_arn = "arn:aws:iam::aws:policy/AmazonS3ReadOnlyAccess"
  role       = aws_iam_role.worker.name
}

resource "aws_iam_role_policy_attachment" "autoscaler" {
  policy_arn = aws_iam_policy.autoscaler.arn
  role       = aws_iam_role.worker.name
}

resource "aws_iam_instance_profile" "worker" {
  depends_on = [aws_iam_role.worker]
  name       = "ed-eks-worker-new-profile"
  role       = aws_iam_role.worker.name
}
This will create all the necessary IAM roles and Policies for the EKS cluster. It will be attached to the EKS cluster once the EKS Cluster is created. This will enable the EKS Cluster to have all the necessary permissions needed.
eks_cluster.tf
resource "aws_eks_cluster" "eks" {
  name     = "pc-eks"
  role_arn = aws_iam_role.master.arn


  vpc_config {
    subnet_ids = [aws_subnet.public-1.id, aws_subnet.public-2.id]
  }

  depends_on = [
    aws_iam_role_policy_attachment.AmazonEKSClusterPolicy,
    aws_iam_role_policy_attachment.AmazonEKSServicePolicy,
    aws_iam_role_policy_attachment.AmazonEKSVPCResourceController,
    aws_iam_role_policy_attachment.AmazonEKSVPCResourceController,
    #aws_subnet.pub_sub1,
    #aws_subnet.pub_sub2,
  ]

}
This will create the EKS Cluster. depends_on =[ means that the EKS Cluster being created depends on the completion of the creation of the IAM roles. The two subnet IDs have also been mentioned here as well.
eks_node_group.tf
resource "aws_instance" "kubectl-server" {
  ami                         = "ami-06ca3ca175f37dd66"
  key_name                    = "EKSKEYPAIR"
  instance_type               = "t2.micro"
  associate_public_ip_address = true
  subnet_id                   = aws_subnet.public-1.id
  vpc_security_group_ids      = [aws_security_group.allow_tls.id]

  tags = {
    Name = "kubectl"
  }

}

resource "aws_eks_node_group" "node-grp" {
  cluster_name    = aws_eks_cluster.eks.name
  node_group_name = "pc-node-group"
  node_role_arn   = aws_iam_role.worker.arn
  subnet_ids      = [aws_subnet.public-1.id, aws_subnet.public-2.id]
  capacity_type   = "ON_DEMAND"
  disk_size       = "20"
  instance_types  = ["t2.small"]

  remote_access {
    ec2_ssh_key               = "EKSKEYPAIR"
    source_security_group_ids = [aws_security_group.allow_tls.id]
  }

  labels = tomap({ env = "dev" })

  scaling_config {
    desired_size = 2
    max_size     = 3
    min_size     = 1
  }

  update_config {
    max_unavailable = 1
  }

  depends_on = [
    aws_iam_role_policy_attachment.AmazonEKSWorkerNodePolicy,
    aws_iam_role_policy_attachment.AmazonEKS_CNI_Policy,
    aws_iam_role_policy_attachment.AmazonEC2ContainerRegistryReadOnly,
    #aws_subnet.pub_sub1,
    #aws_subnet.pub_sub2,
  ]
}
This will create 2 resources.
The first block will create an EC2 instance for the Kubectl server.
Note that you need a key pair in your AWS account in the region you are deploying this in other to be able to ssh into the kubectl server. If you do not have one then you will need to create one.
The second block will create the AWS EKS node group, capacity type is set to ON DEMAND, instance type is t2.small, and disk size is set to 20. Scaling Config, maximum size is 3, desired size is 2, and minimum size is set to 1.
Now that the Terraform codes are ready its time to run our Terraform commands
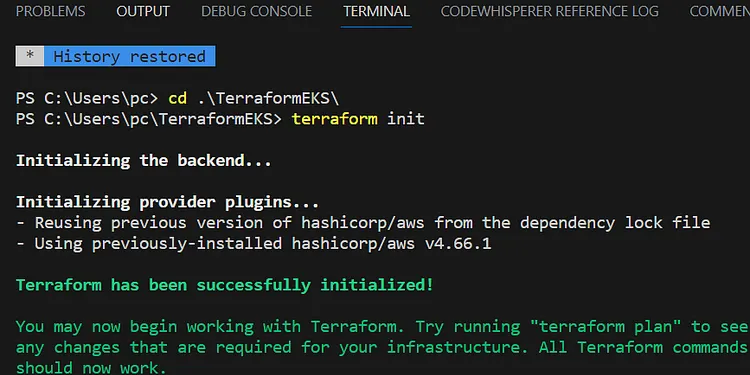
terraform init
terraform validate
terraform plan
terraform apply
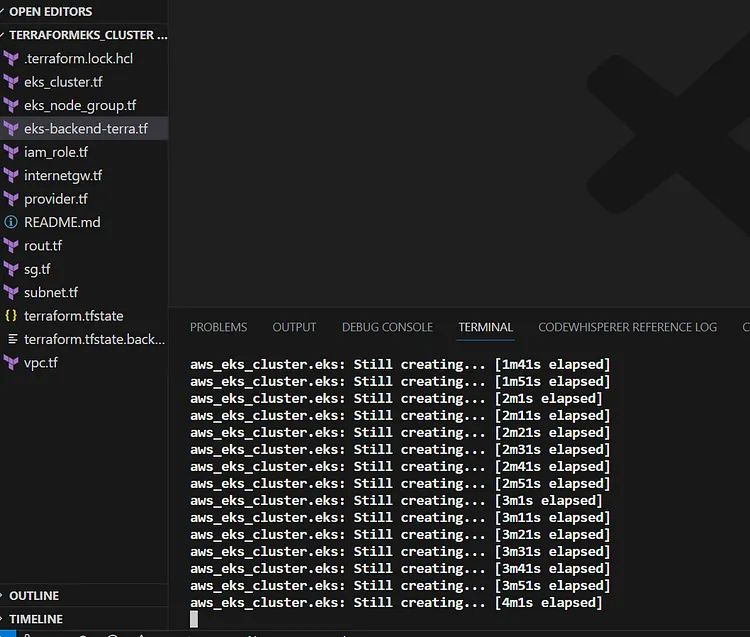
Terraform is creating the resources after running the terraform apply command.

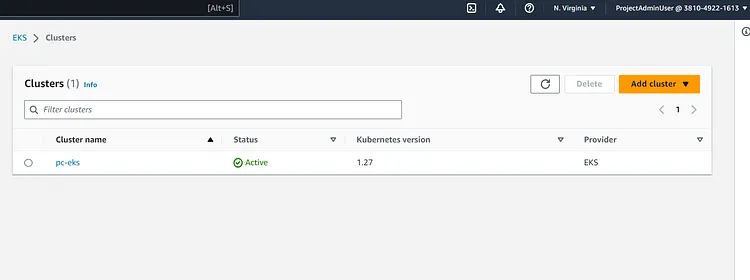
All resources have been created successfully. Let's check our AWS Account
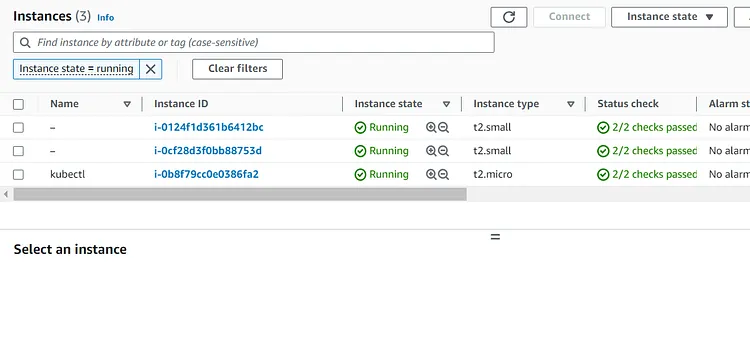
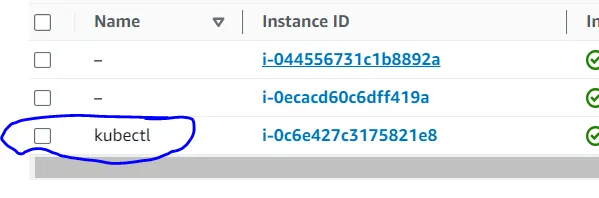
Let's check the Kubectl Server and the other instances created
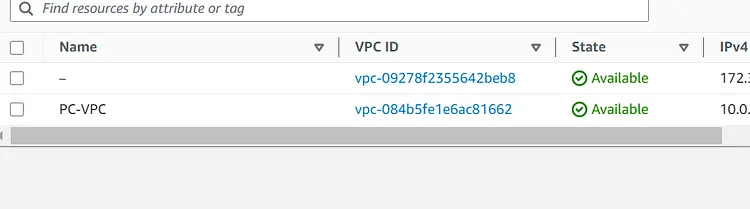
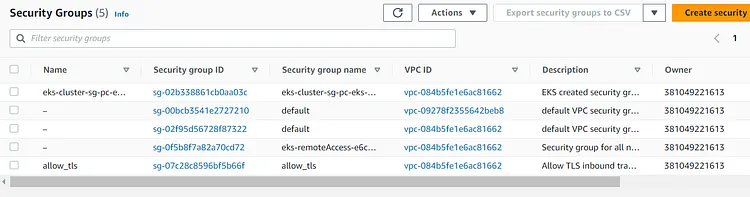
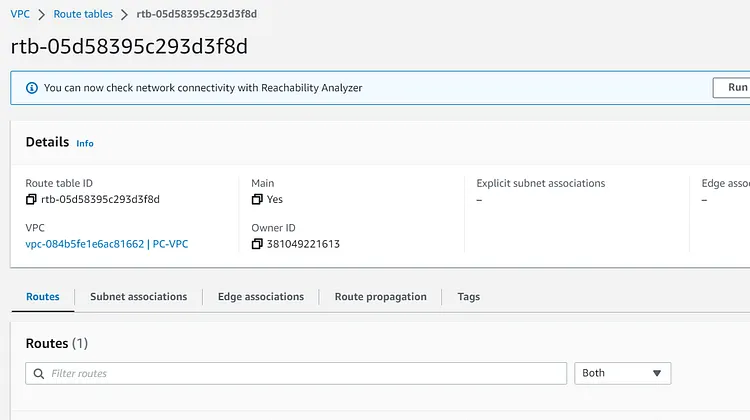
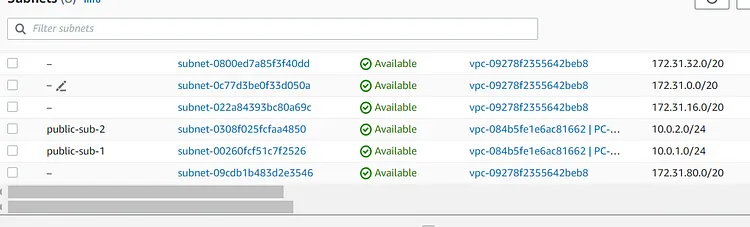
Let's check the VPC and Security Group, Route Table, and Subnets
Now that all resources have been provisioned by Terraform next step is to try to ssh into the Kubectl server.
I am using a newer version of Windows so I do not need to ssh with putty. If you are using an older version of Windows you will need to ssh into your instance using putty. You can learn how to do that here
Putty Installation for Connect to your Linux instance from Windows
Click on the Instance Kubectl
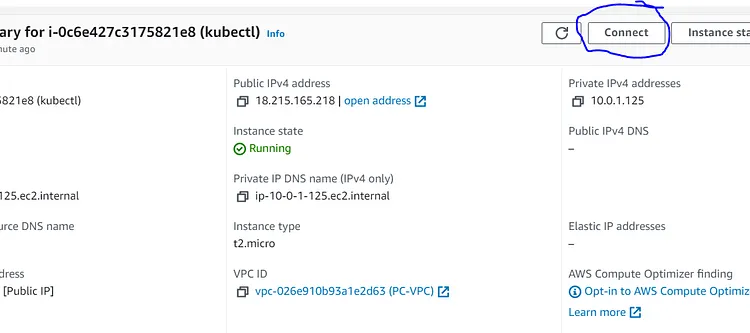
On the next page click on connect
Copy the ssh — i under Example
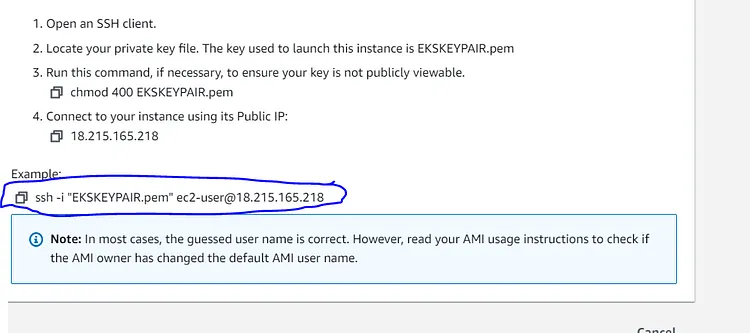
Now head to your cmd line on your machine and cd into the directory where your Keypair(.pem) is stored. In my case, it's stored in the Downloads directory. Yours could be different so take note. Once you are in the directory where your Keypair is stored paste in the ssh line you copied and press enter
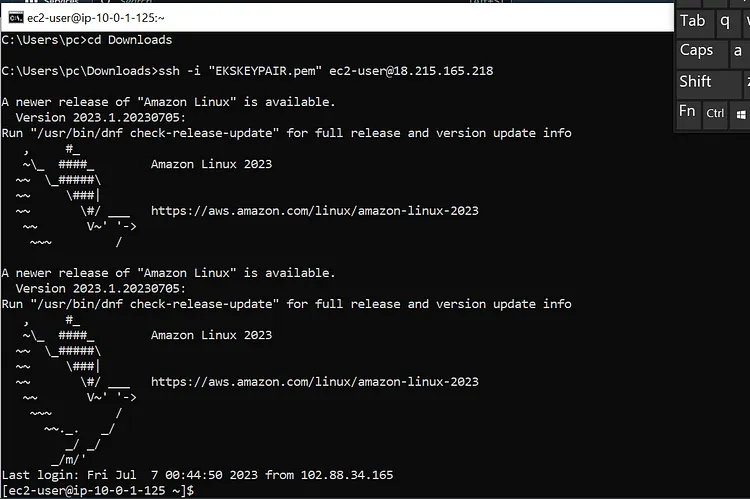
I had connected to mine earlier so there was no prompt but if you are connecting for the first time there will be a prompt. Just type yes and you will be connected to your ec2 instance.
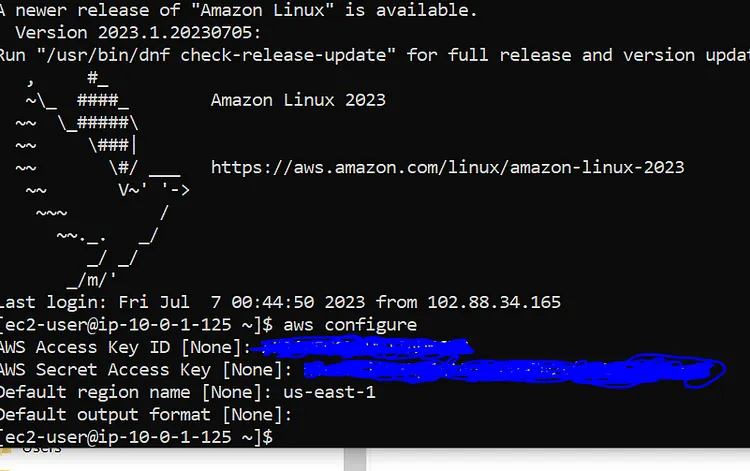
Let's install AWS CLI on the Kubectl Server
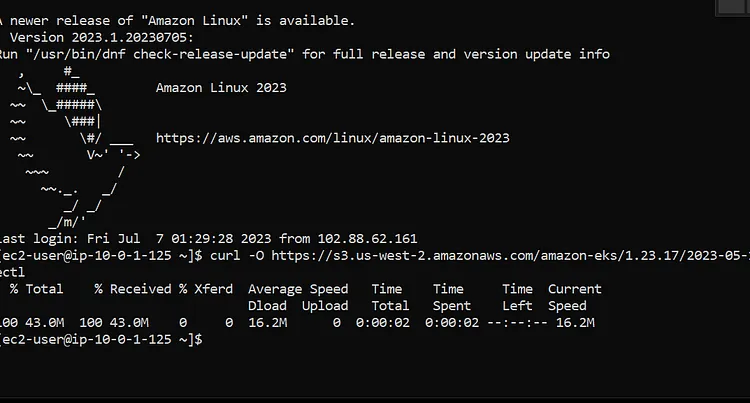
Next up is to set up Kubectl on the ec2 instance. For that, we will run these command
curl -O https://s3.us-west-2.amazonaws.com/amazon-eks/1.27.1/2023-04-19/bin/linux/amd64/kubectl
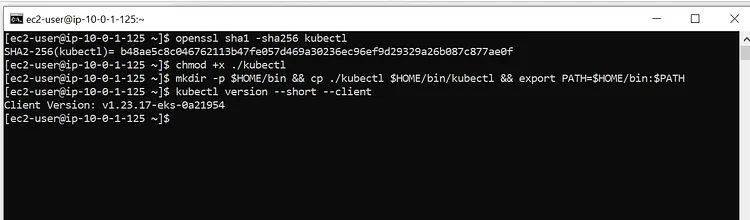
openssl sha1 -sha256 kubectl
chmod +x ./kubectl
mkdir -p $HOME/bin && cp ./kubectl $HOME/bin/kubectl && export PATH=$HOME/bin:$PATH
kubectl version --short --client
Let's set up our EKS Cluster on the Kubectl Server. These two commands should do just that
aws eks --region us-east-1 describe-cluster --name pc-eks --query cluster.status
aws eks --region us-east-1 update-kubeconfig --name pc-eks
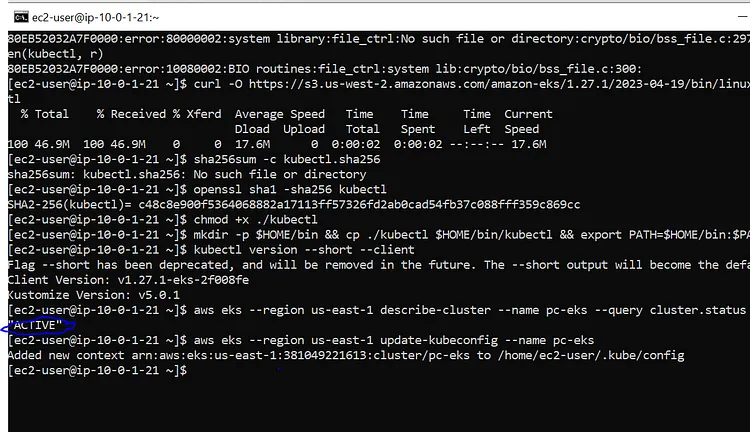
While the first command showed our Kubectl is active the second command updated the Kubectl server by adding my aws:arn to the Kubectl server config
Finally, we will run this last command
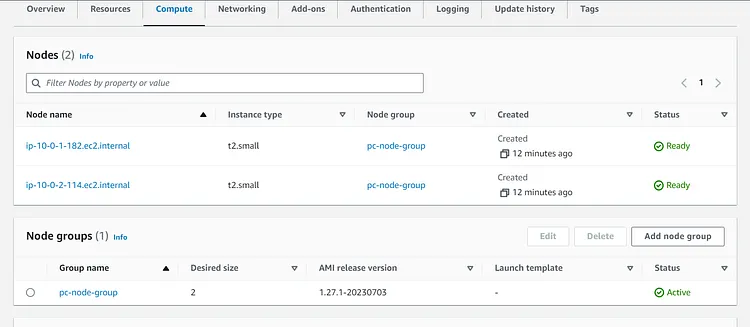
kubectl get nodes

And here are the two nodes.
Note: Run terraform destroy to remove all provisioned infrastructures from your AWS account so as not to incur unnecessary bills on your account. Also, remember to delete the S3 bucket and the DynamoDB table
This provides a comprehensive guide on provisioning an Amazon Elastic Kubernetes Service (EKS) cluster on AWS using Terraform. It covers the necessary prerequisites, creation of an S3 bucket for storing the Terraform state file, enabling state-locking with DynamoDB, creating the required Terraform files, running Terraform commands to provision the resources, verifying the created resources in the AWS account, SSH into the Kubectl server, installing AWS CLI on the server, setting up the EKS cluster using AWS CLI, and verifying the cluster’s status. By following these basic steps, we can successfully provision an EKS cluster on AWS using Terraform
If you are planning to use this repo for learning, please hit the star. Thanks!
