This repository provides a good foundation for establishing a README, written in AsciiDoc markup. Documents written in AsciiDoc markup can be easily converted to HTML5, PDF, EPUB, and other formats. Its syntax is similar to markdown, and includes extensive features and flexibility which make it suitable for writing high quality documentation.
AsciiDoc is simply plain-text. You can author documents in your favorite text editor of choice, such as Visual Studio Code with a proper extension, or any derivative of VIM. If you’re just getting started with AsciiDoc, you may want to try AsciidocFX, until the markup syntax becomes second nature to you.
|
ℹ️
|
This README template does not include dependencies on features, such as Shields.io, which require the repository to be a public repository. |
-
Asciidoctor - a fast text processor and publishing toolchain for converting AsciiDoc content to other formats.
-
AsciidocFX - a book / document editor to build PDF, Epub, Mobi and HTML books, documents, and slides.
This is an example of how you may give instructions on setting up your project locally. To get a local copy up and running follow these simple example steps.
Select the prequisites procedure which aligns with your operating system of choice.
Determine on which Linux distribution your system is ased on. See List of Linux distributions — Wikipedia — for a list. Most Linux systems — including Ubuntu — are Debian-based.
Open a terminal window. Copy & paste the following into the terminal window and hit Return. You may be prompted to enter your password.
sudo apt update
sudo apt upgrade
sudo apt install git
You can use Git now.
Step 1 — Install Homebrew
|
ℹ️
|
Homebrew […] simplifies the installation of software on the macOS operating system. |
Copy & paste the following into the terminal window and hit Return.
/bin/bash -c "$(curl -fsSL https://raw.githubusercontent.com/Homebrew/install/HEAD/install.sh)"You will be offered to install the Command Line Developer Tools from Apple. Confirm by clicking Install. After the installation finished, continue installing Homebrew by hitting Return again.
Step 1 — Install Chocolatey
|
ℹ️
|
Chocolatey is a software management for Windows. It brings the concepts of true package management to allow you to version things, manage dependencies and installation order, better inventory management, and other features. |
Copy & paste the following into the PowerShell window and hit Return.
Set-ExecutionPolicy Bypass -Scope Process -Force; [System.Net.ServicePointManager]::SecurityProtocol = [System.Net.ServicePointManager]::SecurityProtocol -bor 3072; iex ((New-Object System.Net.WebClient).DownloadString('https://chocolatey.org/install.ps1'))Wait a few seconds for the command to complete. If you don’t see any errors, you are ready to use Chocolatey.
This repository is published as a template repository, hosted on GitHub. The branches within this repository include a boilerplate README, as well as a placeholder README, for your convenience. To ensure you repository includes these convenience branches, you’ll need create your repository from within the GitHub website.
|
💡
|
While it is possible to create a repository from a template using the GitHub CLI, it currently does not support including all branches. For more information, see gh repo create in the GitHub CLI documentation.
|
-
On GitHub, navigate to the main page of this repository.
-
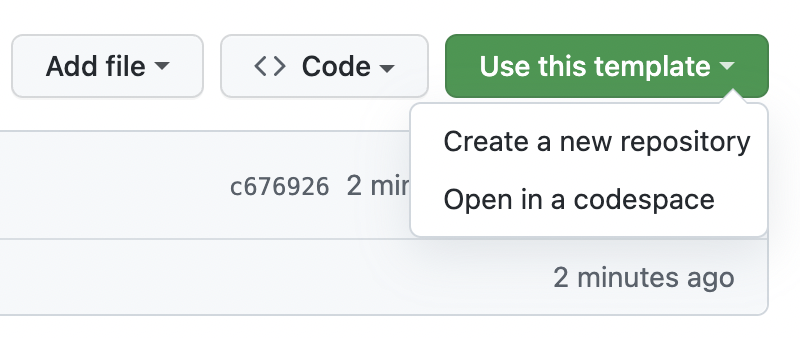
Above the file list, click Use this template.
-
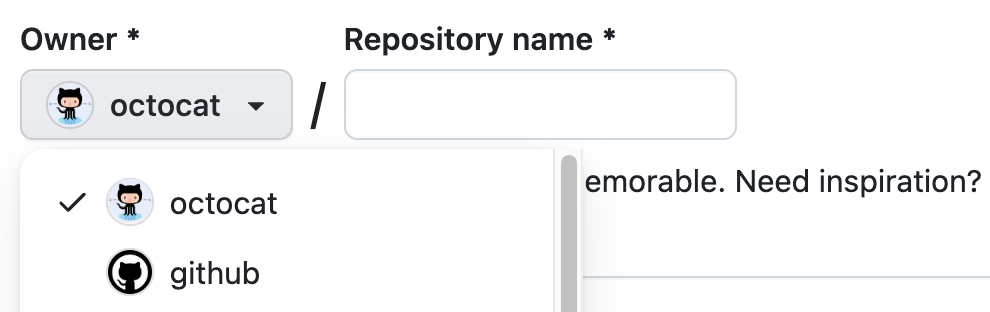
Use the Owner drop-down menu, and select the account you want to own the repository.
-
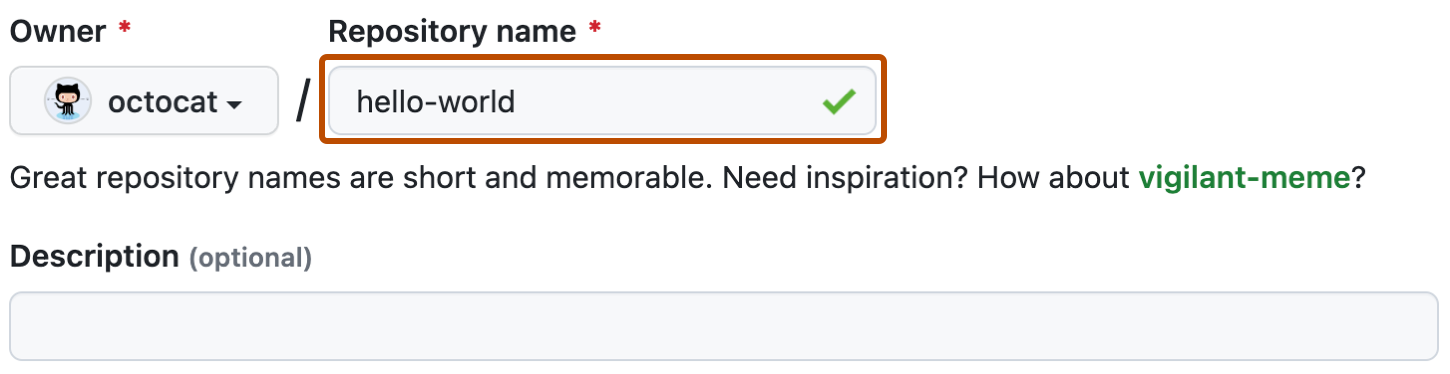
Type a name for your repository, and an optional description.
-
Choose a repository visibility. For more information, see About repository visibility.
-
To include the directory structure and files from all branches in the template, YOU MUST select Include all branches.

-
Click Create repository from template.
-
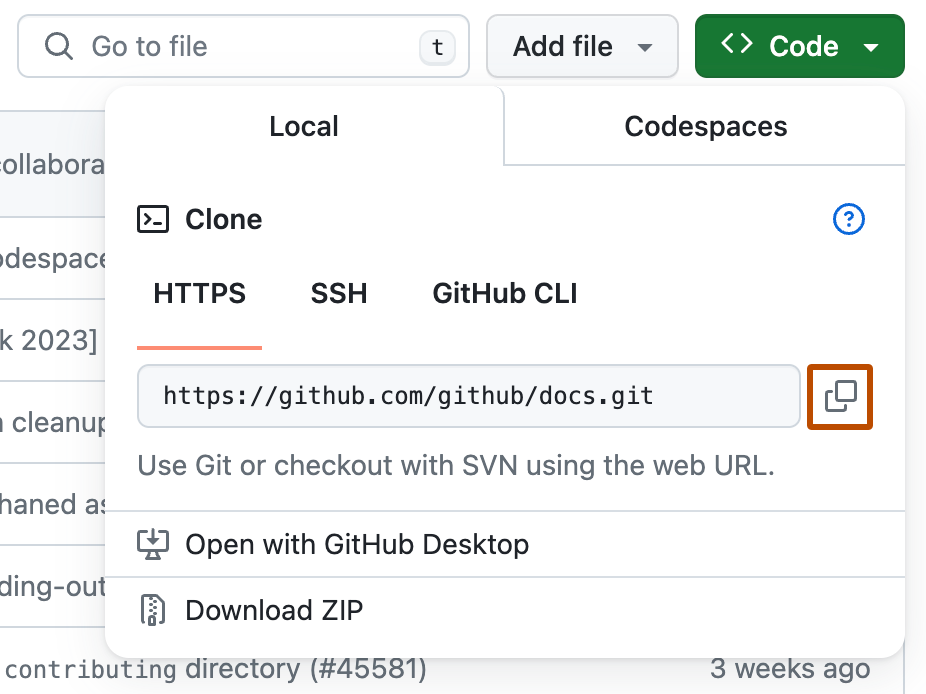
On GitHub, navigate to the main page of the repository.
-
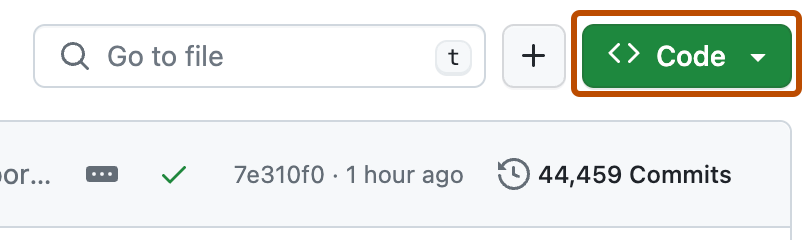
Above the list of files, click
 Code.
Code. -
To clone the repository using HTTPS, under "Clone with HTTPS", click
 to copy the URL.
 -
Launch your terminal.
-
Change the current working directory to the location where you want the cloned directory.
-
Type `git clone `, and then paste the URL you copied earlier
git clone https://github.com/YOUR-USERNAME/YOUR-REPOSITORY
-
Press Enter to create your local clone.
git clone https://github.com/YOUR-USERNAME/YOUR-REPOSITORY
> Cloning into `Spoon-Knife`...
> remote: Counting objects: 10, done.
> remote: Compressing objects: 100% (8/8), done.
> remove: Total 10 (delta 1), reused 10 (delta 1)
> Unpacking objects: 100% (10/10), done.

Once a new repository is created from this template, the boilerplate readme is displayed on the main branch. This repository also includes the following two branches for convenience.
-
docs/readme-boilerplate
-
This branch includes an example of what a typical readme might look like.
-
This has already been merged into
main, and is what you’re reading now. -
You’ll likely want to create a branch from this so you can author your own custom readme.
-
-
docs/readme-placeholder
-
This branch includes an example of what a placeholder readme might look like.
-
A placeholder readme is usually displayed until the actual readme is ready to be published.
-
The use of a placeholder readme is a good practice to provide visitors to your repsository with a hint of what’s to come.
-
-
Launch your terminal.
-
Change the current working directory to the location where you already cloned the repository.
-
Copy & paste the following into the terminal window and hit
Return.git checkout docs/readme-placeholder git checkout main git rm readme.adoc git clean -f . git commit -m 'DOCS(readme): purge boilerplate' git merge docs/readme-placeholder -m 'DOCS(readme): stage placeholder' --allow-unrelated-histories
-
You can now edit the
readme.adocfile to serve as a placeholder until the actual readme is ready to be published.= <Enter the Project Title> :doctype: article :description: <Enter a short description of the project> :license-type: <enter license type> :author: Author Name :email: [email protected] :revnumber: v0.1 :revdate: 2021-01-01
💡The example listed above is only a starting point for customizing the readme. Take a close look at the lines within to ensure you replace all the placeholder values. For example, don’t forget to modify the HTML code near the top of the readme which is used when displaying on GitHub. -
Once your edits are complete, commit your changes and push to remote.
git add .
git commit -m 'DOCS(readme):  set placeholder'
git push
-
Launch your terminal.
-
Change the current working directory to the location where you already cloned the repository.
-
Copy & paste the following into the terminal window and hit
Return.git checkout docs/readme-boilerplate git checkout -b docs/readme-draft
-
You can now edit the
readme.adocfile, customizing it for your specific project. -
Once the readme is ready to be published, copy & paste the following into the terminal window and hit
Return.git add . git commit -m 'DOCS(readme): author draft' git push -u origin docs/readme-draft git checkout main git rm readme.adoc git clean -f . git commit -m 'DOCS(readme): purge placeholder' git merge docs/readme-draft -m 'DOCS(readme): publish draft' --allow-unrelated-histories git push
For more AsciiDoc examples, please refer to the Documentation.
See the open issues for a list of proposed features (and known issues).
-
Clone repo and create a new branch:
$ git checkout https://github.com/JoeArauzo/AsciiDoc-README-Template -b name_for_new_branch. -
Make changes and test.
-
Submit Pull Request with comprehensive description of changes.
See CHANGELOG.
Author Name - [email protected]
Project Link: https://github.com/JoeArauzo/AsciiDoc-README-Template

