Amazon Virtual Private Cloud (VPC) is a service that allows you to launch AWS resources in a logically isolated virtual network that you've defined. This virtual network closely resembles a traditional network that you'd operate in your own data center, with the benefits of using the scalable infrastructure of AWS.
With a VPC, you can have complete control over your virtual networking environment, including:
-
The IP address range of your VPC
-
The subnets within your VPC
-
The security groups that control inbound and outbound traffic to your VPC resources
-
The route tables control how traffic is routed within your VPC and to the internet
NOTE: Assuming that you have an AWS account, let's get started with VPC!
-
Go to the AWS website to log in to your AWS account, and Click on the Console button in the top right corner of the page.
-
Click on the Services tab in the top left corner of the page and make sure the selected region is "Oregon" (us-west-2) as we will be performing all the operations in the same region.
-
In the search bar, type "VPC" and then select the VPC service from the drop-down menu.
-
Click on the "Create VPC" button


Once you are on the VPC service page, click on the Create VPC button.
-
Select VPC only under resources to create.
This will create a VPC with the default resources, such as a default route table and a default security group.
-
Give your own VPC name under the name tag.
This is a name that you will use to identify your VPC. It is a good idea to give your VPC a descriptive name so that you can easily find it later.
-
Select IPv4 CIDR manual input under the IPv4 CIDR block option.
This will allow you to specify your own IPv4 CIDR block for your VPC.
-
Give 10.0.0.0/16 in the input field.
This is the CIDR block that you will use for your VPC. It is a /16 CIDR block, which means that it contains 65,536 IP addresses.
-
Click on the Create VPC button.
This will create your VPC.

Before moving further we need to understand what is a subnet.
What is a subnet?
A subnet is a logical division of a VPC. It is a range of IP addresses that are carved out of the VPC's CIDR block. Subnets allow you to isolate resources within your VPC and control how they communicate with each other.
Creating a subnet
To create a subnet, follow these steps:
-
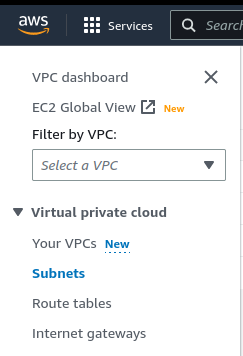
Click on the Subnets tab on the left panel of the VPC dashboard.
-
Click on the Create Subnet button.
-
Select the VPC that you created in the previous step.
-
Under Subnet settings, give your subnet a name, such as "Border subnet".
-
Under the Availability zone, select the availability zone where you want to create the subnet.
-
Under IPv4 CIDR block, give the subnet a CIDR block. The CIDR block must be a subset of the VPC's CIDR block. In this example, we will use the CIDR block 10.0.0.0/24.
In this example, we are creating a subnet with the CIDR block 10.0.0.0/24. This means that the subnet will have 256 IP addresses, from 10.0.0.0 to 10.0.0.255.
-
Click on the Create Subnet button.


This will create a subnet in the selected availability zone with the specified CIDR block.

but but but what is a routing/route table??
What is a routing/route table?
A routing table is a set of rules that determine how traffic is routed within a VPC. It contains a list of destinations (IP addresses or CIDR blocks) and the next-hop devices that should be used to reach those destinations.
Why do we need a route table?
A route table is necessary to route traffic within a VPC and to the internet. Without a route table, traffic would not be able to flow between different subnets within a VPC or to the internet.
Creating a route table
To create a route table, follow these steps:
-
Click on the Route Tables tab on the left panel of the VPC dashboard.
-
Click on the Create route table button.
-
Under Route table settings, give your route table a name, such as "Border RT".
-
Select the VPC that you created in the previous steps.
-
Click on the Create route table button.


This will create a route table in the selected VPC. You can now add routes to the route table to control how traffic is routed within the VPC and to the internet.

- To associate the "Border RT" route table to the border subnet under subnet associations, Under the Subnet associations tab, click
Edit subnet associations.

Select the border subnet checkbox.
Click Save Associations.

What is an internet gateway?
An internet gateway is a highly available device that allows you to connect your VPC to the internet. It provides a central egress point for internet traffic from your VPC.
Why do we need an internet gateway?
An internet gateway is necessary to allow resources in your VPC to access the internet. Without an internet gateway, resources in your VPC will not be able to access the internet.
Creating an Internet gateway
To create an internet gateway, follow these steps:
-
Click on the Internet gateways tab on the left panel of the VPC dashboard.
-
Click on the Create Internet Gateway button.
-
Under Internet gateway settings, give your Internet gateway a name, such as "border GW".
-
Click on the Create Internet Gateway button.


This will create an internet gateway in your AWS account.

Attaching the internet gateway to the VPC
To attach the internet gateway to the VPC, follow these steps:
-
Go to the Internet gateways page in the Amazon VPC console.
-
Select the border GW internet gateway.
-
Under the Actions menu, click Attach to VPC.
-
Select the VPC that you created in the previous steps.
-
Click Attach Internet Gateway.


This will attach the "border GW" internet gateway to the VPC. Resources in the VPC will now be able to access the internet through the "border GW" internet gateway.
Note: Internet gateways that are created are detached by default. You must explicitly attach the internet gateway to the VPC before resources in the VPC can access the internet.
What is a security group?
A security group is a firewall that controls inbound and outbound traffic to the instances in your VPC. It acts as a virtual firewall for your instances, protecting them from unauthorized access.
What are inbound and outbound rules in a security group?
Inbound rules control which traffic can reach your instances, while outbound rules control which traffic can leave your instances.
Creating a security group
To create a security group, follow these steps:
-
Click on the Security groups option under Security in the left panel of the VPC dashboard.
-
Click on the Create Security Group button.
-
Under Basic details, give your security group a name, such as "Border SG".
-
Enter a proper description.
-
Under VPC, select the VPC that you created in the previous steps.
-
Click on the Create Security Group button.


This will create a security group in your VPC.
Editing inbound and outbound rules
To edit the inbound and outbound rules for the security group, follow these steps:
-
Under the Inbound Rules tab, click on the Add Rule button.
-
Under Type, select SSH.
-
Under Source, select Anywhere.

This will add a rule to the inbound rules of the security group that allows SSH traffic from anywhere.
You can also add additional rules to the inbound and outbound rules of the security group, depending on your specific needs. For example, you could add a rule to the inbound rules that allows HTTP traffic from only specific IP addresses.
Important: It is important to configure the security groups in your VPC carefully to ensure that your instances are properly protected. Leaving the security groups open to too much traffic can increase the risk of attack.
To create a machine inside the Border subnet:
-
In the AWS Management Console, search for EC2 and select the EC2 service.
-
Click on the Launch Instance button.
-
Under Names and tags provide a name for the instance, in this example, it's "PublicInstance".
-
Under Choose an Amazon Machine Image (AMI), select the AMI for the Ubuntu operating system.
-
Under Instance type, select the t2.micro instance type.
-
Under Key pair, select the key pair that you created in a previous step.
-
Under Network settings, select the VPC that you created in a previous step.
-
Under Subnet, select the Border subnet.
-
Under Security Groups, select the Border SG security group.
-
Click on the Launch Instance button.


This will launch an EC2 instance in the Border subnet with the specified AMI, instance type, key pair, VPC, subnet, and security group.
Additional notes:
-
Enable auto-assign public IP: This will assign a public IP address to your EC2 instance. This is necessary if you want to access your EC2 instance from the internet.
-
Select existing security group: This allows you to select an existing security group to associate with your EC2 instance.
-
Border SG: This is the security group that you created in a previous step.
Once the EC2 instance has launched, you can connect to it using the SSH protocol. To do this, you will need to use the SSH private key that you downloaded when you created the key pair.
Before we remotely connect to our PublicInstance, we need to edit the route for Border RT, where the destination is 0.0.0.0/0 which is anywhere on the internet, target as border GW that we created in the previous steps and save changes:
-
Go to the Route tables page in the Amazon VPC console.
-
Select the Border RT route table.
-
Under the Routes tab, click on the Edit Routes button.
-
Click on the Add Route button.
-
Under Destination, enter
0.0.0.0/0. -
Under Target, select the border GW internet gateway.
-
Click on the Save button.


Now, To remotely SSH log in to the PublicInstance using the terminal:
-
Copy the public IP address of the PublicInstance machine. You can find the public IP address in the AWS Management Console by going to the EC2 service and selecting the PublicInstance instance.
-
Open a terminal window.
-
Run the following command, replacing
<Public-IP-Address>with the public IP address of the PublicInstance machine:
ssh ubuntu@<Public-IP-Address>
You will be prompted to enter your SSH private key. Enter the SSH private key that you downloaded when you created the key pair.
If the SSH connection is successful, you will be logged in to the PublicInstance machine.
Example:
This will log in to the PublicInstance machine with the public IP address 192.168.1.100.
Once you are logged in to the PublicInstance machine, you can start using it like any other Linux machine. You can run commands, install software, and create files.
Important: Do not share your SSH private key with anyone else. Your SSH private key is the key to your EC2 instance. If someone else has your SSH private key, they will be able to log in to your EC2 instance and do anything they want.


Do not worry about me exposing my public IP address of the instance, I have deleted all the resources :D
So far, we've created a VPC with a public subnet and launched an ec2 machine which will act as a NAT gateway. This is a good start, but we're only halfway there. Now we need to create a private subnet for our application servers.
We need a private subnet because we want to protect our application servers from direct access to the internet. By putting our application servers in a private subnet, we can use our NAT gateway to control all inbound and outbound traffic.
Creating a private subnet
To create a private subnet, follow these steps:
-
Go to the VPC service in the AWS Management Console.
-
Under Resources, click on Subnets.
-
Click on the Create Subnet button.
note: Make sure to create the subnet under the same VPC that we created earlier
-
Give your subnet a name, such as
app subnet. -
Select the VPC that you created in a previous step.
-
Under Subnet settings, select the Availability Zone where you want to create the subnet.
-
Under IPv4 CIDR block, enter a CIDR block for your subnet. Make sure that the CIDR block is within the CIDR block of your VPC.
-
Click on the Create Subnet button.

This will create a private subnet in your VPC.
To create a route table for the App subnet:
-
Go to the Route tables page in the Amazon VPC console.
-
Click on the Create route table button.
-
Under Route table settings, give your route table a name, such as "App RT".
-
Select the VPC that you created in a previous step.
-
Click on the Create route table button.
This will create a route table in your VPC.
Note: You can create multiple route tables in a VPC, but each subnet can only be associated with one route table.
Next steps:
Once you have created the App RT route table, you need to associate it with the App subnet. To do this, follow these steps:
-
Go to the Route tables page in the Amazon VPC console.
-
Select the App RT route table.
-
Under the Subnet Associations tab, click on Edit Subnet Associations.
-
Select the App subnet checkbox.
-
Click on the Save Associations button.
This will associate the App RT route table with the App subnet.
To add a route to the App RT route table to route all traffic to the PublicInstance instance:
-
Go to the Route tables page in the Amazon VPC console.
-
Select the App RT route table.
-
Under the Routes tab, click on the Edit Routes button.
-
Click on the Add Route button.
-
Under Destination, enter
0.0.0.0/0. -
Under Target, select the PublicInstance instance.
-
Click on the Save button.
This will add a route to the App RT route table that tells traffic to anywhere on the internet to go through the PublicInstance instance.

Why is this necessary?
The 'PublicInstance' instance is acting as a NAT gateway for the App subnet. This means that all traffic from the App subnet to the internet must go through the PublicInstance instance.
By adding a route to the App RT route table that routes all traffic to the PublicInstance instance, we are ensuring that all traffic from the App subnet to the internet is routed through the NAT gateway.
Important: If you do not add this route to the App RT route table, traffic from the App subnet to the internet will not be routed through the NAT gateway. This could pose a security risk, as resources in the App subnet would be directly exposed to the internet.
To create a security group for the App subnet:
-
Go to the Security Groups page in the Amazon VPC console.
-
Click on the Create Security Group button.
-
Under Basic details, give your security group a name, such as "App SG".
-
Enter a proper description.
-
Under VPC, select the VPC that you created in a previous step.
-
Click on the Create Security Group button.
This will create a security group in your VPC.
Editing Inbound and Outbound Rules
Once you have created the App SG security group, you need to edit the inbound and outbound rules to allow traffic.
To edit the inbound rules:
-
Go to the Security Groups page in the Amazon VPC console.
-
Select the App SG security group.
-
Under the Inbound Rules tab, click on the Add Rule button.
-
Under Type, select All Traffic.
-
Under Source, select Anywhere.
-
Click on the Save button.

Now, for outbound rules:
-
Go to the Security Groups page in the Amazon VPC console.
-
Select the App SG security group.
-
Under the Outbound rules tab, make sure that the following rule is selected.
-
Click save rules.

but but but but🍑, what did we just do???
Now that you have created a security group for the App subnet and edited the inbound and outbound rules to allow traffic from anywhere, you can start launching application servers in the App subnet. The application servers will be able to receive traffic from anywhere on the internet.
now what????
To create a machine inside the App subnet:
-
Search for EC2 in the search bar and select the EC2 service.
-
Click on the Launch Instance button.
-
Under Choose an Amazon Machine Image (AMI), select the AMI for the Ubuntu operating system.
-
Under Instance type, select the t2.micro instance type.
-
Under Key pair, select the key pair that you created in a previous step.
-
Under Network settings, select the VPC that you created in a previous step.
-
Under Subnet, select the App subnet.
-
Disable Auto-assign public IP. This will ensure that the PrivateInstance machine does not have a public IP address.
-
Under Firewall, select Select existing security group.
-
Select the App SG security group from the common security groups menu.
-
Click on the Launch Instance button.

This will launch a PrivateInstance machine in the App subnet.

Why Disable Auto Assign Public IP?
We disable the Auto-assign public IP because the PrivateInstance machine does not need to be accessible from the internet. The PrivateInstance machine will communicate with the internet through the PublicInstance instance, which is acting as a NAT gateway.

Simple answer: NO, नहीं, না, కాదు, இல்லை, ಇಲ್ಲ, ਨਹੀਂ , નહિં, नाही, ഇല്ല
To make this happen we need to make sure a few things are enabled and are in the right place.
The machine in the Border Subnet 'PublicInstance' will act as a NAT gateway once you run the following commands:
Note: You need to run these commands on 'PublicInstance', make sure you SSH login to the 'PublicInstace' and execute these commands.
echo 1 | sudo tee /proc/sys/net/ipv4/conf/all/forwarding
sudo iptables -t nat -A POSTROUTING -o eth0 -j MASQUERADE
What do these commands do?
The first command enables IP forwarding on the PublicInstance machine. This allows the PublicInstance machine to forward traffic between its network interfaces.
The second command creates a NAT rule that tells the PublicInstance machine to masquerade all outgoing traffic from its eth0 interface. This means that the PublicInstance machine will use its public IP address for all outgoing traffic, regardless of the IP address of the device that originated the traffic.
How does this make the PublicInstance machine a NAT gateway?
When a device in the App subnet sends traffic to the internet, the traffic is first routed to the PublicInstance machine. The PublicInstance machine then forwards the traffic to the internet using its public IP address. The response traffic from the internet is routed back to the PublicInstance machine, which then forwards it to the device in the App subnet that originated the request.
Why is this important?
NAT gateways allow multiple devices on a local network to share a single public IP address for outbound traffic. This is important because public IP addresses are a limited resource. By using a NAT gateway, multiple devices on a local network can access the internet without each device needing its public IP address.
Are we done now?
Hmmmm, not yet. not done yet. You may ask "Bruhh frrr??? WHYYYYY?"
because, To connect to the PrivateInstance machine using the PublicInstance machine, you need to edit your SSH configuration file. This file is located in the .ssh directory in your home directory.
To edit the SSH configuration file, open a terminal window and navigate to the .ssh directory:
cd ~/.ssh
Then, open the config file in a text editor:
nano config
Add the following two Host entries to the config file:
Host PublicInstance
  HostName 54.67.28.52
  ForwardAgent yes
  User ubuntu
  StrictHostKeyChecking no
  IdentityFile ~/.ssh/id_rsa

Host 10.0.10.114
  ProxyCommand ssh -q -W %h:%p PublicInstance
  ForwardAgent yes
  StrictHostKeyChecking no
  IdentityFile ~/.ssh/id_rsa
  User ubuntu
Replace the following values (enter your machine IP addresses):
-
34.214.170.91with the public IP address of the PublicInstance machine. -
10.0.10.41with the private IP address of the PrivateInstance machine.
Save and close the config file.
Now, you can connect to the PrivateInstance machine using the following command:
ssh ubuntu@PrivateInstance
This command will use the SSH configuration file to connect to the PrivateInstance machine through the PublicInstance machine.
Explanation of the Host entries
The Host entry for the PublicInstance machine is fairly straightforward. It specifies the hostname, username, and SSH private key file to use to connect to the PublicInstance machine.
The Host entry for the PrivateInstance machine is a bit more complicated. It uses the ProxyCommand directive to specify that all SSH traffic to the PrivateInstance machine should be routed through the PublicInstance machine. The -q option to the ssh command tells the ssh client to suppress all output. The -W %h:%p option tells the SSH client to forward all traffic on the specified port to the specified host.
Example
The following example shows how to connect to the PrivateInstance machine using the PublicInstance machine:
ssh ubuntu@PrivateInstance
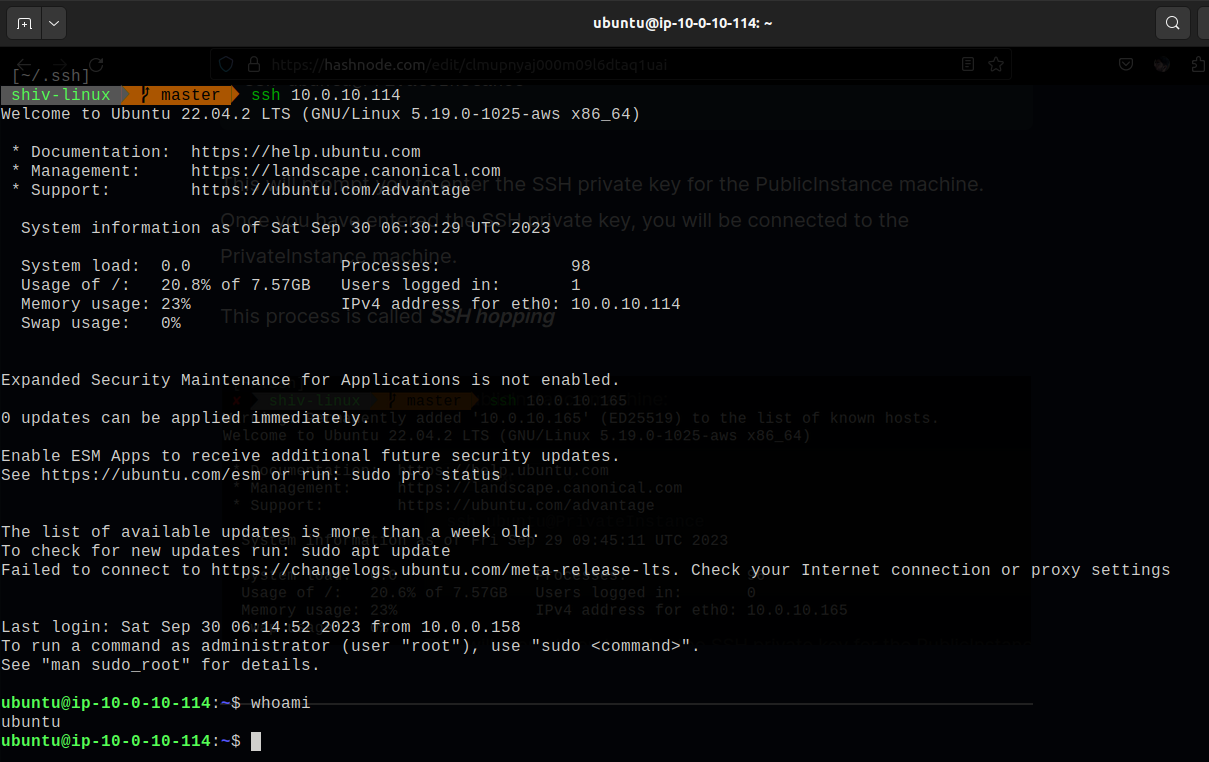
This will prompt you to enter the SSH private key for the PublicInstance machine. Once you have entered the SSH private key, you will be connected to the PrivateInstance machine.
This process is called SSH hopping

You can see in the above image that through the magic of SSH hopping.
we connected to our PrivateInstance, even though it had no public IP address.
Can our PrivateInstance connect to the internet through our NAT gateway, which is our PublicInstance? Not yet. We can run commands like ping or apt-get update, but we won't see any results.
To make it work we need to enable a source/destination check on your PublicInstance:
-
Go to the Instances page in the AWS Management Console.
-
Select your PublicInstance.
-
Click on Actions.
-
From the drop-down menu, select Network Settings.
-
Click on Change source/destination check.
-
Select the Stop checkbox if it is unchecked from the pop-up window.
-
Click Save.


Now let's connect and run the ping command on our PrivateInstance if it can access the Internet via NAT

Voilà, Boom, Huzzah, ¡Olé!, Bravo, C'est magnifique, Aha, Yippee, Fantástico, Kapow!
WE DID ITT!!!!
We've done it! We can now access the internet from our private machines via NAT. Feeling like a tech genius? Feeling like a Cloud Genius? Feeling like LV Nilesh Ji? Hold your horses. What if I told you that you could automate the entire process using Terraform, which would create all of these resources for you in minutes?
Don't feel dumb. You've just learned the underlying concepts of cloud networking fundamentals, such as VPCs, subnets, route tables, and security groups. Even if you just completed the exercise and have a basic understanding of how things work, you've accomplished a lot. See you next blog!
