sangyun884 / hr-viton Goto Github PK
View Code? Open in Web Editor NEWOfficial PyTorch implementation for the paper High-Resolution Virtual Try-On with Misalignment and Occlusion-Handled Conditions (ECCV 2022).
Official PyTorch implementation for the paper High-Resolution Virtual Try-On with Misalignment and Occlusion-Handled Conditions (ECCV 2022).


Hi,
Thanks for releasing the training code.
I would like to train the condition generator with another dataset (with a resolution of 512 x 384). However, running the complete 300000 steps under the default setting takes a long time (> 130h). So I would like to ask whether the author plans to release the multi-GPU version of the training code. Or is there any suggestion about how to train the condition generator within 1~2 days?
I have this error when I try to test the pertained model. Can someone help me to resolve it ?

thank you
I'm trying to replicate the preprocessing steps and the results I have obtained have given me some differences.
In the 4 step cloth mask: I ran the model that is referenced but the results that it gives me are the clothes in color and without background. But the images that there are in the dataset are with the clothes in white and all the black background.
cloth-mask in your dataset

cloth-mask model generates to me

In the 2 step Human parse: Can you explain better how do you get the final image? When I run the model I had two folders cihp_edge_maps and cihp_parsing_maps this with two different images with and without vis alias. Then I don't understand well the steps that you defined here.
Kindly share with me how CIHP_PGN was used and with what tensorflow version to obtain the human parsing
Using test data from VITON-HD, python3 test_generator.py --occlusion --test_name $test_name --tocg_checkpoint $tocg_checkpoint_path --gpu_ids $gpu_ids --gen_checkpoint $gen_checkpoint_path --datasetting unpaired --dataroot $dataset_path --data_list $pair_list gives below error:
Original Traceback (most recent call last):
  File "/usr/local/lib/python3.7/dist-packages/torch/utils/data/_utils/worker.py", line 302, in _worker_loop
    data = fetcher.fetch(index)
  File "/usr/local/lib/python3.7/dist-packages/torch/utils/data/_utils/fetch.py", line 49, in fetch
    data = [self.dataset[idx] for idx in possibly_batched_index]
  File "/usr/local/lib/python3.7/dist-packages/torch/utils/data/_utils/fetch.py", line 49, in <listcomp>
    data = [self.dataset[idx] for idx in possibly_batched_index]
  File "/content/HR-VITON/cp_dataset_test.py", line 121, in __getitem__
    c[key] = Image.open(osp.join(self.data_path, 'cloth', c_name[key])).convert('RGB')
  File "/usr/local/lib/python3.7/dist-packages/PIL/Image.py", line 2843, in open
    fp = builtins.open(filename, "rb")
FileNotFoundError: [Errno 2] No such file or directory: './datasets/test/cloth/08909_00.jpg'
I commented out this line of code and then worked fine
Line 42 in 54c9b3c
Hi there,
Thankyou for posting Preprocessing.md file. It is really helpful.
However, get_parse_agnostic.py seems not working for me.
I am feeding openpose_json and image-parse-v3 version of test image to the script but the output file is almost same as input.
Can you please tell me what's wrong here?
Thanks
(files are attached for reference).
pose_keypoints_2d json file: {"version":1.3,"people":[{"person_id":[-1],"pose_keypoints_2d":[377.347,150.683,0.878828,377.364,329.162,0.854779,255.485,329.12,0.750042,229.968,578.648,0.784553,193.315,822.293,0.783354,507.766,326.454,0.74983,533.321,575.794,0.799812,550.191,822.278,0.777631,374.589,779.774,0.595498,283.929,779.74,0.538896,0,0,0,0,0,0,465.266,785.431,0.525901,0,0,0,0,0,0,351.767,122.423,0.962565,405.737,122.434,0.886836,315.058,144.963,0.557863,439.813,142.213,0.784597,0,0,0,0,0,0,0,0,0,0,0,0,0,0,0,0,0,0],"face_keypoints_2d":[319.38,127.579,0.751224,319.38,143.588,0.809515,320.076,160.294,0.790853,322.164,176.999,0.794225,325.644,193.008,0.849269,335.389,205.537,0.828812,347.222,217.37,0.792474,363.231,227.114,0.842114,379.936,229.899,0.846106,396.641,227.114,0.859212,411.258,217.37,0.772164,423.091,204.841,0.810962,430.051,190.92,0.796223,432.14,174.215,0.775057,433.532,156.813,0.760198,434.228,140.804,0.765868,434.228,125.491,0.735009,329.82,112.266,0.779718,336.085,108.09,0.863761,346.526,106.698,0.852168,356.27,109.482,0.871376,363.927,112.266,0.890085,389.681,113.658,0.827457,397.337,109.482,0.905375,407.778,106.002,0.904971,418.219,106.698,0.850264,425.179,112.962,0.893872,376.456,125.491,0.869189,376.456,137.324,0.860178,375.76,148.461,0.861719,375.76,160.294,0.912359,363.231,165.166,0.939292,369.495,167.254,0.916936,375.76,170.734,0.934891,384.112,167.254,0.867908,391.073,165.166,0.937826,340.957,125.491,0.906943,347.222,121.315,0.950957,355.574,122.011,0.877362,362.535,126.883,0.89843,354.182,127.579,0.881709,346.526,126.883,0.954901,391.769,126.883,0.96355,398.729,122.011,0.855446,407.778,121.315,0.923747,413.346,126.187,0.970141,407.778,126.883,0.95683,399.425,127.579,0.879406,347.222,179.783,0.882068,358.358,176.999,0.948998,369.495,176.303,0.93487,377.152,176.999,0.893785,385.504,176.303,0.888562,397.337,176.303,0.90328,408.474,177.695,0.942415,398.033,193.008,0.870786,386.896,198.576,0.876316,378.544,199.272,0.901641,368.799,199.272,0.939339,357.662,193.008,0.901118,352.094,181.175,0.9361,369.495,181.175,0.871688,377.848,181.871,0.856293,386.2,180.479,0.853609,404.994,179.783,0.859839,386.2,193.008,0.884429,378.544,193.704,0.921926,368.799,193.008,0.933628,352.094,124.099,0.839171,402.906,124.795,0.872935],"hand_left_keypoints_2d":[543.673,834.132,0.782809,527.56,854.272,0.837533,513.462,888.512,0.858695,511.448,920.737,0.801544,508.427,942.892,0.701775,547.701,908.653,0.732341,535.617,945.913,0.794778,519.504,956.99,0.810137,504.399,960.011,0.750657,556.765,912.681,0.752773,544.68,951.955,1.00048,522.525,962.026,0.898601,505.406,962.026,0.746398,559.786,911.674,0.810647,550.722,945.913,0.731902,528.568,955.983,0.856978,512.455,961.018,0.636564,559.786,907.645,0.697951,550.722,935.843,0.632913,536.624,946.92,0.592884,524.539,948.934,0.407364],"hand_right_keypoints_2d":[193.271,833.399,0.763477,209.34,851.477,0.851761,217.374,881.605,0.874549,217.374,912.738,0.922487,221.391,936.841,0.837963,185.237,903.7,0.735815,200.301,936.841,0.788084,214.361,953.914,0.830897,224.404,967.974,0.823097,177.203,904.704,0.738815,191.263,943.871,0.871404,209.34,958.936,0.916983,225.408,969.983,0.95493,176.198,904.704,0.774935,186.241,937.846,0.737773,206.327,953.914,0.80248,221.391,964.961,0.70411,179.211,899.683,0.637081,186.241,928.807,0.55934,200.301,941.863,0.522707,213.357,946.884,0.423154],"pose_keypoints_3d":[],"face_keypoints_3d":[],"hand_left_keypoints_3d":[],"hand_right_keypoints_3d":[]}]}
parse-v3

output

Can you share the complete test data set? The test data set in using VITON_HD is incomplete
Hi @koo616 , thank you for sharing the code and supporting the reproducability in the community!
Could you please share the procedure or insights for creating masks for garment images? Did you use classical cv or deep-learning methods?
Unfortunately, can't find that in any VITON paper. Maybe I missed it, so pointing will be good too :)
Dear Authors,
How does the network understand that it has to generate hands/neck/hair (when tryin on t-shirt on a long sleeve)?
How to reproduce the same result with generating legs (like when trying on skirt on a jeans)?
Should I change something here?
        labels = {
            0:  ['background',  [0]],
            1:  ['paste',       [2, 4, 7, 8, 9, 10, 11]],
            2:  ['upper',       [3]],
            3:  ['hair',        [1]],
            4:  ['left_arm',    [5]],
            5:  ['right_arm',   [6]],
            6:  ['noise',       [12]]
        }
Error with ModuleNotFoundError: No module named 'torch.ao'
python3 test_generator.py --occlusion --test_name test --gpu_ids 0 --checkpoint_dir checkpoint --dataroot data/zalando-hd-resized --data_list test_pairs.txt --tocg_checkpoint checkpoint/mtviton.pth --gen_checkpoint checkpoint/gen.pth --output_dir out
/home/jrinaldi/miniconda3/lib/python3.8/site-packages/torchvision/io/image.py:13: UserWarning: Failed to load image Python extension: /home/jrinaldi/miniconda3/lib/python3.8/site-packages/torchvision/image.so: undefined symbol: _ZNK3c106IValue23reportToTensorTypeErrorEv
warn(f"Failed to load image Python extension: {e}")
Traceback (most recent call last):
File "test_generator.py", line 4, in
from torchvision.utils import make_grid as make_image_grid
File "/home/jrinaldi/miniconda3/lib/python3.8/site-packages/torchvision/init.py", line 7, in
from torchvision import models
File "/home/jrinaldi/miniconda3/lib/python3.8/site-packages/torchvision/models/init.py", line 18, in
from . import quantization
File "/home/jrinaldi/miniconda3/lib/python3.8/site-packages/torchvision/models/quantization/init.py", line 3, in
from .mobilenet import *
File "/home/jrinaldi/miniconda3/lib/python3.8/site-packages/torchvision/models/quantization/mobilenet.py", line 1, in
from .mobilenetv2 import * # noqa: F401, F403
File "/home/jrinaldi/miniconda3/lib/python3.8/site-packages/torchvision/models/quantization/mobilenetv2.py", line 6, in
from torch.ao.quantization import QuantStub, DeQuantStub
ModuleNotFoundError: No module named 'torch.ao'
I am unable the find the correct scripts to preprocess the data.
Hi, following your code, in order to generate the train/test dataset I apparently must prepare the 'image-parse-agnostic-v3.2'. It looks like it's the same file as in the 'openpose_img', but the regions of the neck and torso are dropped to zero values, but, with some peculiar differences. Which is the process to generate this type of data? Why isn't being performed online. Greetings.
Sincerely,
@Atotem
How can generate agnostic-v3.2,densepose and parse-agnostic-v3.2 for my own human image?
Please help!
Can you help me with train_condition.py?
I have an error:
File "train_condition.py", line 499, in
main()
File "train_condition.py", line 490, in main
train(opt, train_loader, val_loader, test_loader, board, tocg, D)
File "train_condition.py", line 159, in train
flow_list, fake_segmap, warped_cloth_paired, warped_clothmask_paired = tocg(input1, input2)
File "/home/user/.local/lib/python3.8/site-packages/torch/nn/modules/module.py", line 1110, in _call_impl
return forward_call(*input, **kwargs)
TypeError: forward() missing 1 required positional argument: 'input2'
What is the problem?
Nice work ! Now I want to try my cloth data to test your work , but how to get clothing agnostic? I found CIHP_PGN emantic part segmentation and detectron2 for densepose . But HR-VITION dont have clothing agnostic code . Can you help me ?
I'm writing an article on my master's degree that use your with reference.
I need do a little review, but I've dificult with Latex.
Could you share with me you article in Latex please?
My email: [email protected]
Hello!
I am trying to test and train with my own images. The clothes images that I have doesn’t have the volume of the body that VITON-HD dataset has, my cloth images are plane like this: https://static.bershka.net/4/photos2/2022/I/0/1/p/8069/660/200/8069660200_2_4_1.jpg?t=1663319089433 . I have seen that the results of using an image without body volume, a plane image, are bad. VITON-HR does not recognize the back of t-shirt and put the label of the back in front. So I had to remove the back as a preprocess, but the process is tedious.
My questions are:

Getting the following error when running on Windows.
Traceback (most recent call last):
  File "test_generator.py", line 249, in <module>
    main()
  File "test_generator.py", line 225, in main
    board = SummaryWriter(log_dir=os.path.join(opt.tensorboard_dir, opt.tocg_checkpoint.split('/')[-2], opt.tocg_checkpoint.split('/')[-1], opt.datamode, opt.datasetting))
IndexError: list index out of range
Any idea?
Hi, thanks for sharing your codes.
But I was confused by the difference between your codes and the description in your paper during retraining your model.
For example, when training try-on generator, the code will train the model for 300K iters but it is only 100k mentioned in your paper (Sec 4.1, last line in Page8).
So, are the excellent results in your paper trained according to the settings mentioned in the paper or according to the released code settings. And which one should us follow to get your paper results.
Hello, I want to ask how your densepose is generated. I generated a character image after it。Can you help me?

I have some doubts in functions like get_agnostic in cp_dataset.py, train in train condition.py, Evaluation in evaluate.py, etc .Would like to have a video meet session on zoom or a similar platform to clarify these doubts.
I'm writing an article with references HR Viton and I need put new photos to dataset HD-Viton, but I didn't found the code that transforme a pair (woman weared + clothes) to others images to process in Network model. I need help, without this my article in master degree will be disaster.

With image 1 and 3, I need to trasnform to 2,4,5,6,7 and code 8. Can you help me?
My email is [email protected] or my univertisy mail: [email protected].
Hi,
How to recreate a pipeline for tryon of jeans, skirts, shorts?
which dense pose model is used?
When making the code, I want to use my poses that I created myself, but online it's mostly 18 point bodies. I want the output like the article, what code should I use. thank you
Hi, I do have 2 images, 1 is shirt, 2nd is person. How can I test on these 2 images. I am unable to do so.
In the file networks.py, line 133~135
flow_norm = torch.cat([flow[:, :, :, 0:1] / ((iW/2 - 1.0) / 2.0), flow[:, :, :, 1:2] / ((iH/2 - 1.0) / 2.0)], 3)
warped_T1 = F.grid_sample(T1, flow_norm + grid, padding_mode='border')
Why do you need to normalize the value of the flow?
Why do you sum the flow_norm with grid?
If we do not perform norm and/or sum the flow_norm with the grid, what are the impact to the final results?
Any paper mention about this warp block? I read your paper but it do not give much explanation about this warp block(The W symbol in the Fig10).
Thanks
Could you specify what version each package have, because I'm trying with many versions and I don't can execute the project.
conda install pytorch torchvision torchaudio cudatoolkit=11.1 -c pytorch-lts -c nvidia
pip install opencv-python torchgeometry Pillow tqdm tensorboardX scikit-image scipy
pytorch=
torchvision=
torchaudio=
cudatoolkit=11.1
opencv-python=
torchgeometry=
Pillow=
tqdm=
tensorboardX=
scikit-image=
scipy=
Hi,
I downloaded the dataset provided in the VITON-HD repo.
Both papers train on the piece of clothing that is already on the model.
However the provided train_pairs.txt contains mismatched human and clothing ids.
Am I misunderstanding something or should I re-create the train_pairs file?
Hello, where is the code for some modules such as image segmentation, body posture, etc. in the project?
Trying to train try-on condition generator using the script and got the error.
python3 train_condition.py --cuda --Ddownx2 --Ddropout --lasttvonly --interflowloss --occlusion
Traceback (most recent call last): File "C:\Users\Admin\Desktop\TryOn\hr_viton\train_condition.py", line 498, in <module> main() File "C:\Users\Admin\Desktop\TryOn\hr_viton\train_condition.py", line 489, in main train(opt, train_loader, val_loader, test_loader, board, tocg, D) File "C:\Users\Admin\Desktop\TryOn\hr_viton\train_condition.py", line 266, in train loss_G_GAN = criterionGAN(pred_segmap, True) File "C:\Users\Admin\Desktop\TryOn\hr_viton\networks.py", line 295, in __call__ loss += self.loss(pred, target_tensor) File "C:\Users\Admin\AppData\Local\Packages\PythonSoftwareFoundation.Python.3.9_qbz5n2kfra8p0\LocalCache\local-packages\Python39\site-packages\torch\nn\modules\module.py", line 1102, in _call_impl return forward_call(*input, **kwargs) File "C:\Users\Admin\AppData\Local\Packages\PythonSoftwareFoundation.Python.3.9_qbz5n2kfra8p0\LocalCache\local-packages\Python39\site-packages\torch\nn\modules\loss.py", line 520, in forward return F.mse_loss(input, target, reduction=self.reduction) File "C:\Users\Admin\AppData\Local\Packages\PythonSoftwareFoundation.Python.3.9_qbz5n2kfra8p0\LocalCache\local-packages\Python39\site-packages\torch\nn\functional.py", line 3112, in mse_loss return torch._C._nn.mse_loss(expanded_input, expanded_target, _Reduction.get_enum(reduction)) RuntimeError: Expected all tensors to be on the same device, but found at least two devices, cuda:0 and cpu!
How can I fix it?
Hello,
First, thank you for sharing your great work!
I'd like to check which github repository did you use to measure a FID as well as KID?
Thank you advance!
Hi,
I'am very interested in this project.
So I try to use and customize this code, but i receive to poor result: the arms generated bad and seem to be black(see attach).
I did not know where the issue come from


Can anyone help me?
Thank!
avg_distance += model.forward(T2(im), T2(output_paired))
Has anyone downloaded the training data set and can share the following? the author's link has been unable to download.
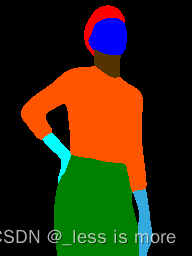
Who can explain to me why in some images I get such a result. The image of agnostics is superimposed on the output image.

What are the requirements for models images?
In directory test/cloth I put a new clothes file, 1024x768
In directory test/image I put a new woman person file, 1024x768
I changed the file test_pairs.txt with only my test.
But when I ran, the error showed is: FileNotFoundError: [Errno 2] No such file or directory: 'HR-VITON/data/zalando-hd-resized/test/cloth-mask/00000_00.jpg'
It's because I dont generated the cloth-mask.
What I need run to generate the artifact to I run?
Hi!
Thanks for sharing your work it helps develop my understanding.
I am trying to understand the TPS warp operations am I correct in saying:
Thank you kindly
I have prepared segmentation image in CIHP_PGN but when I execute it in HR-VITON I have this error:
ValueError: operands could not be broadcast together with shapes (1024,768) (1024,768,3)
Hi, thank you for the great work.
Just want to ask is it possible to train the model only with the custom full-body outfit? Or is it designed only for images where a person is not completely visible?
Hello,
I use my own clothes image to test but i get a bad result.
But I randomly chose a mask from your test set instead of my own cloth mask.
I get a good result.
Do you know what the problem is?
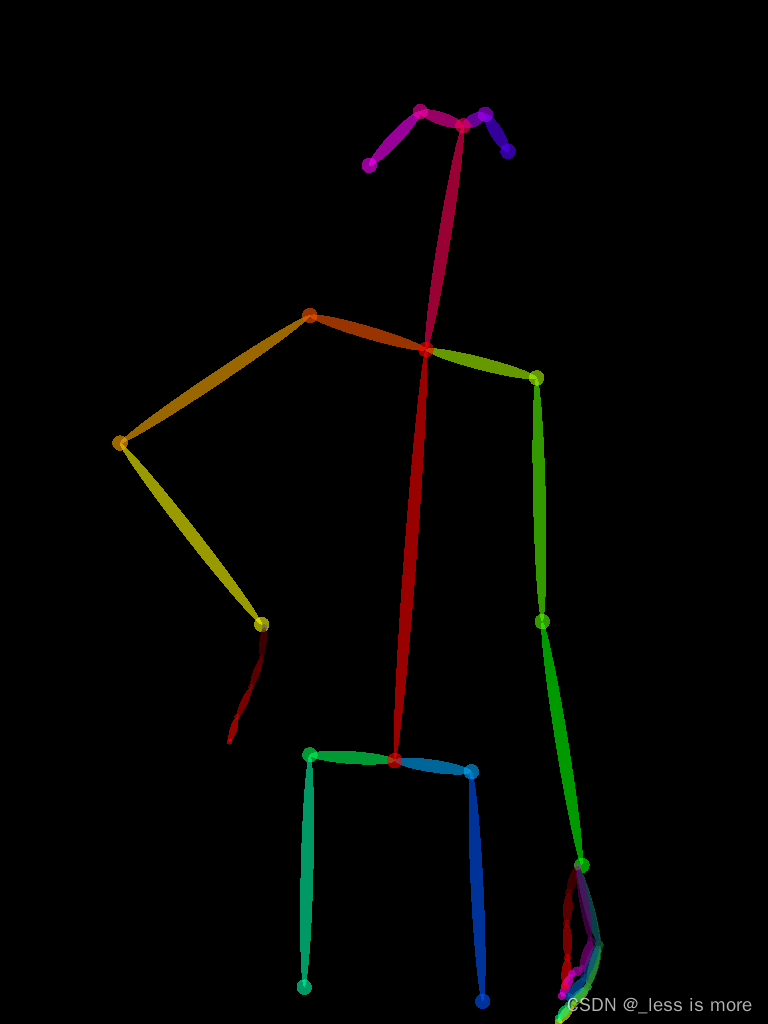
I have coordinates of body points and want to join them. However my ouput is not what I expected. The difference is the color of the body segments and the width. how should i edit it now or can anyone give me the code for reference? BODY_25
wish : https://drive.google.com/file/d/106ST7yUzzboQ9r-KcMulm6AkcwHpP2MN/view?usp=sharing
actual: https://drive.google.com/file/d/1YU34RU1C-zOIbrv0QwNdZSYcvEBtRD0V/view?usp=sharing
I ran your code and got codes with different results. The results were bad. I don't know what the problem was. In the paper, even your HD results were good, while my 256 * 192 results were poor.
I don't know what's different from yours, but the result is very poor. Can you give me some help


Can you provide the discriminator check points to test the rejection of defected segmentation?
Hi, I'm training with my own dataset and had some initial results with 1000 epochs. However, I noticed that the targeted garment moves from its position during training. Do you know what this can be happening? I followed the same preprocessing process but can't figure out at this point what can be causing it. Greetings!

Sincerely,
@Atotem
To be honest, it is the most roughly explained storage I've ever seen.
The preprocessing process is so unexplained that it is impossible to reproduce.
I even tried two days to get the agnostic and parse with the images of the dataset you provided,
but my results are different from yours.
Can't you be a little kinder?


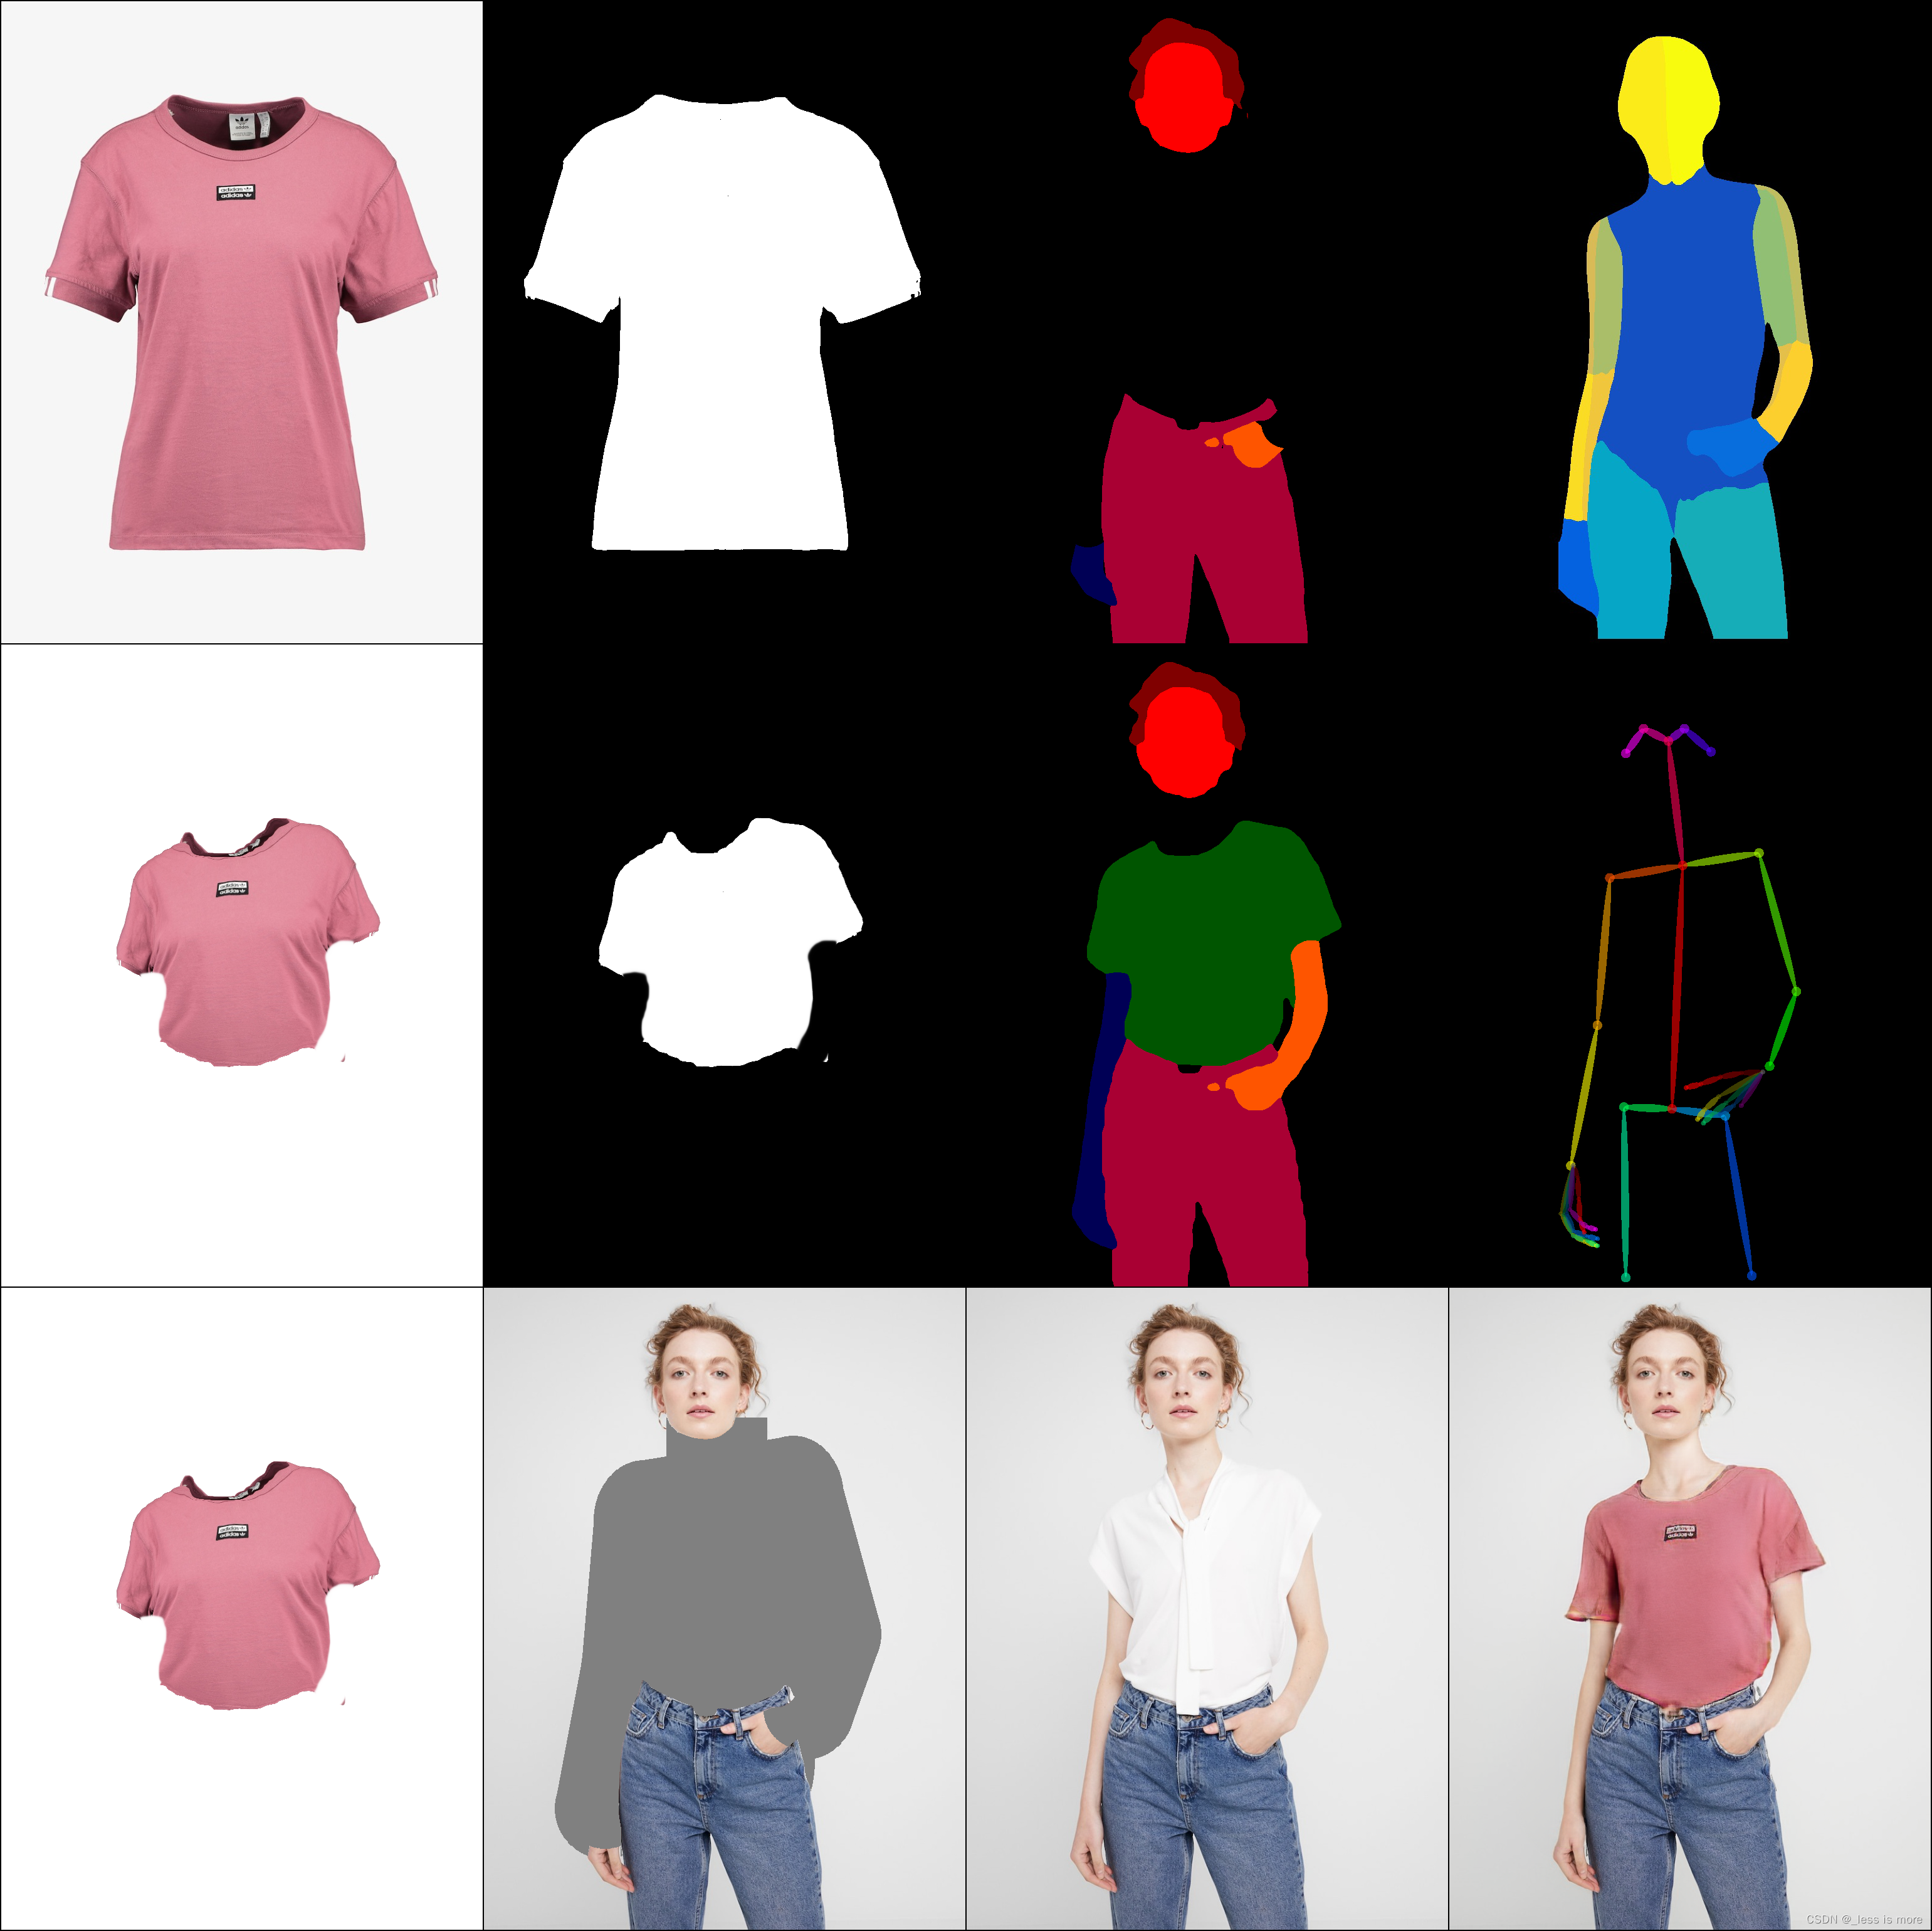
After investigating for 3 days, I got almost all done except for some minor problems. Here is a link of personal made study case of HR-VITON
According to explanation from authors: Preprocessing.md. At least a few steps are needed for getting all required inputs of model.
Most of those are reproduced on Colab, except Human Parse, which needs Tensorflow 1.15 and GPU is highly prefered.
(1) Install OpenPose, taking about 15 minutes
import os
from os.path import exists, join, basename, splitext

git_repo_url = 'https://github.com/CMU-Perceptual-Computing-Lab/openpose.git'
project_name = splitext(basename(git_repo_url))[0]
if not exists(project_name):
  # see: https://github.com/CMU-Perceptual-Computing-Lab/openpose/issues/949
  # install new CMake becaue of CUDA10
  !wget -q https://cmake.org/files/v3.13/cmake-3.13.0-Linux-x86_64.tar.gz
  !tar xfz cmake-3.13.0-Linux-x86_64.tar.gz --strip-components=1 -C /usr/local
  # clone openpose
  !git clone -q --depth 1 $git_repo_url
  !sed -i 's/execute_process(COMMAND git checkout master WORKING_DIRECTORY ${CMAKE_SOURCE_DIR}\/3rdparty\/caffe)/execute_process(COMMAND git checkout f019d0dfe86f49d1140961f8c7dec22130c83154 WORKING_DIRECTORY ${CMAKE_SOURCE_DIR}\/3rdparty\/caffe)/g' openpose/CMakeLists.txt
  # install system dependencies
  !apt-get -qq install -y libatlas-base-dev libprotobuf-dev libleveldb-dev libsnappy-dev libhdf5-serial-dev protobuf-compiler libgflags-dev libgoogle-glog-dev liblmdb-dev opencl-headers ocl-icd-opencl-dev libviennacl-dev
  # install python dependencies
  !pip install -q youtube-dl
  # build openpose
  !cd openpose && rm -rf build || true && mkdir build && cd build && cmake .. && make -j`nproc`
Now, OpenPose will be installed under your current path.
(2) Get all needed models
!. ./openpose/models/getModels.sh(3) Prepare your test data
# for storing input image
!mkdir ./image_path
# copy official provided data to image_path, you may need to download and unzip it in advance
!cp ./test/image/000* ./image_path/
# create directories for generated results of OpenPose
!mkdir ./json_path
!mkdir ./img_path
(4)Run
# go to openpose directory
%cd openpose
# run openpose.bin
!./build/examples/openpose/openpose.bin --image_dir ../image_path --hand --disable_blending --display 0 --write_json ../json_path --write_images ../img_path --num_gpu 1 --num_gpu_start 0
Then json files will be saved under ../json_path and images will be saved under ../img_path.
The image result looks like
More details about results can be found at openpose
In this section, you can either do it on Colab, Cloud, or local. Unfortunately, I didn't successfully make use of GPU on Colab, and I can only use CPU, which is super slow when image size at 768 × 1024 (about 13 minutes per image).
If you can accept, then install Tensorflow 1.15, before which you have to change Python version to 3.7 or 3.6.
(1) Get pretrained model
%%bash
FILE_NAME='./CIHP_pgn.zip'
FILE_ID='1Mqpse5Gen4V4403wFEpv3w3JAsWw2uhk'

curl -sc /tmp/cookie "https://drive.google.com/uc?export=download&id=$FILE_ID" > /dev/null
CODE="$(awk '/_warning_/ {print $NF}' /tmp/cookie)"
curl -Lb /tmp/cookie "https://drive.google.com/uc?export=download&confirm=${CODE}&id=$FILE_ID" -o $FILE_NAME
unzip
!unzip CIHP_pgn.zip(2) Get repo
!cp -r /content/drive/MyDrive/CIHP_PGN ./
%cd CIHP_PGN
Note: I just saved the repo and cleaned it for my own purpose, but you can use official provided code as well.
(3) Prepare data and model
!mkdir -p ./checkpoint
!mkdir -p ./datasets/images
# You also need to download dataset provided or use your own images
!mv ../CIHP_pgn ./checkpoint/CIHP_pgn
!cp ../test/image/0000* ./datasets/images
(4) Configuration
Change to Python 3.6
!sudo update-alternatives --config python3
Install dependencies (Tensorflow 1.15)
!sudo apt-get install python3-pip
!python -m pip install --upgrade pip
!pip install matplotlib opencv-python==4.2.0.32 Pillow scipy tensorflow==1.15
!pip install ipykernel
(5) Run
now you can run your code
!python ./inference_pgn.pyNote: In official repo, the file is named inf_pgn.py, which leads to the same result as mine.
Finally, you can get result looks like
More details can be found at CIHP_PGN
In this section, I will give more explanation about what we really need.
You need conda in this part, which is what I used at least.
(1) Create a new env for oldschool Tensorflow
conda create -n tf python=3.7(2) Configuration
conda activate tfinstall GPU dependencies: cudatoolkit=10.0 cudnn=7.6.5
conda install -c conda-forge cudatoolkit=10.0 cudnn=7.6.5install Tensorflow 1.15 GPU
pip install tensorflow-gpu==1.15You may need to install below in a new env
pip install scipy==1.7.3 opencv-python==4.5.5.62 protobuf==3.19.1 Pillow==9.0.1 matplotlib==3.5.1More info about compatibility between Tensorflow and CUDA can be found here
(3) Prepare data, repo and model as mentioned before
A final dir looks like
So you basically just put model under checkpoint/CIHP_pgn
And put data under datasets/images
It can be just a few images of people. A repo of my cleaned version can be found at Google Drive. Feel free to download it. If you use official provided inf_pgn.py, same results will be generated.
(4) Run
python inference_pgn.pyThen you should see the output. Unfortunately, I didn't make it inference with GPU, no matter on server or local.
At local, my GPU is MX250 with 2G memory, which is not enough for inference.
At server, the GPU is RTX A5000, but for some unknown reason, probably something incompatible, the GPU is not invoked for inference. But model is successfully loaded into GPU though.
Fortunately, the server I used has 24 Cores and supports 2 threads per Core, which make it running still fast (20 to 30 seconds per 768×1024 image) even with CPU.
Final result looks like
However, the result inferenced with input of 768×1024 is not the same as input of 192×256. The former looks worse as shown above.
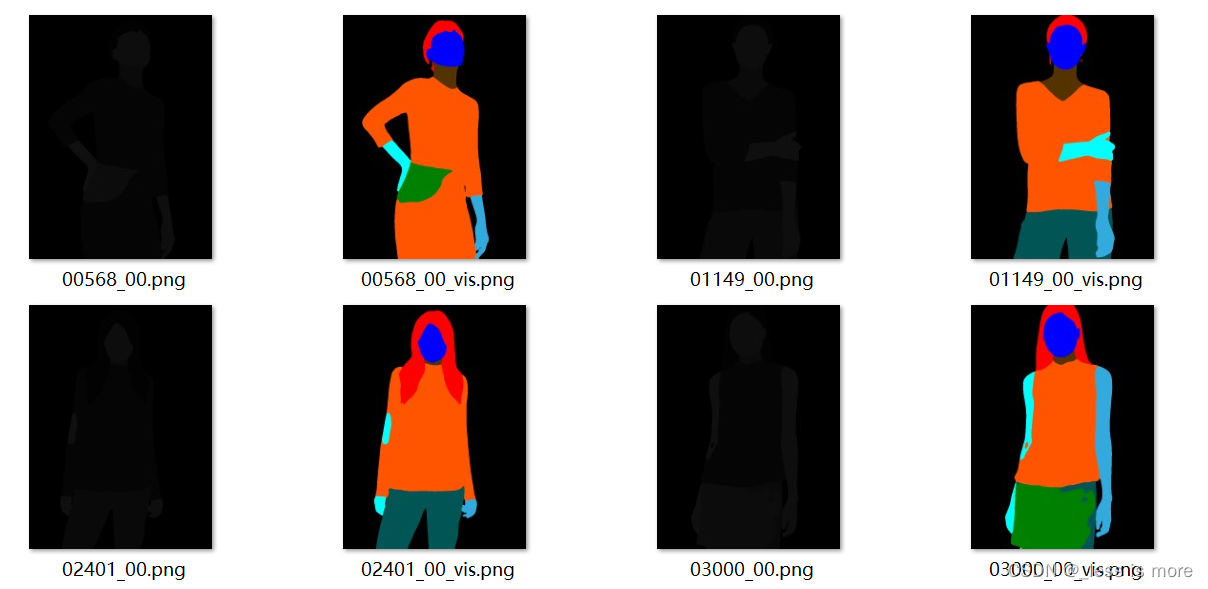
Note: The black images are what we really need, because the values of colored one are for example 0, 51, 85, 128, 170, 221, 255, which are not from 0 - 20 and inconsistant with HR-VITON. The values of black one are for example 0, 2, 5, 10, 12, 13, 14, 15, which are needed as labels for getting agnostic images.
One thing to mention, the images provided by official dataset keep both visualization (colored) and label (0 - 20). I don't know how they did that. I also tried P mode in PIL, but found nothing.
(1) get repo of detectron2
!git clone https://github.com/facebookresearch/detectron2(2) install dependencies
!python -m pip install -e detectron2(3) install packages for DensePose
%cd detectron2/projects/DensePose
!pip install av>=8.0.3 opencv-python-headless>=4.5.3.56 scipy>=1.5.4
(4) Prepare your images
!mkdir ./image_path
!cp /content/test/image/0000* ./image_path/
(5) Modify code
At the time I used DensePose, there are some bugs, I have to modify some code to make it work as I want it to. When you follow this tutorial, situation may change.
 alpha=0.7 to 1
 inplace=True to False
This modification is because above change is not enough, image_target_bgr = image_bgr * 0 made a copy instead of a reference and lost our result.
image_target_bgr = image_bgr * 0
to
image_target_bgr = image_bgr
image_target_bgr *= 0
out_fname = './image-densepose/' + image_fpath.split('/')[-1]
out_dir = './image-densepose'
(6) Run
If you are using CPU, add --opts MODEL.DEVICE cpu to end of below command.
!python apply_net.py show configs/densepose_rcnn_R_50_FPN_s1x.yaml \
https://dl.fbaipublicfiles.com/densepose/densepose_rcnn_R_50_FPN_s1x/165712039/model_final_162be9.pkl \
image_path dp_segm -v
Then you can get results look like
This is a lot easier.
(1) Install
!pip install carvekit_colab(2) Download models
from carvekit.ml.files.models_loc import download_all
download_all();
(3) Prepare cloth images
!mkdir ./cloth
!cp ./test/cloth/0000* ./cloth/
prepare dir for results
!mkdir ./cloth_mask(4) Run
#title Upload images from your computer
#markdown Description of parameters
#markdown - `SHOW_FULLSIZE` - Shows image in full size (may take a long time to load)
#markdown - `PREPROCESSING_METHOD` - Preprocessing method
#markdown - `SEGMENTATION_NETWORK` - Segmentation network. Use `u2net` for hairs-like objects and `tracer_b7` for objects
#markdown - `POSTPROCESSING_METHOD` - Postprocessing method
#markdown - `SEGMENTATION_MASK_SIZE` - Segmentation mask size. Use 640 for Tracer B7 and 320 for U2Net
#markdown - `TRIMAP_DILATION` - The size of the offset radius from the object mask in pixels when forming an unknown area
#markdown - `TRIMAP_EROSION` - The number of iterations of erosion that the object's mask will be subjected to before forming an unknown area
import os
import numpy as np
from PIL import Image, ImageOps
from carvekit.web.schemas.config import MLConfig
from carvekit.web.utils.init_utils import init_interface
SHOW_FULLSIZE = False #param {type:"boolean"}
PREPROCESSING_METHOD = "none" #param ["stub", "none"]
SEGMENTATION_NETWORK = "tracer_b7" #param ["u2net", "deeplabv3", "basnet", "tracer_b7"]
POSTPROCESSING_METHOD = "fba" #param ["fba", "none"]
SEGMENTATION_MASK_SIZE = 640 #param ["640", "320"] {type:"raw", allow-input: true}
TRIMAP_DILATION = 30 #param {type:"integer"}
TRIMAP_EROSION = 5 #param {type:"integer"}
DEVICE = 'cpu' # 'cuda'
config = MLConfig(segmentation_network=SEGMENTATION_NETWORK,
preprocessing_method=PREPROCESSING_METHOD,
postprocessing_method=POSTPROCESSING_METHOD,
seg_mask_size=SEGMENTATION_MASK_SIZE,
trimap_dilation=TRIMAP_DILATION,
trimap_erosion=TRIMAP_EROSION,
device=DEVICE)
interface = init_interface(config)
imgs = []
root = '/content/cloth'
for name in os.listdir(root):
imgs.append(root + '/' + name)
images = interface(imgs)
for i, im in enumerate(images):
img = np.array(im)
img = img[...,:3] # no transparency
idx = (img[...,0]==0)&(img[...,1]==0)&(img[...,2]==0) # background 0 or 130, just try it
img = np.ones(idx.shape)*255
img[idx] = 0
im = Image.fromarray(np.uint8(img), 'L')
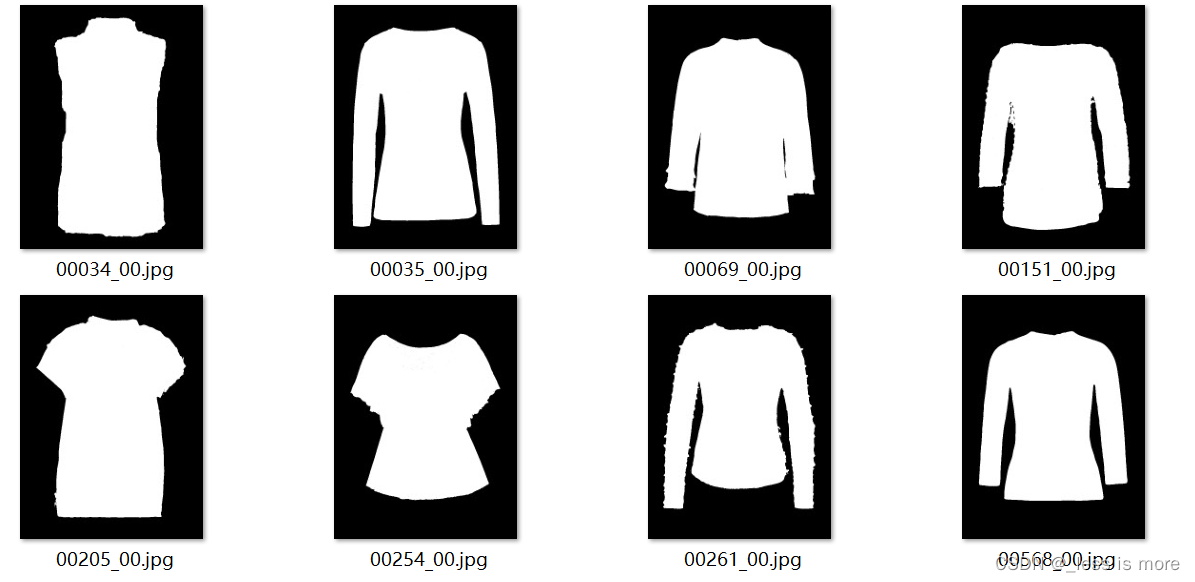
im.save(f'./cloth_mask/{imgs[i].split("/")[-1].split(".")[0]}.jpg')Make sure your cloth mask results are the same size with input cloth image (768×1024). And looks like
Note: you may have to change above code to get the right results, because sometimes the generated results are different, and I didn't investigate to much about this tool. Especially the line of idx = (img[...,0]==0)&(img[...,1]==0)&(img[...,2]==0), you may get results of 0 or 130 as background depending on the model you use and settings.
Here is the parse label and corresponding body parts. You may need or not.
0 - 20
Background
Hat
Hair
Glove
Sunglasses
Upper-clothes
Dress
Coat
Socks
Pants
tosor-skin
Scarf
Skirt
Face
Left-arm
Right-arm
Left-leg
Right-leg
Left-shoe
Right-shoe
(1) Install packages
!pip install Pillow tqdm(2) Prepare data
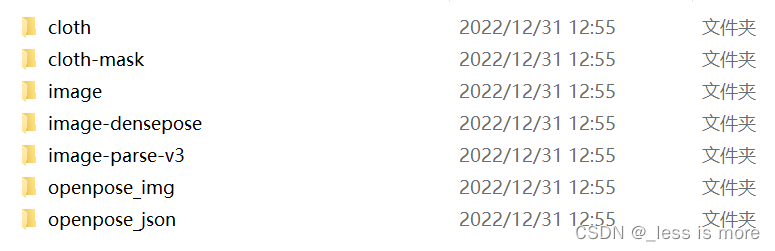
After all above steps, now you should have a data structure like this, they are under directory of test. If you are not sure which results locate in which dir, check out official dataset structure, you can download it from here.
You can zip them into test.zip and unzip them on Colab with !unzip test.zip.
Note: the images under image-parse-v3 (black images with label) are not looking the same as official data (colored images with label), the reason has been mentioned before.
(3) Run
import json
from os import path as osp
import os
import numpy as np
from PIL import Image, ImageDraw
from tqdm import tqdm

def get_im_parse_agnostic(im_parse, pose_data, w=768, h=1024):
    label_array = np.array(im_parse)
    parse_upper = ((label_array == 5).astype(np.float32) +
                    (label_array == 6).astype(np.float32) +
                    (label_array == 7).astype(np.float32))
    parse_neck = (label_array == 10).astype(np.float32)

    r = 10
    agnostic = im_parse.copy()

    # mask arms
    for parse_id, pose_ids in [(14, [2, 5, 6, 7]), (15, [5, 2, 3, 4])]:
        mask_arm = Image.new('L', (w, h), 'black')
        mask_arm_draw = ImageDraw.Draw(mask_arm)
        i_prev = pose_ids[0]
        for i in pose_ids[1:]:
            if (pose_data[i_prev, 0] == 0.0 and pose_data[i_prev, 1] == 0.0) or (pose_data[i, 0] == 0.0 and pose_data[i, 1] == 0.0):
                continue
            mask_arm_draw.line([tuple(pose_data[j]) for j in [i_prev, i]], 'white', width=r*10)
            pointx, pointy = pose_data[i]
            radius = r*4 if i == pose_ids[-1] else r*15
            mask_arm_draw.ellipse((pointx-radius, pointy-radius, pointx+radius, pointy+radius), 'white', 'white')
            i_prev = i
        parse_arm = (np.array(mask_arm) / 255) * (label_array == parse_id).astype(np.float32)
        agnostic.paste(0, None, Image.fromarray(np.uint8(parse_arm * 255), 'L'))

    # mask torso & neck
    agnostic.paste(0, None, Image.fromarray(np.uint8(parse_upper * 255), 'L'))
    agnostic.paste(0, None, Image.fromarray(np.uint8(parse_neck * 255), 'L'))

    return agnostic


if __name__ =="__main__":
    data_path = './test'
    output_path = './test/parse'

    os.makedirs(output_path, exist_ok=True)

    for im_name in tqdm(os.listdir(osp.join(data_path, 'image'))):

        # load pose image
        pose_name = im_name.replace('.jpg', '_keypoints.json')

        try:
            with open(osp.join(data_path, 'openpose_json', pose_name), 'r') as f:
                pose_label = json.load(f)
                pose_data = pose_label['people'][0]['pose_keypoints_2d']
                pose_data = np.array(pose_data)
                pose_data = pose_data.reshape((-1, 3))[:, :2]
        except IndexError:
            print(pose_name)
            continue

        # load parsing image
        parse_name = im_name.replace('.jpg', '.png')
        im_parse = Image.open(osp.join(data_path, 'image-parse-v3', parse_name))

        agnostic = get_im_parse_agnostic(im_parse, pose_data)

        agnostic.save(osp.join(output_path, parse_name))
You can check results under ./test/parse. But it's all black as well. To ensure you are getting the right agnostic parse images, do below
import numpy as np
from PIL import Image

im_ori = Image.open('./test/image-parse-v3/06868_00.png')
im = Image.open('./test/parse/06868_00.png')
print(np.unique(np.array(im_ori)))
print(np.unique(np.array(im)))
The output may look like
[ 0  2  5  9 10 13 14 15]
[ 0  2  9 13 14 15]
The first row is longer than the second row.
You can also visualize it by
np_im = np.array(im)
np_im[np_im==2] = 151
np_im[np_im==9] = 178
np_im[np_im==13] = 191
np_im[np_im==14] = 221
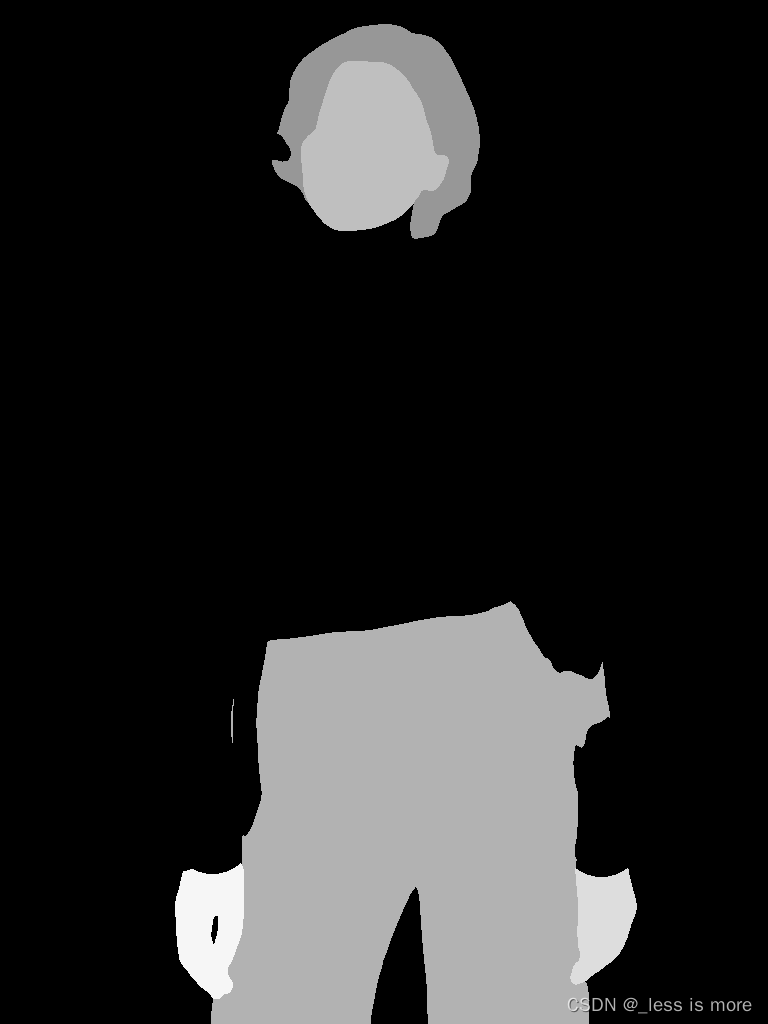
np_im[np_im==15] = 246
Image.fromarray(np_im)result may be like, which is cloth-agnostic
Save all the images under parse to image-parse-agnostic-v3.2
Steps are almost the same as above section.
(1) install
!pip install Pillow tqdm(2) Prepare data
Now it looks like
(3) Run
import json
from os import path as osp
import os
import numpy as np
from PIL import Image, ImageDraw
from tqdm import tqdm
def get_img_agnostic(img, parse, pose_data):
parse_array = np.array(parse)
parse_head = ((parse_array == 4).astype(np.float32) +
(parse_array == 13).astype(np.float32))
parse_lower = ((parse_array == 9).astype(np.float32) +
(parse_array == 12).astype(np.float32) +
(parse_array == 16).astype(np.float32) +
(parse_array == 17).astype(np.float32) +
(parse_array == 18).astype(np.float32) +
(parse_array == 19).astype(np.float32))
agnostic = img.copy()
agnostic_draw = ImageDraw.Draw(agnostic)
length_a = np.linalg.norm(pose_data[5] - pose_data[2])
length_b = np.linalg.norm(pose_data[12] - pose_data[9])
point = (pose_data[9] + pose_data[12]) / 2
pose_data[9] = point + (pose_data[9] - point) / length_b * length_a
pose_data[12] = point + (pose_data[12] - point) / length_b * length_a
r = int(length_a / 16) + 1
# mask arms
agnostic_draw.line([tuple(pose_data[i]) for i in [2, 5]], 'gray', width=r*10)
for i in [2, 5]:
pointx, pointy = pose_data[i]
agnostic_draw.ellipse((pointx-r*5, pointy-r*5, pointx+r*5, pointy+r*5), 'gray', 'gray')
for i in [3, 4, 6, 7]:
if (pose_data[i - 1, 0] == 0.0 and pose_data[i - 1, 1] == 0.0) or (pose_data[i, 0] == 0.0 and pose_data[i, 1] == 0.0):
continue
agnostic_draw.line([tuple(pose_data[j]) for j in [i - 1, i]], 'gray', width=r*10)
pointx, pointy = pose_data[i]
agnostic_draw.ellipse((pointx-r*5, pointy-r*5, pointx+r*5, pointy+r*5), 'gray', 'gray')
# mask torso
for i in [9, 12]:
pointx, pointy = pose_data[i]
agnostic_draw.ellipse((pointx-r*3, pointy-r*6, pointx+r*3, pointy+r*6), 'gray', 'gray')
agnostic_draw.line([tuple(pose_data[i]) for i in [2, 9]], 'gray', width=r*6)
agnostic_draw.line([tuple(pose_data[i]) for i in [5, 12]], 'gray', width=r*6)
agnostic_draw.line([tuple(pose_data[i]) for i in [9, 12]], 'gray', width=r*12)
agnostic_draw.polygon([tuple(pose_data[i]) for i in [2, 5, 12, 9]], 'gray', 'gray')
# mask neck
pointx, pointy = pose_data[1]
agnostic_draw.rectangle((pointx-r*7, pointy-r*7, pointx+r*7, pointy+r*7), 'gray', 'gray')
agnostic.paste(img, None, Image.fromarray(np.uint8(parse_head * 255), 'L'))
agnostic.paste(img, None, Image.fromarray(np.uint8(parse_lower * 255), 'L'))
return agnostic
if __name__ =="__main__":
data_path = './test'
output_path = './test/parse'
os.makedirs(output_path, exist_ok=True)
for im_name in tqdm(os.listdir(osp.join(data_path, 'image'))):
# load pose image
pose_name = im_name.replace('.jpg', '_keypoints.json')
try:
with open(osp.join(data_path, 'openpose_json', pose_name), 'r') as f:
pose_label = json.load(f)
pose_data = pose_label['people'][0]['pose_keypoints_2d']
pose_data = np.array(pose_data)
pose_data = pose_data.reshape((-1, 3))[:, :2]
except IndexError:
print(pose_name)
continue
# load parsing image
im = Image.open(osp.join(data_path, 'image', im_name))
label_name = im_name.replace('.jpg', '.png')
im_label = Image.open(osp.join(data_path, 'image-parse-v3', label_name))
agnostic = get_img_agnostic(im, im_label, pose_data)
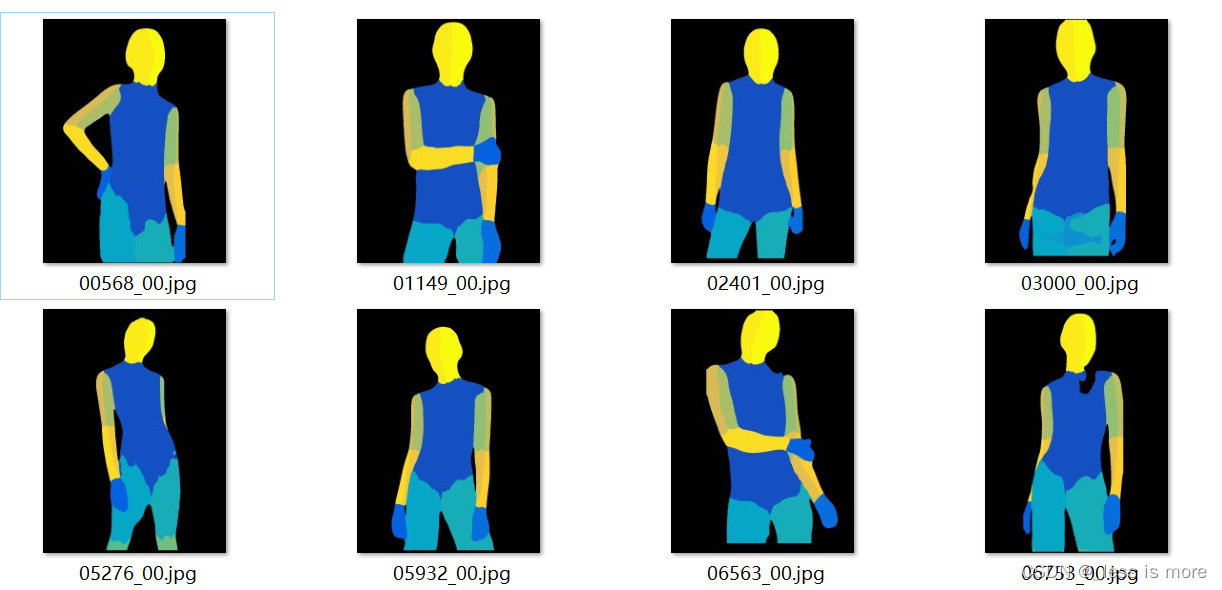
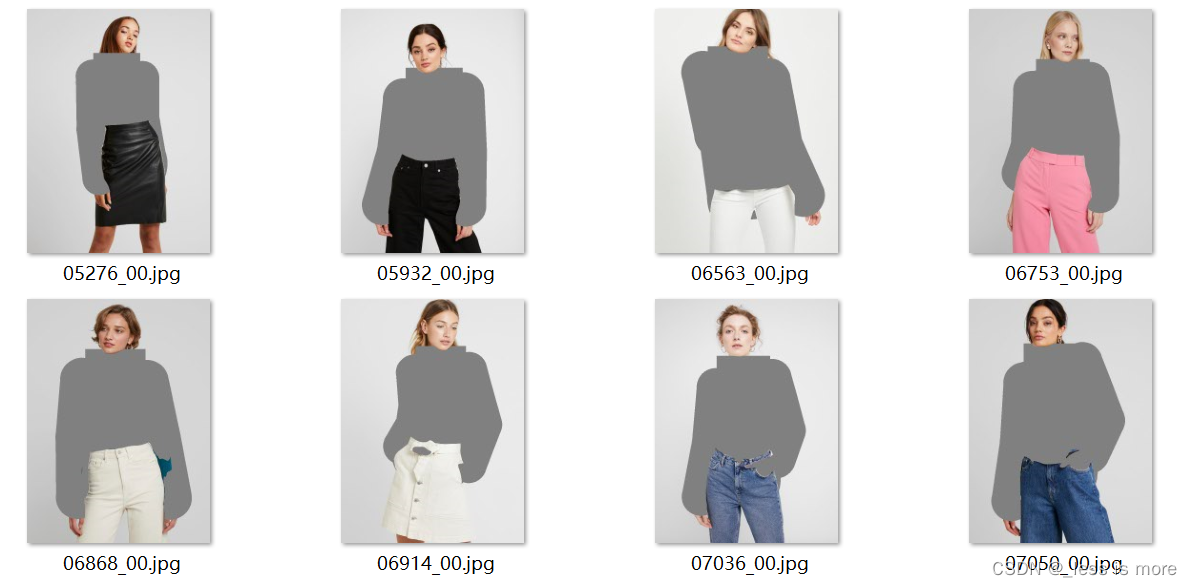
agnostic.save(osp.join(output_path, im_name))Results look like
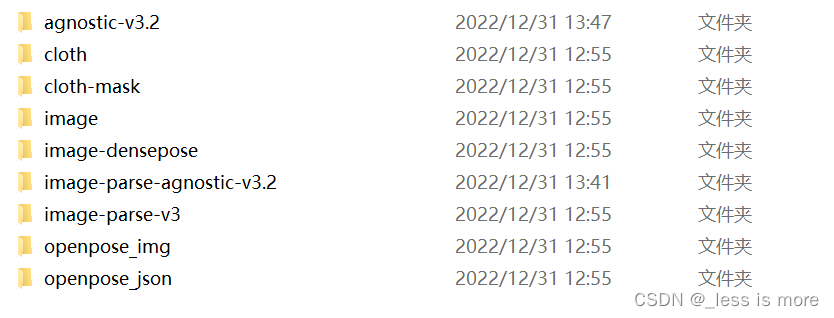
Save them to dir of agnostic-v3.2. Now you are almost done. The final structure of preprocessing results are
Thanks for reading. It's not easy to get all this done. Before you run HR-VITON with you preprocessed dataset, note that each person image need a corresponding cloth image even though it's not used while inference. If you don't want this behavior, you can either change the source code manually or just add some random images with the same name of person images. After all done, suppose you are testing 5 people images and 3 cloth images, which are all unpaired, you should end up with 3 images under cloth dir and 3 images under cloth-mask; and 5 images under each other dirs: agnostic-v3.2, image, image-densepose, image-parse-agnostic-v3.2, image-parse-v3, openpose_img, and openpose_json.
Final test result
A declarative, efficient, and flexible JavaScript library for building user interfaces.
🖖 Vue.js is a progressive, incrementally-adoptable JavaScript framework for building UI on the web.
TypeScript is a superset of JavaScript that compiles to clean JavaScript output.
An Open Source Machine Learning Framework for Everyone
The Web framework for perfectionists with deadlines.
A PHP framework for web artisans
Bring data to life with SVG, Canvas and HTML. 📊📈🎉
JavaScript (JS) is a lightweight interpreted programming language with first-class functions.
Some thing interesting about web. New door for the world.
A server is a program made to process requests and deliver data to clients.
Machine learning is a way of modeling and interpreting data that allows a piece of software to respond intelligently.
Some thing interesting about visualization, use data art
Some thing interesting about game, make everyone happy.
We are working to build community through open source technology. NB: members must have two-factor auth.
Open source projects and samples from Microsoft.
Google ❤️ Open Source for everyone.
Alibaba Open Source for everyone
Data-Driven Documents codes.
China tencent open source team.


