##Introduction:
Fission Labs developed ADBTool with simple user friendly UI to help QA Engineers to increase productivity in testing and validating Android mobile apps. It reduces the test execution time by 40-50 percent and helps in capturing detailed information ( string ids for automation, screenshots, logcat, and dumpsys etc) for debugging purpose.
Click HERE for demo video.
#Installation
-
To use this tool you should have ANDROID SDK. You can download ANDROID SDK from this link https://developer.android.com/studio/index.html#downloads
-
Set Android SDK path in Environment variables as ANDROID_HOME.
-
Download the ADBTool.jar
#How to run
On MAC or Linux:
Open terminal and go to the path where ADBTool.jar file downloaded. And run this command
java -jar adbtool.jar
On Windows:
Double click on that jar file or run from terminal as
java -jar adbtool.jar
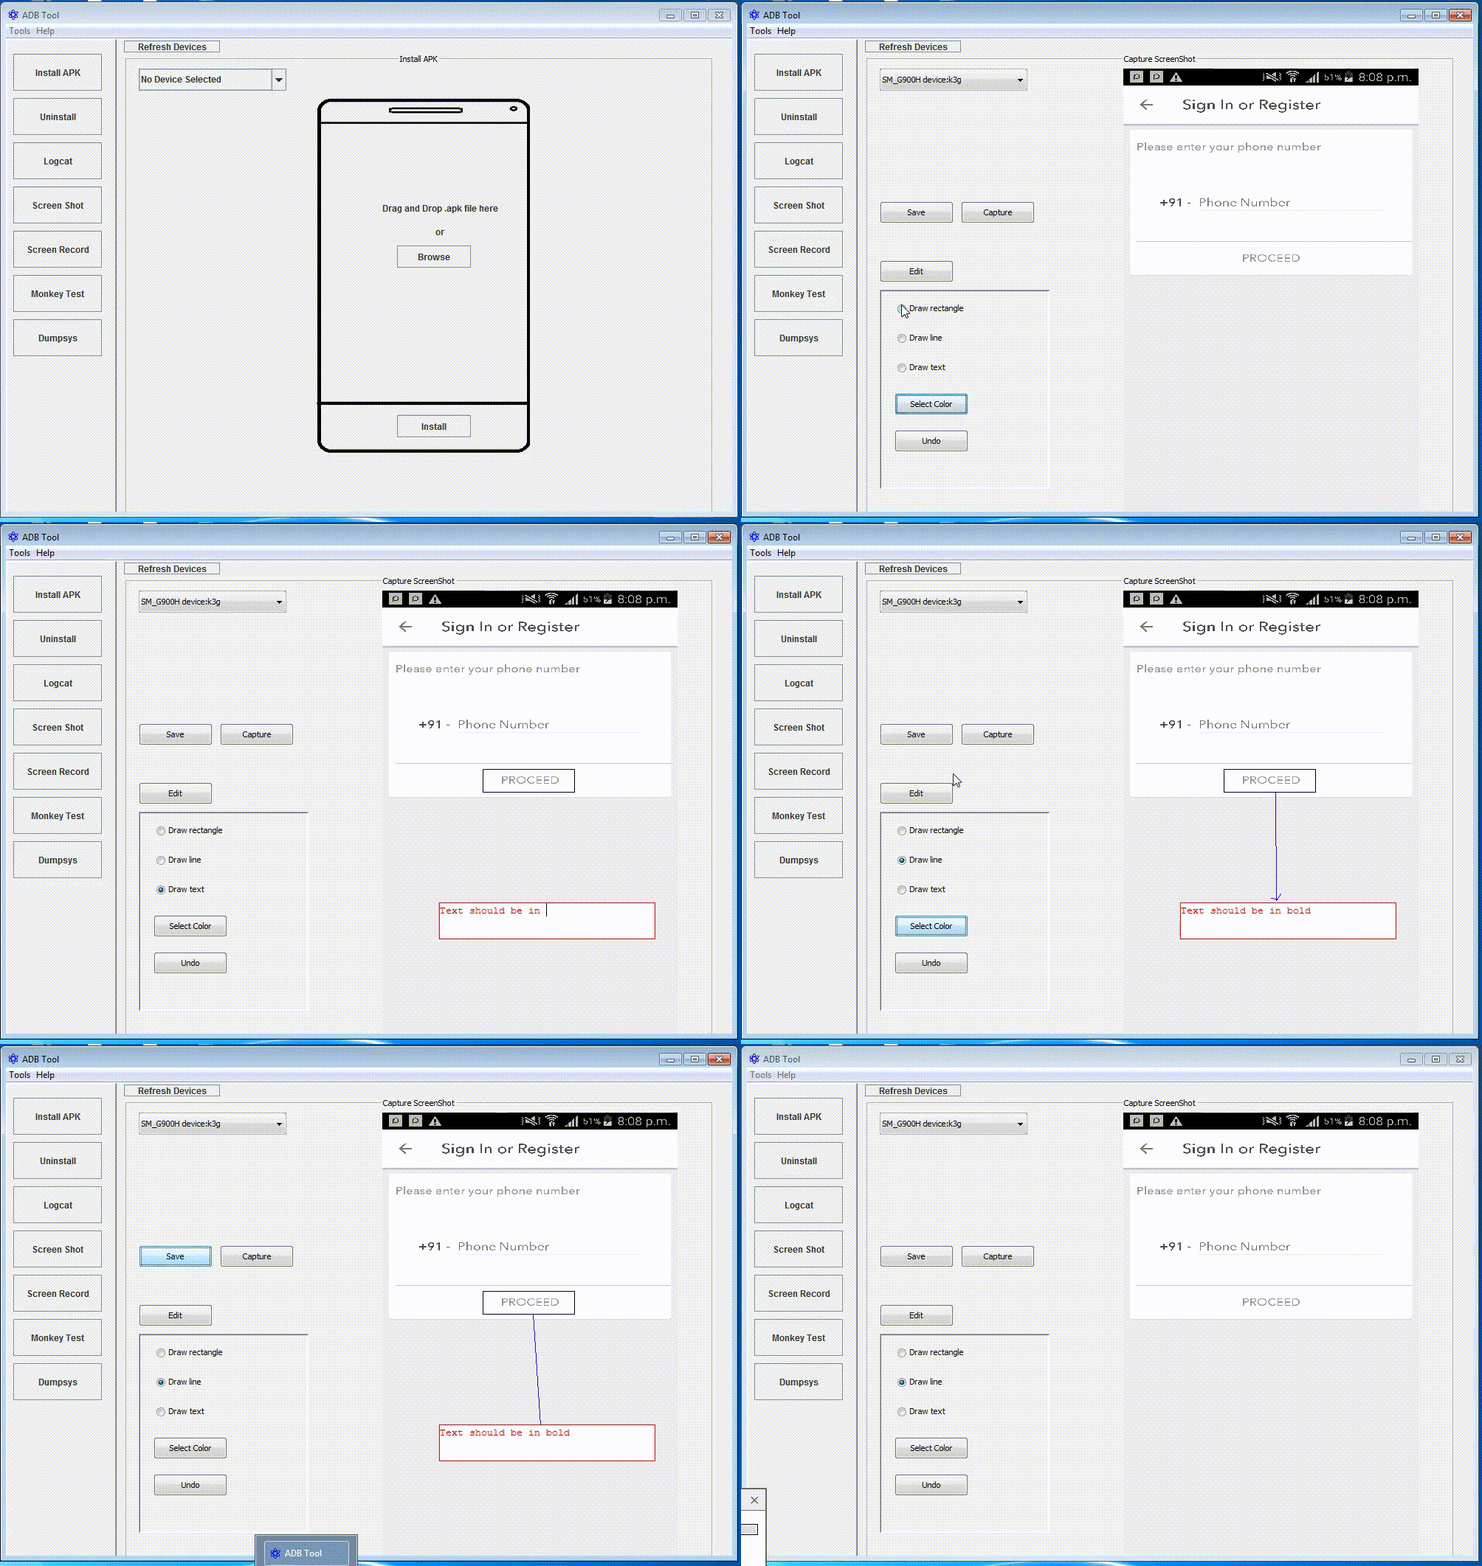
#Capturing Screenshot:
-
Click on Screen Shot button from left side menus.
-
Select your device from device list drop down.
-
Click on Capture button.
-
Click on Edit button if you want to edit screenshot.
-
Click on Save button to save the screenshot.
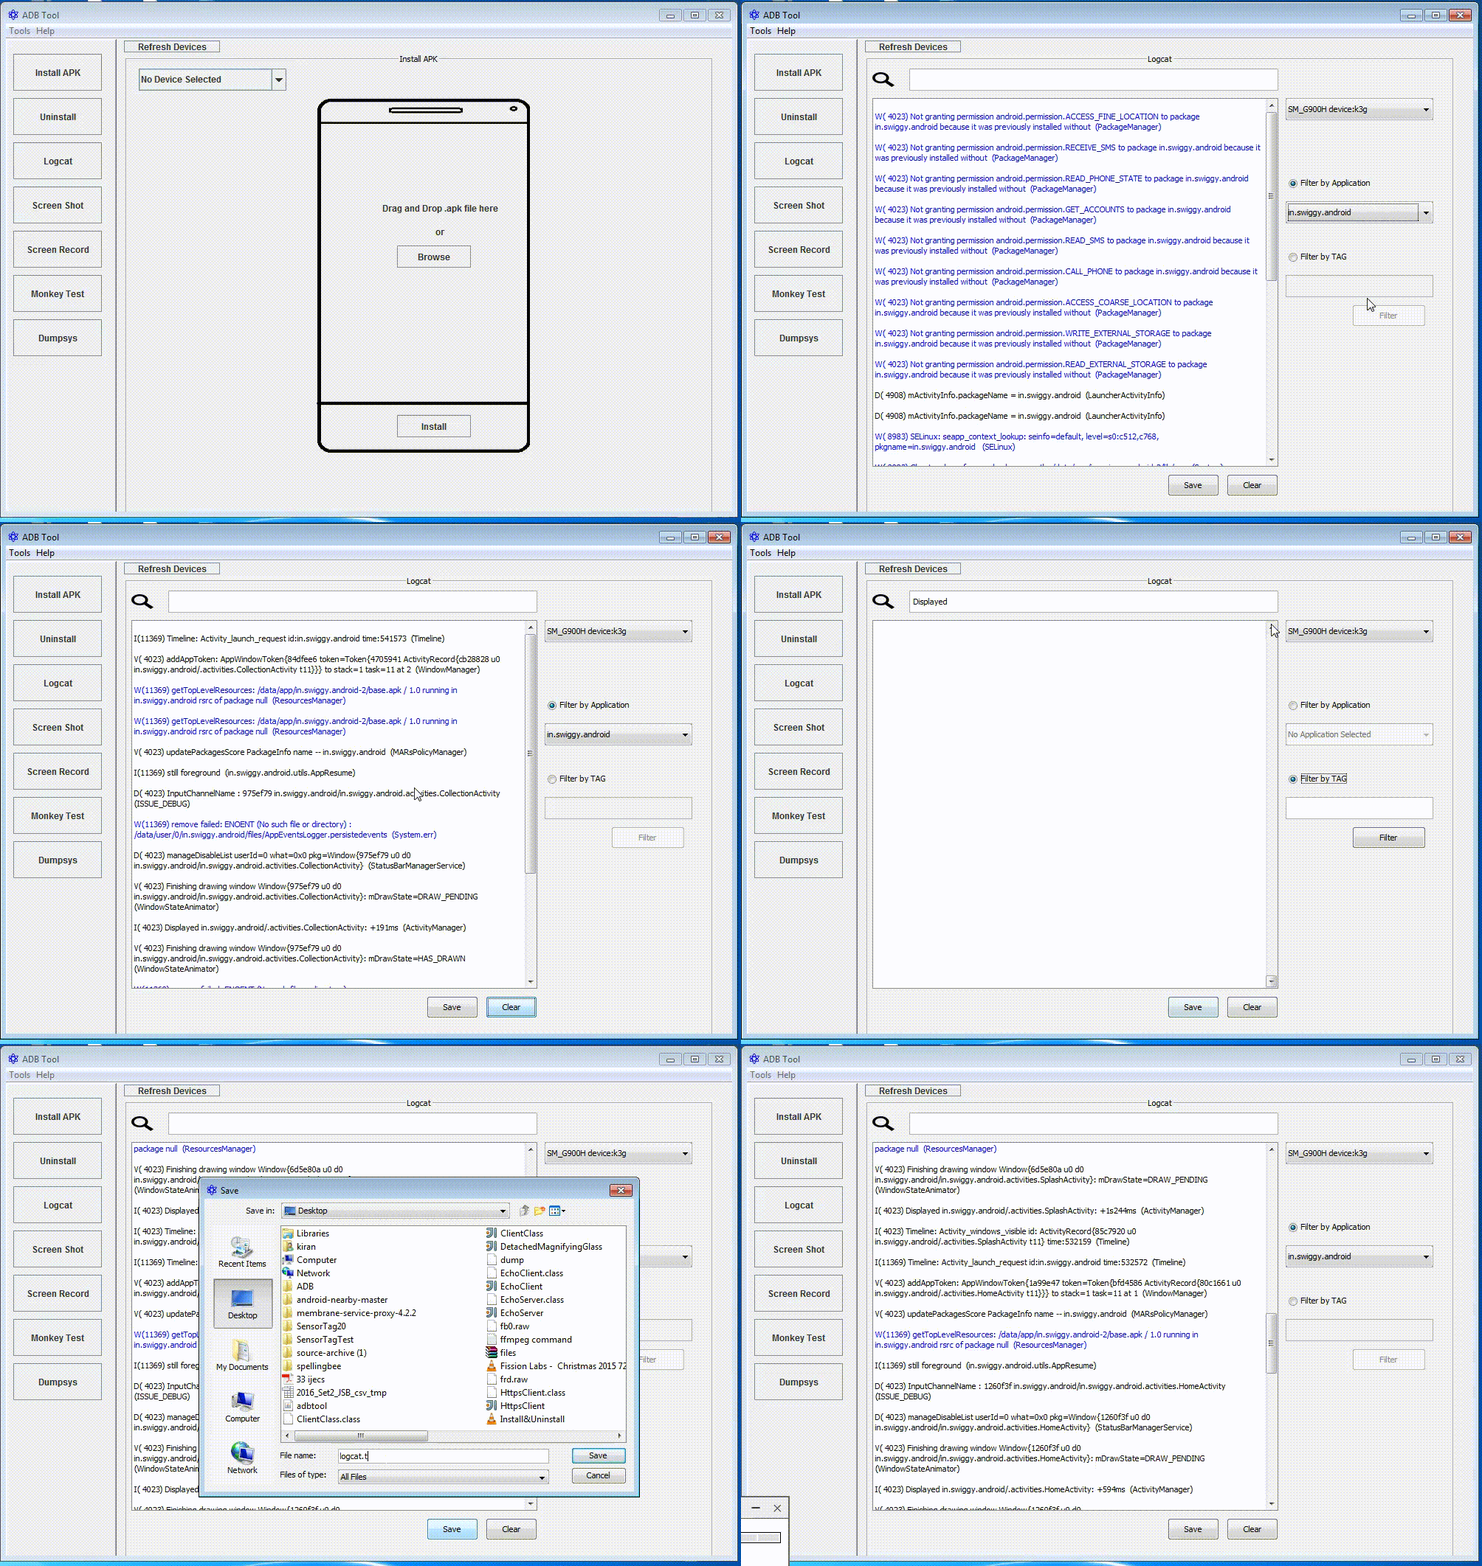
#Logcat:
-
Click on Logcat button from left side menus.
-
Select your device from device list drop down.
-
Select Filter By Application and select package name.
-
Or you can choose Filter By TAG option and enter TAG.
-
Logcat will be displayed in text area. You can save logcat by clicking on Save button.
-
You can clear the logcat by clicking on Clear button.
-
You can search any text in logcat by entering text in search box.
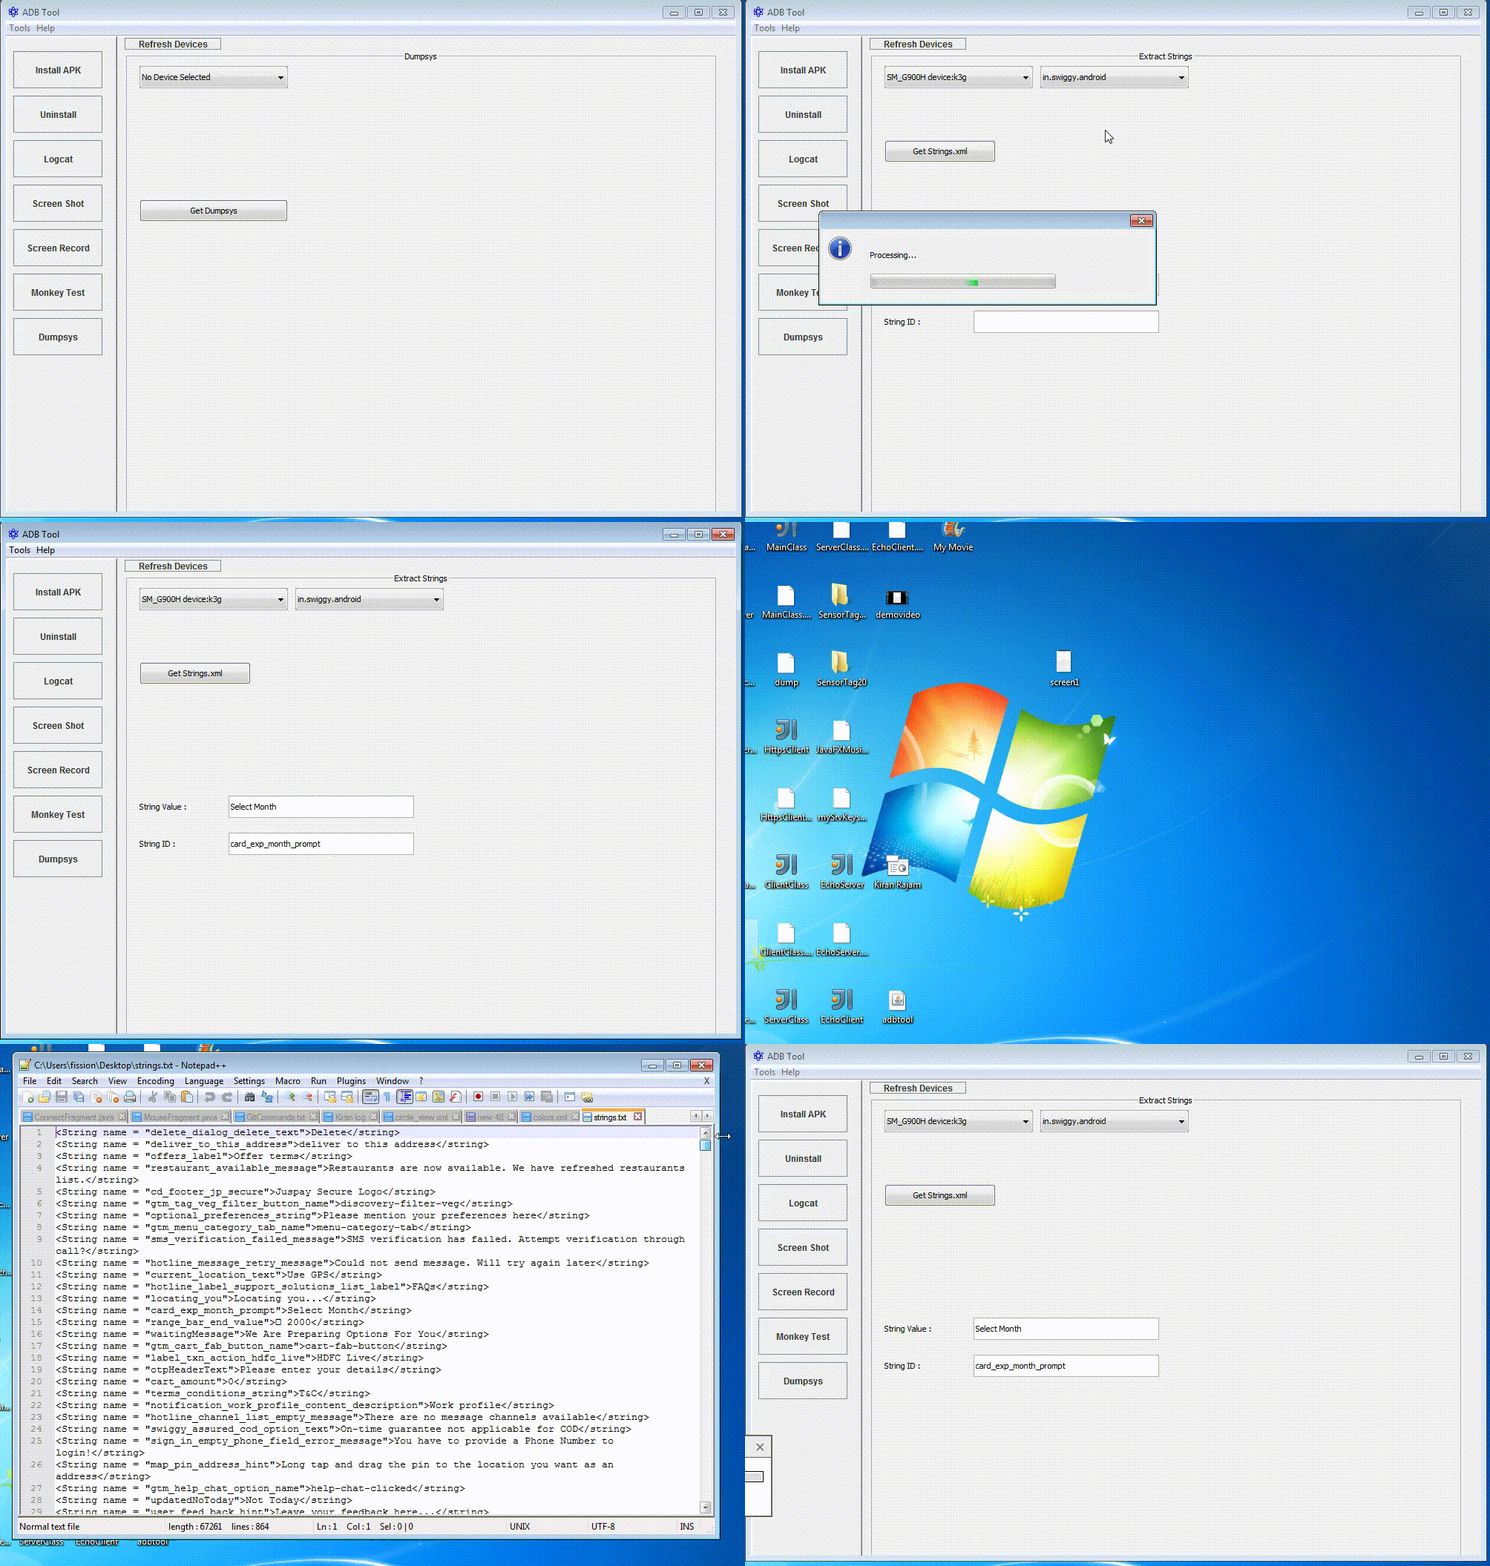
#Extract Strings and String ids:
-
Select Extract Strings from Tools menu.
-
Select your device from device list drop down.
-
Select package name from package list drop down.
-
If you know the string and want to know its string id then enter your string in String Value text box then corrsponding string id will be shown in String ID text box.
-
Or by clicking on Get Strings.xml button, you can get all strings and string ids.
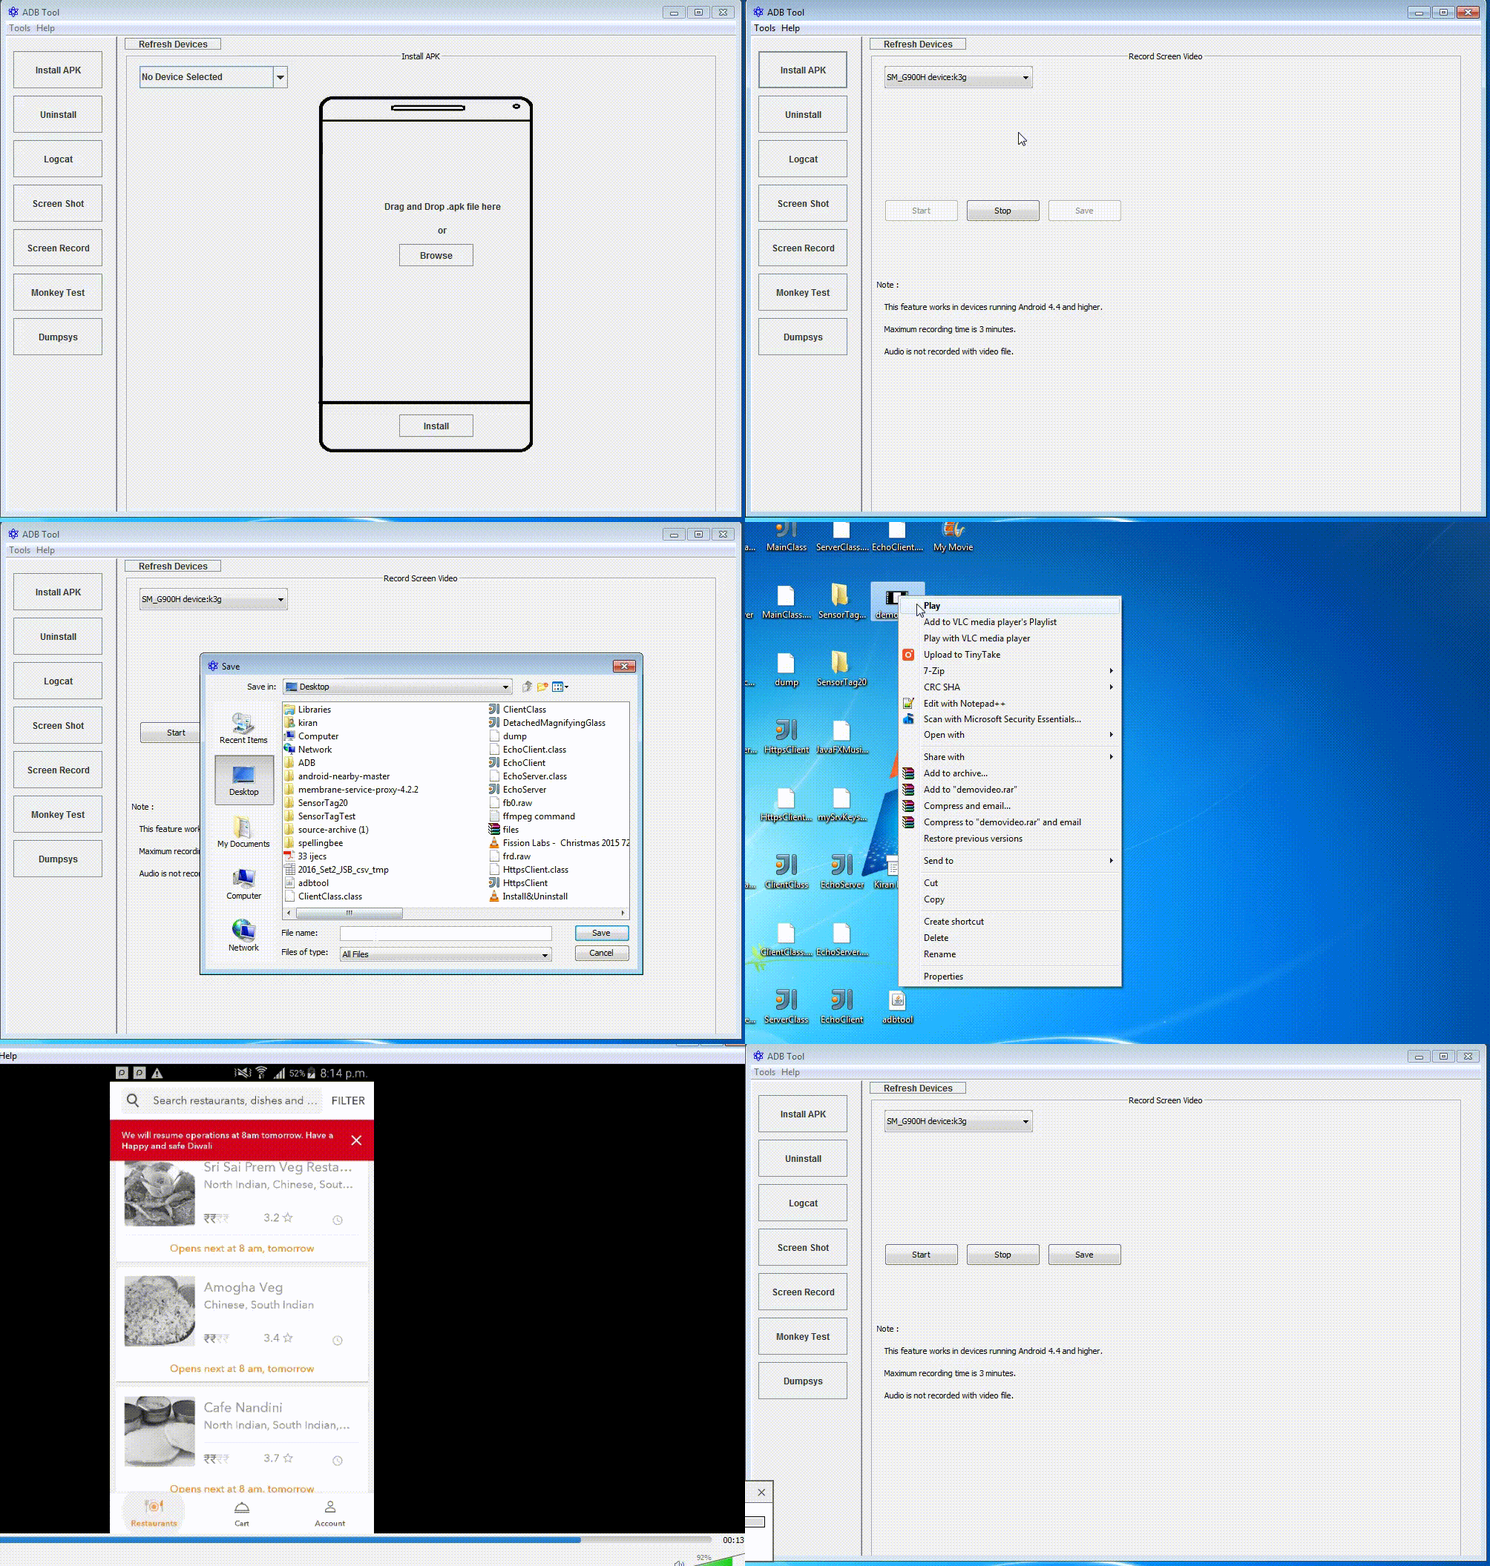
#Screen Recording:
-
Select Screen Record from left side menus.
-
Select your device from device list drop down.
-
Click on Start button to start recording.
-
Click on Stop button to stop recording.
-
Save the recorded video by clicking on Save button.
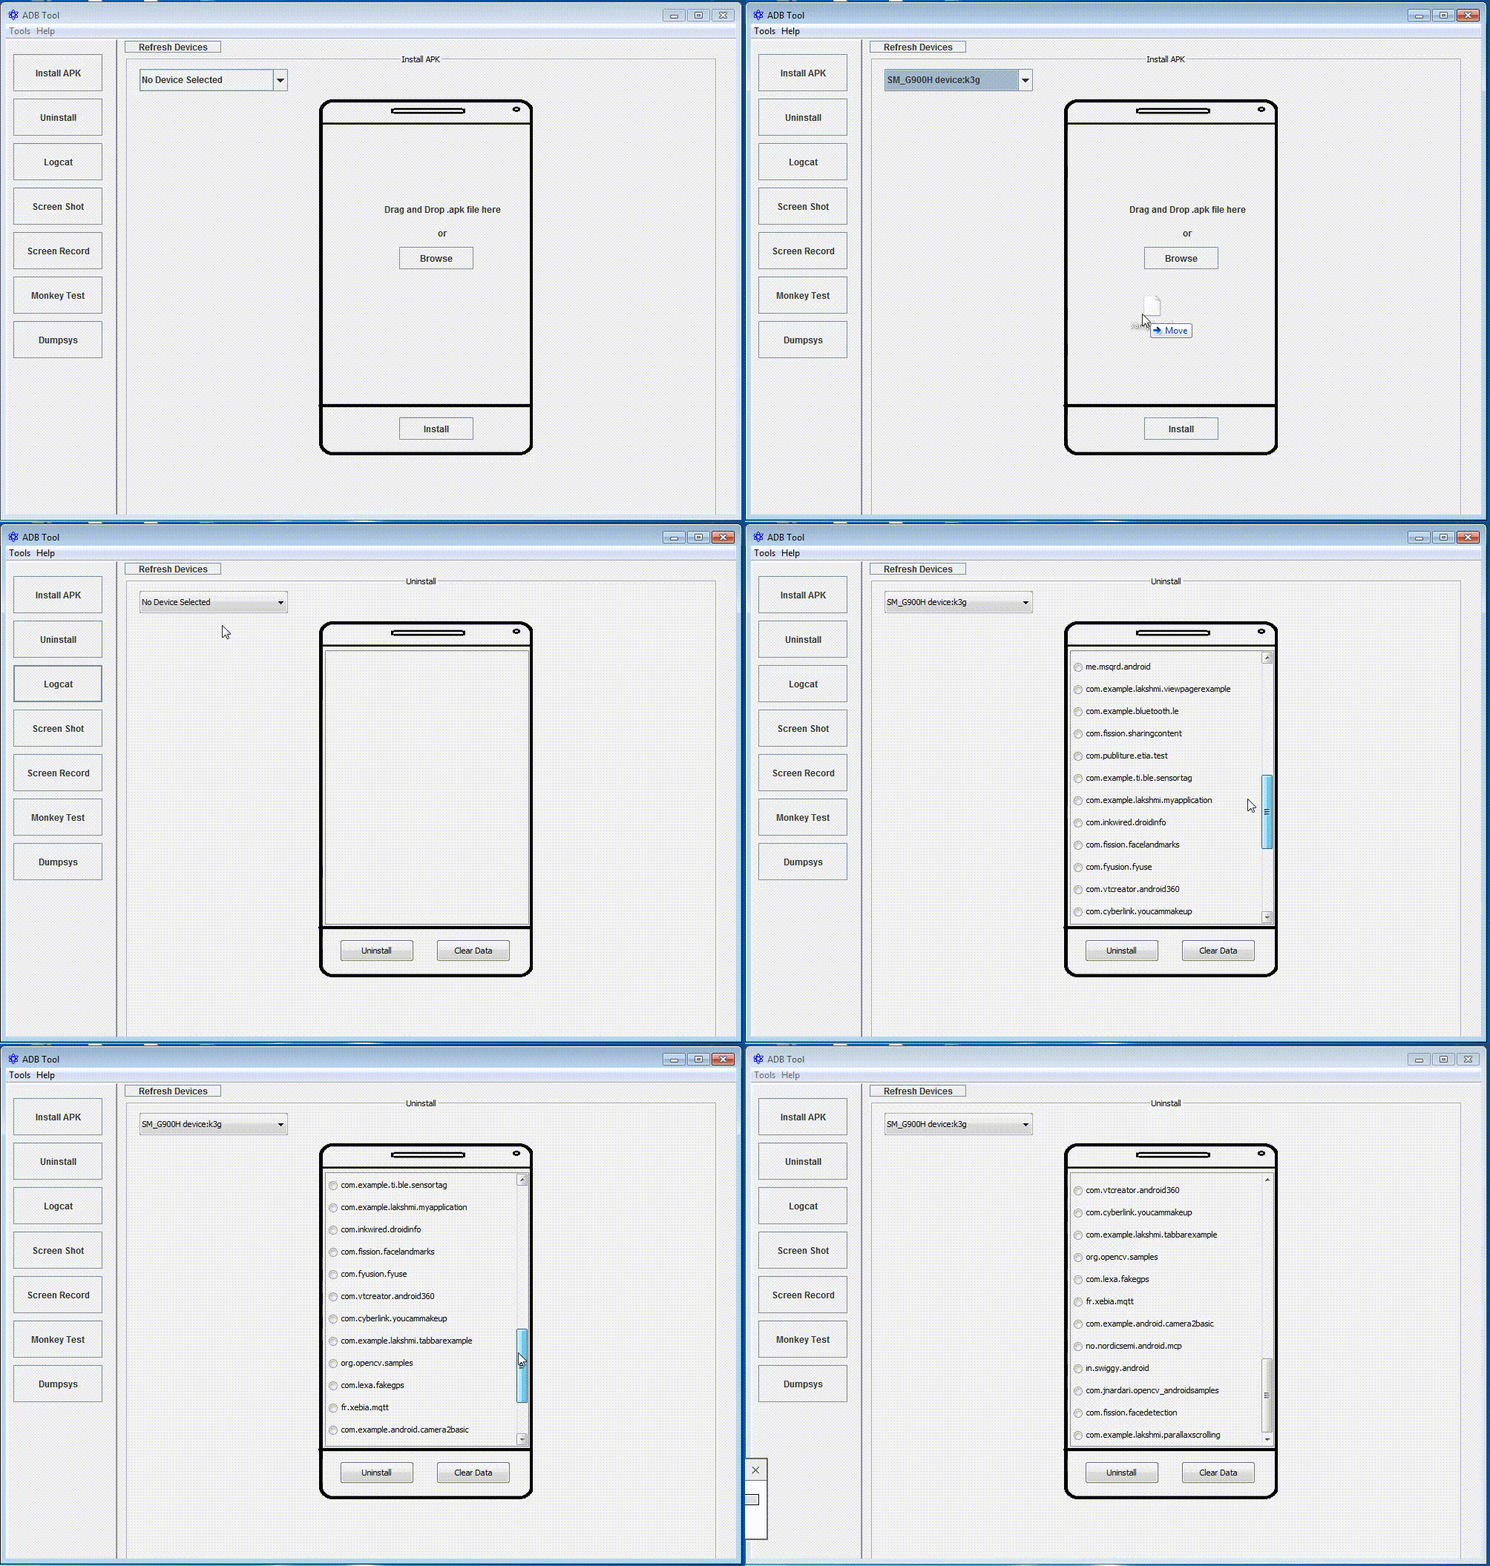
#Install and Uninstall APK:
-
Select Install APK from left side menus.
-
Select your device from list and drag or browse your APK.
-
Click Install button to install the selected APK into device.
-
Click on Uninstall button from left side menus.
-
Select your device from device list drop down.
-
After selecting your device it shows all installed application package names.
-
Select any application from the list, click Clear Data button to clear application data or click on Uninstall button to uninstall the selected application.
#Extract APK:
-
Select Install APK from left side menus.
-
Drag or browse your APK.
-
Click Extract APK button to extract or unzip the selected APK file.
-
By default it creates a directory with selected APK file name and extract contents to it. And the path of this directory is same as selected APK file path.
#Monkey Test:
-
Select your device from drop down list.
-
Select package name.
-
Enter number of events and delay between events. you should enter delay in milliseconds. (1 second = 1000 milliseconds)
-
Click on Run Test button to run the monkey test.
#Dump:
-
Select your device from drop down list.
-
Click on Get Dumpsys button to pull dumpsys from selected device.
-
Click on Get Dumpstate button to pull dumpstate from selected device.
#Connect via WIFI:
-
Select Connect using WIFI from Tools menu.
-
Click on Connect button.
-
After connecting successfully you can remove the usb cable and run through WIFI.

