Thank you Wild West Hackin' Fest for your help and support in our community-driven hackathon! We've created a on-demand proxy tool that leverages cloud environments giving a user the ability to source (all) your traffic from an endless supply of cloud based IP address. Think of it as your own private TOR network for your redteam and pentest engagements. No more defenses throttling and blocking you!
Hackathon sponsored by Sprocket Security and hosted at Wild West Hackin' Fest 2018


.
In two days, we built the initial release of proxycannon-ng. We're in the process of ironing out final changes and will continue to improve the tool.
Objectives:
VPN Server Build (scripted)
Client VPN (Full Tunnel)
Terraform Node Management (Build, Destroy, Routing)
AWS Multipath Node Routing (Load Balanced Exit Nodes)
Node VPN Tunnels
Support multiple cloud environments (initial release only supports AWS)

The control-server is a OpenVPN server that your workstation will connect to. This server always remains up. Exit-nodes are systems connected to the control-server that provides load balancing and multiple source IP addresses. Exit-nodes can scale up and down to suite your needs.
- In the AWS console, go to services (upper left)
- Select EC2 under the Compute section.
- Select Key Pairs in the nav on the left.
- Select Create Key Pair and name it 'proxycannon'.
- Download and save the key to ~/.ssh/proxycannon.pem
- Launch (1) Ubuntu Server t1-micro instance, recommend public AMI ami-0f65671a86f061fcd, and use the "proxycannon" keypair.
- Login to the control-server and download proxycannon-ng:
git clone https://github.com/proxycannon/proxycannon-ng - cd into proxycannon-ng/setup and run
sudo ./install.sh
- In the AWS console, go to services (upper left)
- Select IAM under the Security, Identity & Compliance section
- In IAM, select Users in the nav on the left.
- Select Add user
- Fill out a User name, and for access type, select programmatic access. Click Next.
- Select the tab/box that's labeled Attach existing policies directly. Add the following policy: AmazonEC2FullAccess. Click Next, than Create user
- Copy the access key and secret for the control-server and paste it in ~/.aws/credentials ex:
[default]
aws_access_key_id = REPLACE_WITH_YOUR_OWN
aws_secret_access_key = REPLACE_WITH_YOUR_OWN
region = us-east-2
Perform the following on the control-server:
- Copy your proxycannon.pem SSH key into
~/.ssh/proxycannon.pem - cd into
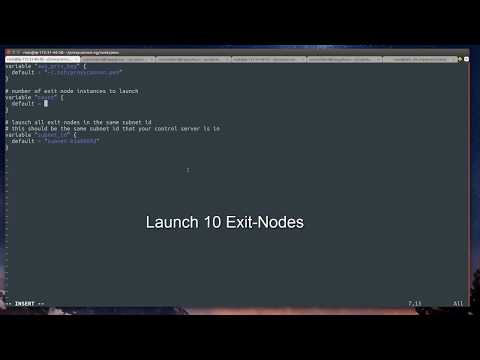
proxycannon-ng/nodes/awsand edit thevariables.tffile updating it with the subnet_id. This is the same subnet_id that your control server is using. You can get this value from the AWS console when viewing the details of the control-server instance. Defining this subnet_id makes sure all launched exit-nodes are in the same subnet as your control server. - Run
terraform initto download the AWS modules. (you only need to do this once)
Copy the following files from the control-server to the /etc/openvpn directory on your workstation:
- ~/proxycannon-client.conf
- /etc/openvpn/easy-rsa/keys/ta.key
- /etc/openvpn/easy-rsa/keys/ca.crt
- /etc/openvpn/easy-rsa/keys/client01.crt
- /etc/openvpn/easy-rsa/keys/client01.key
Test OpenVPN connectivity from your workstation by running:
openvpn --config proxycannon-client.conf
Setup Completed! yay! From now on you'll only need to connect to the VPN to use proxycannon-ng. The next section details how to add and remove exit-nodes (source IPs):
Scaling of exit-nodes is controlled on the control-server using terraform.
To create AWS exit-nodes, do the following:
- cd into
proxycannon-ng/nodes/aws - Edit the count value in
variables.tfto the number of exit-nodes (source IPs) you'd like - run
terraform applyto launch the instances.
If you want to stop all exit-nodes run terraform destroy.
OR
Scaling down exit-nodes can be done by reducing the count value in variables.tf and running terraform apply again. Terraform will automatically remove X number of exit-node instances.
@jarsnah12 - original proxycannon v1 author
@w9hax - mad openVPN skillz
@caseycammilleri - Gets lost deep in iptables
@jaredhaight - Streamlining install and a ton of improvements
Special thanks to @i128 (@jarsnah12 on twitter) for developing the original proxycannon tool that is our inspirartion.
See Wiki