Code Monkey home page Code Monkey logo

vscode-gather's Introduction

Gather for the Jupyter extension

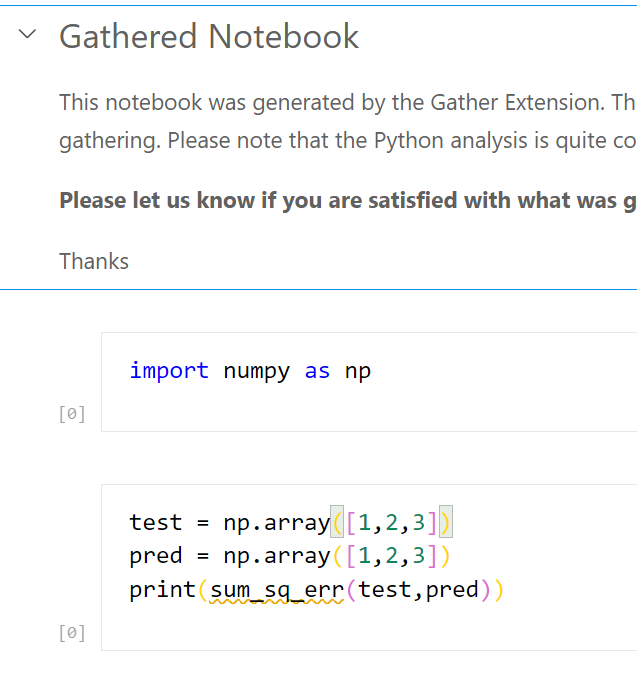
A Visual Studio Code extension that adds the experimental Gather feature to the Jupyter extension on Python code. With one button click on any notebook or Interactive Window cell, Gather uses a static analysis technique to find and then copy all of the dependent code that was used to generate that cell's result into a new notebook or script.

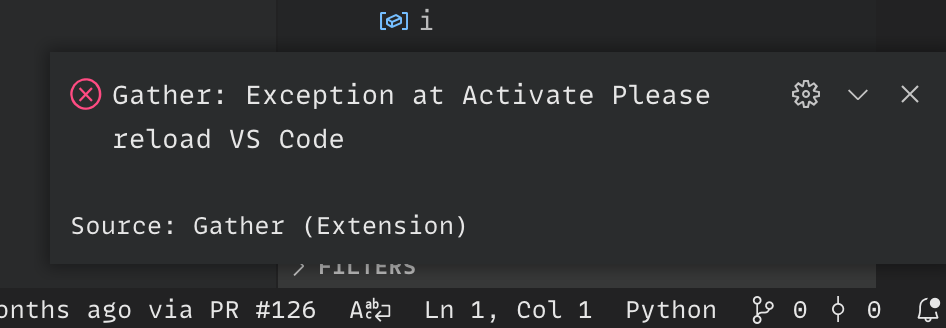
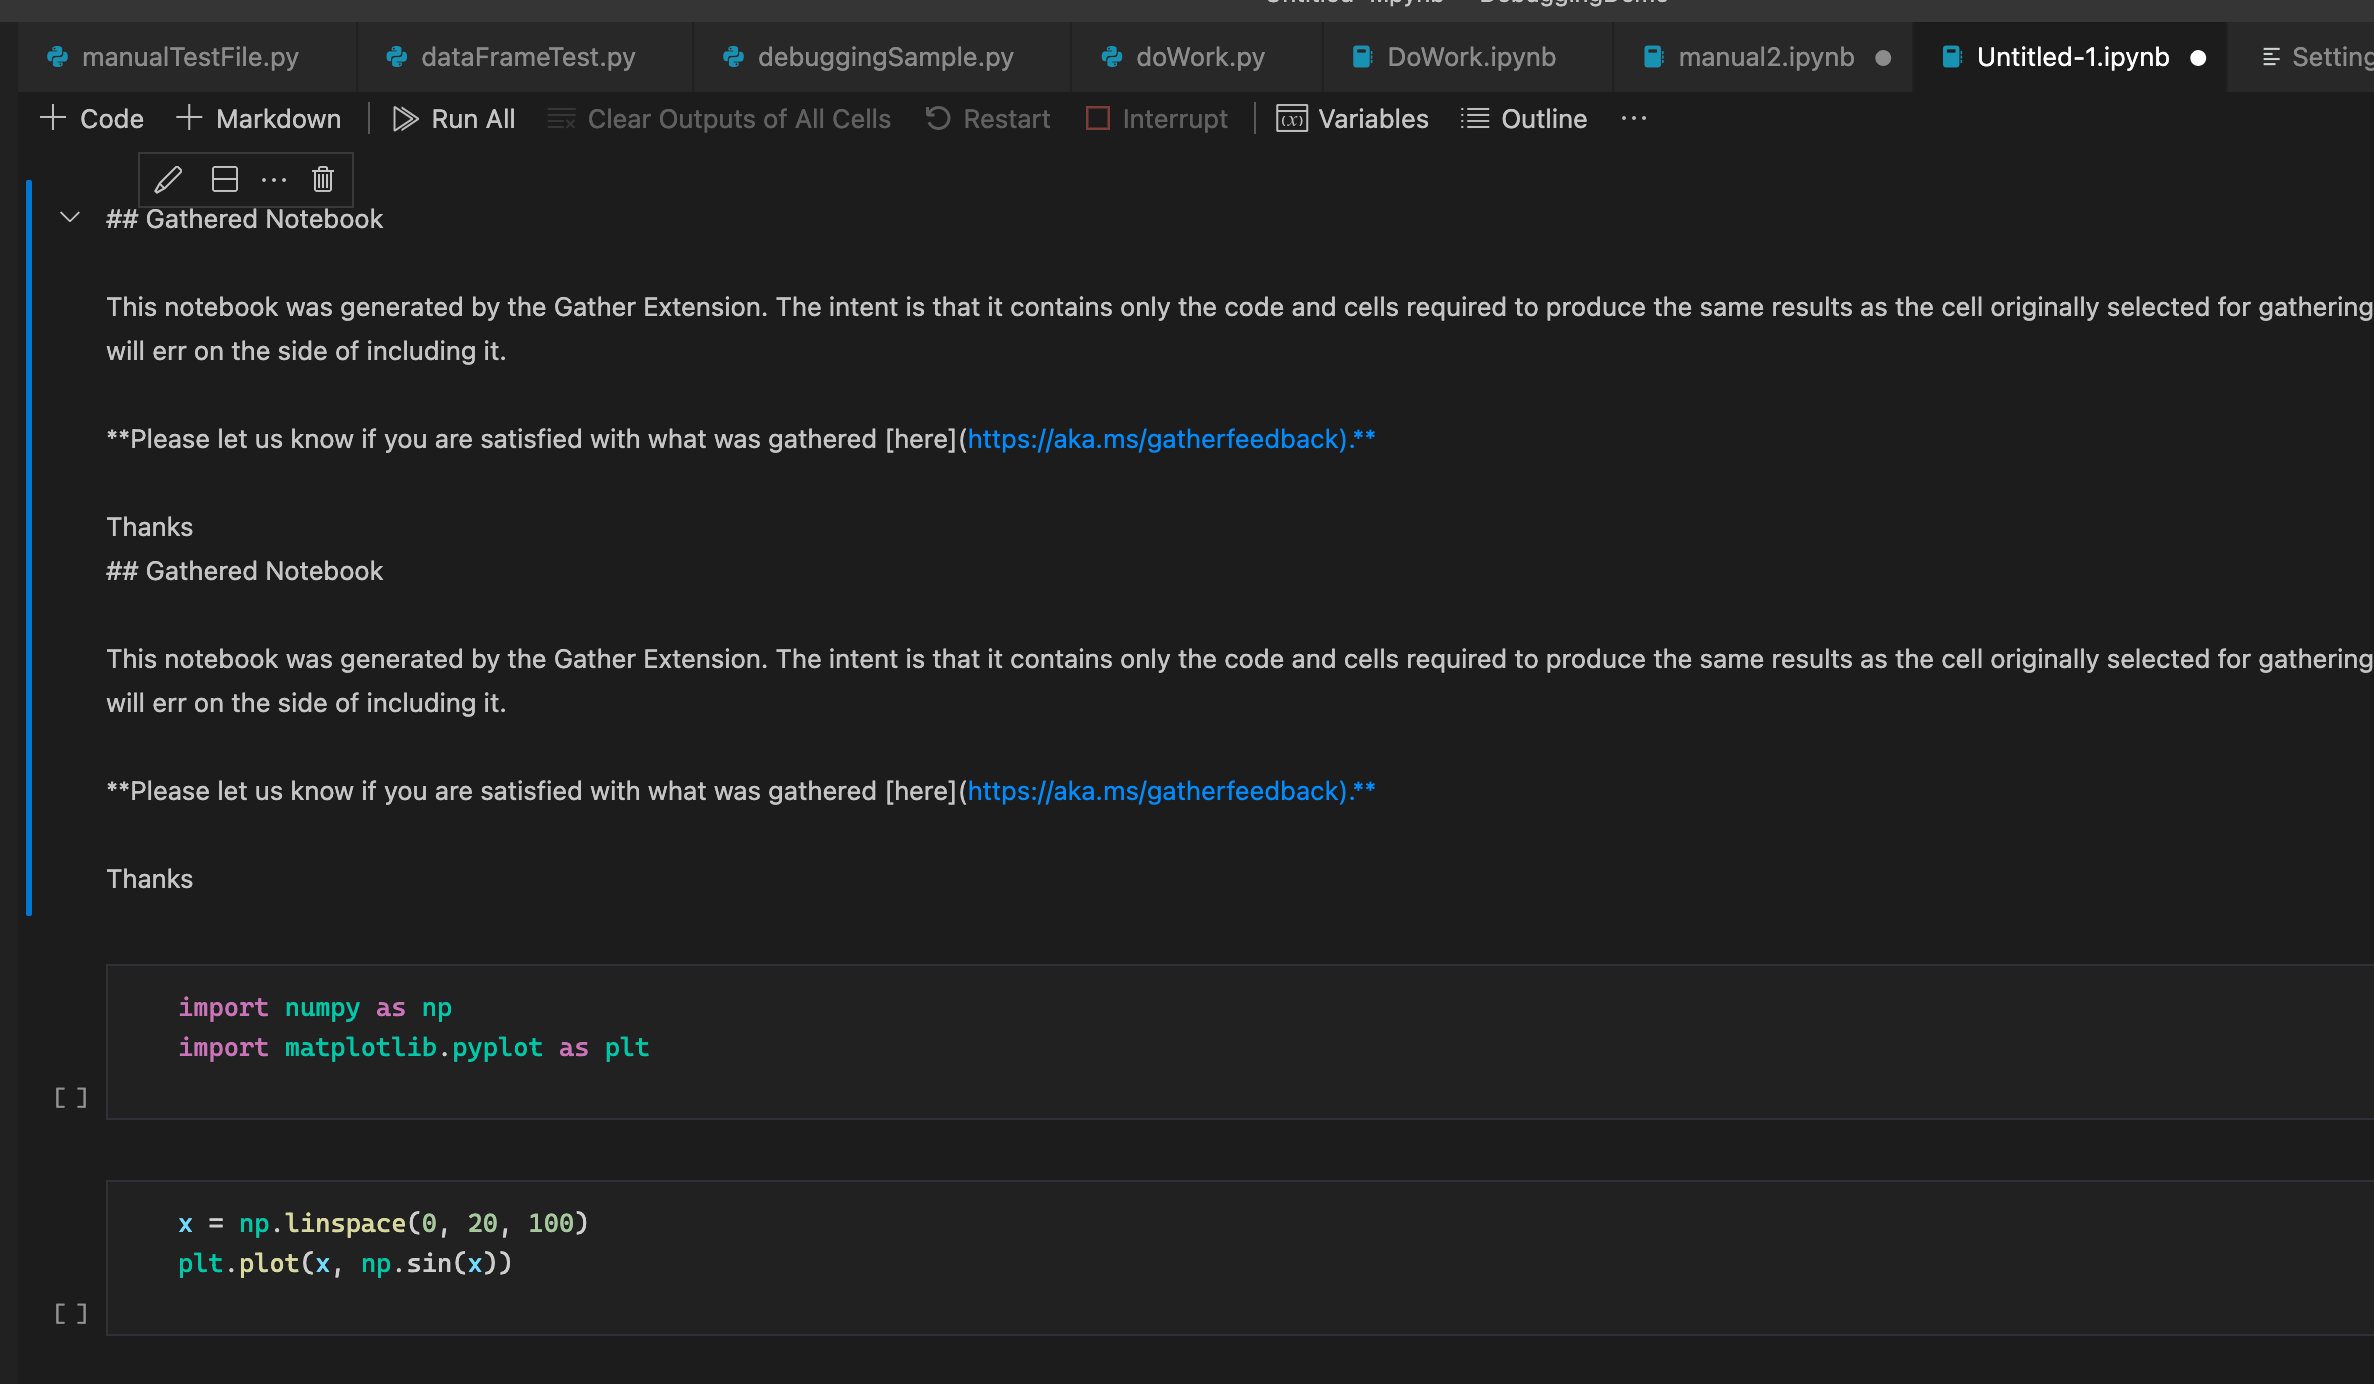
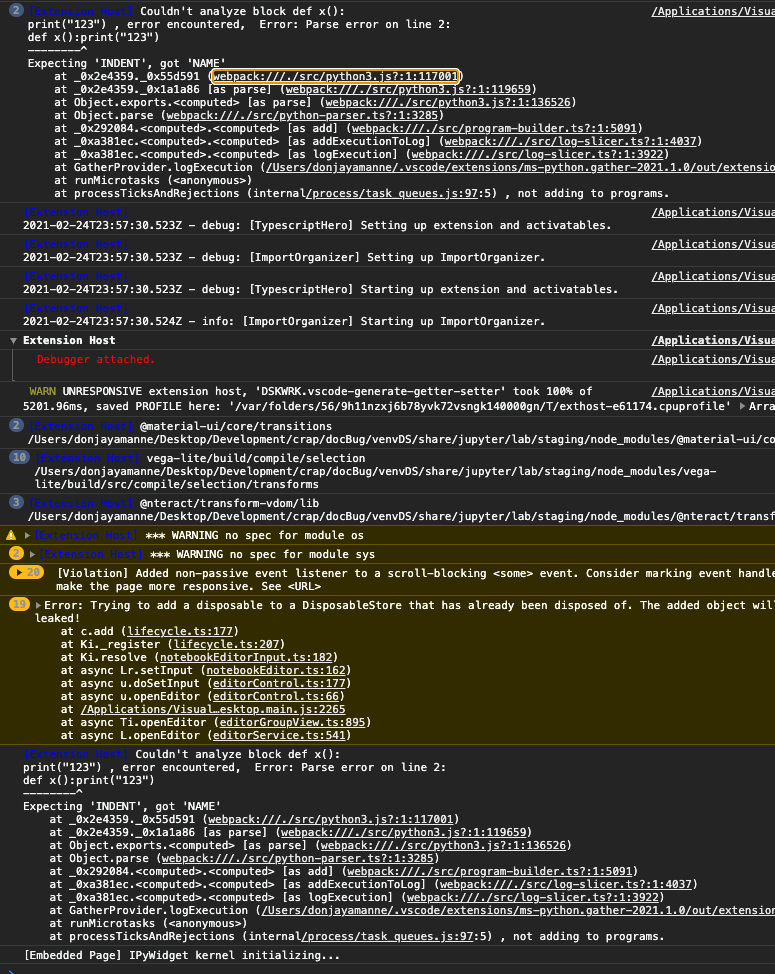
Please note that the Python analysis is quite conservative, so if it is unsure whether a line of code is necessary for execution, it will err on the side of including it in the new notebook/script. We are keen to understand how well this feature works for you so please let us know if you are satisfied with the results you are getting through the survey presented at the top of each gathered file.

Quick start

  • Step 1. Install both the Jupyter and the Gather extension for Visual Studio Code.

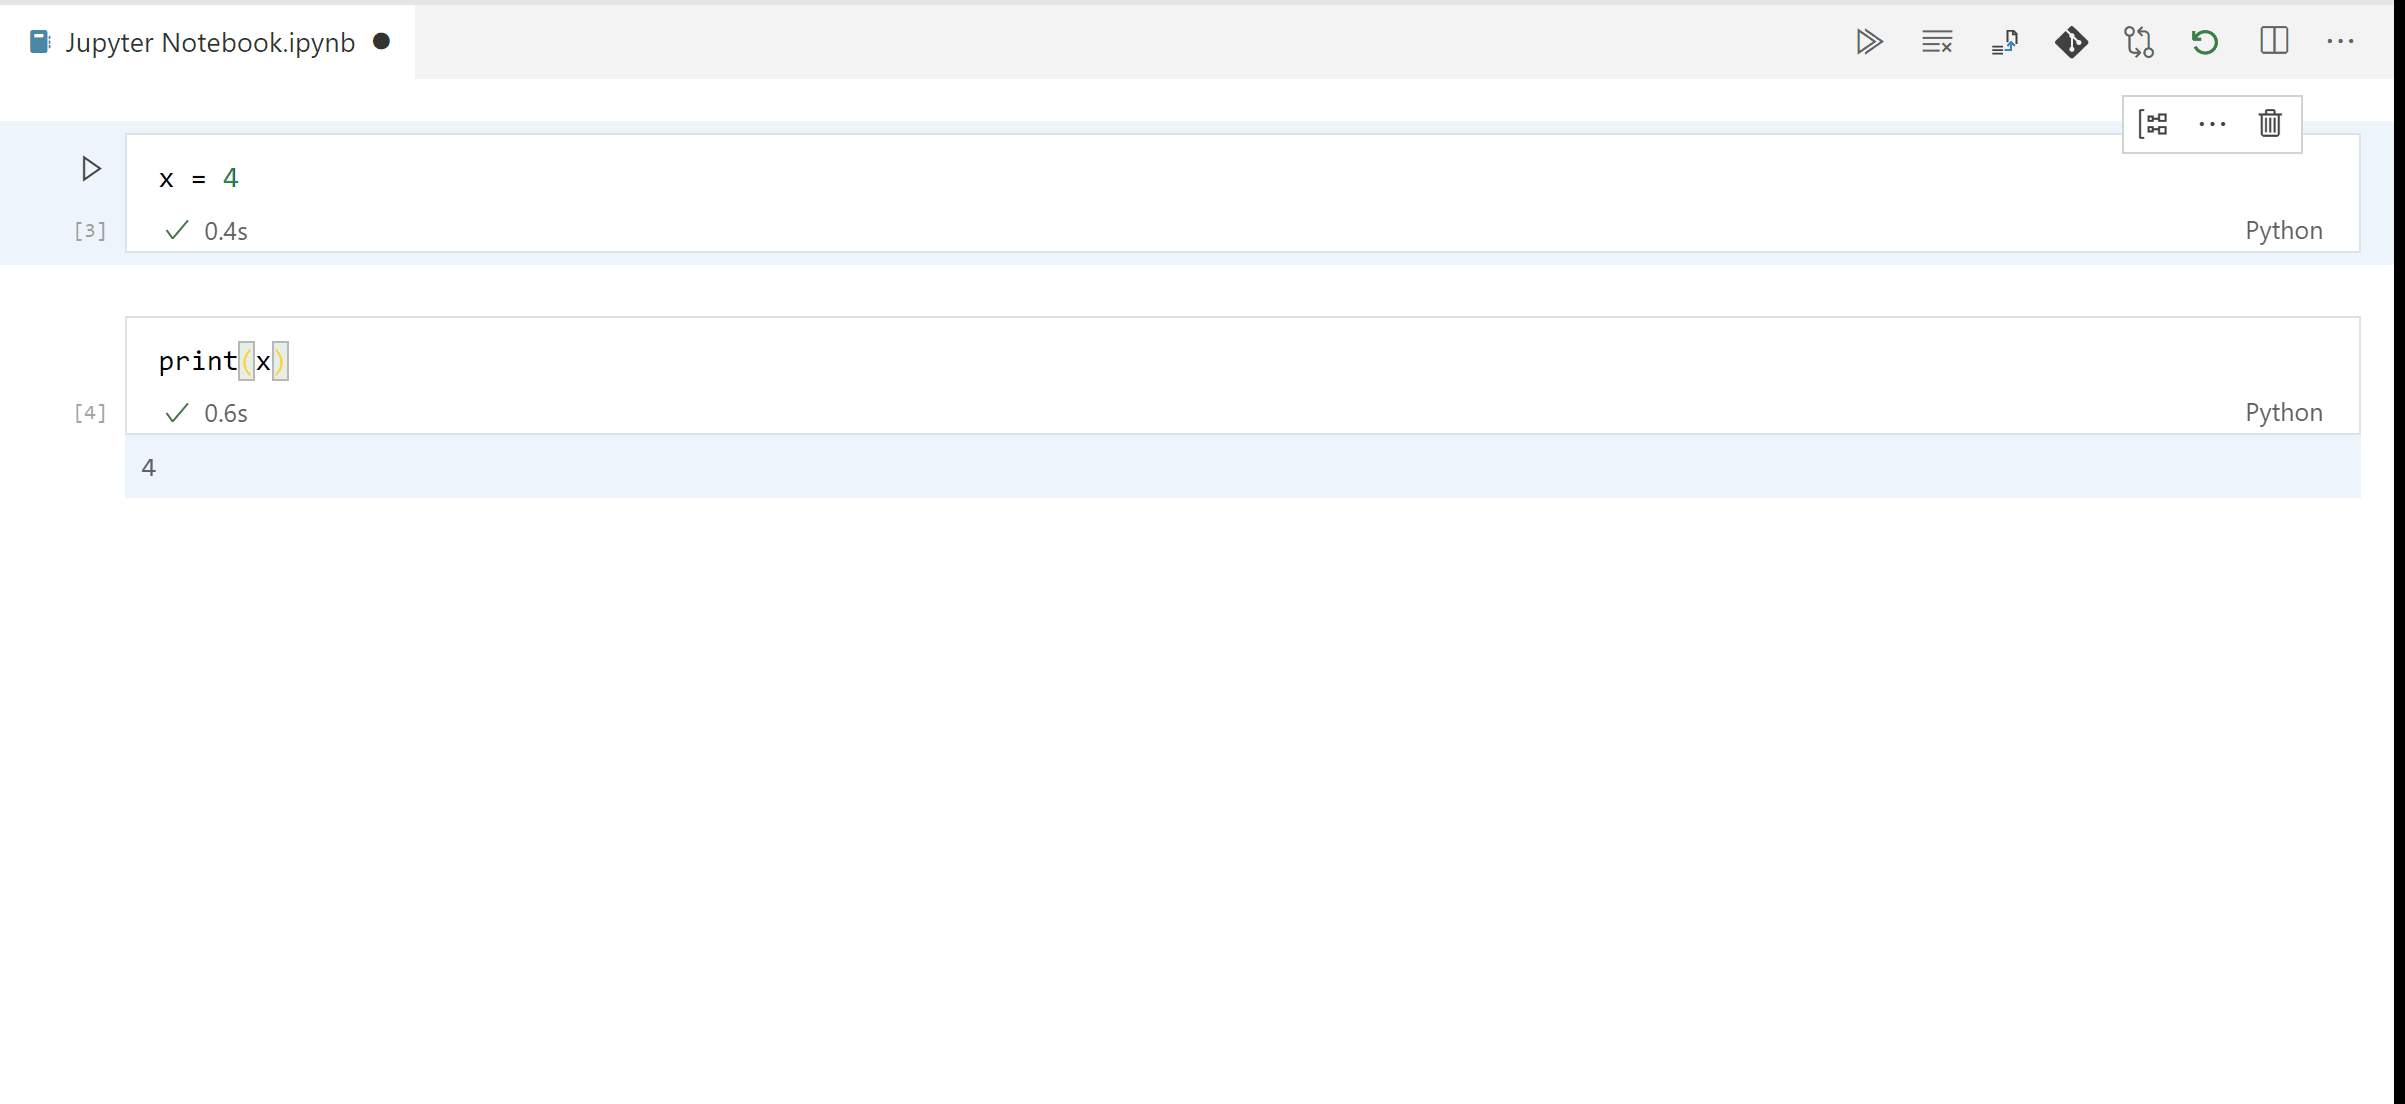
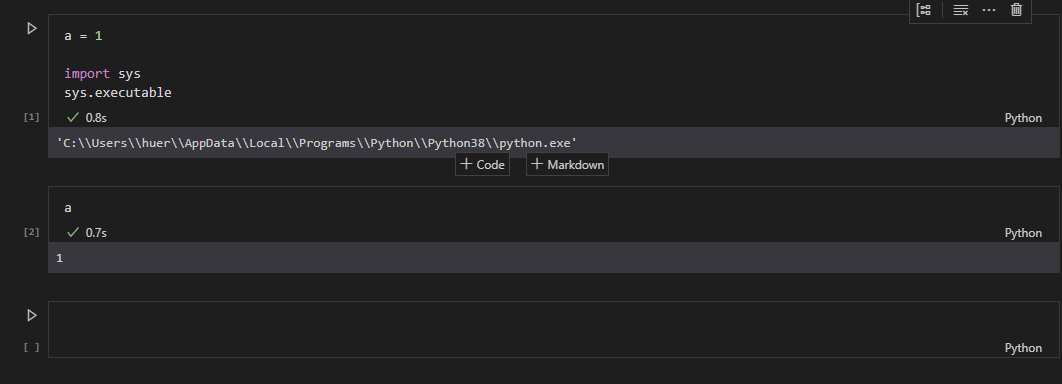
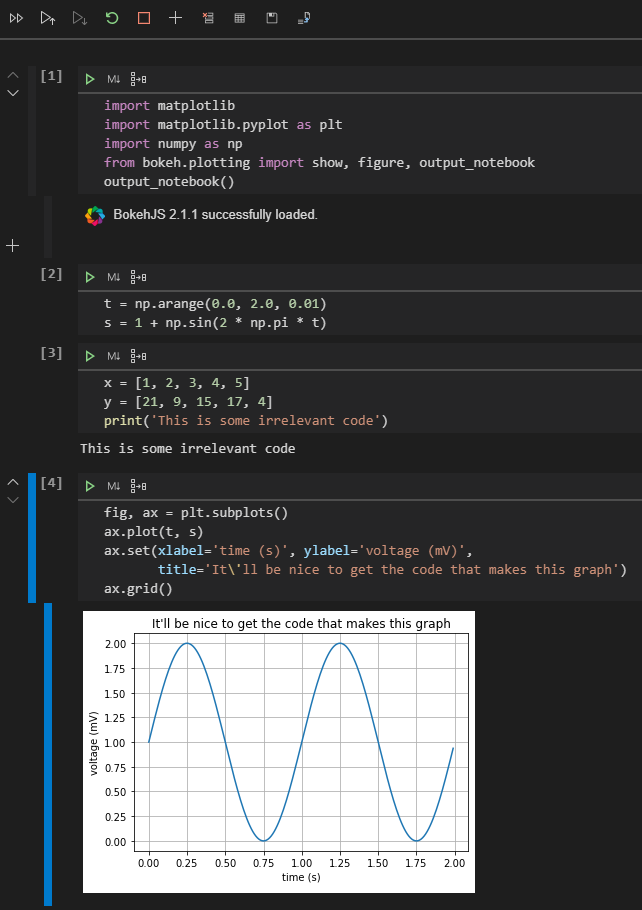
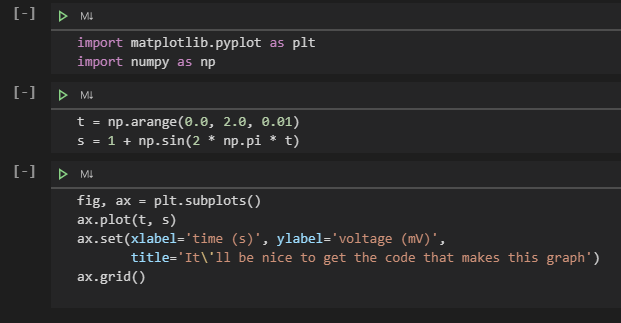
  • Step 2. Run cells on the Interactive Window or Notebook Editor to do your work.

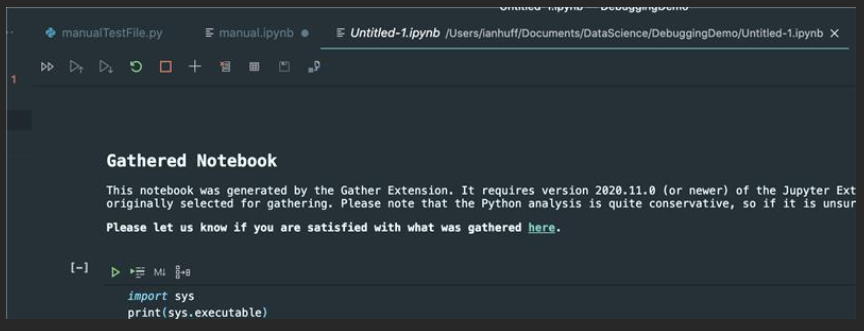
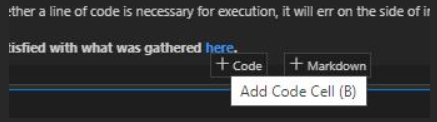
  • Step 3. When you're satisfied with a cell's output, click the Gather icon to build a new notebook or script that generates that same output.

Additional Information

Gather uses a set of files called "specs" that are used to identify whether each function provided in a Python package modifies kernel state. Currently, the packages that are fully supported are:

  • matplotlib
  • numpy
  • pandas
  • random
  • sklearn
  • a set of built-in Python functions/keywords

It is possible to add packages or APIs to the supported list on your local installation. If you are interested in doing this for your own private work, or would like to contribute to the community to support other popular Python packages, please let us know!

Questions and issues

  • If you come across a problem, please file an issue.
  • If you have a question about how to accomplish something with the extension, please ask on Stack Overflow
  • Any and all feedback is appreciated and welcome!
    • If someone has already filed an issue that encompasses your feedback, please leave a ๐Ÿ‘/๐Ÿ‘Ž reaction on the issue
    • Otherwise please file a new issue

Building

This repository uses the private MSR-Python-Analysis npm feed feed for some of its functionality.

After gaining access to that feed, run

  • npm run npm-auth
  • npm install

vscode-gather's People

Contributors

davidkutu avatar dependabot[bot] avatar donjayamanne avatar greazer avatar ianmatthewhuff avatar lramos15 avatar lszomoru avatar microsoftopensource avatar rchiodo avatar rzhao271 avatar

Stargazers

 avatar  avatar  avatar  avatar  avatar  avatar  avatar  avatar  avatar  avatar  avatar  avatar  avatar  avatar  avatar  avatar  avatar  avatar  avatar  avatar  avatar  avatar  avatar

Watchers

 avatar  avatar  avatar  avatar  avatar  avatar  avatar  avatar  avatar  avatar  avatar  avatar  avatar  avatar  avatar

vscode-gather's Issues

DSBugBash: Suggestion - provide refactoring for a notebook into functions

During creation of cells in the notebook, the user is building up a series of things to do.

It would be super cool to take a set of cells (or code) and refactor it into a function.

Example:

This:
from nltk.tokenize import sent_tokenize, word_tokenize
from nltk.corpus import stopwords
from string import punctuation

#%%
sents = sent_tokenize(text)
sents

#%%
word_sent = word_tokenize(text.lower())
word_sent

#%%
_stopwords = set(stopwords.words('english') + list(punctuation) + list(['โ€', 'โ€œ']))
_stopwords

#%%
word_sent=[word for word in word_sent if word not in _stopwords]
word_sent

#%%
from nltk.probability import FreqDist
freq = FreqDist(word_sent)
freq

#%%
from heapq import nlargest
nlargest(10, freq, key=freq.get)

#%%
from collections import defaultdict
ranking = defaultdict(int)

for i, sent in enumerate(sents):
for w in word_tokenize(sent.lower()):
if w in freq:
ranking[i] += freq[w]

ranking

#%%
sents_idx = nlargest(4, ranking, key=ranking.get)
sents_idx

#%%
[sents[j] for j in sorted(sents_idx)]

Gets turned into:

def summarize(text, n):
sents = sent_tokenize(text)

assert n <= len(sents)
word_sent = word_tokenize(text.lower())
_stopwords = set(stopwords.words('english') + list(punctuation))

word_sent=[word for word in word_sent if word not in _stopwords]
freq = FreqDist(word_sent)


ranking = defaultdict(int)

for i,sent in enumerate(sents):
    for w in word_tokenize(sent.lower()):
        if w in freq:
            ranking[i] += freq[w]
         
    
sents_idx = nlargest(n, ranking, key=ranking.get)
return [sents[j] for j in sorted(sents_idx)]

Gather Feedback

Survey Monkey Feedback:

4/8 said Gather did not produce the code they were expecting because it did not respect the indentation of their code and broke their functions.
2/8 said the function definitions in their code were not brought into the Gathered code.
1/8 specifically requested for "Verification before gathering in order to add any cells which might also be relevant but gather missed them."

These additional problems would be solved with Smart Select feature. Can white space be honored when Gather is selecting lines of code? If not, could be worth considering retiring Gather as is and renaming Smart Select back to the new Gather.

After discussing with David, another potential and more "widespread" solution could be to rename the Gather extension itself.

Gathered notebook is not dirty

When you gather to a notebook, the notebook is not dirty, so you have to change it to actually save it (the save button is disabled) no need to fix now I think, but might be a nice QOL fix to be able to hit the save button after gathering.

image

Gather generates a single cell for an entire file

Ran this file to the end one file at a time (data is from the pima-data example on the web):

#%% [markdown]
# # Predicting Diabetes
# ## Import Libraries
# 

#%%
import pandas as pd # pandas is a dataframe library
import matplotlib.pyplot as plt # matplotlib.pyplot plots data
import numpy as np
import sklearn # numpy provides N-dim object support

#%% [markdown]
# ## Load and review data

#%%
df = pd.read_csv("./data/pima-data.csv") # load Pima data


#%%
df.head(5)


#%%
def plot_corr(df, size=11):
    """
    Function plots a graphical correlation matrix for each pair of columns in the dataframe.
    
    Input:
        df: pandas DataFrame
        size: vertical and horizontal size of the plot
        
    Displays:
        matrix of correlation between columns. Blue-cyan-yellow-red-darkred => less to more correlated
                                               0------------------------->1
                                               Expect a darkred line running from top to bottom right
    """
    
    corr = df.corr() # data frame correlation function
    fig, ax = plt.subplots(figsize=(size, size))
    ax.matshow(corr) # color code the rectangles by correlation value
    plt.xticks(range(len(corr.columns)), corr.columns) # draw x tick marks
    plt.yticks(range(len(corr.columns)), corr.columns) # draw y tick marks


#%%
plot_corr(df)


#%%
del df['skin']

#%% [markdown]
# ## Check Data Types

#%%
diabetes_map = {True:1, False:0}


#%%
df['diabetes'] = df['diabetes'].map(diabetes_map)


#%%
df.head(5)

#%% [markdown]
# ## Spliting the data
# 70% for training, 30% for testing

#%%
from sklearn.model_selection import train_test_split

feature_col_names = ['num_preg', 'glucose_conc', 'diastolic_bp', 'thickness', 'insulin', 'bmi', 'diab_pred', 'age']
predicted_class_names = ['diabetes']

x = df[feature_col_names].values # predictor feature columns (8 X m)
y = df[predicted_class_names].values # predicted class (1=true, 0=false) column (1 X m)
split_test_size = 0.30

x_train, x_test, y_train, y_test = train_test_split(x, y, test_size=split_test_size, random_state=42)
# test_size = 0.3 is 30%, 42 is the answer to everything

#%% [markdown]
# We check to ensure we have the desired 70% train, 30% test split of the data

#%%
print("{0:0.2f}% in training set".format((len(x_train)/len(df.index))*100))
print("{0:0.2f}% in test set".format((len(x_test)/len(df.index))*100))

#%% [markdown]
# ## Post-split Data Preparation
#%% [markdown]
# ### Impute with the mean

#%%
from sklearn.impute import SimpleImputer as Imputer

# Impute with mean all 0 readings
fill_0 = Imputer(missing_values=0, strategy="mean")

x_train = fill_0.fit_transform(x_train)
x_test = fill_0.fit_transform(x_test)

#%% [markdown]
# ## Training Initial Algorithm = Naive Bayes

#%%
from sklearn.naive_bayes import GaussianNB

# create Gaussian Naive Bayes model object and train it with the data
nb_model = GaussianNB()

nb_model.fit(x_train, y_train.ravel())

#%% [markdown]
# ### Performance on Training data

#%%
# predict values using the training data
nb_predict_train = nb_model.predict(x_train)

# import the performance metrics library
from sklearn import metrics

# Accuracy
print("Accurary: {0:.4f}".format(metrics.accuracy_score(y_train, nb_predict_train)))
print("")

#%% [markdown]
# ### Performance on Testing data

#%%
# predict values using the training data
nb_predict_test = nb_model.predict(x_test)

# import the performance metrics library
# from sklearn import metrics

# Accuracy
print("Accurary: {0:.4f}".format(metrics.accuracy_score(y_test, nb_predict_test)))
print("")

#%% [markdown]
# ### Metrics

#%%
print("Confusion Matrix")
print("{0}".format(metrics.confusion_matrix(y_test, nb_predict_test)))
print("")

print("Classification Report")
print(metrics.classification_report(y_test, nb_predict_test))

#%% [markdown]
# ## Retrain =  Random Forest

#%%
from sklearn.ensemble import RandomForestClassifier

rf_model = RandomForestClassifier(random_state=42) # Create random forest object

rf_model.fit(x_train, y_train.ravel())

#%% [markdown]
# ### Performance on Training data

#%%
# predict values using the training data
rf_predict_train = rf_model.predict(x_train)

# import the performance metrics library
from sklearn import metrics

# Accuracy
print("Accurary: {0:.4f}".format(metrics.accuracy_score(y_train, rf_predict_train)))
print("")

#%% [markdown]
# ### Performance on Testing data

#%%
# predict values using the testing data
rf_predict_test = rf_model.predict(x_test)

# import the performance metrics library
from sklearn import metrics

# Accuracy
print("Accurary: {0:.4f}".format(metrics.accuracy_score(y_test, rf_predict_test)))
print("")

#%% [markdown]
# ### Metrics

#%%
print("Confusion Matrix")
print("{0}".format(metrics.confusion_matrix(y_test, rf_predict_test)))
print("")

print("Classification Report")
print(metrics.classification_report(y_test, rf_predict_test))

#%% [markdown]
# ## Retrain = Logistic Regression

#%%
from sklearn.linear_model import LogisticRegression

lf_model = LogisticRegression(C=0.7, class_weight="balanced", random_state=42)
lf_model.fit(x_train, y_train.ravel())

#%% [markdown]
# ### Performance on Training data

#%%
# predict values using the training data
lf_predict_train = lf_model.predict(x_train)

# import the performance metrics library
from sklearn import metrics

# Accuracy
print("Accurary: {0:.4f}".format(metrics.accuracy_score(y_train, lf_predict_train)))
print("")

#%% [markdown]
# ### Performance on Testing data

#%%
# predict values using the training data
lf_predict_test = lf_model.predict(x_test)

# import the performance metrics library
from sklearn import metrics

# Accuracy
print("Accurary: {0:.4f}".format(metrics.accuracy_score(y_test, lf_predict_test)))
print("")

#%% [markdown]
# ### Metrics

#%%
print("Confusion Matrix")
print("{0}".format(metrics.confusion_matrix(y_test, lf_predict_test)))
print("")

print("Classification Report")
print(metrics.classification_report(y_test, lf_predict_test))

#%% [markdown]
# ### Setting regularization parameter

#%%
C_start = 0.1
C_end = 5
C_inc = 0.1

C_values, recall_scores =[], []

C_val = C_start
best_recall_score = 0
while(C_val < C_end):
    C_values.append(C_val)
    lr_model_loop = LogisticRegression(C=C_val, class_weight="balanced", random_state=42)
    lr_model_loop.fit(x_train, y_train.ravel())
    lr_predict_loop_test=lr_model_loop.predict(x_test)
    recall_score=metrics.recall_score(y_test, lr_predict_loop_test)
    recall_scores.append(recall_score)
    if(recall_score > best_recall_score):
        best_recall_score = recall_score
        best_lr_predict_test = lr_predict_loop_test
        
    C_val = C_val + C_inc
    
best_score_C_val = C_values[recall_scores.index(best_recall_score)]
print("first max value of {0:.3f} occurred at C={1:.3f}".format(best_recall_score, best_score_C_val))

get_ipython().run_line_magic('matplotlib', 'inline')
plt.plot(C_values, recall_scores, "-")
plt.xlabel("C value")
plt.ylabel("recall score")

#%% [markdown]
# ## Retrain with class_weight='balanced' and C=0.3

#%%
from sklearn.linear_model import LogisticRegression

lr_model = LogisticRegression(C=best_score_C_val, class_weight="balanced", random_state=42)
lr_model.fit(x_train, y_train.ravel())

#%%
from sklearn.linear_model import LogisticRegressionCV
lr_cv_model = LogisticRegressionCV(n_jobs=-1, random_state=42, Cs=3, cv=10, refit=False, class_weight="balanced", max_iter=500)  # set number of jobs to -1 which uses all cores to parallelize
lr_cv_model.fit(x_train, y_train.ravel())

#%% [markdown]
# ### Performance on Testing data

#%%
# predict values using the training data
lr_predict_test = lr_model.predict(x_test)

# import the performance metrics library
from sklearn import metrics

# Accuracy
print("Accurary: {0:.4f}".format(metrics.accuracy_score(y_test, lr_predict_test)))
print("")

#%% [markdown]
# ### Metrics

#%%
print("Confusion Matrix")
print("{0}".format(metrics.confusion_matrix(y_test, lr_predict_test)))
print("")

print("Classification Report")
print(metrics.classification_report(y_test, lr_predict_test))
print(metrics.recall_score(y_test,lr_predict_test))


#%%
import joblib  
joblib.dump(lr_cv_model, "./data/pima-trained-model.pkl")


# %%

Do gather on the last cell.

Expected:
Multiple cells.

Actual:
One cell.

Gather should support ability to automatically group imports at the top of the resulting file

Using this script, run in order:

# %%
import time
t0 = time.clock()
#%%
import sys
print(sys.version)
#%%
print(sys.version + str(t0))

Then Gather the last cell.

The result will be:

# %%
import time
t0 = time.clock()
import sys
print(sys.version + str(t0))

If I would have used the interactive window to type these lines/cells, I would have expected my Gather to lump "import time" and "import sys" to the top of the resulting file.

Support virtual workspaces

๐Ÿ‘‹ Hi there, Martin here, from the VS Code team.

Recently we've announced the Remote Repository feature that lets you browse and edit files and folders directly on GitHub.

Open Remote Repository... opens VSCode on a folder or workspace located on a virtual file system. We call this a virtual workspace. We observed that not all extension support this well, either because they can not, or they haven't thought about it.

It would be fantastic if you could test whether your extension can handle virtual workspaces:

Check out the Virtual Workspaces Extension Author Guide on how to do that.

When done, set the new virtualWorkspaces capability in your 'package.json'.

{
  "capabilities": {
    "virtualWorkspaces": true | false
  }
}
  • Use "virtualWorkspaces": true if your extension is prepared for virtual workspaces
  • Use "virtualWorkspaces": false if your extension should be disabled when a virtual workspace is opened

For questions and comments please use the Virtual Workspaces Tracking Issue.

Thanks for the support and the great work! โค๏ธ

"Exception at Activate" error for "Gather" extension, not sure how to resolve?

Environment data

  • VS Code version: 1.60.0
  • Jupyter Extension version (available under the Extensions sidebar): v2021.8.2031190714
  • Python Extension version (available under the Extensions sidebar): v2021.9.1191016588
  • OS (Windows | Mac | Linux distro) and version: macOS 11.5.2
  • Python and/or Anaconda version: 3.9.6
  • Type of virtual environment used (N/A | venv | virtualenv | conda | ...): virtualenv (via Poetry)
  • Jupyter server running: N/A? (I'm not sure, more details below)

Problem statement

I'm opening this issue here because that's where the error I encountered pointed me to

When launching a Python project that is using Poetry to manage dependencies (honestly not sure if this is applicable, but I only use Poetry projects these days), I get an error at the bottom left that says Gather: Exception at Activate Please reload VS Voce:

CleanShot Code 2021-09-02 at 20 15 32

I reload VS Code, restart, etc., and it doesn't seem to make this error go away. Is there a way to look at more detail about the error that's being encountered? I don't really understand what "Gather" is, and there's no direction in the pop-up to let the user (me) look for additional logging about what's wrong.

I can reproduce this reliably even when I disable all extensions and just enable this Gather extension manually (after enabling Python/Jupyter - Python/Jupyter seem to enable fine though).

Tooltip ignoring "Gather To Script" setting

Hi all,

When "gather.gatherToScript": true, I would expect the tooltip of the "Gather" button above cells in notebooks to reflect the setting. Instead, the tooltip shows

"Gather the code required to generate this cell
into a new notebook"

regardless of the setting.

Screenshot to illustrate:
Screenshot 2020-12-02 at 19 16 58

gathering into a script returns only one cell

-check if that was the case before and if so
-return the script with cell markers

Here's the input:
First cell:

%% Basic Imports

import numpy as np
import pandas as pd
import matplotlib.pyplot as plt

Second cell:

%% Matplotlib Plot

x = np.linspace(0, 20, 100)
plt.plot(x, np.sin(x))
plt.show()

I get one cell when gathering
Result:

%%

import numpy as np
import matplotlib.pyplot as plt
x = np.linspace(0, 20, 100)
plt.plot(x, np.sin(x))
plt.show()

Errors when the extension is installed with notebooks already opened

With native notebooks:
It throws an exception (probably when adding the button) and the only way to fix it is by reloading.

In general:
A gather instance only gets initialized when a kernel is started. If the kernel started before the extension is installed, the button will show the message to 'run cells before gathering' until the user closes and reopens the notebook. Not even restarting fixes it.

Support Workspace Trust

Hello ๐Ÿ‘‹ I'm from the VS Code team.

Recently, we have been exploring a security feature we refer to as Workspace Trust. This feature is intended to centralize and unify a security conscious decision required by a variety of VS Code features. With workspace trust, the user will be able to declare whether or not they trust the folder that is opened in VS Code before these features are executed.

Why you should care

Your extension is incredibly popular with VS Code users! We want to make sure that those users have a delightful experience with workspace trust and that includes extension authors deciding how much of their extension is supported in an untrusted workspace.

Workspace Trust experience

You can enable the feature with the following setting security.workspace.trust.enabled. Once enabled, you will see the following dialog when opening folders in VS Code.

Workspace Trust Startup Dialog

This dialog is important for allowing the user to make a decision early and understand the impact of their decision. Once you understand the feature, you may want to customize when to display the dialog using the setting security.workspace.trust.startupPrompt.

You can follow the development of Workspace Trust and provide feedback in issue #106488.

Workspace trust API

First off, all of what I am about to say can be found in issue #120251. That issue will include discussion of the feature and any updates to the feature.

The Workspace Trust extension API is now in stable. This allowed us to release the first cut of our guide for onboarding your extension to Workspace Trust. The API is small, so here is a quick look.

You can declare your extension to provide complete, partial or no support in untrusted workspaces using the untrustedWorkspaces capability in package.json.

The following example declares that the extension is supported completely in untrusted workspaces. In this case, the extension is enabled in untrusted workspaces.

"capabilities": {
  "untrustedWorkspaces": {
    "supported": true
  }
}

The next example declares that the extension is not supported in untrusted workspaces. In this case, the extension is disabled in untrusted workspaces.

"capabilities": {
  "untrustedWorkspaces": {
    "supported": false
  }
}

The third option is to declared limited support. There are three tools provided to you when you select the limited option.

First, if you have a setting that can be configured in the workspace but requires the workspace to be trusted in order to apply the workspace value, then you can include the setting using restrictedConfigurations array property in untrustedWorkspaces object. Doing so, VS Code will ignore the workspace value of these restricted settings when your extension reads these settings values using the VS Code Workspace Configuration API.

The following example declares the settings that are restricted in untrusted workspaces.

"capabilities": {
  "untrustedWorkspaces": {
    "supported": "limited",
    "restrictedConfigurations": [
      "markdown.styles"
    ]
  }
}

Next, you can also check and listen if the current workspace is trusted or not programmatically using the following API:

export namespace workspace {
  /**
   * When true, the user has explicitly trusted the contents of the workspace.
   */
  export const isTrusted: boolean;
  /**
   * Event that fires when the current workspace has been trusted.
   */
  export const onDidGrantWorkspaceTrust: Event<void>;
}

Lastly, you can hide commands or views declaratively with the isWorkspaceTrusted context key in your when clauses.

A far more detailed guide on how to onboard which will be updated as we receive feedback can be found in issue #120251.

Rollout plan

Workspace Trust will remain disabled for the month of May, but we are planning on enabling this by default in the future. To prepare for that day, we would love for you to try it out and provide feedback.

We'd love your feedback

Since this issue was created in an automated fashion, we won't be monitoring the responses in this issue (our notifications would explode!). Instead we ask you to drop questions, and feedback in issue #120251 as we've mentioned above.

We're excited to see what you do with workspace trust!

Native Notebooks - Multiselect Updated

When multiselect is enabled:

  • Remove the Gather action/icon from the cell toolbar.
  • Remove "Gather code" from the cell toolbar overflow menu and the right click menu on a cell.

Gather + Multiselect

Suggestion:
If multiselect is enabled and a user Gathers on multiple cells, it could behave like below.

Example:
A depends on cell 2*, B depends on cell 2* and 5*.
Gather with order maintained and remove duplicates if a line of code contributes to both Gathered cells.
image

Gather takes over a second to activate

  1. Install the Gather extension
  2. Open a notebook (ipynb)
  3. Run the Developer: Show Running Extensions

Most other extensions are under 300ms, including Python and Jupyter.

image

Gather took a few minutes for a super simple cell

Environment data

  • VS Code version: Stable 1.53.3
  • Gather Extension version (available under the Extensions sidebar): Latest marketplace
  • Jupyter Extension version (available under the Extensions sidebar): Point Relaese
  • Python Extension version (available under the Extensions sidebar): Latest Dev
  • OS (Windows | Mac | Linux distro) and version: Mac
  • Python and/or Anaconda version: 3.8 Virtual Env

Expected behaviour

here's the cell

def x():
	print("123")
  • RUn this cell
  • Click gather icon & nothing happens, i get the following
    Screen Shot 2021-02-24 at 16 00 04
IPynb file here
{
 "cells": [
  {
   "cell_type": "code",
   "execution_count": 4,
   "metadata": {},
   "outputs": [
    {
     "data": {
      "text/plain": "'/Users/donjayamanne/Desktop/Development/crap/docBug/venvNew/bin/python'"
     },
     "execution_count": 4,
     "metadata": {},
     "output_type": "execute_result"
    }
   ],
   "source": [
    "import sys\n",
    "sys.executable"
   ]
  },
  {
   "cell_type": "code",
   "execution_count": 6,
   "metadata": {},
   "outputs": [],
   "source": [
    "def x():\n",
    "\tprint(\"123\")"
   ]
  },
  {
   "cell_type": "code",
   "execution_count": 3,
   "metadata": {},
   "outputs": [
    {
     "name": "stdout",
     "output_type": "stream",
     "text": [
      "123\n"
     ]
    }
   ],
   "source": [
    "x()"
   ]
  },
  {
   "cell_type": "code",
   "execution_count": null,
   "metadata": {},
   "outputs": [],
   "source": []
  }
 ],
 "metadata": {
  "kernelspec": {
   "display_name": "Python 3.8.2 64-bit ('venvNew')",
   "metadata": {
    "interpreter": {
     "hash": "f555e90eceaae9b83c0612c3310e4a681596a148c4a7ba80e048409401f555cc"
    }
   },
   "name": "python3"
  },
  "language_info": {
   "codemirror_mode": {
    "name": "ipython",
    "version": 3
   },
   "file_extension": ".py",
   "mimetype": "text/x-python",
   "name": "python",
   "nbconvert_exporter": "python",
   "pygments_lexer": "ipython3",
   "version": "3.8.2"
  },
  "orig_nbformat": 2
 },
 "nbformat": 4,
 "nbformat_minor": 2
}

Support local file imports

Support local file imports

It would be nice to generate code for local file imports, eg:

icecream.py

def cream():
  return "cream"

from notebook

from icecream import cream
c = cream()

Functions not showing up in Gathered notebook

Steps to Reproduce

  1. Create function
  2. Use function
  3. Gather on cell that uses function

Expected Behavior

Function that is created and used should be pulled into Gathered notebook

Actual Behavior

Function used code is lost and creates error in Gathered notebook

Input

image

Gathered Output

image

Recommend Projects

  • React photo React

    A declarative, efficient, and flexible JavaScript library for building user interfaces.

  • Vue.js photo Vue.js

    ๐Ÿ–– Vue.js is a progressive, incrementally-adoptable JavaScript framework for building UI on the web.

  • Typescript photo Typescript

    TypeScript is a superset of JavaScript that compiles to clean JavaScript output.

  • TensorFlow photo TensorFlow

    An Open Source Machine Learning Framework for Everyone

  • Django photo Django

    The Web framework for perfectionists with deadlines.

  • D3 photo D3

    Bring data to life with SVG, Canvas and HTML. ๐Ÿ“Š๐Ÿ“ˆ๐ŸŽ‰

Recommend Topics

  • javascript

    JavaScript (JS) is a lightweight interpreted programming language with first-class functions.

  • web

    Some thing interesting about web. New door for the world.

  • server

    A server is a program made to process requests and deliver data to clients.

  • Machine learning

    Machine learning is a way of modeling and interpreting data that allows a piece of software to respond intelligently.

  • Game

    Some thing interesting about game, make everyone happy.

Recommend Org

  • Facebook photo Facebook

    We are working to build community through open source technology. NB: members must have two-factor auth.

  • Microsoft photo Microsoft

    Open source projects and samples from Microsoft.

  • Google photo Google

    Google โค๏ธ Open Source for everyone.

  • D3 photo D3

    Data-Driven Documents codes.