Code Monkey home page Code Monkey logo

nodejs-project-night's Introduction

NodeJs Project Night

License: MIT

Description goes here...

Demo

Live version on Heroku

Table of contents

Getting Started

These instructions will get you a copy of the project up and running on your local machine for development and testing purposes.

Note: Please make sure you have all the prerequisites program listed installed on your local machine.

Prerequisites

  • Node.js
  • Npm

Installing

  1. Fork this repository on Github.
  2. Clone your forked repository onto your local computer.
  3. Use $ cd nodejs-project-night to move into the project directory.
  4. Use $ npm install to install the required depency.
  5. Use $ npm start to start a local server on your machine.
  6. Open your browser and go to http://localhost:8000/ to view the server.
  7. Explore and enjoy!

Contributing

  1. Use $ git checkout -b beta to create and move to beta branch.
  2. Use $ git branch to make sure that you are on beta branch before making any new features/changes.
  3. After commiting any new features/changes locally; Use $ git push -u origin beta to push the changes to your forked respository.
  4. To contribute back to the main repository, you will have to create a new Pull Request
  5. Happy Coding!

Built with

  • HTML5
  • CSS3
  • JavaScript (ES6+)
  • NodeJs

Contributors

nodejs-project-night's People

Contributors

codingwithdan avatar dex-thedev avatar harris2310 avatar istarlet avatar jericashall avatar joedravarol avatar michaelpachec0 avatar mire-web avatar r-dev03 avatar sarahmelki avatar thecornisians avatar

Stargazers

 avatar  avatar  avatar  avatar  avatar

Watchers

 avatar  avatar  avatar

nodejs-project-night's Issues

Front-end planning.

This will be used as conversation on how the back-end will be structured and will reference other issues pertaining to more specific bugs/enhancements. The specific issues that will be referenced here will talk about what the front-end will do and can then be assigned individually.

Issues to tackle:

Instructions for commiting

Create Instructions for a workflow in read-me (or another file), the rough idea is

  1. Fork this repository to your account (done in GitHub)
  2. Clone from your repository url ( git clone <forked repository url>)
  3. Make a branch to work on the code (ideally name it based on what you are trying to contribute, like "add license" or "front end") (git checkout -b <branch name> master)
  4. Make changes & add the changes to the staging area.
  5. Commit changes to that branch git. (git commit)
  6. Push said changes to your GitHub repository (git push)
  7. When are ready to contribute back to the main repository then send a pull request to my repositories master branch (on GitHub)
  8. Once that gets merged then fetch and merge from your GitHub master branch (on your repository in GitHub). You also can delete the branch that the PR was used for (not needed anymore since the commits are already in the master branch).
  9. Pull new changes locally (git pull)
  10. If you want to commit another set of changes, after updating your local master branch follow 3 on.

Update/Remove CSS directory

The CSS directory should not be in the root file, it should be either move into the public folder or remove entirely if we do not need it as we already have an app.css file within public folder.

Implement api

The api endpoint currently does nothing, needs to be filled out. Entrypoint is here:

if (page === "/api"){
// TODO: handle api here
} else {
We need to decide on what we want to return in consideration on what our node app will be.

Futher work on extension parsing

Regarding this line

let cType = fileTypes[file.split('.')[1]] //splits the string into an array of 2 elements, from wherever '.' is and returns the extension

Im requesting a couple of changes

  • Ideally the comment should be in its own line
  • There can be some instances where files can have a . in a filename i.e file.extrabit.html, this can be fixed by breaking up the one liner setting a variable to the split method. We can then use length-1 to use the last entry in the array. This ensures that we only take the suffix (the extension) from the file path.

UI FIX: Pokemon image is too small.

The pokemon image that is displayed in the card is too small as shown below:

UI Issue

Propose fix:
Note: If you can, you should use the existing CSS class provided and modify the said class to solve this problem.

  • The pokemon image should have the same height and width as the card (Parent); ideally should look like the image shown below:

Pokemon card

REFACTOR: Event handler should be contained in a function.

The code below should be refactor into its own function so that we can call it on game start or game reset.

// this function toggles the pokemon card on click
let cards = document.querySelectorAll('.card');

cards.forEach(card => {
    card.addEventListener('click', ()=>{
        if(!(card.classList.contains('visible'))){
            card.className = 'card visible'
        }else{
            card.classList = 'card'
        }
    })
})

Replace regex with something more descriptive

Self explanatory from the title. Code in question is a non-descriptive regex.

let cType = fileTypes[file.replace(/^\/?.*?\./g,"")]

While this saves a line of code, its extremely hard to read and will probably create headaches down the road. Ideally break that out into a more descriptive line of code. A possible idea would be to use string split (mdn link) to split on "." since file-path is in the form of public/file.ext and use the second entry in the array (the ext part).

If there is a more descriptive way to do this I am all ears. For now I am considering this a bug.

Dockerize App

Implement dockerfile and dockerignore so to that it can be easily deployed.

Back-end planning.

This will be used as conversation on how the back-end will be structured and will reference other issues pertaining to more specific bugs/enhancements. The specific issues that will be referenced here can then be assigned individually.

Issues to tackle:

Rendering the pokemon cards to the DOM.

Features:

  • Render the back side of the pokemon cards into the DOM.
  • Handle the logic for revealing the pokemon after the user click on the card. (Flip the card so that the faceside is shown)

Create RESET button

We need a button created that says RESET. This button will be used to reset the game back to its original state.

Original State:
All cards are facedown

Button Needs

  • id = "resetbtn"
  • class = "btn"

License

Probably low priority but a license should be decided upon. Currently the project has a ISC license as the default because of npm init. Need to decide if the license is fine or it should be changed to something like GPL/AGPL or MIT.

REFACTOR: Rendering Pokemon cards to DOM.

Propose refactor:

  • Replace dummy data with data from backend.
  • Add helper function to render pokemon cards in the randomized order provided by response data.
  • Remove cards from HTML as it will be generated in the JavaScript.
  • Remove .dance CSS class to avoid visual bug.

Duplicate copies of front-end code

So its come to my attention that #45 committed a copy of the front-end to the root folder. The back end code code wont serve this since it will only look at the files that are in the public folder and only in the public folder. Since there have been new commits to the front end, there is divergence. In this case the front end developers need to decide whether to keep and if so what to keep from what this pr merged.

Creating the base memory game structure.

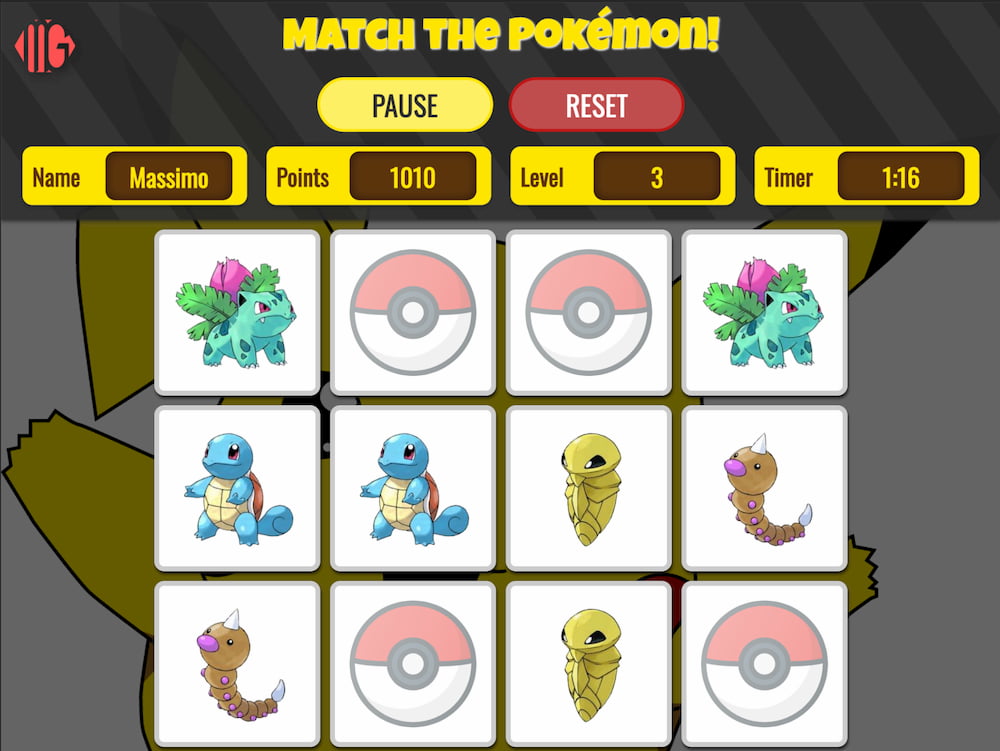
Make the basic HTML structure and some basic styling so that we have a 4/4 grid cells display in the center on the screen. You could try to make it mobile responsive but that isn't neccesary. So ideally it would look like something below without the header.

image info

Note: this was not an agreed layout design it just act as an inspiration/example. I think the group agreed on it being a pokemon card so something along that lines would be great.

Flipping animation to reveal the pokemon.

Self explanatory from the title. Though it requires #15 to be completed first.

It would be ideal to create the flipping animation in a new CSS-class so that there will not be any styling conflicts and we can add or remove the flipping animation by just adding the flipping class in JavaScript when neccesary.

@jericashall mention "you can pick if you'd like to work with JS or CSS animations."

Hosting the server

This will probably be a low priority since it's another hurdle we would have to go through. Though If we want to host the backend server online we could use something like Surge.sh or Heroku which Leon has mention on stream.

Documentation planning

This will be used as conversation on how the documentation will be structured and will reference other issues pertaining to more specifics bugs/enhancements. The specific issues that will be referenced here can then be assigned individually.

Issues to tackle:

Update README

Proposal:

  • Add a description on what our project is/does.
  • Update the contributor list to include: @thecornisians, @CodingWithDan and @Mire-web.
  • Add an acknowledgement section to acknowledge the Pokemon TCG API used for backend or other resources if applicable.
  • Add a gif/video of the project.

Documentation on merging

It has come to my attention that for more intricate issues, there have been issues with sending PRs to the repository.
I will outline 3 ways to create clean PRs and their pros and cons.

  1. Deleting and reforking from Upstream (this repository).
    I figure most of you know how to do this and probably are doing this.
  • Steps:

    1. Backup your work you have done.
    2. Delete your local and remote forks.
    3. Refork this repository and clone locally
    4. Create a new branch and then insert your updated code.
    5. Commit the code in question and publish a PR to this repository.
  • Pros:
    - Extremely easy to do
    - Can be automated
    - Do not have to worry about git getting in the way of committing

  • Cons:

    • Git isnt getting in the way when committing
      • Whenever there are mismatches between your branch and main master branch concerning changes, attention should be paid to such changes. There is usually a good reason why git complains about this.
      • There might be code that has changed, this way of doing things can possibly create a broken version of the repository if the code is not reviewed carefully
    • There is a much better way of doing this without reforking.
      1. we can update the master branch locally
      • git fetch origin master:master can be used to update the master branch even if you are not in the same branch
      1. save your work
      2. delete your branch
      • git branch -D <branch-name>
        • make sure you have saved your changes, any changes that are in your remote
      1. remake your branch
      • git checkout -b <branch-name> master
        • If you using the same branch-name as the deleted one, then you are going to use --force when pushing
      1. Insert your backed up code and commit it locally
      2. Now its time to push it to your repository
      • This is where if you named the branch the same as the deleted one where --force
      • Warning: Be careful this will tell git to ignore differences between what is on your local repository and the remote on github
      • If you are confident with that you are ready to push you can either push each branch one by one or push them all at the same time
        • the command to do them all at once is git push origin --all remembering that you need --force if your deleted branch and new branch are the same.
        • this ensures that your master and any branches you were working on are in sync with the remote
      1. You can then follow opening a PR using the site in github.
  1. Better way 1: using git merge.
    • Steps:
      1. Update the master branch locally
        • git fetch upstream master:master can be used to update the master branch even if you are not in the same branch
          • make sure that you have my branch set to upstream git remote add upstream [email protected]:MichaelPachec0/nodejs-project-night.git
      2. we merge the master into your working branch
        • git merge master --no-edit will do this
      3. There is a chance that there will be scary error messages. If so go back to vscode, there should be files in the explorer that will have a ! next to them, review the conflicting changes and decide you want keep the changes that master has (Accept Current Change) or if you want your code to overwrite whats currently in master (Accept Incoming Changes). Once you have fixed all the conflicts in a file, make sure you save the file and go to the next one. If you are unsure, you can contact me or ask in group chat and ask.
      4. At anytime if you feel like you made a mistake you can always back out
        • git merge --abort will do this for you and you can start over.
      5. Once all the conflicting changes are fixed go back to your terminal and let git know it can continue
        • git merge --continue --no-edit
      6. Now branch should be clean and ready to push.
      7. Time to open a PR on github.
    • Pros:
      • It is less prone to give you problems compared to the next way.
      • You dont need to go through all the hassle of deleting and reforking.
      • Git will warn you when there are conflicting changes.
    • Cons:
      • There is more work when merging.
      • Merging can be can have scary looking messages, and sometimes you dont know whether or not you overwrite whats on master.
      • There will be merge commits on top of your actual work, which might make it slightly annoying to review
  2. Better way 2: using git rebase.
    • Steps:
      1. Update the master branch locally
        • git fetch upstream master:master can be used to update the master branch even if you are not in the same branch
          • make sure that you have my branch set to upstream git remote add upstream [email protected]:MichaelPachec0/nodejs-project-night.git
      2. we merge the master into your working branch this time using rebase
        • git rebase master
      3. There very likely chance that rebase will complain output scary messages in the terminal. as with "Better way 1", use vscode to go over the changes.
      4. Once all the conflicting changes are resolved go back to your terminal and add the files that have edited
        • use git status to see which files have been marked as modified
        • git add \<file\> to add the files, or all at once using git add -u
      5. You are ready to tell git to continue.
        • git rebase --continue
        • This will open an editor in case you want to edit your commit
      6. Time to push.
      7. Making sure that everything worked, open a PR with the changes ready to be merged.
    • Pros:
      • Same as "Better way 1" except you will get more warnings
      • A big plus is that only the commits that matter get pushed, meaning no extra merging commits
    • Cons:
      • Same as "Better way 1" with the exception of getting more warnings and more work
      • Much more work, im not kidding on this

Logic to keep score

#28 Front-end JavaScript implementation of logic to keep the score between the two players.

Update node-fetch

According to node-fetch/node-fetch#1611 earlier versions of node fetch are vulnerable to DOS when the the user can manipulate the url referrer. While the user of this app wont be able to do this, it does not make sense to keep a vulnerable version when none of the changes affect usability.

Tasks to be done:

  • Create a branch where node-fetch is update to a non-vulnerable version
  • Test it and assess if there are any functionality issues.
  • If not then send a pr as is, else comment here and create a new issue about such issues with node-fetch which can then be referenced when a pr gets sent with fixes.

Recommend Projects

  • React photo React

    A declarative, efficient, and flexible JavaScript library for building user interfaces.

  • Vue.js photo Vue.js

    ๐Ÿ–– Vue.js is a progressive, incrementally-adoptable JavaScript framework for building UI on the web.

  • Typescript photo Typescript

    TypeScript is a superset of JavaScript that compiles to clean JavaScript output.

  • TensorFlow photo TensorFlow

    An Open Source Machine Learning Framework for Everyone

  • Django photo Django

    The Web framework for perfectionists with deadlines.

  • D3 photo D3

    Bring data to life with SVG, Canvas and HTML. ๐Ÿ“Š๐Ÿ“ˆ๐ŸŽ‰

Recommend Topics

  • javascript

    JavaScript (JS) is a lightweight interpreted programming language with first-class functions.

  • web

    Some thing interesting about web. New door for the world.

  • server

    A server is a program made to process requests and deliver data to clients.

  • Machine learning

    Machine learning is a way of modeling and interpreting data that allows a piece of software to respond intelligently.

  • Game

    Some thing interesting about game, make everyone happy.

Recommend Org

  • Facebook photo Facebook

    We are working to build community through open source technology. NB: members must have two-factor auth.

  • Microsoft photo Microsoft

    Open source projects and samples from Microsoft.

  • Google photo Google

    Google โค๏ธ Open Source for everyone.

  • D3 photo D3

    Data-Driven Documents codes.