front-blog's People
Contributors

Watchers
front-blog's Issues
全局拦截ajax请求
需求
拦截xmlhttprequest或者fetch,在请求发出去之前,修改请求的url。
例如现在有个www.test.cn/api/xxx的请求,需要将api前缀统一更换成/api/v1。通常可以通过修改请求库的baseURL来实现这个需求,但目前项目系统采用微前端部署,子应用特别多,逐一修改的成本太大。于是就考虑采用全局拦截的方式进行hack。
现状
ajax的底层实现有两种形式,也即XMLHttpRequest和fetch。
axios是对前者的封装,而fetch由于浏览器的支持情况不全(或者在老代码中),仍然会使用polyfill。这其中有以dva/fetch的输入输出流派:
如果import -> export 一下就可以称之为库,那可太得劲了。
graph LR;
dva/fetch --> mor[isomorphic-fetch]--Browser--> whatwg-fetch;
mor --Node--> node-fetch;
也有直接在浏览器使用whatwg-fetch的流派。不过在browser端,最终都是whatwg-fetch作为polypill。这里要多说一句,对于原生不支持fetch的runtime,whatwg-fetch也会使用XMLHttpRequest实现ajax请求。
兼容
根据不同的底层实现,兼容的方式也不太一样。
XMLHttpRequest
使用方式:
const request = new XMLHttpRequest()
request.open(method, url[,otherParam])
request.send()

request.on(xxx, xxx)api的使用形式就是异步callback的代表,正是因为原生的方式不好用,才衍生出了axios这种支持Promise的库。当然,axios底层仍然是使用的XMLHttpRequest,下面这个方式可以hack:
const open = XMLHttpRequest.prototype.open
XMLHttpRequest.prototype.open = function (method, url, ...other) {
  open.call(this, method, '/hack', ...other)
}
// 假设axios已经作为模块引入
axios('/demo')
// 最终请求的是/hack
fetch
如果当前环境支持fetch那么在window中会存在window.fetch的方法。polyfill库会先检查fetch方法是否已经存在,不存在的情况下才会重新定义。
whatwg-fetch的代码仓库是这个https://github.com/github/fetch
下面whatwg-fetch定义global.fetch的过程证明了这一点:
var global =
  (typeof globalThis !== 'undefined' && globalThis) ||
  (typeof self !== 'undefined' && self) ||
  (typeof global !== 'undefined' && global)

//sourcecode...
if (!global.fetch) {
  global.fetch = fetch
  global.Headers = Headers
  global.Request = Request
  global.Response = Response
}
globalThis是js针对不同runtime提供的一个获取全局对象的方法,在browser中,就是self;在node.js中就是global。
mdn: https://developer.mozilla.org/en-US/docs/Web/JavaScript/Reference/Global_Objects/globalThis
由于js的解析是单线程的,不考虑defer或async的情况下,js执行顺序由出现在dom中的顺序决定。
用户全局拦截的代码应该要早于fetch调用,并且还要晚于fetch-polyfill的加载。但不能确定在微前端中,第一次加载fetch-polyfill的时机。为了解决这个问题,首先考虑到的是将拦截的代码写到DOMContentLoaded事件回调中,即:
document.addEventListener("DOMContentLoaded", function(event) {
  // 确保fetch-polyfill已被任意形式加载
  const globalFetch = window.fetch
  window.fetch = function (url,...args) {
    return globalFetch.call(self, url,...args)
  }
});
在测试阶段,发现有种情况没有拦截到。在某个应用中有如下代码:
import fetch from 'dva/fetch'
fetch('/xxx')这个fetch执行之后,并没有进入上面的拦截逻辑中。通过分析dva/fetch模块的代码发现,其引用的isomorphic-fetch是通过如下方式暴露模块的:
源码地址:https://github.com/matthew-andrews/isomorphic-fetch/blob/master/fetch-npm-browserify.js
// fetch-npm-browserify.js
require('whatwg-fetch');
module.exports = self.fetch.bind(self);通过import fetch form 'dva/fetch',也就是引入的self.fetch.bind(null)。之前修改的window.fetch并不会影响binded fetch,可以通过以下例子来证明这一点:
// 1 whatwg-fetch 先确保fetch的定义
window.fetch = function () {
  console.log("old fetch");
};
// 2 isomorphic-fetch 导出 bind fetch
const bindFetch = window.fetch.bind(window);

// 3 ajaxInterceptor 重写 window.fetch
const oldFetch = window.fetch;
window.fetch = function () {
  console.log('new fetch')
  oldFetch();
};

bindFetch();
// old fetch通过DOMContentLoaded回调的方式拦截window.fetch看来是不行了。还是通过以上代码,假如将第三步调整到第二步之前,再来看看执行结果:
// 1 whatwg-fetch 先确保fetch的定义
window.fetch = function () {
  console.log("old fetch");
};
// 2 ajaxInterceptor 重写 window.fetch
const oldFetch = window.fetch;
window.fetch = function () {
  console.log('new fetch')
  oldFetch();
};
// 3 isomorphic-fetch 导出 bind fetch
const bindFetch = window.fetch.bind(window);

bindFetch();
// new fetch
// old fetch
事实证明,是可以的。在实际业务中,也可以控制步骤之间的执行顺序达到我们想要的效果:
// 拦截fetch,这段代码必须放在主应用入口js中,确保在引入dva/fetch之前执行
require('whatwg-fetch')
const globalFetch = window.fetch
window.fetch = function (url,...args) {
  return globalFetch.call(self, url,...args)
}
全文完。
useEffect防止内存泄露
在使用hooks Api的时候,常常会使用useEffect来模拟组件mount和update阶段所触发的钩子函数。假如在useEffect中有注册异步任务或者其他可能在组件卸载后还会执行的周期性任务,那么就必须在useEffect中返回对应的clear方法,否则会造成内存泄露,以及不必要的性能开销。
下面通过最近工作中的一个例子进行说明:
-
需求
在进入页面后,需要轮询接口,得到任务的执行状态。如果任务执行完毕,就要结束轮询。同时,在离开页面之后,也需要结束轮询。
-
代码
const clearableLoop = method =>
  function loop(...params) {
    // 1. 判断stop标记是否被置为true
    if (loop.stop) return
    // 2. 启动轮询方法
    ;(async () => {
      // 轮询方法可以返回true,表示主动结束轮询
      const stop = await method(...params)
      if (!stop) {
        // sleep 可以增加一个延迟,在这里是为了控制轮询的间隔
        await sleep()
        loop(...params)
      }
    })()
		// 3. 返回一个函数,调用后可以将stop标记置为true
    return () => {
      loop.stop = true
    }
  }
// loopMachine 是一个函数,并且这个函数有个stop的属性,其返回值还是一个函数,调用后可以将loopMachine的stop属性置为true
const loopMachine = clearableLoop(async () => {
  const { response } = await request(/**请求配置**/)
  // 终止轮询
  if (response.stepStatus === 'done')
    return true
})

useEffect(() => {
  // clearMachineLoop 这个函数执行后会将stop标记置为true
  const clearMachineLoop = loopMachine()
  // useEffect的返回值(还是一个函数)会在组件被卸载的时候执行。
  return () => {
    // 已卸载,执行clearMachineLoop
    clearMachineLoop()
  }
}, [])
shell脚本实现git批操作
基于多分支模型的开发规范中,经常会有合并分支、推送分支等等操作。不同的操作要切换到不同的分支行进行。举个例子:
基于production分支checkout出feature-a分支,开发完之后需要合并到testing分支,并推送到远端,触发ci/cd构建任务。操作如下:
[production] git checkout -b feature-a
[feature-a] # coding
# 重复的部分-开始
[feature-a] git checkout testing
[testing] git merge feature-a
[testing] git push
# 此时测试提了一些bug,接下来的操作是
[testing] git checkout feature-a
# 重复的部门-结束
[feature-a] # coding
# 重复以上步骤
对于一个爱偷懒的程序员来讲,重复操作是不能接受的,于是就有了下面的简单脚本:
gitt
#!/bin/bash
current=`git branch --show-current`

echo -n "enter commit msg:"
read msg

git commit -am "fix: $msg"

echo -n "enter target branch:(testing)"
read target_branch

if [ -z "${target_branch}" ];then
    target_branch=testing
fi

git checkout $target_branch
git merge $current -Xtheirs --no-edit
git push

git checkout $current
将以上脚本放到系统path目录中,并增加可执行权限即可。
mv gitt /use/local/bin/gitt
chmod +x /use/local/bin/gitt
还是上面的那个那个工作流,在coding完之后,只需要这么做:
[feature-a] gitt
# enter commit msg: xxx
# enter target branch:(testing)xxx #不填则默认是testing分支
# gitt会自动执行合并代码,push代码的操作,并最终会切回到feature-a分支
[feature-a] # 继续coding吧~
js模块简介(1)
背景
模块(module)是日常开发中回避不了的部分,js生态中,模块规范就有好多种。得益于打包工具,日常写代码的时候经常是require和import杂在一起写,但开发者真的清楚自己在写什么吗?
我是比较懵逼的
所以我总结了这篇文章,试图给自己解释清楚。
不同的规范
CommonJS
也叫做cjs,Node.js实现了cjs规范。
一定要注意,Node.js是runtime(运行时)而不是语言,Node.js中实现了CommonJS规范。
在2013年的时候,有大佬号称Node.js中CommonJS已死,但似乎到目前为止,使用CommonJS依然是主流。
使用示例:
// a.js
module.exports = {
  a: () => {}
}

// b.js
exports.b = () => {}

// c.js
const { a } = require('./a.js')
a()
// or
const moduleA = require('./a.js')
moduleA.a()

const { b } = require('./a.js')
b()以上就是cjs的基础用法了,通过exports或者module.exports定义模块的输出,再使用require导入模块。cjs有以下特点:
-
通过 require引入模块
-
模块以文件为单位,一个文件通常就是一个模块
-
模块的输出是
module.exports,可以是js中的一切值
模块机制
下面结合源码,分析一下cjs的模块机制。首先是require,它是用来引入模块的方法。require方法的定义为:
Module.prototype.require = function(id) {
 	// ...
  return Module._load()
}调用之后会接着调用Module._load,这个是定义在Module类上的静态方法:
Module._load = function() {
  // 根据cjs的模块查找规则,找到模块的位置
  var filename = Module._resolveFilename()

  // 判断是否已经加载过模块,如果加载过,则直接返回
  // 这里是解决循环依赖以及解释cjs中模块以引用方式导出的关键代码
  var cachedModule = Module._cache[filename]
  if(cachedModule) {
    return cacheModule.exports
  }

  // 判断是否为原生模块,是的话直接返回
  //...

  // 模块初始化
  const module = new Module()

  // 是否为主模块
  //...

  // 加入缓存,值得注意的是,到这里的时候,其实还没有进入模块代码的加载,但是已经将module加入缓存了,
  // 如果有循环依赖的出现,那么在后续的加载中,require会直接拿到模块的`exports`,并且是未初始化的。
  Module._cache[filename] = module

  // 尝试加载模块
  tryModuleLoad(module, filename)

  return module.exports
}_load方法做了一系列的判断逻辑,除了原生模块和主模块,对普通模块来讲,主要有以下几点:
1、 模块会进行缓存,只会加载一次
2、已被require过的模块,会对应一个module实例,并缓存到Module._cache中
3、模块导出的内容均为module.exports对象的引用
4、循环依赖可能不会立马拿到预期的值
5、模块是同步的
继续往下看,搞清楚模块到底是如何加载的,tryModuleLoad方法使用try...catch...对模块加载的实际方法进行了一个包装,实际上调用的是Module.prototype.load方法:
Module.prototype.load = function(filename) {
  // 根据文件名后缀,调用不同的loader(这个设计还是有点意思的)
  var extension = findLongestRegisteredExtension(filename)
  Module._extensions[extension](this, filenam)

  // 如果node线程启动的时候有experimentalModules 参数,那么还会进入ESM相关逻辑
  // ...
}
从代码中可以了解到,node支持的文件类型有四种,即:
1、js
2、json
3、node
4、mjs
如果是js文件,则会进入Module.prototype._compile方法:
Module.prototype._compile = function (content, filename) {
  // 将模块的内容,即content进行一层包裹。这里很关键,可以解释为什么在模块中可以使用__filename,require等变量,同时,cjs是以文件来确定模块边界的
  content = Module.wrap(content)

  // 将content转换成js,也就是得到一个包裹了模块内容的函数
  var compiledWrapper = vm.runInThisContext(content, {...options})

  // 定义模块所在文件夹的名称
  var dirname = path.dirname(filename)
  // 创建require函数
  var require = makeRequireFuntion(this)

  // 忽略其他逻辑
  // ...
  const result = compiledWrapper.call(this.exports, this.exports, require, this, filename, dirname)
  return result
}

// 为了便于理解,将Module.wrap的代码以及makeRequireFuntion的代码一并列出来
Module.wrap = function (script) {
  return Module.wrapper[0] + script + Module.wrapper[1]
}
Module.wrapper = [
  '(function (exports, require, module, __filename, __dirname) { ',
  '\n});'
]
function makeRequireFunction(module) {
  const Module = module.constructor
  function require(id) {
    try{
      // 其实还是Module.prototype.require
      module.require(id)
    } finally {

    }
  }
  // 注入全局Module上的某些属性,便于在模块中直接使用
  require.extensions = Module._extensions
  require.cache = Module._cache

  return require
}
通过以上分析,cjs几个比较重要的知识点就都好理解了。下面再通过一个例子,对之前的分析做一个验证。
// index.js
const moduleA = require('./a.js')
moduleA.sayA()
console.log(moduleA.name)

// a.js
const moduleB = require('./b.js')
exports.name = 'a'
exports.sayA = moduleB.sayA

// b.js
const moduleA = require('./a')
const { name } = require('./a')
console.log('in b', moduleA, name)
exports.sayA = function () {
  console.log('in b function', moduleA, name)
  moduleA.name = 'in b , a name'
}

// 执行 node index.js,输出结果如下
// ...
// ...
// 可以先想想,然后再看结果


// node -> index.js
// 加载模块A,第一次加载,因此会进入A模块中执行代码 index.js -> a.js
// A:L1: 加载模块B,第一次加载,同样进入B模块执行代码 a.js -> b.js
// B:L1: 加载模块A,第二次加载(循环依赖),全局缓存中存在模块A,因此直接返回A模块,moduleA = a.exports
// B:L2: 加载模块A,第三次加载,。。。,直接返回A模块,name = a.exports.name
// B:L3: 打印 in b {} undefined
// B:L4: 定义B模块的输出,B模块执行完毕,退回到A模块,b.js -> a.js
// A:L2-L3: 定义A模块的输出,A模块执行完毕,退回到index.js,a.js -> index.js
// index:L2:执行moduleA.sayA,也就是module.sayA,输出 in b function {name: a, sayA: [Cunction]} undefined
// 并且对moduleA.name进行修改,修改后的值为 in b , a name
//index:L3 输出 in b , a name
gitlab-ci中yarn构建任务提速
在以 ci/cd 工具作为自动化构建流程已经是业内的标准了,对于企业而言使用较多的是 gitlab-ci。
ci/cd 工具的好处自然很多,但是怎么要得更好?我觉得“用好”的标准有以下几点:
1、速度快
2、速度快
3、速度快
以前端工程为例,一般的步骤就是【安装依赖】、【打包】、【部署】。如果想要提速,那么主要应该从安装依赖和打包过程下手。
安装依赖
假设我们使用的包管理器是 yarn,那么如何从安装依赖的角度来提效呢?
还是得从 yarn 安装依赖的步骤开始拆解:
yarn install: https://yarnpkg.com/cli/install
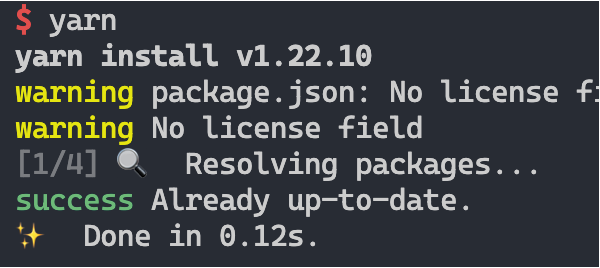
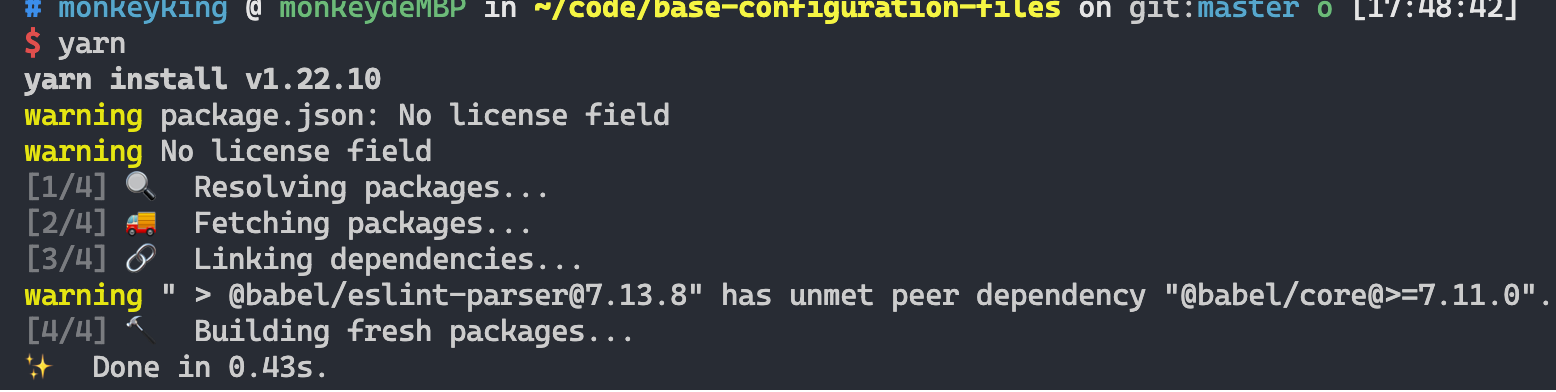
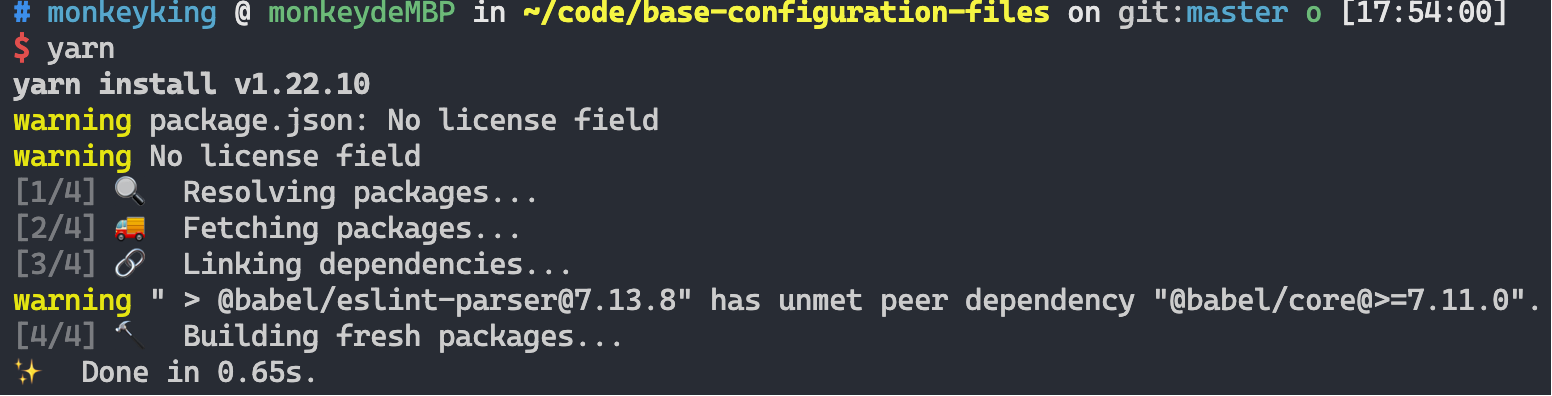
文档指出,install 的过程有以下四步:
Resolution: First the package manager will resolve your dependencies. The exact way a dependency version is privileged over another isn't standardized outside of the regular semver guarantees. If a package doesn't resolve to what you would expect, check that all dependencies are correctly declared (also check our website for more information: ).

Fetch: Then we download all the dependencies if needed, and make sure that they're all stored within our cache (check the value of cacheFolder in yarn config to see where are stored the cache files).

Link: Then we send the dependency tree information to internal plugins tasked from writing them on the disk in some form (for example by generating the .pnp.cjs file you might know).

Build: Once the dependency tree has been written on the disk, the package manager will now be free to run the build scripts for all packages that might need it, in a topological order compatible with the way they depend on one another.
简单点讲,第一步的时候会根据 package.json 文件中的依赖关系确定每个软件包所需要安装的版本。这里涉及到语义化版本的概念以及npm循环依赖的问题,所以这一步也会比较耗时。解决这一步耗时的方法也比较简单,使用 yarn 默认提供的 yarn.lock 文件就可以了,所以 yarn.lock 文件一定要放到 code base 中。
到了第二步的时候,yarn 会下载所有的软件包。这里 yarn 会将下载的软件包保存在全局 cache 目录中,如果下次下载同一份软件包,就可以直接读取缓存了。在缓存存在的情况下,也可以大量减少安装的时间。
其实在前两步中,yarn 默认提供了优化策略。换到 ci/cd 环境,第二步的缓存情况有点特殊。
在 ci/cd 环境中,用于执行构建任务的环境被称为 runner,他是一个 docker 容器。一般情况下,执行完任务之后,容器资源会被释放,所以 yarn 默认的缓存会在下次任务执行的时候失效。
所以要想办法把 yarn 的缓存保存起来,以便下次使用的时候可以恢复。通过最近的尝试,我知道两种方法:
使用 cache 在 job 之间共享缓存
before_script:
	- yarn config set cache-folder .yarn
stages:
  - install
install:
	state: install
  cache:
    key:
      files:
        - package.json
    paths:
      - .yarn
  script:
  	- yarn
以上是一个配置示例。将 yarn 的 cache 目录设置为当前项目下的 .yarn 目录,在安装依赖的时候缓存文件就可以保存到 .yarn 目录了。然后通过 cache 的配置,最终会以 package.json 文件的 hash 作为本次缓存的 key 将缓存保存起来。注意,保存缓存的方式可以由gitlab-ci实例进行个性化配置。例如我司就是将缓存保存到内部的 fds 系统中。
更多的 cache 配置可以参考 gitlab-ci 的配置文档。
cache 的方式可以解决缓存的问题,但……解决问题还不够。在实际使用过程中,.yarn 缓存过大之后,fds 传输时间比较长(1G的缓存需要30秒左右)。下面提到的一个方式可以更进一步优化缓存。
使用共享数据卷
在咨询了负责 gitlab-ci 的同学之后,被告知在文件系统中有一个共享数据卷的存在。对于任意 runner 启动的任务中都可以对这个数据卷进行访问。数据卷的路径如下:
/root/.npm
有了这个外部数据卷,也就解决了缓存的保存问题。同时,由于数据卷可以理解为本地存储,所以也不存在网络传输上的时间消耗。下面提供了这种方式下的 gitlab-ci 配置方式:
variables:
  CACHE_DIR: /root/.npm/.my-cache
  PROJECT_CACHE_DIR: ${CACHE_DIR}/${CI_PROJECT_ID}
before_script:
  - mkdir -p ${PROJECT_CACHE_DIR}/node_modules
	- yarn config set cache-folder ${CACHE_DIR}/yarn
  - ln -sf ${PROJECT_CACHE_DIR}/node_modules/ ./
stages:
  - install
install:
  stage: install
  script:
  	- yarn
在以上配置中,我们将 yarn 的 cache 目录直接指定为 /root/.npm/.my-cache/yarn,那么在不同的任务,甚至是不同项目下的任务中,均可以使用到缓存文件。这一步是没有任何网络传输的。
以上配置中还有对 node_modules的缓存策略,这个下文会再进行解释。
使用本地数据卷的好处就是可以减少因网络传输造成的不确定因素。
接下来是第三、四步的优化。设想一个情景,如果我们将 node_modules 也缓存起来,那么是不是就可以直接完成安装过程了?答案是肯定的。其原因就是在 node_modules 存在的时候,第三、第四步也可以很快。下面简单分析一下原因。
通过yarn.lock文件可以记录每个软件包的 resolved 地址。在 yarn 安装完成依赖之后会将 .yarn-integrity文件写入 node_modules 目录下。在下次安装依赖的时候对两个文件中保存的 resolved 地址进行比较,如果每个包的地址都是一致的,那么就可以快速结束本次安装过程。
如图,在第一步的 resolving 阶段已经判断依赖完全匹配,就可以结束本次安装了。如果将 .yarn-integrity 中的某个软件包地址修改一下,再进行安装的效果就变成下面这样了。
yarn 会执行完四个步骤,但由于我们并未删除软件包,所以最终安装的时间也很短。(和上面比较起来就是多走了三个步骤)。假如将 .yarn-integrity 修改后,同时删除某些软件包,会是什么效果呢?
比之前稍慢了一点点。可见,yarn在发现 .yarn-integrity 不匹配后,会执行接下来的三步,也就是会将删除掉的软件包重新安装到 node_modules 目录。但依然很快!
接下来我们尝试将 node_modules 目录下除了 .yarn-integrity 外的文件全部删除。再安装的时候,yarn 竟然直接跳过了。

但此时 node_modules 目录是没有任何软件包的。不知道这算不算一个 bug……
回到主题上,yarn 安装依赖的第三步做的事情是将已下载的软件包拷贝至 node_modules 目录。如果node_modules中已存在对应软件包,就会跳过拷贝的过程。而第四步,就是执行软件包的中配置的 install 钩子。例如 node-sass包就会在 yarn 的第四步中触发 build 操作。
总结一下,第三步第四部做的事情都是在往 node_modules 目录中写文件,如果对 node_modules 目录进行缓存,就可以对第三、四部加速了。
在上面提到的配置中,使用了软链接本次 install 任务所在项目目录中的 node_modules 文件夹映射到共享数据卷中,也就是下面这种效果:
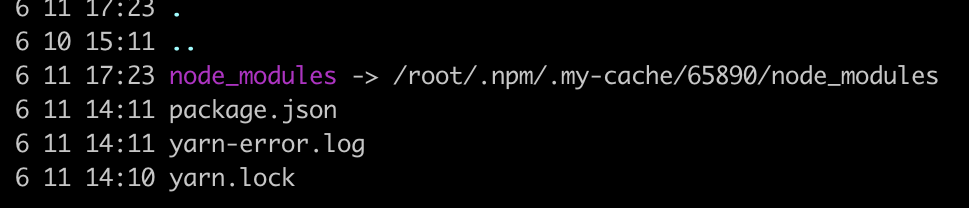
在使用 node_modules 缓存的时候,以
${CI_PROJECT_ID}进行了区分,这么做可以对不同项目进行隔离。
如此配置后,就可以让 yarn install 的四个步骤如丝般顺滑了。
题外话,两处异常
1、 symlink target 不存在从而导致 yarn 安装失败

2、对 .yarn- 的修改造成无法复用
yarn
yarn add @mi/fds-deploy
完美结合eslint和prettier
eslint作为一个语法检查工具,格式化(美化)代码的能力不如prettier,但如果使用prettier格式化代码之后,有可能会在eslint语法检查的时候报错。下面是完美结合这两个工具的方法。
需要的npm包
1、eslint-plugin-prettier:提供一个 eslint plugin ,将prettier作为eslint的插件使用,并且将prettier的错误作为一种独立的类型进行控制。使用方式:
{
  "plugins": ["prettier"],
  "rules": {
    "prettier/prettier": "error"
  }
}
注意:需要单独安装prettier包
2、eslint-config-prettier:提供一份配置,将格式化后的代码可能与eslint规则不符合的报错去掉。
module.exports = {
  "extends": ['<other config>', "prettier"],
}
同时,eslint-plugin-prettier 还提供了一个推荐配置plugin:prettier/recommended,
module.exports = {
  extends: ['<other config>', 'plugin:prettier/recommended'],
}这个配置等同于结合eslint-plugin-prettier与eslint-config-prettier的如下配置:
{
      extends: ['prettier'],
      plugins: ['prettier'],
      rules: {
        'prettier/prettier': 'error',
        'arrow-body-style': 'off',
        'prefer-arrow-callback': 'off'
      }
}
也就是忽略与prettier规则冲突的配置以及根据prettier校验代码的功能。
这里需要注意的是,prettier 与 plugin:prettier/recommended 这两个配置必须置于 extends 最后,并且最终的 eslintrc 配置不应包含再与prettier 可能存在冲突的rules配置。
这是因为最后的rules的优先级高于extends。
安装步骤
# 如有需要,在仓库中安装 prettier 与 eslint
# eslint-plugin-prettier 和 eslint-config-prettier 根据需要安装
yarn add -D eslint prettier eslint-plugin-prettier eslint-config-prettier
仅使用eslint-plugin-prettier
按照下面的示例,修改eslint配置:
module.exports = {
  "plugins": ["prettier"],
  "rules": {
    "prettier/prettier": "error"
  }
}
此配置将赋予eslint使用prettier规则校验代码的能力
仅使用eslint-config-prettier
module.exports = {
  extends: ['<other config>','prettier'],
}
同时使用二者的能力
module.exports = {
  extends: ['<other config>', 'plugin:prettier/recommended'],
}
老项目集成
将项目中老的eslintrc.js拷贝一份,另存为eslintrc.old.js。
module.exports = {
  extends: ['.eslintrc.old', 'plugin:prettier/recommended'],
}
老项目集成
对于老项目,修改完配置之后可能需要使用prettier全局格式化一次代码,命令如下:
./node_modules/.bin/prettier --write "src/**/*.{js,jsx,ts,tsx}"

or

npx prettier --write "src/**/*.{js,jsx,ts,tsx}"--write后面的参数为想要格式化的文件匹配规则。
如果是写到npm scripts里面,注意将上面命令中的两个引号应用
\转义
React 自定义 hooks
最近负责一个新项目的开发,在技术选型的时候,抛开了dva,hooks一把梭。最终也算是按时完成了开发任务。在这个项目开发过程中,积累了几个自定义的hooks,特在此记录一下。
异步任务的loading状态
设想一个场景:【提交】按钮点击之后,会发出一个请求。在请求完成之前,这个按钮会展示loading状态,此时不可点击。请求完成之后,按钮状态恢复。
以 hooks 为例,实现以上功能所需的代码可能是下面这样的:
function Demo() {
  const [loading, setLoading] = useState(false)
  function submit() {
    setLoading(true)
    request(/***/).then(res => {
      setLoading(false)
    })
  }
  return <button loading={loading} onClick={submit} >提交</button>
}实现并不复杂,只是需要定义一个中间状态loading,以及手动处理loading状态的改变。
之前在使用dva的时候,有一个dva-loading的插件,可以为每个effect的调用增加loading状态的记录。可以避免手动处理loading状态的改变。也是受到了dva-loading的启发,我写了一个自定义hook来处理loading态。
代码:
export function useLoading(asyncMethod, watchList = []) {
  const [loading, setLoading] = useState(false)

  const memoMethod = useCallback(
    async (...params) => {
      setLoading(true)
      const originalRes = await asyncMethod(...params)
      setLoading(false)
      return originalRes
    },
    [loading, ...watchList]
  )

  return [memoMethod, loading]
}

function Demo() {
    // 解构数组,可以对每个useLoading的结果赋值不同的变量
    const [executeCronJob, loading] = useLoading(async function (id) {
      const { error } = await request(urlMap.cronExecute, {
        params: {
          cronId: id,
        },
      })
      if (!error) message.info('操作成功')
    })

    return <button loading={loading} onClick={id => executeCronJob(id)}>提交</button>
}
通过使用useLoading,就能得到一个loading状态(可以自己改变)和包装函数 (在这里是executeCronJob)。省去了手动操作loading的代码。
Recommend Projects
-
 React
React
A declarative, efficient, and flexible JavaScript library for building user interfaces.
-
Vue.js
🖖 Vue.js is a progressive, incrementally-adoptable JavaScript framework for building UI on the web.
-
 Typescript
TypeScript is a superset of JavaScript that compiles to clean JavaScript output.
-
TensorFlow
An Open Source Machine Learning Framework for Everyone
-
Django
The Web framework for perfectionists with deadlines.
-
 Laravel
A PHP framework for web artisans
-
D3
Bring data to life with SVG, Canvas and HTML. 📊📈🎉
-
Recommend Topics
-
javascript
JavaScript (JS) is a lightweight interpreted programming language with first-class functions.
-
web
Some thing interesting about web. New door for the world.
-
server
A server is a program made to process requests and deliver data to clients.
-
Machine learning
Machine learning is a way of modeling and interpreting data that allows a piece of software to respond intelligently.
-
Visualization
Some thing interesting about visualization, use data art
-
Game
Some thing interesting about game, make everyone happy.
Recommend Org
-
Facebook
We are working to build community through open source technology. NB: members must have two-factor auth.
-
Microsoft
Open source projects and samples from Microsoft.
-
Google
Google ❤️ Open Source for everyone.
-
Alibaba
Alibaba Open Source for everyone
-
D3
Data-Driven Documents codes.
-
Tencent
China tencent open source team.