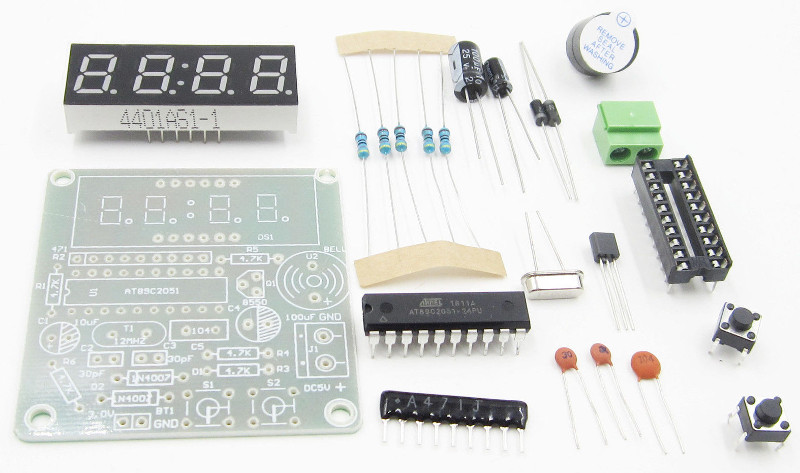
I purchased a clock kit off eBay based on the AT89C2051 microcontroller. The clock failed to operate after assembly. I discovered that the MCU had not been flashed with firmware, but actually contained the first 2kb of the assembly source code for the firmware. I purchased 2 more kits from eBay from different sellers hoping to find one with the assembled firmware, but the two new kits also had the same, partial source code flashed on the MCU. I have since been able to obtain the complete, original firmware for this clock kit from one of the eBay sellers. The firmware worked, but had some issues such as when setting time each digit was set separately and each digit could be set to a value of 0-9; it was possible to set a time of 99:99.
I began this project to create a new firmware that would function in a manner that I desired, including support for a 12-hour format.
- 12 and 24 hour format display
- Display HH:MM and MM:SS
- Alarm with enable/disable option
- Blinking colon (1/2 second on, 1/2 second off)
There are two buttons, the left (B1) and right (B2) buttons.
Short B2 presses cycle through displaying the current time in HH:MM and MM:SS format as well as the 12/24-hour display format option. A short B1 press while on the 12/24-hour display format will toggle the setting. A short B2 press will then enter the timer mode. A short B1 press will toggle the start/stop of the timer. A long B2 press will reset the timer. The timer will continue to increment (if running) even when cycling through other modes. Timer currently resets after 60 minutes.
A long B1 press while viewing the current time in HH:MM format will enter the set time mode. The hours section will begin to blink. Short B2 presses will increment the hour by 1. Holding B2 down will cause the clock to increment quickly after 1 second. A short B1 press will then move to the minutes where operation is similar to setting the hour. Another B1 press will exit set time mode and the clock will return to display the current time.
Short B1 presses cycle through setting and enabling the alarm. When viewing the currently set alarm time, the display will blink. This is done to differentiate between viewing the current time and the currently set alarm time. While viewing the alarm time, a long press of B1 will enter the set alarm mode, at which point only the digits being set will blink. Setting the alarm is similar to setting the current time.
A short B1 press while viewing the alarm or exiting out of setting the alarm will enter the enable/disable alarm mode. A short B2 press will toggle this setting. A short B1 press exist to the display current time mode.
While setting the current time or alarm in 12-hour mode, the colon will be off to indicate AM and is on to indicate PM.
The kit includes a 2-pin header marked "3V" which can be used to provide a battery backup for the clock. If you wish to use a battery backup with your kit, there are some modifications you will need to make. Either do not install, or remove resistors R3 and R4. These are 4.7k pull-up resistors for the two buttons. When 5V power (VCC) is pulled random button presses are read by the MCU. The MCU's internal pull-ups can be used instead of these resistors and the clock will continue to operate normally when 5V power is pulled from the circuit.
Resistor R6, I believe, is being used to trickle-charge a rechargeable backup battery. If you are using a non-rechargeable battery you may consider not installing/removing this resistor. The current might not be enough to damage a non-rechargeable battery, but it's worth noting.
I compile this code using the Small Device C Compiler. The included makefile will compile this code and generate an Intel hex format file named clock.hex. This file may be used to the program the microcontroller.
You may encounter an error where the compiled file is too large for the EEPROM on the AT89C2051. If this happens I recommend seeking out version 3.5.0 of SDCC and compile with that. Later versions of SDCC appear to increase the size of the compiled program to beyond the 2kb limit of the AT89C2051.
This kit does not include an ICSP/ISP programming header. As such you will need to use an external device to program the chip before putting it into circuit. Instruction on how to do that will vary with the device used to program the chip, so no such instructions are included here. I use a TL866, however there are probably much cheaper options out there.
This code is provided as-is, with NO guarantees or liabilities. Use at your own risk.
