The goal of this sample is to provide an end-to-end scenario how to copy your trained custom model in Form Recognizer between your different environments using CI/CD.
This example is using Github Actions but the same can be achieved using Azure DevOps or any other CI/CD tools.
To facilitate the deployment and training of the custom model a Azure Function was developed. This is not MANDATORY, you can do everything using the Rest API of Form Recognizer and creating HTTP call in your pipeline.

The sample contains 3 environments, DEV, QA and Production represented by 3 different resource groups, one for each environment.
Another resource group contains the Azure Function that is used for the CI/CD pipeline and the Blazor Web App. This Azure Function is a REST API that provides endpoints to help with the copy between each environment and to test your trained model. The Blazor Web App provides a UI to test documents for your trained models and retrieve your model between environments.
In development, most of the time you will train the model using the Form Labeling tool (v2 of the API) or the Form Recognizer Studio for the newest version of the API.
This sample is using the most recent version of Form Recognizer API (v3.0). Once you model is trained using the UI tool is possible to save it in code source if needed.
Saving your model in code source can be a good practice to keep a backup of the assets to train your model in a git repository.
In this simple we use this approach.
This is the DevOps flow illustrated in this sample.
- A user train the model with the assets needed calling the Azure Function. This step is not mandatory and the model can be trained using the Form Recognizer Tool.
- The previous step will create the trained model in the Development environment, once is done the user trigger the pipeline to copy the model into QA. Before copying the model from DEV to QA the pipeline validates if the entered ID for the model is present in DEV.
- If the previous step succeeds, the model is copied to QA.
- The team is now ready to test the model in the QA environment.
- The model is tested and ready to migrate to production, from there an approver needs to approve the model to be copied from QA to Production.
- Once approved, the model is copied from QA to Production.
- The user can test the trained model using the Blazor Web App.
This section will explain how to run this sample into your own Azure tenant.
The first thing you need to do is to fork this Github repository.
To do so, click the Fork button in the top right menu.
To create the resources in Azure you will need to create a service principal that will be used for each Github action. To do this, follow this link. Be sure to take note of the credential returned when creating the service principal you will need it for the next step.
Because multiple resource groups will be created don't create a scope at resource group level.
The command should look something like this:
az ad sp create-for-rbac --name "sp-gh-action" --role contributor --sdk-auth
The actions need to have some Github secrets to be created before execution. To create the secrets, click the Settings in the menu.

Next, click Secrets in the left menu.

Now, click on the button New repository secret.
Now create the two following secrets.
| Name | Value |
|---|---|
| AZURE_CREDENTIALS | The value from the step before when creating the service principal. |
| SUBSCRIPTION_ID | The ID of the subscription where all the resources will be created. |
For the deployment to work correctly between your different environments (Dev, QA, Prod) you need to create them in Github. For this go to Settings.
In the left menu click Environments

Click the new environment button
You will create DEV and QA with those settings.
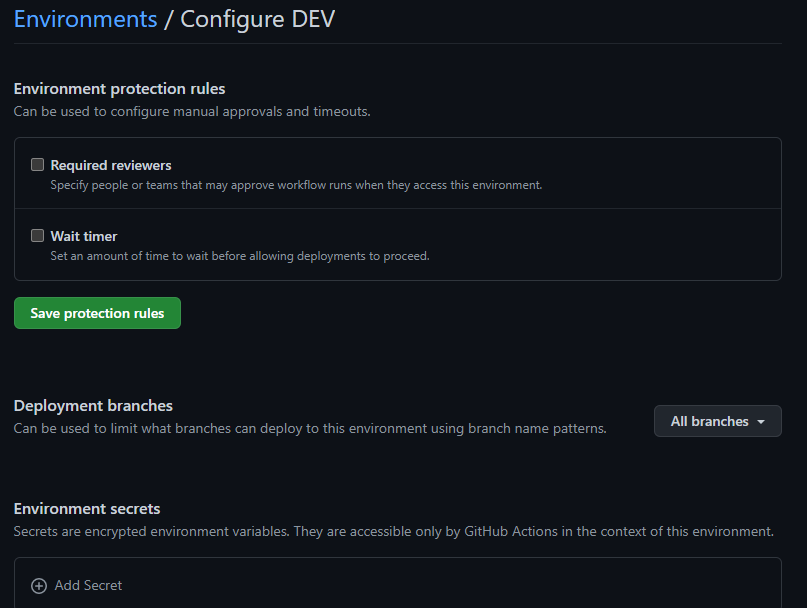
Now, create the PROD environment with this setting.
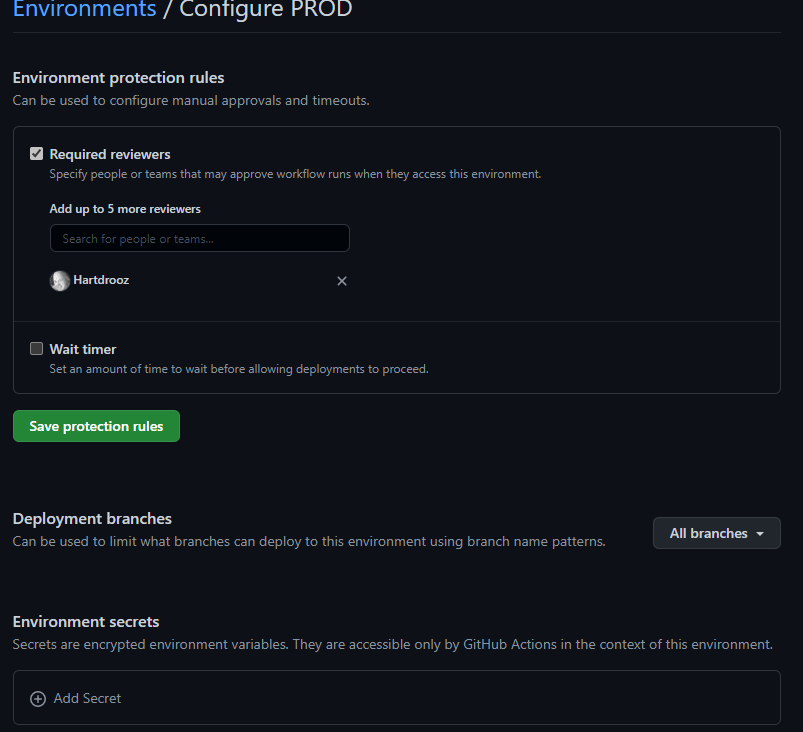
Be sure to click the button Save protection rules after adding the required reviewers.
For production, you will add a reviewer, you can use your own Github user. The goal here it's to illustrate a common practice in CI/CD, that nothing goes to production before being approved.
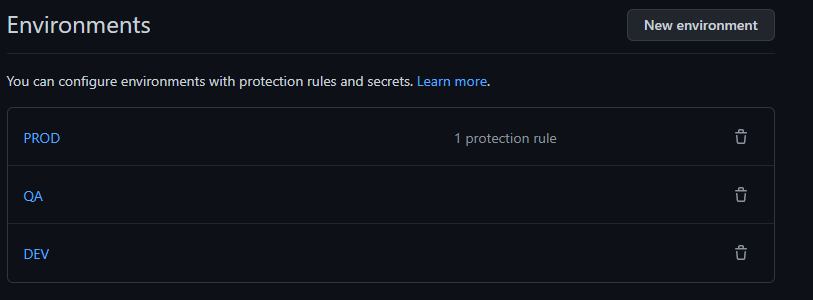
You should now have 3 environments that look like this.
Now it's time to create all the Azure Resources by running the proper Github Action.
Now, click on the menu in the Actions tab.
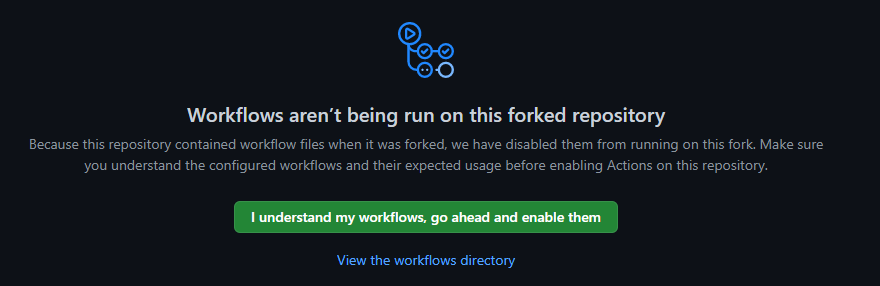
You will have a warning that tells you the Github Actions are disabled, click the green button to enable them.
Now click on the Create Azure Resources in the left menu.
Now click on the Run workflow button and click on the green button called Run workflow.
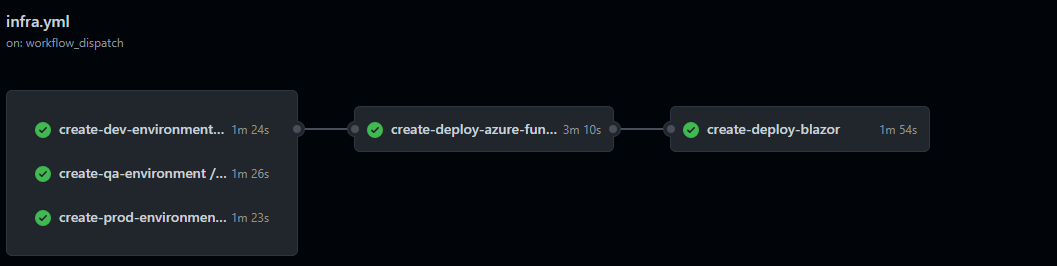
This Github action will create in parallel the 3 environments once it's completed it will build and deploy the Azure Function and Blazor Web App.
This is what the Github Action look like:
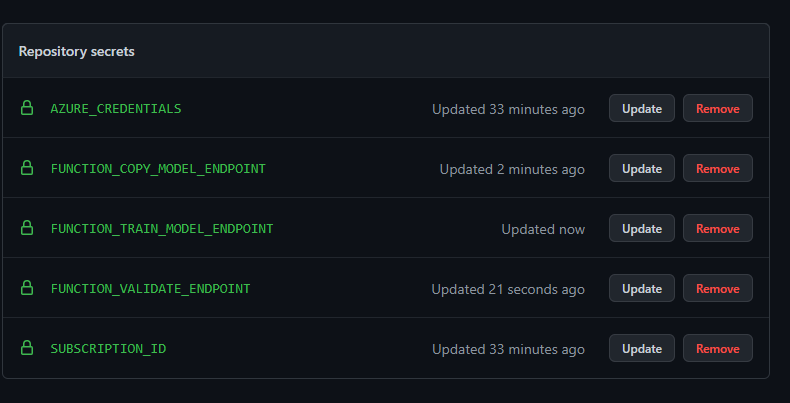
Now, you will need to create 3 new secrets related to the deployment of the Azure function.
Those secrets are needed to deploy your model between your different environment.
| Name | Value |
|---|---|
| FUNCTION_COPY_MODEL_ENDPOINT | This is the endpoint of the copy model function |
| FUNCTION_VALIDATE_ENDPOINT | This is the endpoint of the validate function |
| FUNCTION_TRAIN_MODEL_ENDPOINT | This is the endpoint of the validate function train model |
To find the endpoint of the FUNCTION_COPY_MODEL_ENDPOINT go to the resource group called rg-form-recognizer-devops-utility.
You will see an Azure Function with the name func-form-

Click on the left menu on Functions

You will see all functions in the function app

Click on the CopyModel one and click on the button Get Function Url and copy the value in the Github Secret FUNCTION_COPY_MODEL_ENDPOINT
Repeat the previous step but this time get the function URL for the ValidateModelExists function and create the Github secret FUNCTION_VALIDATE_ENDPOINT.
Repeat the previous step but this time get the function url for the TrainModel function and create the Github secret FUNCTION_TRAIN_MODEL_ENDPOINT.
Once all those secrets created in your repository you should see this.
Like mentioned before, you can train the model using Form Recognizer Studio but in this sample all the document and labelling are already provided. Because of this we can leverage the SDK (that is wrapped inside the Azure Function).
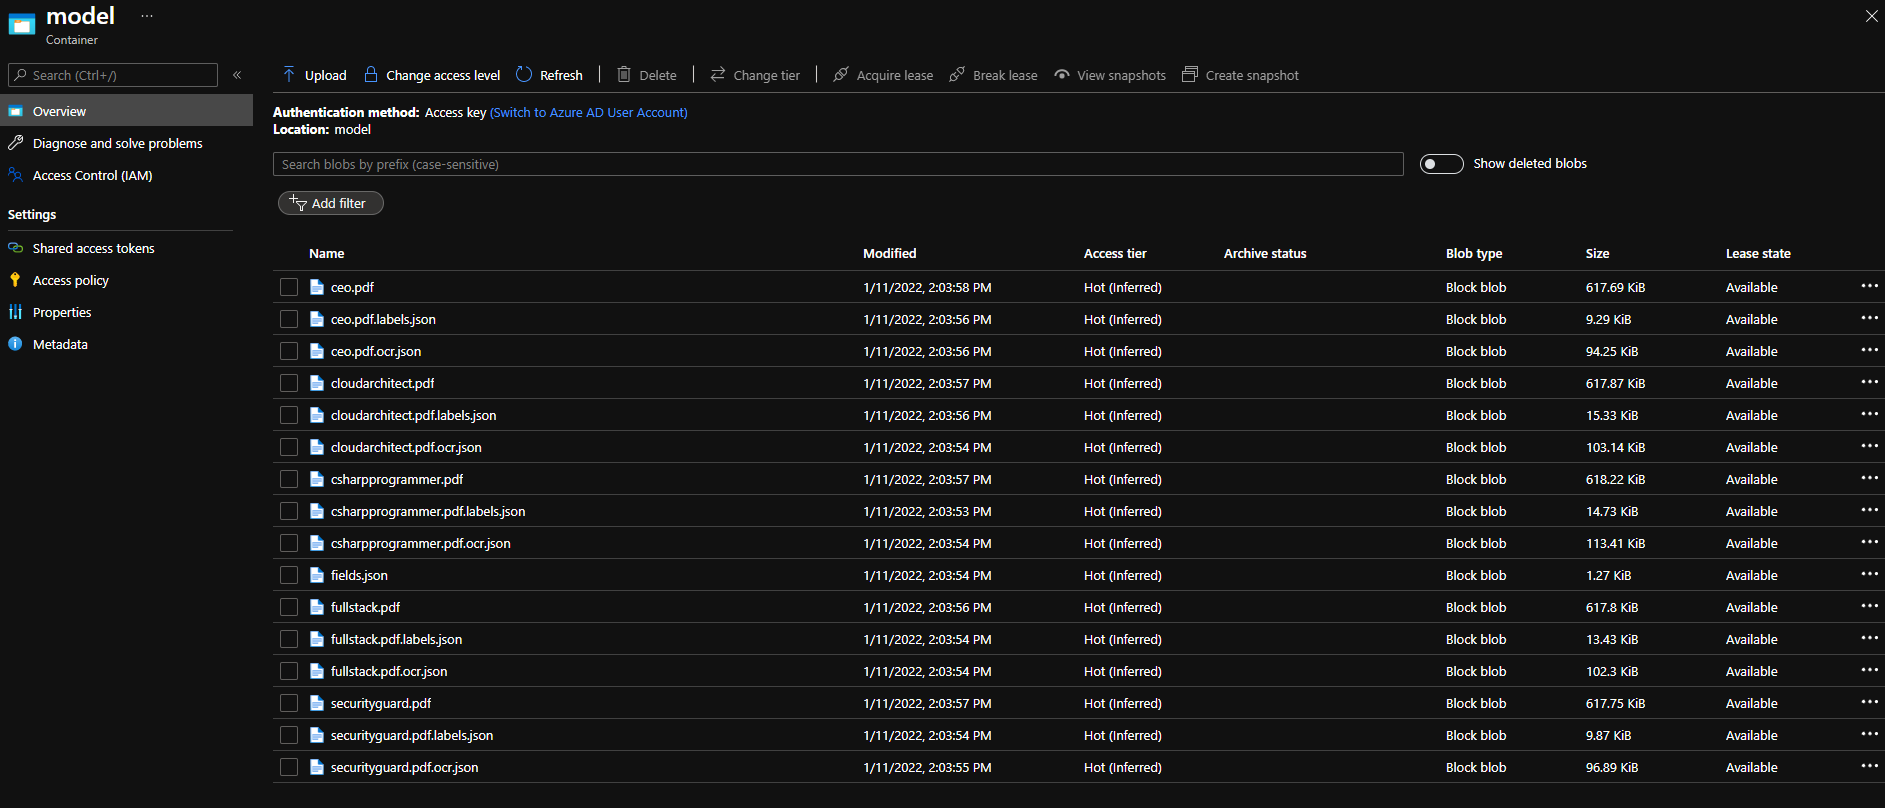
Go to the Azure Storage in the resource group rg-form-recognizer-devops-dev.
Click on the Containers menu in the left

Now click on the button Container at the top
You will see a container called model, click on it.
Now you will need to upload all the assets in the container.
In the git repository you will find a folder called model.

Upload all the files in this folder into the container.
Once it is done your container should look like something like this.
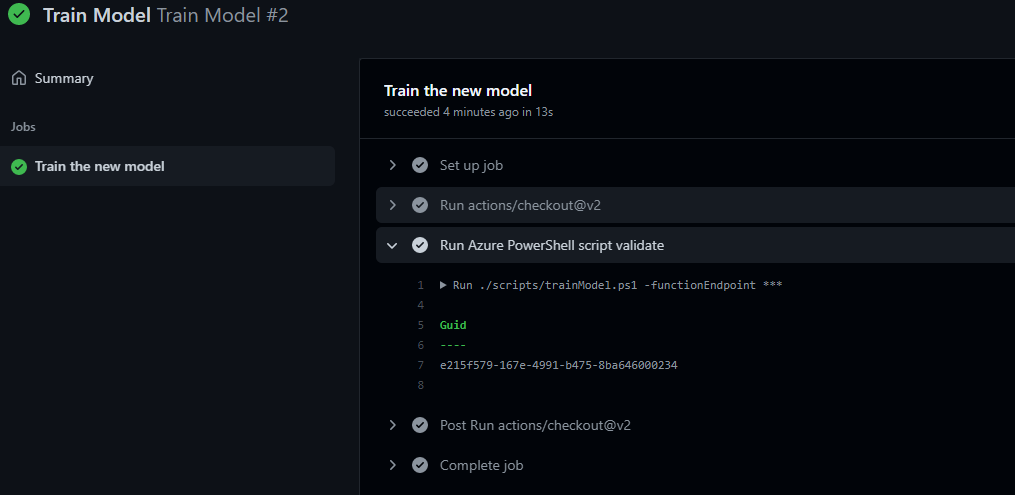
Now go back to the Actions menu in the Github repository.
Select the train model action

Now run this Github action, once is done this will return a Guid (this is the ID of the trained model). Take note of this Guid.
It's possible to know all the models you have in your environment using the Blazor Web App. This will be explained later in this document.
Now the model is trained in DEV environment, it is now time to migrate it to the QA environment.
Go back to the Actions menu and select the action Migrate Model.

You will need to enter the GUID of the model trained before (previous Github Action).

First, the github action will validate the model is present in the DEV environment. If it's the case, it will copy the model into QA environment. Once this is completed, you should see something like this.
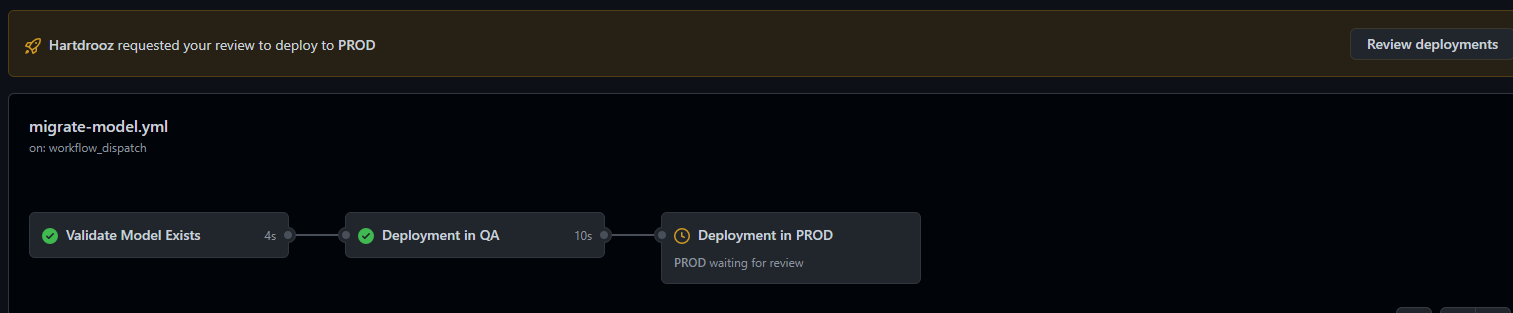
As you can see, the approver you defined before in your PROD environment need to approve before the model is copied into production.
You can now review the deployments and approve it by clicking the Review deployments button at the top.
Now that you have copied the model in all environments it's time to test it. Before using the Blazor Web app, you will need to add one configuration to it.
Go back to your Azure function in the resource group rg-form-recognizer-devops-utility.
Click in the left menu App keys.
You will see two keys, _master and default, click the default one and copy the value.

Now go the blazor app called blazor-admin-### and click on it.

Click on the Configuration in the left menu.

You will now need to create a new application setting, for this, click on the button New application setting

You will create a new application setting with the name FunctionKeyCode and the value copied from the App Keys of the Azure Function.
Click the OK button and finally click the Save button at the top.
Now, click on the Overview button in the left menu.
In the right side you will see the URL of the Web App, click on it.

This will open the Blazor App
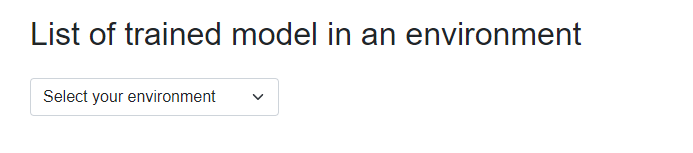
From there you can select one environment in the drop-down list

Now, you can delete one model from there or click the TEST button, this will bring you to this following screen.

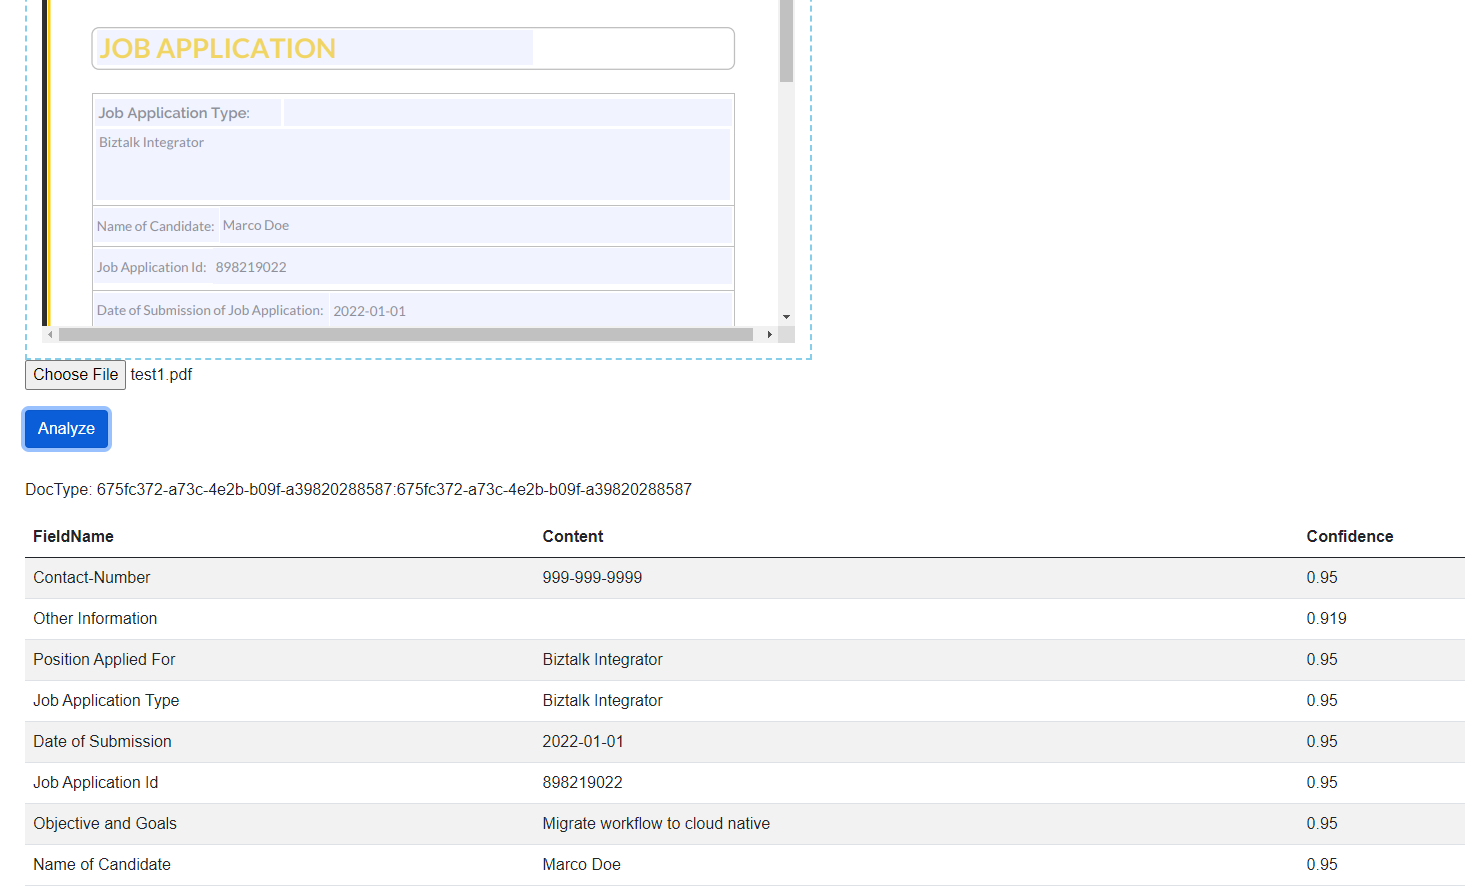
This screen will allow you to upload a document and test your trained model with it.
This sample provides a form to test your trained model, go in the folder model and from there go to the folder Test.
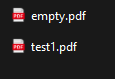
You have two pdf, the empty.pdf is a form you can use and fill with your own value to test. The file test1.pdf is the one you can use to test your model. Upload this file and you the Blazor Web App will call Form Recognizer to analyze the document based on your trained model.
If you want to destroy all the resources create in Azure you can run the Github action called Destroy Resources.
IMPORTANT!!!
The form recognize resources have the soft delete option in Azure. The Github action will delete them permanently looking for resources with the tag.
frm-devops-demo-tag-[your subscription id]
Be sure nothing else in your Azure subscription has this tag.
The code in this repo is NOT production grade and lacks any automated testing. It is intentionally kept as simple as possible (KISS). Its primary purpose is demonstrating DevOps concept with Form Recognizer and not being a full fledged application that can be put into production as is.
The author can in no way be held liable for damage caused directly or indirectly by using this code.

![dependabot[bot] avatar](https://avatars.githubusercontent.com/in/29110?v=4 "dependabot[bot]")