CNNs are a type of neural network that allow greater extraction of features from captured images. Unlike classical models, CNNs take image data, train the model, and then classify the features automatically for healthier classification. The image data was fit to the CNN model with 80% in the training set and 20% in the testing set. Since the technology that was used to fit the image data to the CNN did not allow for the label to be a string, the 32 individual characters strings of the CAPTCHA images were converted to their corresponding ASCII codes, as illustrated in the following steps
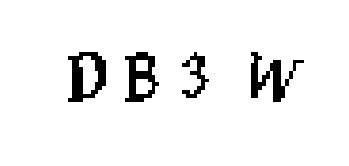
The Captcha image consists of four characters that are either a string of letters or a combination of letters with numbers. In some of the combinations, the captcha characters contain all letters but they are not aligned cleanly. Some of the letters are joined together or diagonally aligned, therefore correctly separating them in order to make them easily recognised as letters is one of the tasks at hand. In the instances of Captcha characters that contain both numbers and letters, the position of the number is not guaranteed and the letters are slanted.
The expected outcome is to correctly identify each of the Captcha characters from the image. We are doing this inorder to measure the efficiency of the neural networks to correctly identify the Captcha characters. The label variable is the letter or number from the image of the separated Captcha characters.
def read_image(image_file_path):
    """Read in an image file."""
    bgr_img = cv2.imread(image_file_path)
    b,g,r = cv2.split(bgr_img)       # get b,g,r
    rgb_img = cv2.merge([r,g,b])     # switch it to rgb

    return rgb_img
images = []
labels = []

for image_file_path in imutils.paths.list_images(image_file_Path):
    image_file = read_image(image_file_path)
    label = image_file_path.split('/')[7]
    images.append(image_file)
    labels.append(label)

for label in labels:
    labelHere = label.split('.')[0]
    newLabels.append(labelHere)

images = np.array(images)
#images4Plot = np.array(images, dtype="float") / 255.0
labels = np.array(newLabels)
A dataset of 9,955 of unique CAPTCHA images each with its label as the filename was used for this research. However, machine learning classification requires a one-to-many relationship between a label and in this context the CAPTCHA images. Therefore, uniqueness of the CAPTCHA images is problematic for a machine learning process.
some_digit = images[300]
#Some_digit_image = some_digit.reshape(24, 72, 3)
plt.imshow(some_digit, cmap = mpl.cm.binary,
           interpolation="nearest")
plt.axis("off")


plt.show()

def pureBlackWhiteConversionThreshold(image):
    # Add some extra padding around the image
    imagePadded = cv2.copyMakeBorder(image, 8, 8, 8, 8, cv2.BORDER_REPLICATE)
    gray = cv2.cvtColor(imagePadded, cv2.COLOR_RGB2GRAY)
    # threshold the image (convert it to pure black and white)
    imagethresholded = cv2.threshold(gray, 0, 255, cv2.THRESH_BINARY_INV | cv2.THRESH_OTSU)[1]
    return imagethresholded

def pureBlackWhiteConversionOGImage(image):
    # Add some extra padding around the image
    imagePadded = cv2.copyMakeBorder(image, 8, 8, 8, 8, cv2.BORDER_REPLICATE)
    gray = cv2.cvtColor(imagePadded, cv2.COLOR_RGB2GRAY)

padded_ThreshImage300 = pureBlackWhiteConversionThreshold(images[300])

some_digit = padded_ThreshImage300
plt.imshow(some_digit, cmap = mpl.cm.binary,
           interpolation="nearest")
plt.axis("off")
plt.show()
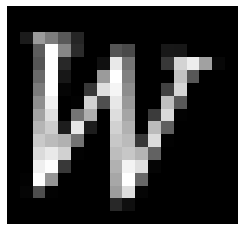
To deal with the uniqueness problem of the dataset, the solution was to separate the CAPTCHA images into the individual 4 characters that make up the CHAPTCHA image. This was to make each character into its own image. The resulting dataset has 39,754 images with one character per image. The new dataset satisfies the one-to-many relationship between the images and the following 32 characters labels {'2', '3', '4','5', '6', '7', '8', '9', 'A', 'B', 'C', 'D', 'E', 'F', 'G', 'H', 'J', 'K', 'L', 'M', 'N', 'P', 'Q','R', 'S', 'T', 'U', 'V', 'W', 'X', 'Y', 'Z'}
def regionsOfLetters(image):

     # find the contours (continuous blobs of pixels) the image
    contours = cv2.findContours(image, cv2.RETR_EXTERNAL, cv2.CHAIN_APPROX_SIMPLE)

    # Hack for compatibility with different OpenCV versions
    contours = contours[0] if imutils.is_cv2() else contours[1]

    letter_image_regions = []

    # Now we can loop through each of the four contours and extract the letter
    # inside of each one
    for contour in contours:
        # Get the rectangle that contains the contour
        (x, y, w, h) = cv2.boundingRect(contour)

        # Compare the width and height of the contour to detect letters that
        # are conjoined into one chunk
        if w / h > 1.25:
            # This contour is too wide to be a single letter!
            # Split it in half into two letter regions!
            half_width = int(w / 2)
            letter_image_regions.append((x, y, half_width, h))
            letter_image_regions.append((x + half_width, y, half_width, h))
        else:
            # This is a normal letter by itself
            letter_image_regions.append((x, y, w, h))
    # If we found more or less than 4 letters in the captcha, our letter extraction
    # didn't work correcly. Skip the image instead of saving bad training data!
    #if len(letter_image_regions) != 4:
       # continue

    # Sort the detected letter images based on the x coordinate to make sure
    # we are processing them from left-to-right so we match the right image
    # with the right letter
    letter_image_regions = sorted(letter_image_regions, key=lambda x: x[0])

    return letter_image_regions

letter_image_regions = regionsOfLetters(padded_ThreshImage300)
letter_image_regions

def extractLetters(letter_image_regions, image):
    # Save out each letter as a single image
    letter_images =[]
    for letter_bounding_box in letter_image_regions:
        # Grab the coordinates of the letter in the image
        x, y, w, h = letter_bounding_box

        # Extract the letter from the original image with a 2-pixel margin around the edge
        letter_image = image[y - 2:y + h + 2, x - 2:x + w + 2]
        #image_file1 = read_image(letter_image)
        letter_images.append(letter_image)
    return letter_images

grayScaleImage = pureBlackWhiteConversionOGImage(images[300])
letter_image_List = extractLetters(letter_image_regions,grayScaleImage)

checkImage = letter_image_List[3]

some_digit = checkImage
#Some_digit_image = some_digit.reshape(24, 72, 3)
plt.imshow(some_digit, cmap = mpl.cm.binary,
           interpolation="nearest")
plt.axis("off")
plt.show()
def plot_digits(instances, images_per_row=10, **options):
size = 28
images_per_row = min(len(instances), images_per_row)
images = [instance.reshape(size,size) for instance in instances]
n_rows = (len(instances) - 1) // images_per_row + 1
row_images = []
n_empty = n_rows * images_per_row - len(instances)
images.append(np.zeros((size, size * n_empty)))
for row in range(n_rows):
rimages = images[row * images_per_row : (row + 1) * images_per_row]
row_images.append(np.concatenate(rimages, axis=1))
image = np.concatenate(row_images, axis=0)
plt.imshow(image, cmap = mpl.cm.binary, **options)
plt.axis("off")
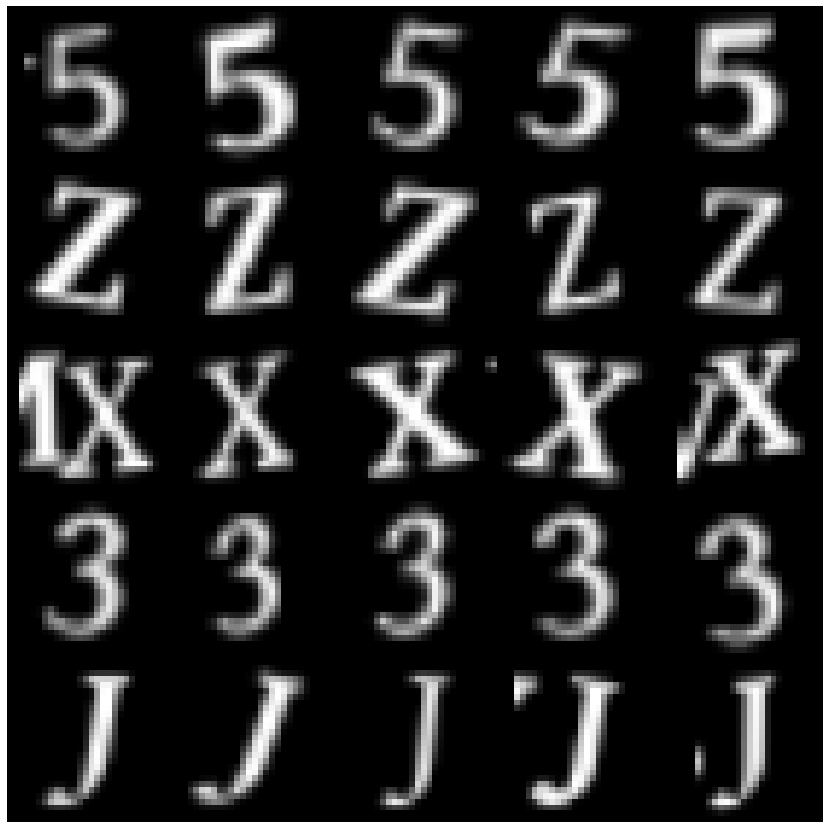
index, = np.where(labels == 'F')
plt.figure(figsize=(15, 15))
example_images = np.r_[images[[14,39,51,39702,39752]],
images[[7,56,61,39703,39714]],
images[[45, 198, 352,39705, 39719]],
images[[2, 12, 52, 39698, 39712]],
images[[3, 26, 87, 39612, 39619]]]
example_images
plot_digits(example_images, images_per_row=5)
#save_fig("more_digits_plot")
#plt.show()
The images data used for this model went through some image processing and was flattened to a csv
See imageProcessing.py in this repo to see how that was done
imagesDF = pd.read_csv ("imagesDF.csv")
length = len(uniqueLabels)
for x in range(length):
    label = uniqueLabels[x]
    imagesDF.replace(to_replace={'labels': label} , value=ord(label), inplace = True)
imagesArray = imagesDF.to_numpy()
labelsArray = labelsDF.to_numpy()
def reset_graph(seed=42):
    tf.reset_default_graph()
    tf.set_random_seed(seed)
    np.random.seed(seed)
height = 28
width = 28
channels = 1
n_inputs = height * width

conv1_fmaps = 32
conv1_ksize = 3
conv1_stride = 1
conv1_pad = "SAME"

conv2_fmaps = 64
conv2_ksize = 3
conv2_stride = 2
conv2_pad = "SAME"

pool3_fmaps = conv2_fmaps

n_fc1 = 64
n_outputs = 91

reset_graph()

with tf.name_scope("inputs"):
    X = tf.placeholder(tf.float32, shape=[None, n_inputs], name="X")
    X_reshaped = tf.reshape(X, shape=[-1, height, width, channels])
    y = tf.placeholder(tf.int64, shape=[None], name="y")

conv1 = tf.layers.conv2d(X_reshaped, filters=conv1_fmaps, kernel_size=conv1_ksize,
                         strides=conv1_stride, padding=conv1_pad,
                         activation=tf.nn.relu, name="conv1")
conv2 = tf.layers.conv2d(conv1, filters=conv2_fmaps, kernel_size=conv2_ksize,
                         strides=conv2_stride, padding=conv2_pad,
                         activation=tf.nn.relu, name="conv2")

with tf.name_scope("pool3"):
    pool3 = tf.nn.max_pool(conv2, ksize=[1, 2, 2, 1], strides=[1, 2, 2, 1], padding="VALID")
    pool3_flat = tf.reshape(pool3, shape=[-1, pool3_fmaps * 7 * 7])

with tf.name_scope("fc1"):
    fc1 = tf.layers.dense(pool3_flat, n_fc1, activation=tf.nn.relu, name="fc1")

with tf.name_scope("output"):
    logits = tf.layers.dense(fc1, n_outputs, name="output")
    Y_proba = tf.nn.softmax(logits, name="Y_proba")

with tf.name_scope("train"):
    xentropy = tf.nn.sparse_softmax_cross_entropy_with_logits(logits=logits, labels=y)
    loss = tf.reduce_mean(xentropy)
    optimizer = tf.train.AdamOptimizer()
    training_op = optimizer.minimize(loss)

with tf.name_scope("eval"):
    correct = tf.nn.in_top_k(logits, y, 1)
    accuracy = tf.reduce_mean(tf.cast(correct, tf.float32))

with tf.name_scope("init_and_save"):
    init = tf.global_variables_initializer()
    saver = tf.train.Saver()
(X_train, X_test, y_train, y_test) = train_test_split(
   imagesArray, labelsArray, test_size=0.2, random_state=11
)
X_train = X_train.astype(np.float32).reshape(-1, 28*28) / 255.0
X_test = X_test.astype(np.float32).reshape(-1, 28*28) / 255.0
y_train = y_train.astype(np.int64)
y_test = y_test.astype(np.int64)
X_valid, X_train = X_train[:5000], X_train[5000:]
y_valid, y_train = y_train[:5000], y_train[5000:]
n_epochs = 10
batch_size = 500

with tf.Session() as sess:
    init.run()
    for epoch in range(n_epochs):

        # Dr. Phil: This inner loop, with shuffle_batch achieves one epoch,
        # looping over randomly selected batches

        for X_batch, y_batch in shuffle_batch(X_train, y_train, batch_size):

             sess.run(training_op, feed_dict={X: X_batch, y: y_batch})
        acc_batch = accuracy.eval(feed_dict={X: X_batch, y: y_batch})
        acc_test = accuracy.eval(feed_dict={X: X_test, y: y_test})
        print(epoch, "Last batch accuracy:", acc_batch, "Test accuracy:", acc_test)
| Batch | Batch Accuracy | Test Accuracy |
|---|---|---|
| 0 | 0.790099 | 0.79373664 |
| 1 | 0.9643564 | 0.96038234 |
| 2 | 0.980198 | 0.9771098 |
| 3 | 0.97821784 | 0.9800025 |
| 4 | 0.9841584 | 0.98063135 |
| 5 | 0.990099 | 0.9825179 |
| 6 | 0.9841584 | 0.9835241 |
| 7 | 0.9940594 | 0.9837756 |
| 8 | 0.9920792 | 0.9839014 |
| 9 | 0.98613864 | 0.9837756 |
- As the batch increases, the training set and test set accuracy are increasing as well. The test set accuracy score converges to 98.378%, which means that the CNN model is predicting the individual character ASCII codes of the CAPTCHA images better than the random forest model, at least a percentage or less better
- The creation of a dataset of characters separated from CAPTCHA images allowed for the fitting of that image data to a convolutional neural network. The purpose of predicting the characters in a CAPTCHA was to give bots the ability to bypass security systems which use CAPTCHA to deny bots entry to their websites. The model used in this research predicted the characters in CAPTCHA images with 98.378% accuracy. A bot equipped with this model will be able to bypass anti-bot security systems equipped with captcha 98% of the time, by simply entering the characters it predicts to be in the image and ticking the “I am not a robot” box.

