How to Deploy To Heroku? Watch Tutorial
Click on buttons below to expand and detailed explanation process. !
Detailed Heroku Depoyment Process »
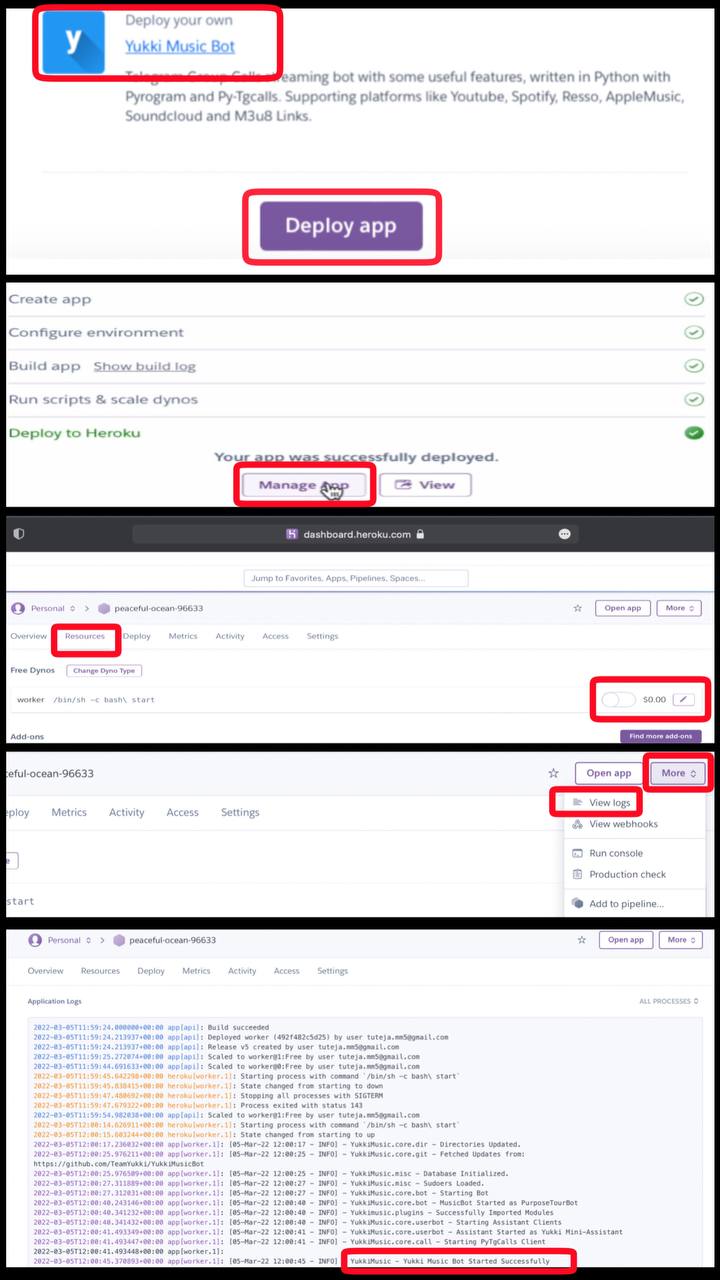
- Click on the deploy button above and login to your heroku account .
- Fill your values there.
- If you don't know how to get config vars : Please refer here
- Make sure you fill correct values.
- Click on Deploy button.
- Please wait till the app gets deployed on heroku. Deploying can take upto 2-3 mins..
- When your app is successfully deployed, click on Manage App button.
- Search for Resources Tab inside your app. ( Check Image for more details)
- Click on the Pencil Icon under resources section.
- Turn on the switch present there near pencil icon.
- Congrats your Music Bot is now Booting.
- After Turning on your booting .
- Click on the More Button present at top right corner .
- Click on the View Logs button from the drop down menu.
- You check your logs there!
- Click on save button there at bottom to save your logs and forward it to us on @AviaxSupport if you face any problem
Checkout Docs for Detailed Explanation on VPS Deploy
shikhar@MacBook~ $ git clone https://github.com/TeamAviax/AviaxMusic
shikhar@MacBook~ $ cd AviaxMusic
shikhar@MacBook~ $ sudo bash setup
Setup will install each and every requirement, nodejs and pip packages automatically. After successfull installation of requirements , setup will ask you to input your vars. Please input your vars correctly.
shikhar@MacBook~ $ bash startNot Getting VPS Method? Watch Tutorial

Reach out to the maintainer at one of the following places:
If you want to say thank you or/and support active development of AviaxMusic:
- Add a GitHub Star to the project.
- Fork the Repo :)
The original setup of this repository is by Team Yukki.
For a full list of all authors and contributors, see the contributors page.


