React Changing State
Objectives
- Practicing updating state in React
- Practice passing state through props
- Describe how React rerenders on state changes
Overview
React allows us to structure applications using small, reusable components, but React isn't just about creating static pages, it's about building reactive user interfaces that enable us to coordinate complex user interactions.
In this lesson we will be learning about how we can update the state of components.
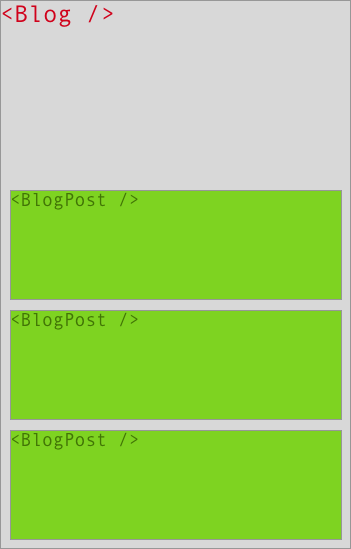
The following examples are going to concentrate on a Blog component that renders multiple BlogPosts. Visually, this might look something like this:
Pure Components
React is all about rendering stuff: A React component takes some data, builds some virtual representation of how our DOM is supposed to look like and returns it:
class BlogPost extends React.Component {
  render () {
    return (
      <article>
        <h1>{this.props.title}</h1>
        <p>{this.props.body}</p>
      </article>
    );
  }
}
The above BlogPost component renders an article consisting of a title and body. Those are being passed down as props. So whenever we want to re-use the BlogPost component, we can simply give it a title and body:
class Blog extends React.Component {
  render () {
    return (
      <div>
        <BlogPost title={'Hello World!'} body={'Hello, this is my blog.'} />
        <BlogPost title={'Good bye!'} body={'I\'m busy. I\'m shutting this blog down.'} />
      </div>
    );
  }
}
This is incredibly powerful, since it allows us to gradually remove complexity by re-structuring our application into smaller, easier to test units. props decouple our components.
Internal State
As we just saw, props can be seen as arguments for pure components. Pure components don't rely on any internal state or side-effects: They simply return a virtual representation of how they want to "look" like.
There is only one problem: props are always being "passed down" from the component's immediate ancestor. So for example, the Blog component passes the blog post data to the BlogPost component. But where does the blog data actually come from?
class Blog extends React.Component {
  render () {
    return (
      <div>
        <BlogPost title={'Hello World!'} body={'Hello, this is my blog.'} />
        <BlogPost title={'Good bye!'} body={'I\'m busy. I\'m shutting this blog down.'} />
      </div>
    );
  }
}
In the above example, we simply hard-coded the blog titles and bodies. Obviously this isn't really what we want, otherwise we might as well just render everything on the server — not very reactive at all.
Instead we typically want to dynamically load the data from some API endpoint, for instance GET /api/posts. So whenever we render a new blog component, we do a XHR call and load the blog posts that we want to render.
class Blog extends React.Component {
  componentDidMount () {
    fetch('http://localhost:4000/api/posts')
      .then(response => response.json())
      .then(posts => {
          console.log('Yey! I got some posts!', posts);
      });
  }
  render () {
    return (
      <div>
          <BlogPost title={'Hello World!'} body={'Hello, this is my blog.'} />
          <BlogPost title={'Good bye!'} body={'I\'m busy. I\'m shutting this blog down.'} />
      </div>
    );
  }
}
This means that whenever we mount this component by rendering it as a child of some other part of our application, e.g. using <Blog />, React executes the componentDidMount method that requests data from our API.
Once we receive those blog posts, we console.log them. While console.logging them is certainly fun, our users won't be too happy about having to open the Chrome DevTools in order to read our blog. So instead of just printing them to the console, the Blog component should somehow "keep track of them".
The most intuitive solution would be to "set" them as a property on the component. React provides a method for that called... setState! setState allows components to keep track of their internal state.
So let's change our component to update the state of the blog component once we receive the requested blog posts from our API:
  componentDidMount () {
    fetch('http://localhost:4000/api/posts')
      .then(response => response.json())
      .then(posts => {
        console.log('Yey! I got some posts!', posts);

        // Let's update the state here:
        this.setState({ posts: posts });

        // or shorter: this.setState({ posts });
      });
  }
Now that we updated the component's state using setState, we want to render our posts using the BlogPost component, so we need to update our component's render method:
  render () {
    return (
      <div>
        {
          this.state.posts.map((post) =>
            <BlogPost title={post.title} body={post.body} />
          )
        }
      </div>
    );
  }
Keep in mind that we didn't change the BlogPost component at all — ideally we should try to keep the majority of our components "stateless".
At this point, you might wonder why we had to use setState, if all setState does is... well... setting this.state. There is a very simple reason for that:
React needs to "know" that a state change happened, since whenever a component's "data" (state or props) changes, React has to re-render the component (runs its render function to figure out "what changed").
State vs Props
At this point you might wonder when to use props and when to use state, but there is a good rule of thumb when laying out our application's architecture:
-
Use
statefor adding interactivity to our component:A dropdown menu for example can be in an
expandedorcollapsedstate, a modal dialog can beopenorclosed. -
Move the state "up":
In our blog example, the
BlogPostcomponent could also "manage" its own state by doing a separate XHR request. Nevertheless, this isn't an elegant solution, since the blog needs to "know" about the blog posts anyways (how else would it "decide" how many<BlogPost />components should be rendered in the first place?).Moving application state higher up generally speaking simplifies the architecture of our application and allows us to keep the majority of the components stateless.
State is hard to manage and difficult to test. You should always try to keep our components as pure as possible.
-
Start with props:
When creating the layout of your project, you typically start with a static version and then add interactivity once we reach a certain point.
During this initial phase, there is almost never a need for state. Everything can be done using props during those initial minutes. Try to keep your components as encapsulated and isolated as possible while we're gradually adding interactivity to individual parts of your application.
For our
<Blog />example, we first hardcoded the<BlogPost />component's props and then added an API call that updated theBlogcomponent's state.
In general, it's usually a good idea to start with a rather static version of your application, in which all data is being rendered by gradually passing down props to child components. Then — as a next step — we can add custom user interactions to your app, e.g. what happens when a user presses this button? Should it open a dialog by doing this.setState({dialogOpen: true})?
setState in detail
Now that we built our blog, let's have a look at something a bit more interesting: A modal.
Let's first start off laying out our component structure:
class App extends React.Component {
  render () {
    return (
      <div>
        <Modal />
      </div>
    );
  }
}
A modal can either be open or closed, so our application needs to keep track of that. The <Modal /> component itself only knows whether or not it is open, it can't "open" itself — instead it has to expose some API for other components for opening it.
Therefore we need to keep track of whether or not the modal is open in its parent component. In this case, that's the <App /> component. On page load, the modal shouldn't be open. The initial state of the modal is closed (isModalOpen = false). We can initialize a component's state in its constructor:
class App extends React.Component {
  constructor (props) {
    super(props);
    this.state = {
      // modal should be closed on page load
      isModalOpen: false
    };
  }
  // ...
}
We then need to "tell" the <Modal /> component whether or not it is open. The only way to communicate with the component is via its props. In this case, we would add a new isOpen prop to the Modal component:
class App extends React.Component {
  // ...
  render () {
    return (
      <div>
        <Modal isOpen={this.state.isModalOpen} />
      </div>
    );
  }
}
Obviously our users are going to be very disappointed if they aren't able to open the popup, so let's add a separate button that triggers the modal:
class App extends React.Component {
  // ...
  openModal () {
    this.setState({ isModalOpen: true })
  }
  render () {
    return (
      <div>
        <button onClick={this.openModal}>Open the modal!</button>
        <Modal isOpen={this.state.isModalOpen} />
      </div>
    )
  }
}
Now if we click the Open the modal! button, we update the <App /> component's internal state, thus enforcing an update on the <App /> component.
Since this.state.isModalOpen evaluates to true now, the modal is being opened:
  render () {
    return (
      <div>
        <button onClick={this.openModal}>Open the modal!</button>
        <Modal isOpen={true} />
      </div>
    );
  }
But what does our modal component actually look like? Up until now, we didn't talk about the <Modal /> component's render method.
As we just saw, the modal accepts an isOpen prop, which it then uses in order to add an modal--is-open class to its container:
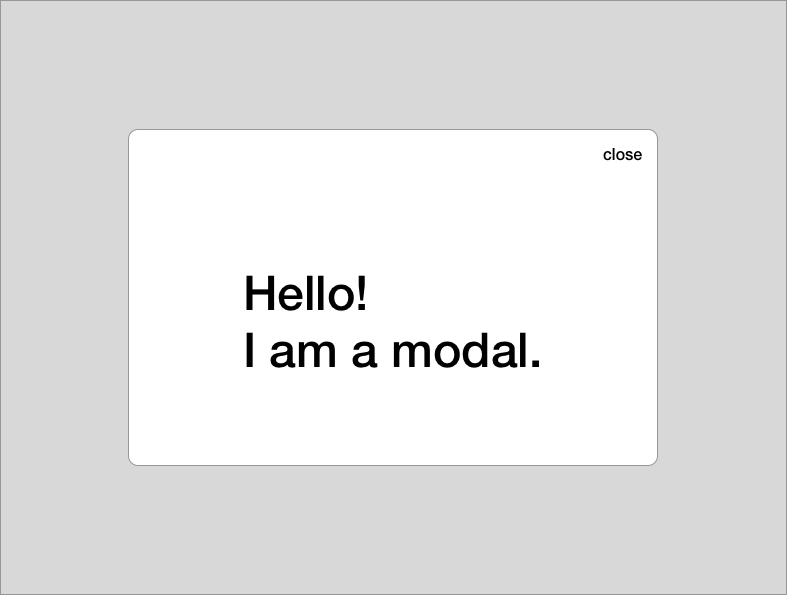
class Modal extends React.Component {
  render() {
    const { isOpen } = this.props;

    return (
      <div className={isOpen ? 'modal modal--is-open' ? 'modal'}>
        <button>close</button>

        <p>Hello! I am a modal.</p>
      </div>
    );
  }
}
Perfect! Now we can simply specify whether or not the modal is open using its isOpen prop.
As you might have noticed, the modal also has a "close" button. Currently it doesn't do anything, so let's think about what should happen if the close button is being pressed:
- The user clicks the close button.
- The
<Modal />component needs to update the<App />component'sisModalOpenstate.
For convenience, we're now going to add a closeModal method on the <App /> components:
class App extends React.Component {
  // ...
  openModal () {
    this.setState({ isModalOpen: true })
  }
  closeModal () {
    this.setState({ isModalOpen: false })
  }
  // ...
}
The <Modal /> component now needs to be able to call the <App /> component's closeModal method. But React components can't directly access their ancestors, so instead we have to pass the App's closeModal method as a handler to the Modal:
class Modal extends React.Component {
  render () {
    const { isOpen, onClose } = this.props;

    return (
      <div className={isOpen ? 'modal modal--is-open' ? 'modal'}>
        <button onClick={onClose}>close</button>

        <p>Hello! I am a modal.</p>
      </div>
    );
  }
}
class App extends React.Component {
// ...
render () {
return (
<div>
<button onClick={this.openModal}>Open the modal!</button>
<Modal isOpen={this.state.isModalOpen} onClose={this.closeModal}/>
</div>
);
}
// ...
}And that's it! Now the modal is able to communicate with the <App /> by calling the passed in handler.
There is only one problem: When we click close, we get the following error:
TypeError: onClose is not a function
Uh? That's a bit weird. What happened?
We forgot to bind our handler functions! Typically we would bind all you component's public methods in the constructor (click handlers etc.):
class App extends React.Component {
  constructor (props) {
    super(props);
    this.state = {
        // modal should be closed on page load
        isModalOpen: false
    };
    this.openModal = this.openModal.bind(this);
    this.closeModal = this.closeModal.bind(this);
  }
  // ...
}
Now everything works as expected. Good job, we just implemented a React modal!
Advanced: If you're ever looking for an actual React modal to use in a production application, react-modal has a very similar API to the component we just implemented.


