You can find the deployed project at https://saybravo.io
| Samar Vir | Aaron Thompson | James Eneh | Borja Soler | Johnson Ogwuru |
|---|---|---|---|---|
 |
 |
 |
 |
 |
| |
|
|
|
|
| Maxime Salomon | Noble Obioma | Petar Vlaisavljevic | ||
 |
 |
 |
||
| |
|
|
Trello Board
Product Canvas
UX Design files
Healthy office cultures often acknowledge good work from their coworkers and peers. Award your peers with acknowledgments that act like coins/points in Slack when they do awesome things - and never let the acknowledgment of their good work get lost in the shuffle again.
- users can see their and their teammates' profiles in the web app
- users can view single shoutout with comments and reactions in the web app
- users can see feed of all shoutouts in the web app
- users can see who is in their team (Slack workspace) in the web app
- users can see their Slack workspace leaderboard in the web app
- React
- Slack API Auth
- Styled-Components
We use Slack API for both authentication and our Slack bot.
For the app to function correctly, the user must set up their own environment variables. There should be a .env file containing the following:
REACT_APP_API_HOST = link to your API host
REACT_APP_CLIENT_ID = your Slack app's client ID, can be found in you app's settings --> basic information
REACT_APP_CLIENT_SECRET = your Slack app's client secret, can be found in you app's settings --> basic information
These instructions will get you a copy of the project up and running on your local machine for development and testing purposes. See deployment for notes on how to deploy the project on a live system.
For development, you will only need Node.js installed on your environment.
$ node --version
v10.16.0

$ npm --version
6.10.3
$ https://github.com/bravolabs/bravo-fe.git
$ cd bravo-fe
$ npm install
$ npm start
Runs the app in the development mode. Open http://localhost:3000 to view it in the browser. The page will reload if you make edits.
$ npm test
Launches the test runner in the interactive watch mode.
$ npm run build
Builds the app for production to the build folder.
It correctly bundles React in production mode and optimizes the build for the best performance.
$ npm lint:fix
Fixes linting automatically.
$ npm coverage
Reports coverage with disabled test-watching.
Eject hidden modules
$ npm eject
Ejects hidden modules into package.json.
  src
  |
  ├── actions
  |   ├── user.js
  |   └── home.js
  |
  ├── components
  |   ├── Home
  |   |   ├── index.js
  |   |   ├── home.styles.js
  |   |   └── home.test.js
  |   |
  |   └── User
  |       ├── index.js
  |       ├── user.styles.js
  |       └── user.test.js
  |
  ├── reducers
  |   ├── index.js
  |   └── userReducer.js
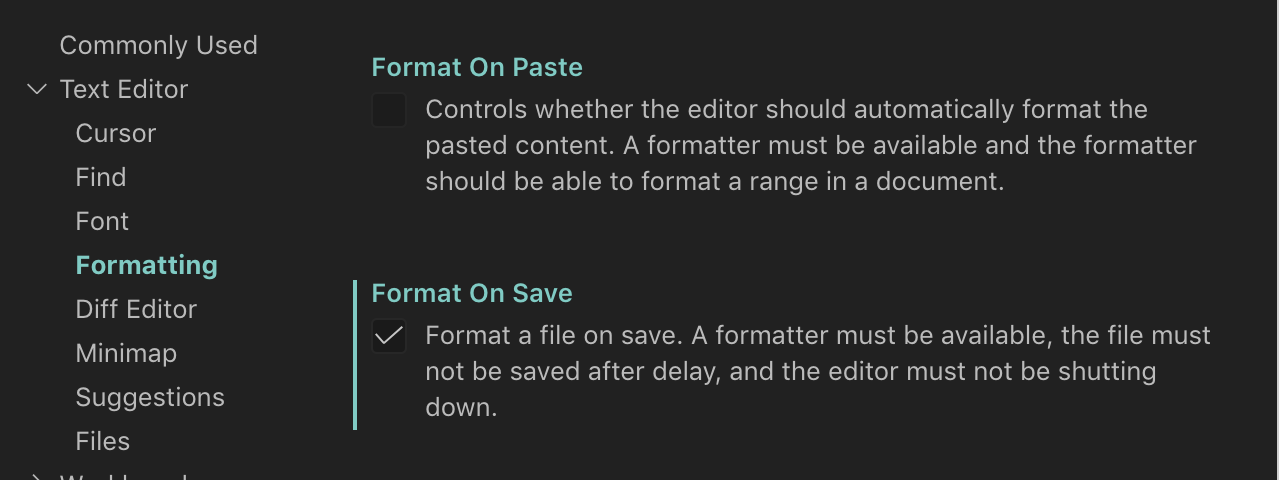
On VsCode:
- Go to
Settings>Text Editor>Formatting - Check
Format on Save
Example:
-
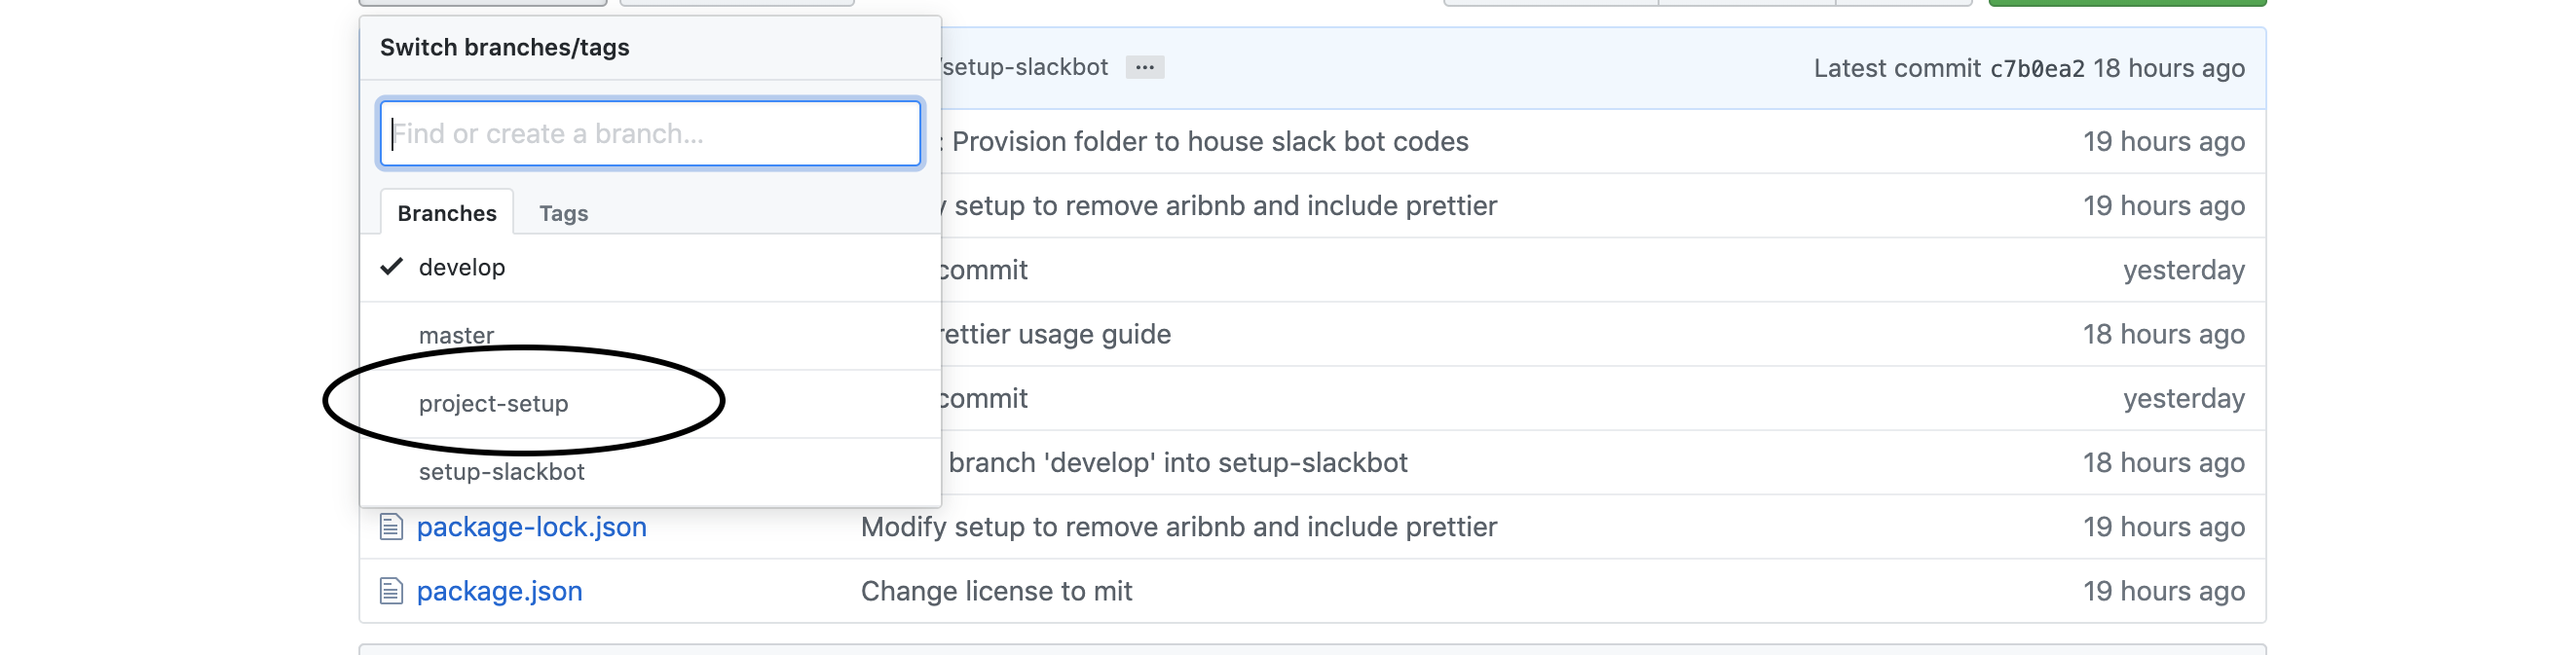
Create a new
feature-branchfromdevelopbranch that describes your work.git checkout -b project-setup
Example:
-
Adding a New Feature
-
Create Component named
index.jsrelated folder.// src/Home/index.js const Home = () => <h1>Welcome to BravoFE</h1>; export default Home;
-
Define Route
// src/routes/AppRouter.js
import Home from '../components/Home';

...
<Route exact path="/" component={Home} />;
-
Create Action
// src/actions/home.js
export const GET_HOME = 'GET_HOME';

export const getHome = user => {
  return { type: GET_HOME, payload: user };
};
-
Create Reducer
// src/reducers/homeReducer.js
import { GET_HOME } from '../actions/home.js';

const homeReducer = (state = initialState, action) => {
  switch (action.type) {
    case GET_HOME:
      return { ...state, home: action.payload };
    default:
      return state;
  }
};

export default homeReducer;
-
Add Reducer to root reducer
// src/reducers/index.js
import homeReducer from '../homeReducer.js';

const rootReducer = combineReducers({
  home: homeReducer,
});

export default rootReducer;
-
Create Test Suite for Component
// src/Components/Home/__tests__/home.test.js
import React from 'react';
import * as rtl from '@testing-library/react';

import '@testing-library/jest-dom/extend-expect';

import Home from '../index';

afterEach(rtl.cleanup);
describe('Home Component', () => {
  it('Should render home component', () => {
    const { container } = rtl.render(<Home />);
    expect(container).toBeTruthy();
  });
});
-
Create Test Suite for Reducer
// src/reducers/__tests__/home.test.js
import { cleanup } from '@testing-library/react';
import userReducer from '../userReducer';
import { FETCH_START } from '../../actions/user';

const initialState = {
  loading: false,
  user: null,
  error: '',
};

afterEach(cleanup);
describe('User Reducer', () => {
  it('Should return initial State', () => {
    expect(userReducer(undefined, {})).toEqual(initialState);
  });

  it('Should Toggle Loading state', () => {
    expect(userReducer(initialState, { type: FETCH_START })).toEqual({
      ...initialState,
      loading: true,
    });
  });
});
-
Create Test Suite for Action
// actions/__tests__/user.test.js
import configureMockStore from 'redux-mock-store';
import thunk from 'redux-thunk';
import nock from 'nock';
import { setUser } from '../user';

const mockStore = configureMockStore([thunk]);

describe('Home Action Creator', () => {
  let store;
  beforeEach(() => {
    store = mockStore({});
  });
  afterEach(() => {
    nock.cleanAll();
  });

  it('Should return FETCH_SUCCESS Action with payload', () => {
    nock('https://home.com/api')
      .post('/user')
      .reply(200, {
        user: 'Sample User',
      });
    const expectedActions = [
      {
        type: 'SET_USER_START',
      },
      {
        type: 'SET_USER_ERROR',
        payload: 'Sample User',
      },
    ];
    store = mockStore({});
    return store.dispatch(setUser()).then(() => {
      expect(store.getActions()).toEqual(expectedActions);
    });
  });
});
-
-
Creating SVG Components
-
Get raw SVG
<svg width="21" height="5" viewBox="0 0 21 5" fill="none" xmlns="http://www.w3.org/2000/svg">
  <circle cx="2.5" cy="2.5" r="2.5" fill="#7D8597"/>
  <circle cx="10.5" cy="2.5" r="2.5" fill="#7D8597"/>
  <circle cx="18.5" cy="2.5" r="2.5" fill="#7D8597"/>
</svg>
-
Remove any unnecessary attributes
Here I've removed all fill, width and height attributes. We'll be setting those later with CSS<svg viewBox="0 0 21 5" xmlns="http://www.w3.org/2000/svg"> <circle cx="2.5" cy="2.5" r="2.5" /> <circle cx="10.5" cy="2.5" r="2.5" /> <circle cx="18.5" cy="2.5" r="2.5" /> </svg>
-
Create component
Wrap all paths in a 'g' tag and spread props in so that styles import properly. Use the SVG component instyling/atoms/SVG.jsximport React from 'react'; import SVG from '../SVG'; function Ellipses(props) { return ( <SVG xmlns="http://www.w3.org/2000/svg" viewBox="0 0 21 5" {...props}> <g> <circle cx="2.5" cy="2.5" r="2.5" /> <circle cx="10.5" cy="2.5" r="2.5" /> <circle cx="18.5" cy="2.5" r="2.5" /> </g> </SVG> ); }
-
Component Usage
Colors, mitter limits and stroke can be set in props.Props:
fillColor="<fill color here>"
strokeColor="<stroke color here>"
strokeWidth="<stroke width here>"
mitter="<mitter limit here>"Here's an example with the Logo SVG:
<Logo fillColor="#4265ED" />
-
-
Create Pull Request
-
The PR title should concisely explain the change or addition. Example:
-
The PR description should clearly state what the PR is about in detail.
-
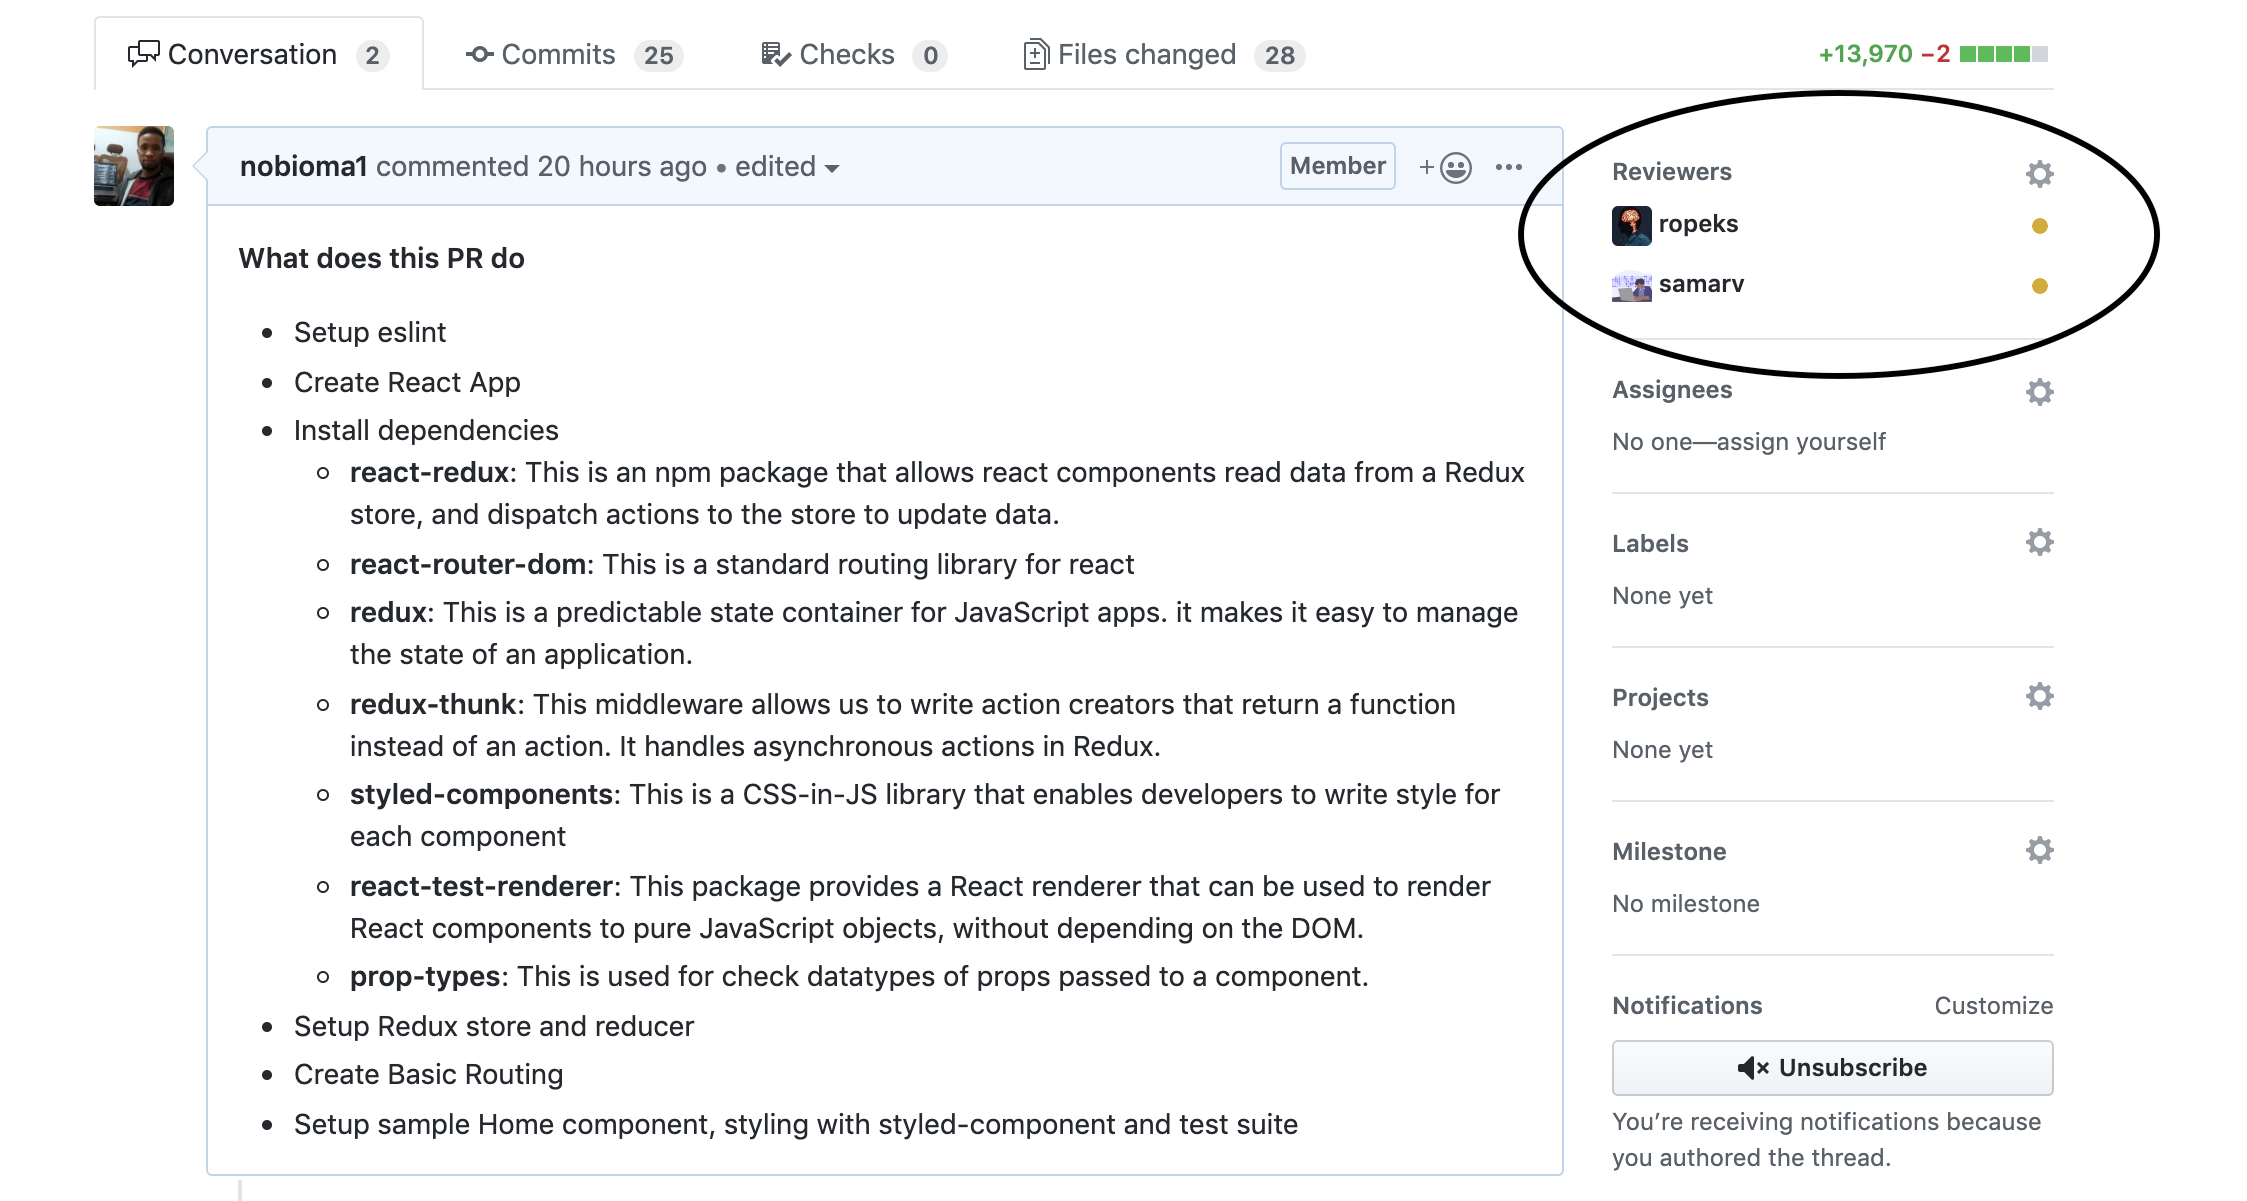
-
Request a Review from at least one team member. Example:
-
Resolve Requested Changes Example:

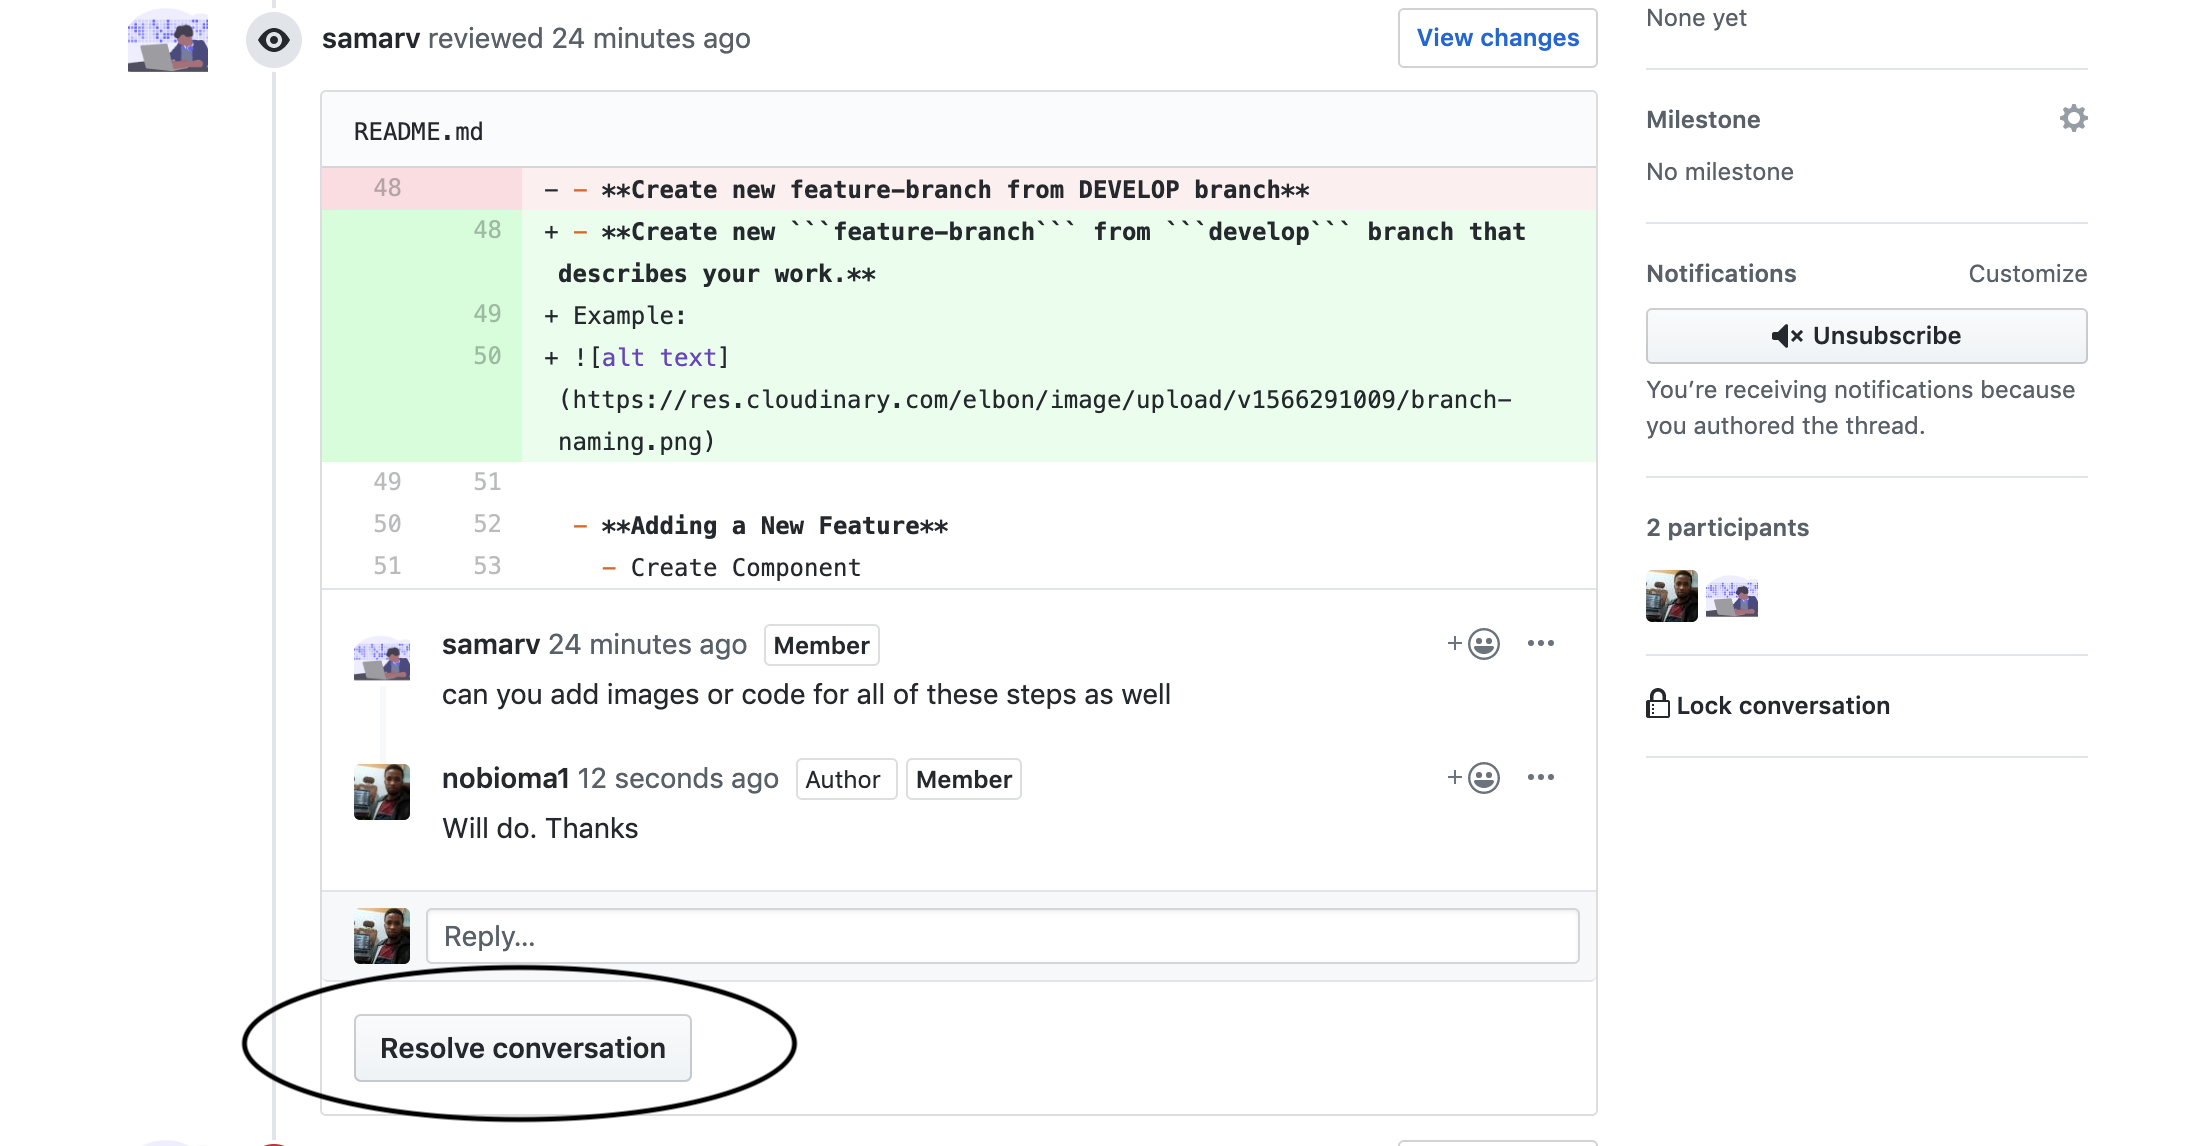
-
All CI status checks should be green
-
Review approval should have been submitted before merging
See Backend Documentation for details on the backend of our project.
This project is licensed under the MIT License - see the LICENSE file for details
These contribution guidelines have been adapted from this good-Contributing.md-template.


