This lab will show you the basics of how to implement Webex Teams powered Chat and Voice/Video Calling Capabilities into an existing App using the Cisco Webex Teams iOS SDK.
In this lab you will be integrating Webex teams using a convenience library (WXTKit) which will take case of much of the heavy lifting for us.
WXTKit is an unofficial convenience library written on top of the Cisco Webex Teams iOS SDK. The purpose of this project is provide a super simple way to add voice, video calling and chat into your app. This wrapper library provides a reference implementation of the Webex Teams SDK as a drop in component that you can add into your existing app to add voice and video capabilities without needing to know how to use the Webex Teams SDK.
This wrapper handles layout of the video streams for local and remote participants, the call setup process, in call functionality such as muting, and switching the camera as well as hanging up the call. An iMessage style Webex Teams powered Chat interface is also included. What that means is that you just need to pass WXTKit your Webex Teams authentication credentials and the address of the recipient and you will be all set. The wrapper is included in source form so you have total control over functionality and UX if you wish to change it.
Building iOS Apps requires a number of prerequisites in order to work correctly. In this case please ensure that your system meets the following requirements.
- A Mac running the latest version of Mac OS X 10.14 Mojave
- If you are unfamiliar with updating Mac OS X you can follow the instructions here Update the software on your Mac - Apple Support
- The latest version of XCode downloaded and installed via the Mac App Store (at time of writing 10.1 or greater)
- Cocoapods installed and initial pod setup completed (to do this, open your terminal and run the following commands):
sudo gem install cocoapodspod setup (can take 10-15 minutes sometimes)
- Open Terminal and Download or clone the WXTKitDemo repository
git clone https://github.com/jfield44/WXTKitDemo.git
- Change into the directory of the downloaded code
cd WXTKitDemo
- In the Terminal which is currently in the WXTKitDemo directory run the pod install command to install dependencies.
pod install
- Navigate the WXTKitDemo folder on your Mac in Finder and open the DrAnywhere.xcworkspace file. If you have not opened Xcode before, you will be prompted to enter your password to enable developer mode on the Mac, if you do not get the popup then no action is required.
- This will have opened Xcode (the tool iOS developers use to build apps). To run the sample app, click the Play button in the top left corner. If the Play button is greyed out, you will need to select a device from the dropdown to the right of it (suggested to use an iPhone 8 or 8 Plus). This will launch the iOS Simulator
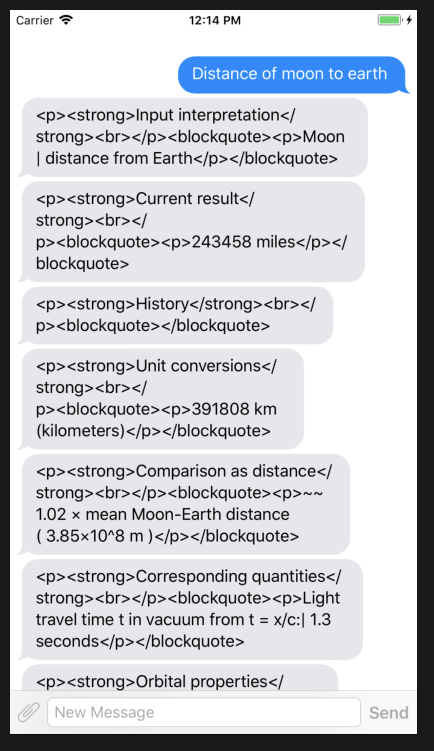
- Once the Simulator is loaded, you will see a list of Medical Professionals, click one one and it you will be presented with the option to start a Chat session or a Video Call. Currently these buttons are not connected to the Webex Teams SDK. In the next steps new we enhance this app with capability to Chat and Video call.
As this is a lab targeted at beginners some of the implementation has been done for you already but we still need to implement a number of functions in order to enable Video Calling and Chat.
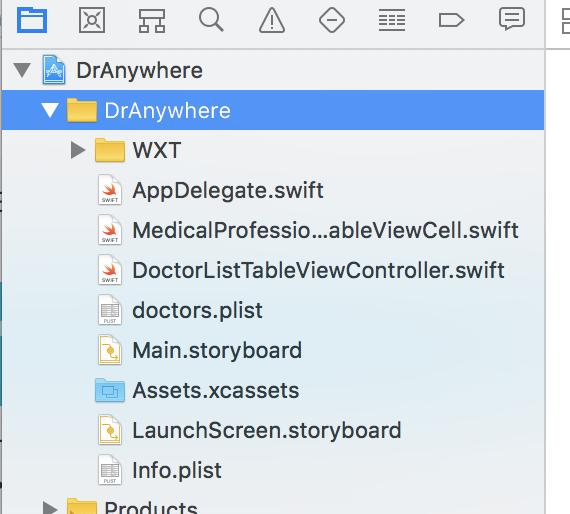
- In Xcode on the left hand side you will see a list of files (if you do not see a list of files you may need to open the file structure by clicking on the disclosure triangle).
- Click on file
DoctorListTableViewController.swift
- Click on file
- This file contains of the code that built the GUI that you used when you pressed on the Doctor and it displayed the options to either Chat or Video Call. To implement Chat we need to add some code into the function which is called when we press the Chat button in the GUI.
- Locate the text inside DoctorListTableViewController.swift that says
Complete Chat Functionality Here 💬
- Locate the text inside DoctorListTableViewController.swift that says
- You will see that there are some comments surrounding
/** (above) */ (below)the Complete Chat functionality text.- Add a new line underneath the final comment
*/
- Add a new line underneath the final comment
- Now we will copy in some code which will trigger the Chat session to run when the the Chat option is selected from the menu.
-
- On the new line that you just created, copy and paste this code block
-
	let wxt = WXTKit(apiKey: "YOUR_API_KEY_HERE", authType: .wxtId)
            wxt.activate(authenticationStatus: { (authenticated) in
                if authenticated {
                    wxt.directMessage(navigationController: self.navigationController!, recipient: "YOUR_RECIPIENT")
                }
            })
- In order to use the WXT SDK you need to provide some credentials for authentication. In production this would either be an OAuth or a Guest token but for testing we will use a Developer Token/API Key. You can get this from developer.webex.com or from your lab instructor.
-
- Update the code where it currently says
YOUR_API_KEY_HEREwith your API Key/Token. (Make sure that you keep the“”that surround the API Key. So yours will look something like below)
- Update the code where it currently says
-
let wxt = WXTKit(apiKey: "ABC123YZ456", authType: .wxtId)
- This will take care of authentication, so all that is left to do is to provide a recipient to which we want to send the Chat.
- Update the
recipientparameter to the Webex Teams Email Address of the account that you wish to Chat with. Make sure to preserve the speech marks just like before. It should look like this.
- Update the
wxt.directMessage(navigationController: self.navigationController!, recipient: "[email protected]")
- Thats it! ✅ Now all you need to do is click the Play button and choose a Doctor. This time when you press on Chat it will start a Chat session directly inside of this app with the user that you included as the recipient in the previous step 💬.
To implement Video Calling, we will perform a similar process as before.
- Locate the text in the DoctorListTableViewController that says
Complete Video Calling Functionality Here ☎️.- Like in the previous project add a new line under the closing
*/
- Like in the previous project add a new line under the closing
- Copy and paste the following code block onto the new line 1.
	let wxt = WXTKit(apiKey: "YOUR_API_KEY_HERE", authType: .wxtId)
            wxt.activate(authenticationStatus: { (authenticated) in
                if authenticated {
                    wxt.videoCall(navigationController: self.navigationController!, recipient: "YOUR_RECIPIENT", delegate: self)
                }
            })
- Add the Authentication details in the form of the API Key that we used in the previous section. It should look like this.
let wxt = WXTKit(apiKey: "ABC123YZ456", authType: .wxtId)
- Add the Recipient in the form of a Webex Teams email address like in the previous section. It should look like this.
wxt.videoCall(navigationController: self.navigationController!, recipient: "[email protected]", delegate: self)
- Press the Play button again and you are now ready to make embedded Video calls! Click on a Doctor an press Video Call to try it out 📞📹
Webex Team Chat could be integrated into any Messaging Framework or User Interface that you choose to use. In this case WXTKit is using a popular third party Messaging Framework that looks similar to iMessage. Next we are going to lightly customize the Messaging view to change the colour of the Inbound/Outbound Message Bubble and Text Color.
- In the DoctorListTableViewController locate the code block that you pasted in the previous sections, you should replace the line that says
wxt.directMessage(navigationController: self.navigationController!, recipient: "[email protected]")
With this additional code snippet that provides options to change the Color of the Messages.
wxt.directMessage(navigationController: self.navigationController!, recipient: "[email protected]", incomingMessageBubbleColor: UIColor.purple, outgoingMessageBubbleColor: UIColor.green, incomingMessageTextColor: UIColor.white, outgoingMessageTextColor: UIColor.white)
- Press the Play button and try out the new chat functionality by talking to a Doctor. You should see that the Outgoing Messages are now Green and the Incoming Messages are Purple.
- Try changing to the Incoming Messages to be Black with Yellow Text or any Color of your choice. Adjust the
incomingMessageBubbleColorandincomingMessageTextColorvalues to beUIColor.blackandUIColor.yellowrespectively. Try this out in the Simulator by pressing the Play button and experiment with some new Color combinations. 🎨
- Try changing to the Incoming Messages to be Black with Yellow Text or any Color of your choice. Adjust the