jeremiahzhang / gopython Goto Github PK
View Code? Open in Web Editor NEW人生苦短, Python当歌.
人生苦短, Python当歌.


直接安装 ss-qt5
sudo apt install shadowsocks-qt5
在ss-qt5里面设置 ss connection
浏览器 chromium 代理设置
chromium-browser --proxy-server="socks5://127.0.0.1:1080"
可以设置 alias:
nano ~/.bashrc

alias chromium='chromium-browser --proxy-server="socks5://127.0.0.1:1080"'
- github repo 这个简单, 略过
- sign up for a a free "Beginner" account on PythonAnywhere.
- Pulling code down on PythonAnywhere
Start a "bash" console.
PythonAnywhere command-line
$ git clone https://github.com/Anifacc/cslewis-chinese-website.git
$ tree tree cslewis-chinese-website/
$ cd cslewis-chinese-website/
$ virtualenv --python=python2.7 myvenv
$ source myvenv/bin/activate
$ pip install -U django==1.10.5
$ python manage.py migrate
$ python manage.py createsuperuser
4 Setting the virtualenv like ref Deploy! · Django Girls Tutorial said
change it like this:
import os
import sys

path = os.path.expanduser('~/cslewis-chinese-website') # change here
if path not in sys.path:
    sys.path.append(path)

os.environ['DJANGO_SETTINGS_MODULE'] = 'lewis.settings'

from django.core.wsgi import get_wsgi_application
from django.contrib.staticfiles.handlers import StaticFilesHandler
application = StaticFilesHandler(get_wsgi_application())
save it and go to Web tab.
- Debugging
There was an error. You can see the error log.
I found:
I didnot add ALLOWED_Host. So I added it. Then pull the code in pythonanywhere platform. Then it is Ok now.
add-pythonanywhere-allowhost · Anifacc/cslewis-chinese-website@a58994b
Get around: C.S.Lewis — 惊喜之旅
主要参考第2个.
参考: Pipenv & Virtual Environments — The Hitchhiker's Guide to Python
安装 Pipenv.
anifacc@mint ~ $ pip3 -V
The program 'pip3' is currently not installed. You can install it by typing:
sudo apt install python3-pip
anifacc@mint ~ $ sudo apt install python3-pip
[sudo] password for anifacc:
Reading package lists... Done
Building dependency tree
Reading state information... Done
The following additional packages will be installed:
  python-pip-whl
Recommended packages:
  build-essential python3-dev python3-setuptools python3-wheel
The following NEW packages will be installed:
  python-pip-whl python3-pip
0 upgraded, 2 newly installed, 0 to remove and 0 not upgraded.
Need to get 1,219 kB of archives.
After this operation, 1,789 kB of additional disk space will be used.
Do you want to continue? [Y/n] Y
Get:1 http://mirrors.aliyun.com/ubuntu xenial-updates/universe i386 python-pip-whl all 8.1.1-2ubuntu0.4 [1,110 kB]
Get:2 http://mirrors.aliyun.com/ubuntu xenial-updates/universe i386 python3-pip all 8.1.1-2ubuntu0.4 [109 kB]
Fetched 1,219 kB in 1s (883 kB/s)
Selecting previously unselected package python-pip-whl.
(Reading database ... 350790 files and directories currently installed.)
Preparing to unpack .../python-pip-whl_8.1.1-2ubuntu0.4_all.deb ...
Unpacking python-pip-whl (8.1.1-2ubuntu0.4) ...
Selecting previously unselected package python3-pip.
Preparing to unpack .../python3-pip_8.1.1-2ubuntu0.4_all.deb ...
Unpacking python3-pip (8.1.1-2ubuntu0.4) ...
Processing triggers for man-db (2.7.5-1) ...
Setting up python-pip-whl (8.1.1-2ubuntu0.4) ...
Setting up python3-pip (8.1.1-2ubuntu0.4) ...
anifacc@mint ~ $ pip3 -V
pip 8.1.1 from /usr/lib/python3/dist-packages (python 3.5)
使用 pip3 出现问题:
anifacc@mint ~ $ pip3 install --user pipenv
Collecting pipenv
  Downloading pipenv-8.2.6.tar.gz (3.7MB)
    100% |████████████████████████████████| 3.7MB 14kB/s
    Complete output from command python setup.py egg_info:
    Traceback (most recent call last):
      File "<string>", line 1, in <module>
    ImportError: No module named 'setuptools'

    ----------------------------------------
Command "python setup.py egg_info" failed with error code 1 in /tmp/pip-build-oetu478i/pipenv/
You are using pip version 8.1.1, however version 9.0.1 is available.
You should consider upgrading via the 'pip install --upgrade pip' command.
改用 pip , 成功
anifacc@mint ~ $ pip install --user pipenv
Collecting pipenv
  Using cached pipenv-8.2.6.tar.gz
Collecting virtualenv (from pipenv)
  Using cached virtualenv-15.1.0-py2.py3-none-any.whl
Collecting pew>=0.1.26 (from pipenv)
  Using cached pew-0.1.27-py2.py3-none-any.whl
Requirement already satisfied: pip>=9.0.1 in /usr/local/lib/python2.7/dist-packages (from pipenv)
Collecting requests>2.18.0 (from pipenv)
  Using cached requests-2.18.4-py2.py3-none-any.whl
Collecting flake8 (from pipenv)
  Using cached flake8-3.4.1-py2.py3-none-any.whl
Collecting urllib3>=1.21.1 (from pipenv)
  Downloading urllib3-1.22-py2.py3-none-any.whl (132kB)
    100% |████████████████████████████████| 133kB 192kB/s
Collecting pathlib; python_version == "2.7" (from pew>=0.1.26->pipenv)
  Downloading pathlib-1.0.1.tar.gz (49kB)
    100% |████████████████████████████████| 51kB 169kB/s
Collecting shutilwhich; python_version == "2.7" (from pew>=0.1.26->pipenv)
  Downloading shutilwhich-1.1.0.tar.gz
Collecting backports.shutil-get-terminal-size; python_version == "2.7" (from pew>=0.1.26->pipenv)
  Downloading backports.shutil_get_terminal_size-1.0.0-py2.py3-none-any.whl
Requirement already satisfied: setuptools>=17.1 in /usr/local/lib/python2.7/dist-packages (from pew>=0.1.26->pipenv)
Collecting virtualenv-clone>=0.2.5 (from pew>=0.1.26->pipenv)
  Downloading virtualenv-clone-0.2.6.tar.gz
Collecting certifi>=2017.4.17 (from requests>2.18.0->pipenv)
  Downloading certifi-2017.7.27.1-py2.py3-none-any.whl (349kB)
    100% |████████████████████████████████| 358kB 26kB/s
Collecting chardet<3.1.0,>=3.0.2 (from requests>2.18.0->pipenv)
  Downloading chardet-3.0.4-py2.py3-none-any.whl (133kB)
    100% |████████████████████████████████| 143kB 51kB/s
Collecting idna<2.7,>=2.5 (from requests>2.18.0->pipenv)
  Downloading idna-2.6-py2.py3-none-any.whl (56kB)
    100% |████████████████████████████████| 61kB 61kB/s
Requirement already satisfied: enum34; python_version < "3.4" in /usr/lib/python2.7/dist-packages (from flake8->pipenv)
Collecting configparser; python_version < "3.2" (from flake8->pipenv)
  Downloading configparser-3.5.0.tar.gz
Collecting mccabe<0.7.0,>=0.6.0 (from flake8->pipenv)
  Downloading mccabe-0.6.1-py2.py3-none-any.whl
Collecting pycodestyle<2.4.0,>=2.0.0 (from flake8->pipenv)
  Downloading pycodestyle-2.3.1-py2.py3-none-any.whl (45kB)
    100% |████████████████████████████████| 51kB 67kB/s
Collecting pyflakes<1.6.0,>=1.5.0 (from flake8->pipenv)
  Downloading pyflakes-1.5.0-py2.py3-none-any.whl (225kB)
    100% |████████████████████████████████| 225kB 41kB/s
Requirement already satisfied: six>=1.6.0 in /usr/lib/python2.7/dist-packages (from setuptools>=17.1->pew>=0.1.26->pipenv)
Requirement already satisfied: packaging>=16.8 in /usr/local/lib/python2.7/dist-packages (from setuptools>=17.1->pew>=0.1.26->pipenv)
Requirement already satisfied: appdirs>=1.4.0 in /usr/local/lib/python2.7/dist-packages (from setuptools>=17.1->pew>=0.1.26->pipenv)
Requirement already satisfied: pyparsing in /usr/local/lib/python2.7/dist-packages (from packaging>=16.8->setuptools>=17.1->pew>=0.1.26->pipenv)
Building wheels for collected packages: pipenv, pathlib, shutilwhich, virtualenv-clone, configparser
  Running setup.py bdist_wheel for pipenv ... done
  Stored in directory: /home/anifacc/.cache/pip/wheels/bb/27/52/280876ceda869276ad85958c1884a05902f1fc80fa82762758
  Running setup.py bdist_wheel for pathlib ... done
  Stored in directory: /home/anifacc/.cache/pip/wheels/2a/23/a5/d8803db5d631e9f391fe6defe982a238bf5483062eeb34e841
  Running setup.py bdist_wheel for shutilwhich ... done
  Stored in directory: /home/anifacc/.cache/pip/wheels/0e/28/70/d5cc6586f26d614b26901485f6f6072d35cbbb5bbeffb6ea43
  Running setup.py bdist_wheel for virtualenv-clone ... done
  Stored in directory: /home/anifacc/.cache/pip/wheels/24/51/ef/93120d304d240b4b6c2066454250a1626e04f73d34417b956d
  Running setup.py bdist_wheel for configparser ... done
  Stored in directory: /home/anifacc/.cache/pip/wheels/1c/bd/b4/277af3f6c40645661b4cd1c21df26aca0f2e1e9714a1d4cda8
Successfully built pipenv pathlib shutilwhich virtualenv-clone configparser
Installing collected packages: virtualenv, pathlib, shutilwhich, backports.shutil-get-terminal-size, virtualenv-clone, pew, certifi, chardet, idna, urllib3, requests, configparser, mccabe, pycodestyle, pyflakes, flake8, pipenv
Successfully installed backports.shutil-get-terminal-size-1.0.0 certifi-2017.7.27.1 chardet-3.0.4 configparser-3.5.0 flake8-3.4.1 idna-2.6 mccabe-0.6.1 pathlib-1.0.1 pew-0.1.27 pipenv-8.2.6 pycodestyle-2.3.1 pyflakes-1.5.0 requests-2.18.4 shutilwhich-1.1.0 urllib3-1.22 virtualenv-15.1.0 virtualenv-clone-0.2.6
不过问题来了, pip 使用的 python 2. 要是我想用安装 python 3 的库, 也能使用 该 pip 嘛?
使用 参考:
$ python -V
$ python2 -V
$ python3 -V
查看系统安装的 python 版本.
Python 2.7.12
Python 3.5.2
我想使用最新的 python 3.6 版本.
参考:
Python 3.6 - install latest version into Linux Mint 文中的结果是 3.6 不会覆盖掉 3.5.
那么就先这样?
还是去 Python 官网看看.
目前 2017.10.01 python3 最新版 3.6.2
使用居然出错.
anifacc@mint ~ $ sudo add-apt-repository ppa:jonathonf/python-3.6
Cannot add PPA: 'No JSON object could be decoded'.
google it. 暂未解决. 目前不是主要问题.
cd AI
我的 project,现在 AI 这个project 下面建立 virtual env
Creating a virtualenv for this project…
Using /usr/bin/python3 to create virtualenv…
⠋Already using interpreter /usr/bin/python3
Using base prefix '/usr'
New python executable in /home/anifacc/.local/share/virtualenvs/AI-5UXR8Oos/bin/python3
Also creating executable in /home/anifacc/.local/share/virtualenvs/AI-5UXR8Oos/bin/python
Installing setuptools, pip, wheel...done.

Virtualenv location: /home/anifacc/.local/share/virtualenvs/AI-5UXR8Oos
Creating a Pipfile for this project…
anifacc@mint ~/Documents/gopython/AI $ ls
algorithm-basic                        data-mining-with-python        master-machine-learning-with-python  practice-machine-learning-with-python
book-neuron-network-and-deep-learning  deep-learning-with-python      ml-review-road.md                    protemplate.py
course-learning-from-data-of-caltech   machine-learning-book-of-zhou  Pipfile                              README.md
anifacc@mint ~/Documents/gopython/AI $ pipenv -h
Usage: pipenv [OPTIONS] COMMAND [ARGS]...

Options:
  --update         Update Pipenv & pip to latest.
  --where          Output project home information.
  --venv           Output virtualenv information.
  --py             Output Python interpreter information.
  --envs           Output Environment Variable options.
  --rm             Remove the virtualenv.
  --bare           Minimal output.
  --completion     Output completion (to be eval'd).
  --man            Display manpage.
  --three / --two  Use Python 3/2 when creating virtualenv.
  --python TEXT    Specify which version of Python virtualenv should use.
  --site-packages  Enable site-packages for the virtualenv.
  --jumbotron      An easter egg, effectively.
  --version        Show the version and exit.
  -h, --help       Show this message and exit.

Commands:
  check      Checks for security vulnerabilities and...
  graph      Displays currently–installed dependency graph...
  install    Installs provided packages and adds them to...
  lock       Generates Pipfile.lock.
  open       View a given module in your editor.
  run        Spawns a command installed into the...
  shell      Spawns a shell within the virtualenv.
  uninstall  Un-installs a provided package and removes it...
  update     Uninstalls all packages, and re-installs...
anifacc@mint ~/Documents/gopython/AI $ pipenv lock
Locking [dev-packages] dependencies…
Locking [packages] dependencies…
Updated Pipfile.lock (711973)!
anifacc@mint ~/Documents/gopython/AI $ ls
algorithm-basic                        data-mining-with-python        master-machine-learning-with-python  Pipfile.lock                           README.md
book-neuron-network-and-deep-learning  deep-learning-with-python      ml-review-road.md                    practice-machine-learning-with-python
course-learning-from-data-of-caltech   machine-learning-book-of-zhou  Pipfile                              protemplate.py
anifacc@mint ~/Documents/gopython/AI $ pipenv install numpy --timeout 1000
Installing numpy…
Collecting numpy

Error:  An error occurred while installing numpy!
  Could not find a version that satisfies the requirement numpy (from versions: )
No matching distribution found for numpy

anifacc@mint ~/Documents/gopython/AI $ pip search numpy
Exception:
Traceback (most recent call last):
  File "/home/anifacc/.local/lib/python3.5/site-packages/pip/_vendor/requests/packages/urllib3/response.py", line 232, in _error_catcher
    yield
  File "/home/anifacc/.local/lib/python3.5/site-packages/pip/_vendor/requests/packages/urllib3/response.py", line 314, in read
    data = self._fp.read(amt)
  File "/usr/lib/python3.5/http/client.py", line 448, in read
    n = self.readinto(b)
  File "/usr/lib/python3.5/http/client.py", line 478, in readinto
    return self._readinto_chunked(b)
  File "/usr/lib/python3.5/http/client.py", line 578, in _readinto_chunked
    n = self._safe_readinto(mvb)
  File "/usr/lib/python3.5/http/client.py", line 623, in _safe_readinto
    n = self.fp.readinto(mvb)
  File "/usr/lib/python3.5/socket.py", line 575, in readinto
    return self._sock.recv_into(b)
  File "/usr/lib/python3.5/ssl.py", line 929, in recv_into
    return self.read(nbytes, buffer)
  File "/usr/lib/python3.5/ssl.py", line 791, in read
    return self._sslobj.read(len, buffer)
  File "/usr/lib/python3.5/ssl.py", line 575, in read
    v = self._sslobj.read(len, buffer)
socket.timeout: The read operation timed out

During handling of the above exception, another exception occurred:

Traceback (most recent call last):
  File "/home/anifacc/.local/lib/python3.5/site-packages/pip/basecommand.py", line 215, in main
    status = self.run(options, args)
  File "/home/anifacc/.local/lib/python3.5/site-packages/pip/commands/search.py", line 45, in run
    pypi_hits = self.search(query, options)
  File "/home/anifacc/.local/lib/python3.5/site-packages/pip/commands/search.py", line 62, in search
    hits = pypi.search({'name': query, 'summary': query}, 'or')
  File "/usr/lib/python3.5/xmlrpc/client.py", line 1092, in __call__
    return self.__send(self.__name, args)
  File "/usr/lib/python3.5/xmlrpc/client.py", line 1432, in __request
    verbose=self.__verbose
  File "/home/anifacc/.local/lib/python3.5/site-packages/pip/download.py", line 778, in request
    return self.parse_response(response.raw)
  File "/usr/lib/python3.5/xmlrpc/client.py", line 1311, in parse_response
    data = stream.read(1024)
  File "/home/anifacc/.local/lib/python3.5/site-packages/pip/_vendor/requests/packages/urllib3/response.py", line 324, in read
    flush_decoder = True
  File "/usr/lib/python3.5/contextlib.py", line 77, in __exit__
    self.gen.throw(type, value, traceback)
  File "/home/anifacc/.local/lib/python3.5/site-packages/pip/_vendor/requests/packages/urllib3/response.py", line 237, in _error_catcher
    raise ReadTimeoutError(self._pool, None, 'Read timed out.')
pip._vendor.requests.packages.urllib3.exceptions.ReadTimeoutError: HTTPSConnectionPool(host='pypi.python.org', port=443): Read timed out.
anifacc@mint ~/Documents/gopython/AI $ cat ^C
anifacc@mint ~/Documents/gopython/AI $ cat Pipfile.lock
{
    "_meta": {
        "hash": {
            "sha256": "101896288cdd87812255ae529b46012345afb654aafcb421f5a82afbbb711973"
        },
        "host-environment-markers": {
            "implementation_name": "cpython",
            "implementation_version": "3.5.2",
            "os_name": "posix",
            "platform_machine": "i686",
            "platform_python_implementation": "CPython",
            "platform_release": "4.10.0-35-generic",
            "platform_system": "Linux",
            "platform_version": "#39~16.04.1-Ubuntu SMP Wed Sep 13 09:02:25 UTC 2017",
            "python_full_version": "3.5.2",
            "python_version": "3.5",
            "sys_platform": "linux"
        },
        "pipfile-spec": 6,
        "requires": {
            "python_version": "3.5"
        },
        "sources": [
            {
                "name": "pypi",
                "url": "https://pypi.python.org/simple",
                "verify_ssl": true
            }
        ]
    },
    "default": {},
    "develop": {}
}
anifacc@mint ~/Documents/gopython/AI $ cat Pipfile
[[source]]
name = "pypi"
verify_ssl = true
url = "https://pypi.python.org/simple"

[requires]
python_version = "3.5"

[dev-packages]

[packages]
remote: Support for password authentication was removed on August 13, 2021. Please use a personal access token instead.
remote: Please see https://github.blog/2020-12-15-token-authentication-requirements-for-git-operations/ for more information.
fatal: unable to access "..." : The requested URL returned error: 403
win7 + ubuntu 14.04LTS 双系统
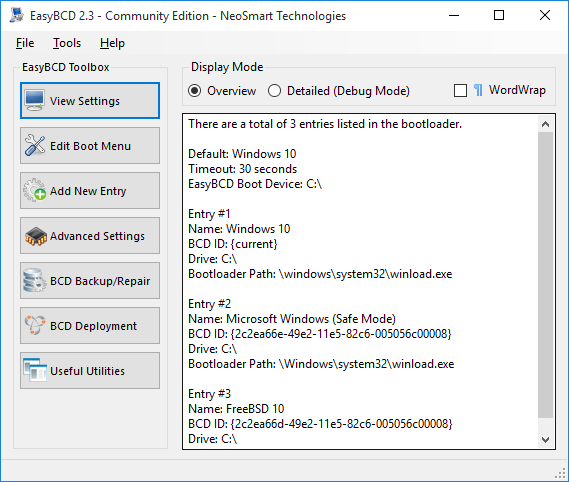 在BCD development 下 write MBR 选择的是 vista+ 的那个 list 选项
(网络上各种方法, 最后还是使用这种方法, 先前的双系统就是使用EasyBCD 制作引导的) 参见jeremiahzhang.github.io/2015-10-27-Ubuntu-Install-DualBoot.md at master · JeremiahZhang/jeremiahzhang.github.io
 还是未果, boot 不了
制作U盘启动后的U盘本来8G的 现在剩下1.6G可以使用
在另一台 win10 电脑上解决
填坑:
cmd 键入 Diskpart 进入dispart 命令窗口list diskselect disk 1 disk 1就是我那个 U 盘clean 清楚空间内容从此 成为薄荷一员 离开 windows 清爽.
Mint 你值得拥有.
尝试批量下载新浪博客文章,抓取博文名字的时候,出现乱码现象。
官网下载 Linux版 - 有道词典 ubuntu版本 32位
youdao-dict_1.1.0-0-ubuntu_i386.deb
根据 Ubuntu 16.04安装有道词典 - 时间轨迹 安装执行.
坑:
gstreamer0.10-plugins-ugly, terminal 中安装这个依赖包是没有的问题来了,
解决:
$ sudo apt-get install libcanberra-gtk-module
$ sudo apt-get install qtdeclarative5-dev
$ sudo apt-get install build-essential qmlscene qt5-qmake qt5-default
$ sudo apt-get install qml-module-qtgraphicaleffects qml-module-qtquick-controls
$ sudo apt-get -f install
# deb文件会提示安装依赖软件包的清单
$ apt-get install python3 python3-dbus python3-lxml python3-pil
$ apt-get install python3-pyqt5 python3-pyqt5.qtmultimedia python3-pyqt5.qtquick python3-pyqt5.qtwebkit
$ apt-get install python3-requests python3-xdg python3-xlib
$ apt-get install tesseract-ocr tesseract-ocr-eng tesseract-ocr-chi-sim tesseract-ocr-chi-tra
$ apt-get install gir1.2-appindicator3-0.1 qtdeclarative5-controls-plugin libqt5multimedia5-plugins ttf-wqy-microhei
直接双击youdao-dict_1.1.0-0-ubuntu_i386.deb 安装会自动安装22个依赖包的,但是linux mint 还需要之前的依赖包.
reinstall 有道词典 成功
2017.06.13
A declarative, efficient, and flexible JavaScript library for building user interfaces.
🖖 Vue.js is a progressive, incrementally-adoptable JavaScript framework for building UI on the web.
TypeScript is a superset of JavaScript that compiles to clean JavaScript output.
An Open Source Machine Learning Framework for Everyone
The Web framework for perfectionists with deadlines.
A PHP framework for web artisans
Bring data to life with SVG, Canvas and HTML. 📊📈🎉
JavaScript (JS) is a lightweight interpreted programming language with first-class functions.
Some thing interesting about web. New door for the world.
A server is a program made to process requests and deliver data to clients.
Machine learning is a way of modeling and interpreting data that allows a piece of software to respond intelligently.
Some thing interesting about visualization, use data art
Some thing interesting about game, make everyone happy.
We are working to build community through open source technology. NB: members must have two-factor auth.
Open source projects and samples from Microsoft.
Google ❤️ Open Source for everyone.
Alibaba Open Source for everyone
Data-Driven Documents codes.
China tencent open source team.