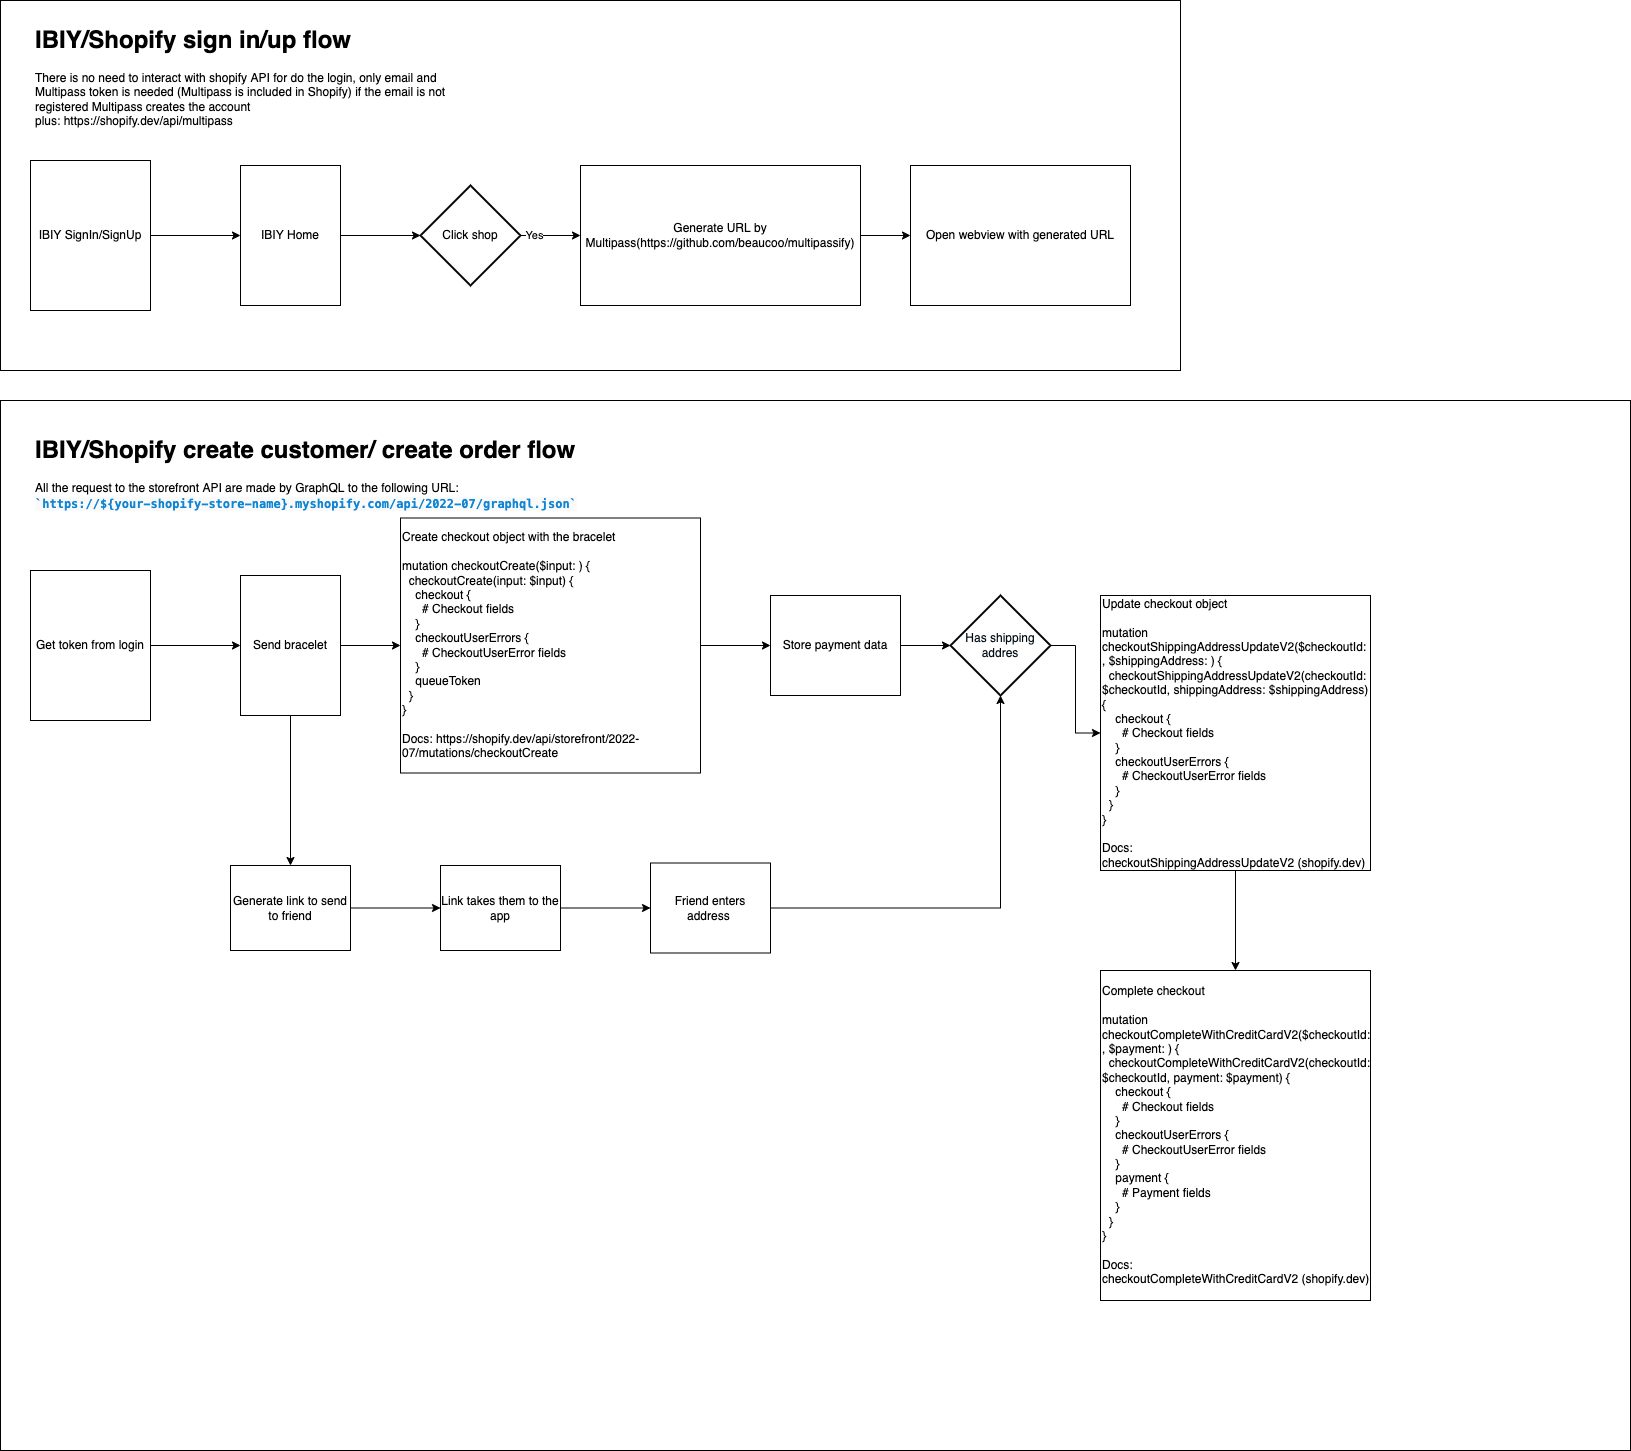
This research comes about the shopify integration with React Native and how the customers, orders and checkout behaves.
The final intention of this is guarantee if the order should be payed(or store payment info with the order) and later fill the shipment info to complete the checkout
The final intention of this is guarantee if the order should be payed(or store payment info with the order) and later fill the shipment info to complete the checkout
Connect with shopify storefront API (Link to storefront api docs)
First of all we need to create an account and next create a store in shopify page to get the storefront access token
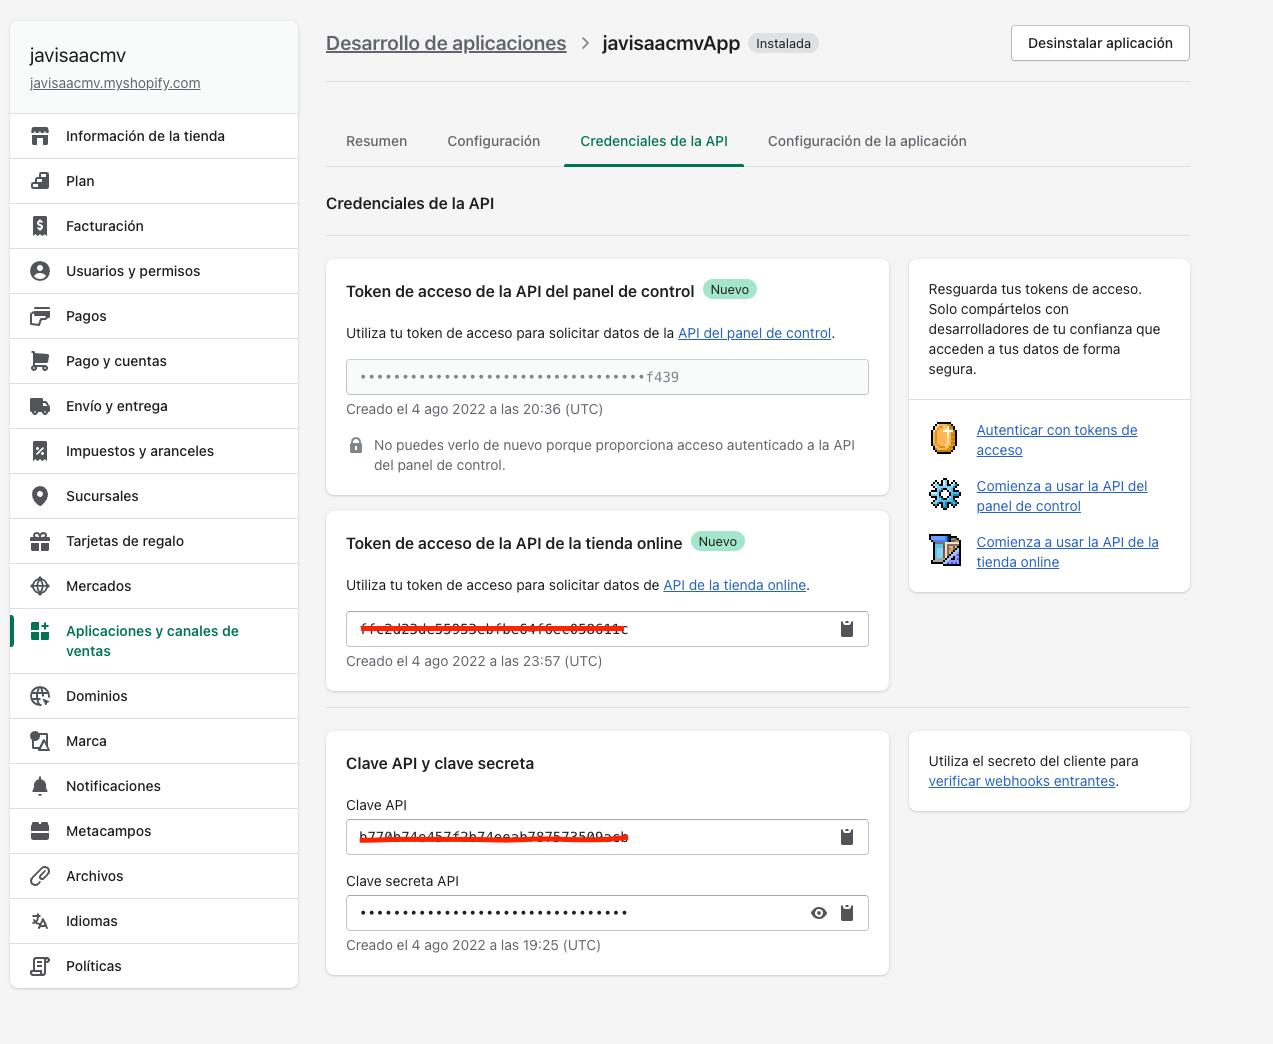
Then we can use it to make the requets. note: the storefront API only works with graphQL.
const httpLink = createHttpLink({
  uri: `https://${'your_storename'}.myshopify.com/api/2022-07/graphql.json`,
});


const authLink = setContext((_, {headers}) => {
  return {
    headers: {
      ...headers,
      'X-Shopify-Storefront-Access-Token': 'your_store_front_access_token',
    },
  };
});

const client = new ApolloClient({
  link: authLink.concat(httpLink),
  cache: new InMemoryCache(),
});

return (
  <NativeBaseProvider>
    <ApolloProvider client={client}>
      ...
    </ApolloProvider>
  </NativeBaseProvider>
);
now we can make requests to the storefront API
Once we can make requests to the API, we can create customers as we will see below
export const CREATE_CUSTOMER = gql`
mutation customerCreate($input: CustomerCreateInput!) {
  customerCreate(input: $input) {
    customer {
      firstName
      lastName
      email
      phone
      acceptsMarketing
    }
    customerUserErrors {
      field
      message
      code
    }
  }
}
`;
   const [createCustomer] = useMutation(CREATE_CUSTOMER);
   const customer = await createCustomer({
        variables: {
          input: {
            email: email,
            password: password,
          },
        },
      });
Since we have created the customer, we can login with the same email and password and get the Customer access token
    export const GET_CUSTOMER_TOKEN = gql`
    mutation customerAccessTokenCreate($input: CustomerAccessTokenCreateInput!) {
      customerAccessTokenCreate(input: $input) {
        customerAccessToken {
          accessToken
          expiresAt
        }
        customerUserErrors {
          code
          field
          message
        }
      }
    }
  `;
    const [getToken] = useMutation(GET_CUSTOMER_TOKEN);
    const customer = await getToken({
            variables: {
              input: {
                email: email,
                password: password,
              },
            },
          });
We can get the product list that we already create in the store page
export const GET_PRODUCTS = gql`
query products($first: Int) {
    products(first: $first) {
    edges {
        cursor
        node {
        id
        title
        description
        handle
        variants(first: $first) {
            edges {
            cursor
            node {
                id
                title
                quantityAvailable
                priceV2 {
                amount
                currencyCode
                }
            }
            }
        }
        }
    }
    }
}
`;

 const {loading: productsLoading, error: productsError, data: productsData}
        = useQuery(GET_PRODUCTS, {
            variables: {first: 20},
        });
Once we have the product's info we have 2 ways for do the thing, can fill the checkout data without shipping address and store it in Data Base or do the checkoutCreate mutation and when we have the shipping address do the checkoutShippingAddressUpdateV2 mutation, in my case I store it
    const createCheckout = async (prod: any) => {
        const realm = await Realm.open({
        path: 'myrealm',
        schema: [
            CheckoutSchema,
            BuyerIdentitySchema,
            LineItemsSchema,
            ShippingAddressSchema,
        ],
        schemaVersion: 2,
        });
        const email = await AsyncStorage.getItem('customer_email');
        const checkout = {
        _id: prod.variants.edges[0].node.id,
        allowPartialAddresses: false,
        buyerIdentity: {
            countryCode: 'MX',
        },
        email,
        lineItems: [
            {
            quantity: 1,
            variantId: prod.variants.edges[0].node.id,
            },
        ],
        shippingAddress: {
            address1: '',
            address2: '',
            city: '',
            company: '',
            country: '',
            firstName: '',
            lastName: '',
            phone: '',
            province: '',
            zip: '',
        },
        };
        let newCheckout;
        realm.write(() => {
        newCheckout = realm.create('Checkout', checkout);

        console.log(newCheckout);
        });
    };
When we have the shipping address we can update the info
const updateCheckout = async (checkout: any, shippingAddress: any) => {
    console.log(checkout);
    const realm = await Realm.open({
    path: 'myrealm',
    schema: [
        CheckoutSchema,
        BuyerIdentitySchema,
        LineItemsSchema,
        ShippingAddressSchema,
    ],
    schemaVersion: 2,
    });

    let newCheckout;
    realm.write(() => {
    newCheckout = realm.create(
        'Checkout',
        {...checkout, shippingAddress, _id: checkout['_id']},
        'modified',
    );

    console.log(newCheckout);
    });
};
export const CREATE_CHECKOUT = gql`
    mutation checkoutCreate($input: CheckoutCreateInput!) {
        checkoutCreate(input: $input) {
        checkout {
            id
        }
        }
    }
`;

export const CHECKOUT_COMPLETE_FREE = gql`
    mutation checkoutCompleteFree($checkoutId: ID!) {
        checkoutCompleteFree(checkoutId: $checkoutId) {
        checkout {
            id
        }
        }
    }
`;

const [createCheckoutMutation] = useMutation(CREATE_CHECKOUT);
const [completeCheckoutMutation] = useMutation(CHECKOUT_COMPLETE_FREE);

const createCheckout = async (checkout: any) => {
    const {_id, ...checkoutCreateInfo} = checkout;
    const check = await createCheckoutMutation({
    variables: {input: checkoutCreateInfo},
    });
    const checkoutId = check?.data?.checkoutCreate?.checkout.id;

    const complete = await completeCheckoutMutation({variables: {checkoutId}});

    console.log(complete?.data?.checkoutCompleteFree.checkout);
};

I complete the checkout with the checkoutCompleteFree mutation, the difference with other methods of complete checkouts is only the payment info
With this example we can agree that we can do the checkout and later another person could enter the shipping address and finish the checkout, and we can do it by 2 different ways, storing the checkout info in DB or doing the mutation and updating the checkout info when enters the shipping address.

