
stackinabox.io is a Vagrant project that configures a single Ubuntu 14.04 VirtualBox VM with OpenStack and Docker. The project pulls Docker images for UrbanCode Deploy, the UrbanCode Deploy agent and relay, the UrbanCode Deploy Blueprint Designer, and the Blueprint Designer Engine. Using this Vagrant project, users are able to develop OpenStack Heat-based automation to deploy complex, multiplatform applications to the embedded OpenStack instance or to any other cloud provider supported by the Blueprint Designer, including Amazon Web Services, SoftLayer, Azure, or even your on-premise VMware vCenter.
Using stackinabox.io, our hope is that you will share the automation you develop with the larger community. For an example, check out the JKE Banking Application.
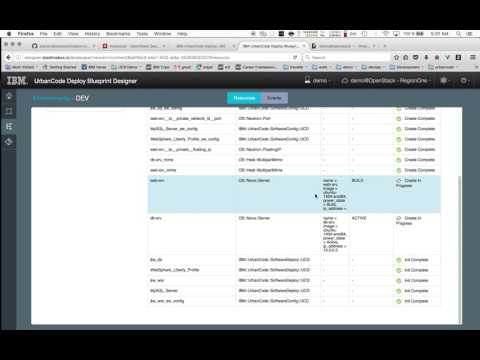
Here's a video demonstrating some of the capabilites of stackinabox:
The plan is to add further Docker images to this Vagrant environment to support many other deployment automation tools such as:
- UrbanCode Build (not yet implemented)
- UrbanCode Release (not yet implemented)
- Chef Server (not yet implemented)
- Salt Stack (not yet implemented)
- Puppet (not yet implemented)
vagrant plugin install vagrant-docker-compose
```

#### Run `vagrant up`
Verify that VirtualBox, Vagrant, and Git are installed and running by typing `vboxmanage help`, `vagrant help`, and `git help` at the command shell.

Execute these commands:
git clone https://github.com/stackinabox/stackinabox.io.git cd stackinabox.io/vagrant vagrant up
The `vagrant up` command will take a while to complete. The project will download the ```stackinabox/openstack``` vagrant box VirtualBox VM from atlas.hashicorp.com. Once downloaded, Vagrant will launch the VM in VirtualBox in "headless" mode (no GUI). When the VM is up, Docker Compose is used to start the UrbanCode products in multiple containers. You will see this output at the end of the process coming from a `docker-compose up` command on the VM:
... ==> opdk: Creating ucddb ==> opdk: Creating heatengine ==> opdk: Creating blueprintdb ==> opdk: Creating ucd ==> opdk: Creating blueprintdesigner ==> opdk: Creating agent ==> opdk: Creating agent-relay ...
When the Vagrant environment is up, you can open your local web browser to the [Blueprint Designer](http://designer.stackinabox.io) and login with `demo`/`labstack`.  The demo user is intended to be the primary user for building your automation.  The demo user belongs to a 'demo' team in the Blueprint Designer and has it's own tenant in the embedded [OpenStack](http://openstack.stackinabox.io).  Additional login information is provided below.

### Important Tip:

It is intended to run stackinabox on your laptop and NOT within another VM since it starts it's own VM environment.  If you are concerned about messing up your machine... DON'T BE, that's what Vagrant will manage the ```environment``` for you and ensure that your machine is not effected by any programs running inside the Vagrant environment. To learn more about Vagrant read the docs here: [http://www.vagrantup.com/docs](http://www.vagrantup.com/docs)

___
### Halt, Resume, or Destroy the Vagrant Machine
You can run `vagrant global-status` to see a list of running Vagrant machines and their IDs.

#### Halt
To halt/suspend a machine, naviagte to the directory where you cloned the stackinabox.io repository and execute `vagrant halt`:
cd /path/to/stackinabox.io/repo vagrant halt
#### Resume
To resume a halted machine and restore all previous work/data:
cd /path/to/stackinabox.io/repo vagrant resume
#### Destroy
To destroy a Vagrant machine and restart with a clean slate:
cd /path/to/stackinabox.io/repo vagrant destroy vagrant up
___
### Access Information
[Web-Based Shell Terminal](http://shell.stackinabox.io) - Available at http://shell.stackinabox.io
- Login with `demo`/`labstack` or `vagrant`/`vagrant`


[OpenStack](http://openstack.stackinabox.io) - Available at http://openstack.stackinabox.io
- Login with `demo`/`labstack` or `admin`/`labstack`


[UrbanCode Deploy Server](http://ucd.stackinabox.io) - Available at http://ucd.stackinabox.io
- Login with `admin`/`admin`


[Blueprint Designer](http://designer.stackinabox.io) (Heat Template Designer) - Available at http://designer.stackinabox.io
- Login with `demo`/`labstack` or `ucdpadmin`/`ucdpadmin`

___
### Additional Steps

#### Install the JKE Sample
Open your browser to the [Web Terminal](http://shell.stackinabox.io).  Login as the `demo` user with password `labstack` and execute the following commands:
docker run --rm stackinabox/demo-jke
To deploy and run the demo follow these steps:

  1. Open your browser to the [Blueprint Designer](http://designer.stackinabox.io) and login with `demo`/`labstack`.
  2. Click on the `Repositories` link on the left-side of the page. Once the `Repositories` page loads click on the drop-down next to the `Repository` text at the top of the page and click the `Clone Repository` button at the bottom of the drop-down menu.
  3. In the `Repository URL` field enter `https://github.com/stackinabox/jke-blueprint.git` and click `Submit`. Once the repo is cloned you can click on the `Blueprints` tab on the left side of the page - the icon looks like a box and the tool tip says `Blueprints` when you hover your mouse over it.  You should now see a folder called `jke-blueprint` along with a `default` and `demo` folder.
  4. Click the triangle to the left of `jke-blueprint` to expand the folder.  Now you can open the JKE Blueprint by clicking on the `jke.yml` under the `jke-blueprint` folder.
  5. Click on the blue `Provision` button at the top of the page. The `Provision Blueprint to new Environment` dialog will pop up. Enter the following values for the fields presented in the dialog.

    - `Environment Name`: DEV
    - `Agent Parameters`: leave alone
    - `Image Parameters`:
      - `Flavor`: `m1.small`
      - `Key Name`: `demo_key`
      - `Web Server Image`: `ubuntu-1404-amd64`
      - `Database Server Image`: `ubuntu-1404-amd64`
    - `Network Parameters`:
      - `Availability Zone`: `nova`
      - `Private Network`: `private`
      - `Public Network`: `public`

  6. Click on the blue `Provision` button at the bottom of the dialog
  7. Click on the `Environments` tab on the left of the page. It looks like the letter `E`. You will see a table displaying the known `environments` that have been deployed via the `Blueprint Designer` that you have access to. You should see and entry in the table with the `DEV` `Environment` name and the `jke` `Applied Blueprint`.
  8. Click on the `DEV` link under the `Environment` column corresponding to the `jke` `Applied Blueprint`.  This will load the `Environment` page for the blueprint you just provisioned. Wait here until all entries in the table show the green check circle icon with the text `Create Complete` beside it.
  9. Click on the `Outputs` link to the left of the page. This will bring you to the blueprints defined `outputs` page.  These are dynamically generated as part of provisioning the blueprint and help with finding the correct IP address of an application in a cloud environment that uses auto-assigned floating IPs.
  10. Right-click on the link next to the `application_url` output value in the table to open the link in a new window/tab. This will open the `JKE Banking` application and load the landing page into your browser.
  11. Login to the `JKE Banking` application using the username `jbrown` and the password `jbrown`
  12. You can delete the provisioned blueprint for the `JKE Banking` application by going back to the [Blueprint Designer](http://designer.stackinabox.io/landscaper/view/environment) `Environments` page at: http://designer.stackinabox.io/landscaper/view/environment and clicking the red trash can icon under the `Actions` column on the right side of the page corresponding to the `DEV` environment you just provisioned.
  13. Congrats! You just provisioned a blueprint.

___
### Troubleshooting

#### Failure while downloading OPDK
You may have timeout errors or see the following while downloading OPDK after running `vagrant up`:
==> opdk: Adding box 'stackinabox/opdk' (v0.9.4) for provider: virtualbox opdk: Downloading: https://atlas.hashicorp.com/stackinabox/boxes/opdk/versions/0.9.4/providers/virtualbox.box ==> opdk: Box download is resuming from prior download progress An error occurred while downloading the remote file. The error message, if any, is reproduced below. Please fix this error and try again.
SSL read: error:00000000:lib(0):func(0):reason(0), errno 60
In this case you should download the OpenStack VM directly via your browser (preferably using a download manager plugin) from [here](https://github.com/stackinabox/devstack/releases/latest/openstack.box) by clicking on the `openstack.box` link. Once you have the VirtalBox VM downloaded locally (`.box` file), you can add the VM to your Vagrant setup using a `vagrant box add` command:
$ vagrant box add /tmp/Downloads/openstack.box --name stackinabox/openstack ==> box: Box file was not detected as metadata. Adding it directly... ==> box: Adding box 'stackinabox/openstack' (v0) for provider: box: Unpacking necessary files from: file:///tmp/Downloads/opdk.box ==> box: Successfully added box 'stackinabox/opdk' (v0) for 'virtualbox'!
Next, you must modify your Vagrantfile by adding a `config.vm.box.url` line and commenting out the `opdk.vm.box_version` line:
... config.vm.box_url = ["file:///tmp/Downloads/opdk.box"] config.vm.define "opdk" do |opdk|
opdk.vm.box = "stackinabox/openstack"
  # opdk.vm.box_version = "= 0.9.4"
...
Retrying the `vagrant up` command should now produce the following output to start:
Bringing machine 'opdk' up with 'virtualbox' provider... ==> opdk: Importing base box 'stackinabox/opdk'...


