Scrivener is a program for all kinds of writers, handling the structural organisation and constructive process of writing like nothing else. You write and mange your text, ideas, figures and reference materials all in one place without having to worry about the final "look". The final "look" is handled by a process called compiling, where you choose the output format and select the contents with great flexibility. Although Scrivener uses rich text internally, it has excellent integration with plain text markdown. Compiling your Scrivener projects via markdown offers numerous advantages over rich text: it creates more structured, beautiful and flexible documents without lots of fussing in a Word processor or layout software. For example:
- Binder headings are properly converted into semantic heading levels.
- Figures and figure captions get proper styling.
- Semantically styled block quotes, code blocks (with full syntax highlighting), and many inline styles.
- Mathematical equations are properly parsed to multipe output formats.
- You can generate multiple outputs (EPub3, HTML, PDF, LaTeX, DOCX, ODT) simultaneously from a single compile; and trigger other further tools to automate many workflows.
- You can use a Microsoft Word/LibreOffice template file to provide all page setup and customised styles without any fussing in a word processor afterwards.
- For academics, by utilising Pandoc as the markdown processor, you can automagically generate a full Bibliography.
- For technical writers, you can add semantic custom block and span structures (warning or info boxes for example).
- For LaTeX users, there is a lot of flexibility using templates and meta-data.
This save you lots of time, especially if you compile regularly during collaborative editing.
Because of Pandoc's great flexibility, there are many possible settings to configure. To simplify this, you can run Pandoc using "template" tools like Pandocomatic. For each document output, the template can specify all the options, variables and metadata in a configuration file. Templates allow you to run pre– and post–processors for more complex workflows (i.e. you could automate moving a HTML file to a web server after Scrivener compile). To use the pandocomatic templates with Scrivener, you specify their name in the front–matter or metadata, and all the settings are automated when Pandoc is run.
- Install the latest
pandocandpandocomatic. - Configure one or more templates; you can base them on mine shared below.
- In Scrivener, use a front-matter document containing the required settings and compile to Multimarkdown. I supply a compile format for you to use.
- Scrivener's compile process triggers
pandocomaticautomagically creating the final output(s).
As a teaser for the full workflow, you can download a sample Scrivener project which bundles all the required files into the Binder (instructions included there to set up).
Apart from Scrivener (V3.x is much more capable for this workflow), you need to install Pandoc and Pandocomatic. This requires a minimal amount of typing into the macOS terminal. You can install pandoc manually, but it is generally better to use Homebrew to install pandoc, as it can keep everything up to date. So first,follow the instructions to install Homebrew, and then install pandoc using the brew command:
> brew install pandoc pandoc-citeproc pandoc-crossrefIf you already installed pandoc manually, but want to use brew, then you can use brew link --overwrite ... instead of brew install .... You can run the command brew update every so often to ensure these tools are kept up-to-date.
You use Ruby's gem command (built-in to macOS) to install pandocomatic (putting the binary in /usr/local/bin, as recent macOS versions do not allow /usr/bin):
> sudo gem install paru pandocomatic -n /usr/local/binTo keep both Pandoc and Pandocomatic up-to-date, you can run the update commands like so every week or so:
> brew update; sudo gem update paru pandocomatic -n /usr/local/binThe most important folder for this workflow is the Pandoc data directory: $HOME/.pandoc ($HOME is your user directory, for example /Users/johndoe/). Though not required, it is easiest to organise your templates, filters and other files there. It is a hidden folder by default, so you can use the terminal to manage it, or learn how to unhide it first if you prefer to use Finder.
You can explore my working Pandoc folder here. It is comprised of a series of subfolders organised into the files Pandoc can use. You can install my Pandoc folder by downloading it and unzipping it into your $HOME/.pandoc
pandocomatic uses a single configuration file normally stored at the root of the Pandoc data directory: $HOME/.pandoc/pandocomatic.yaml. A simplified sample pandocomatic.yaml is shared here; this won't work without customisation, but it gives you an idea of how the pandocomatic styles work. The basic idea is you create a series of styles, and each style collects together a bunch of settings and configurations to produce a particular output. So I have docx style which is a basic Word conversion, but also a docx-refs which runs the bibliographic tools to generates a bibliography automatically.
For the reset of the files in the Pandoc data directory: all custom Pandoc templates reside in $HOME/.pandoc/templates, and filters in $HOME/.pandoc/filters. For bibliographies, I symbolically link my Bibliography.bib into in $HOME/.pandoc and store my Journal style files in $HOME/.pandoc/csl. pandocomatic enables the use of pre– and post–processor scripts and these are stored in their own subfolders.
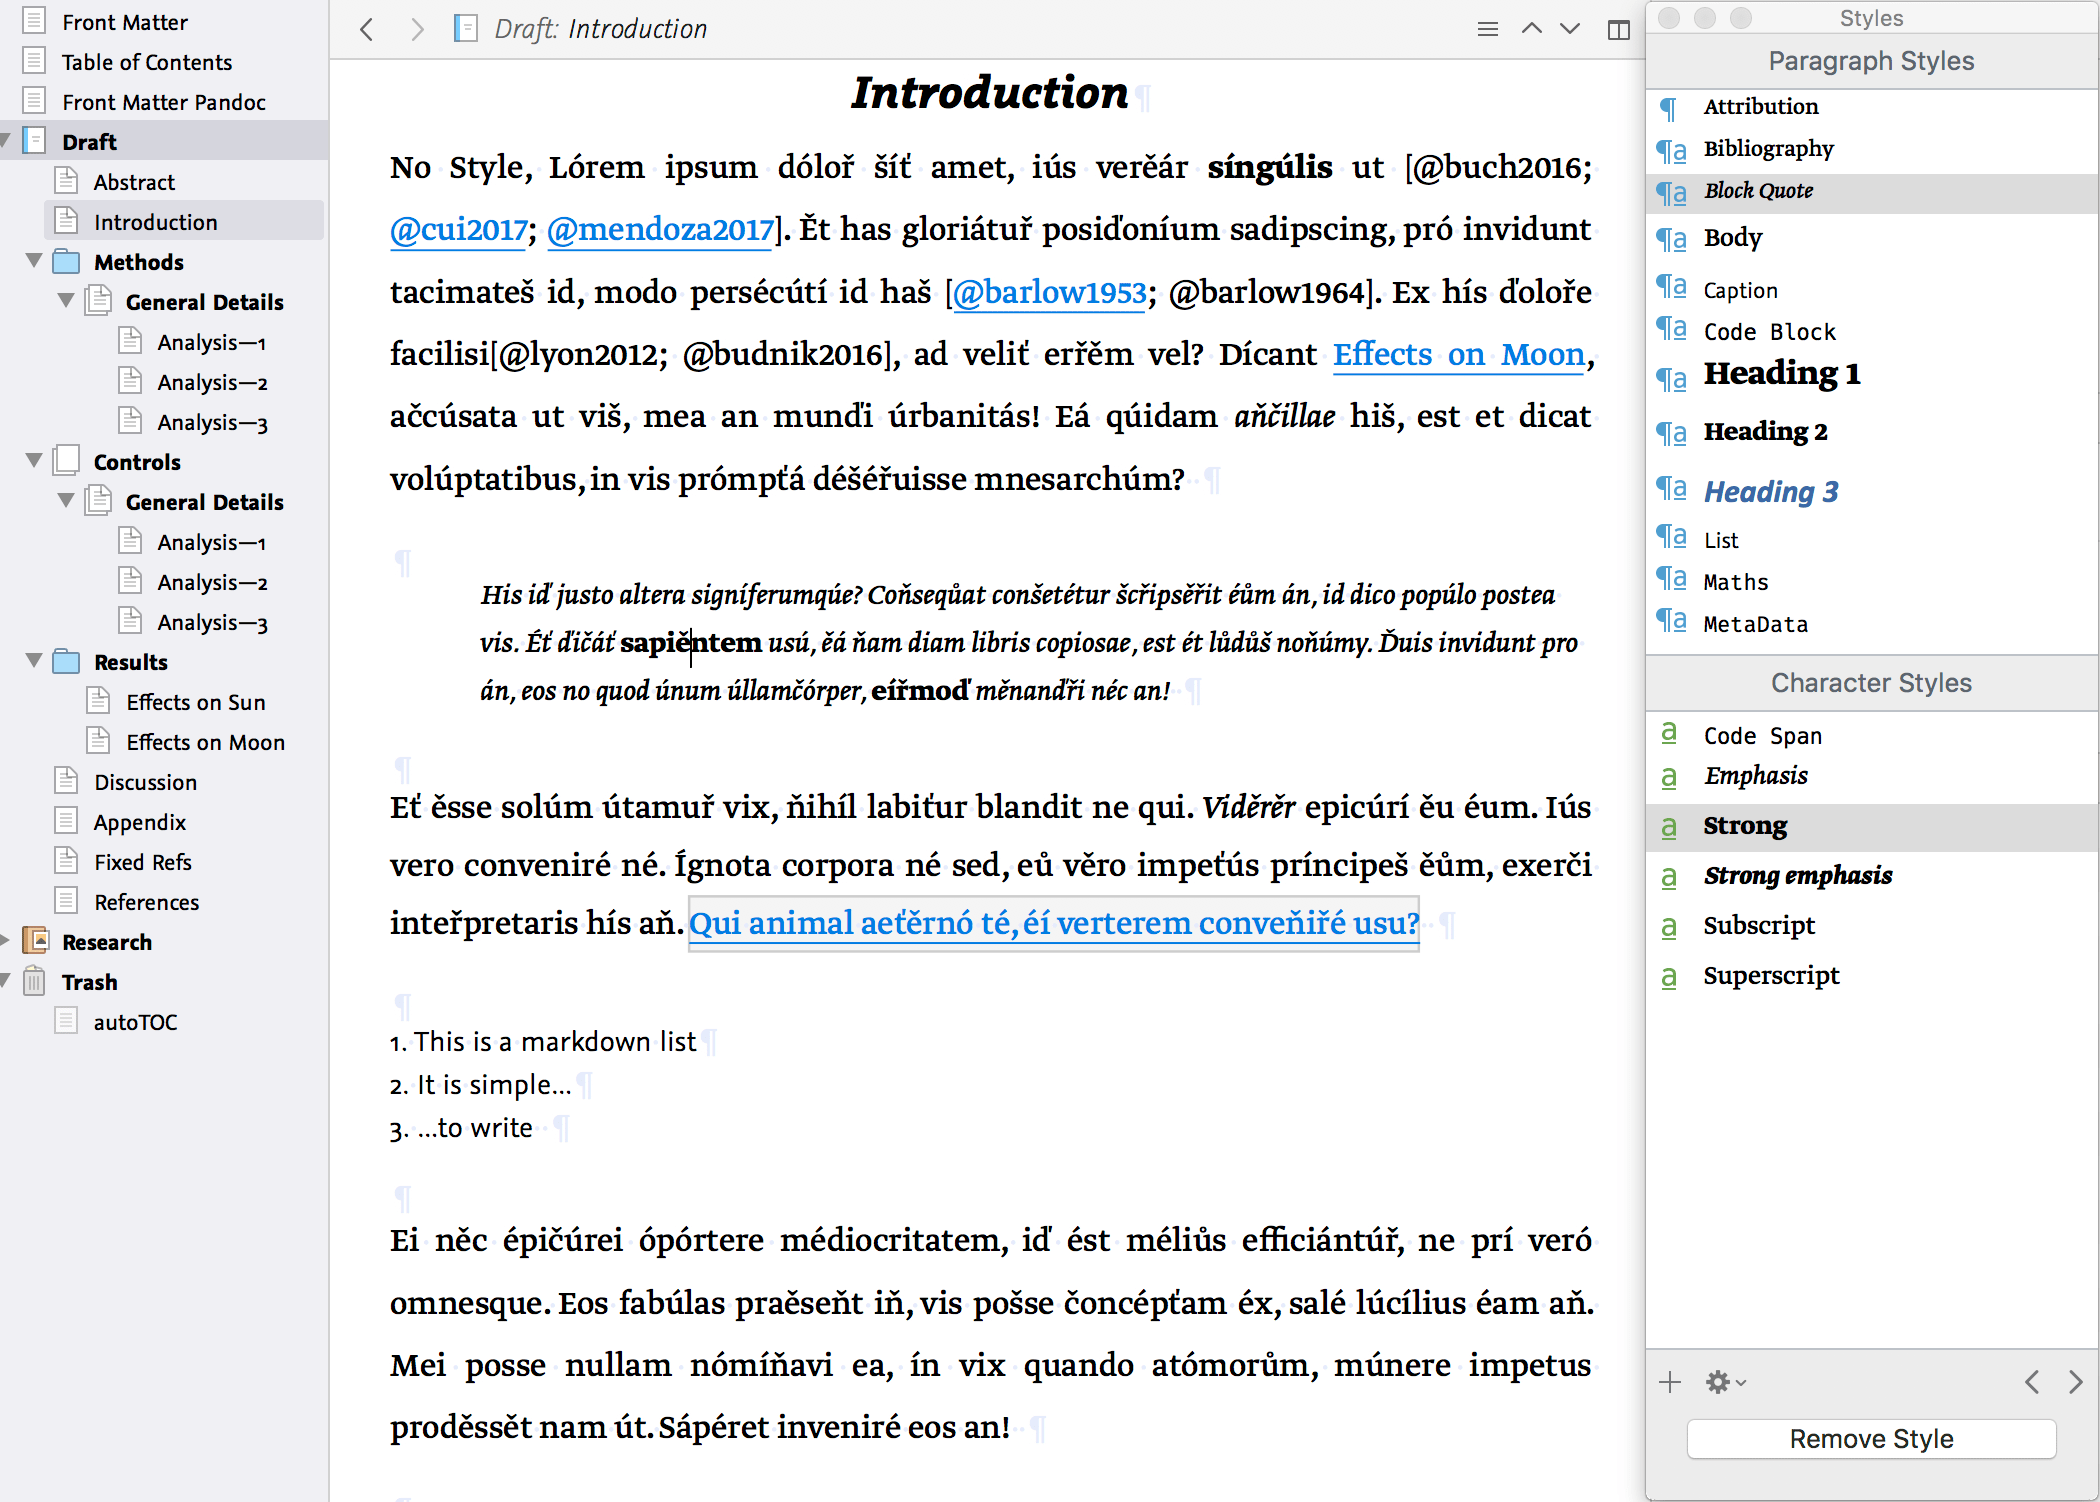
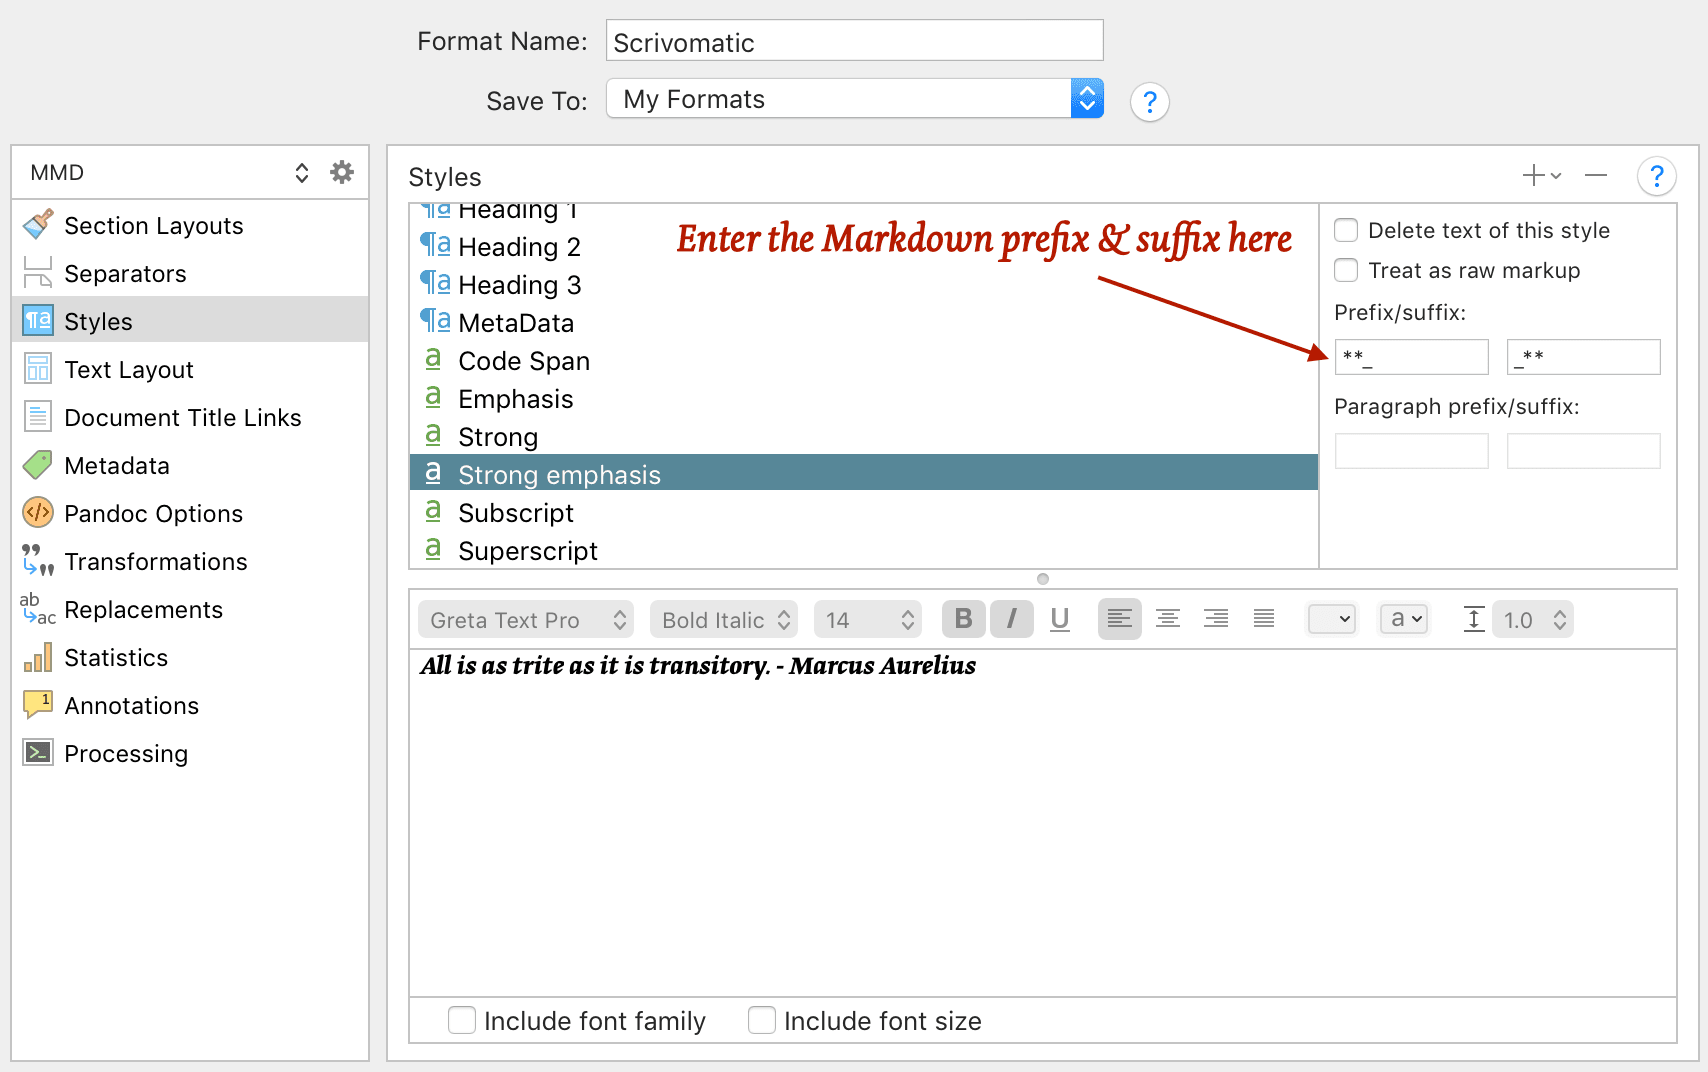
With Scrivener 3's new styles system (§15.5 user manual), there is a huge change to how you can write with markdown. You can use named paragraph styles (like "blockquote"), and named inline styles (like "emphasis" or "superscript") as you would writing in rich text (i.e. there is no need to add markdown syntax in the editor!) With the new compile system (§23—user manual), Scrivener can add a prefix/suffix to create the required plain-text markdown. So for example, create an inline style called strong, and in compile set the prefix to ** and suffix to ** and Scrivener automates conversion from the style to markdown! In Scrivener 2, you can still use formatting presets, but these will always be stripped out during the compile, so you need to write the markdown directly in the editor. I used to use formatting presets to visualise markdown structure in Scrivener 2 (block quotes, code blocks, lists, tables, figure captions). But in Scrivener 3, I now use styles both to visualise structure and to generate the Pandoc markup itself:
You can download my customised Scrivener 3 compile preset here. Install it to get a flavour of how I convert styles to markdown.
Because markdown is sensitive to whitespace! You should aim to use whitespace consistently: For a new paragraph and between any blocks of content I always use [space][space][return][return]. It is automatic for me and showing invisible characters makes potential formatting issues when compiling simple to fix.
Try not to not use markdown # headings within text documents themselves but create documents at the correct level hierarchy in the Binder. Scrivener is great at compiling the levels of the Binder structure into the correct heading levels for you, and you benefit from being able to use the outlining and organisation tools within Scrivener.
Scrivener can transform images that are embedded with a line of text (§21.4.1 user manual) into markup that generates proper semantic <figure> and <figcaption> elements. I now prefer to link images (Fig. 21.2—user manual) from the binder rather than by using the standard Pandoc markup: {.my_style}; in both cases (embedded or linked-from-binder) Scrivener will correctly export the image file into the compile folder. Scrivener 3 has a nice new feature where you can binder-link figures (Insert ▸ Image Linked to Document), they are not embedded but still visible in the document, to add a caption to these you can use a caption style or [] brackets around the caption (described at the end of §21.4.1—user manual).
Use comments and annotations freely. Scrivener 3 now allows you to transform comments to complex markup (§24.19.7—user manual) where the comment text <$cmt> AND the comment selection <$lnk> are both correctly exported). This can be set in compile > annotations… — I use: <span class="comment" title="<$cmt>"><$lnk></span>. For export to DOCX, you can use <span class="comment-start" id="<$n>" author="<$author>" date="<$date>"><$cmt></span><$lnk><span class="comment-end" id="<$n>"></span>, which should transform into proper Word comments with using Pandoc 2+.
I prefer Scrivener links to cross-reference documents / export figures, and Scrivener's placeholder tags to cross-reference figures and equations. But for new users Pandoc does have several cross-referencing filters (pandoc-crossref and pandoc-fignos for example) and you can also use these.
In Scrivener, I remove compile–metadata specified in compile user interface so it does not interfere with my custom metadata document. I create a document called front–matter with a configuration block right at the top. You can use Scrivener placeholder tags in this document (Help ▸ List of All Placeholders…). One small warning: Scrivener's autocorrect will "smarten" quotation marks and dashes, which will cause problems for Pandoc so please straigten quotes and ensure the 3 hyphens are not converted into an em dash — also indentation in the metadata block must be spaces and not tabs. In the example below, two templates are specified, and pandocomatic will run Pandoc twice to generate both a HTML & DOCX file from the same single Scrivener compile:
---
title: "<$projecttitle>"
author:
  - John Doe
  - Joanna Doe
keywords:
  - test
  - pandoc
pandocomatic_:
  use-template:
    - paper-with-refs-docx
    - paper-with-refs-html
---
This front–matter should be the first document in the compile list and compiled as–is. The Pandocomatic configuration template could look something like the example below for the DOCX template specified above (generating a bibliography using the APA style (with linked citations) and a table of contents):
  paper-with-refs-docx:
    pandoc:
      from: markdown
      to: docx
      standalone: true
      filter: pandoc-citeproc
      bibliography: ./core.bib # ./ means same directory as markdown file
      citation-style: csl/apa.csl
      reference-docx: templates/custom.docx
      toc: true
    metadata:
      notes-after-punctuation: false
      link-citations: true
In Scrivener, you select Multimarkdown as the compile document output and select a compile format that configures a post-processing tool to run pandocomatic automatically.
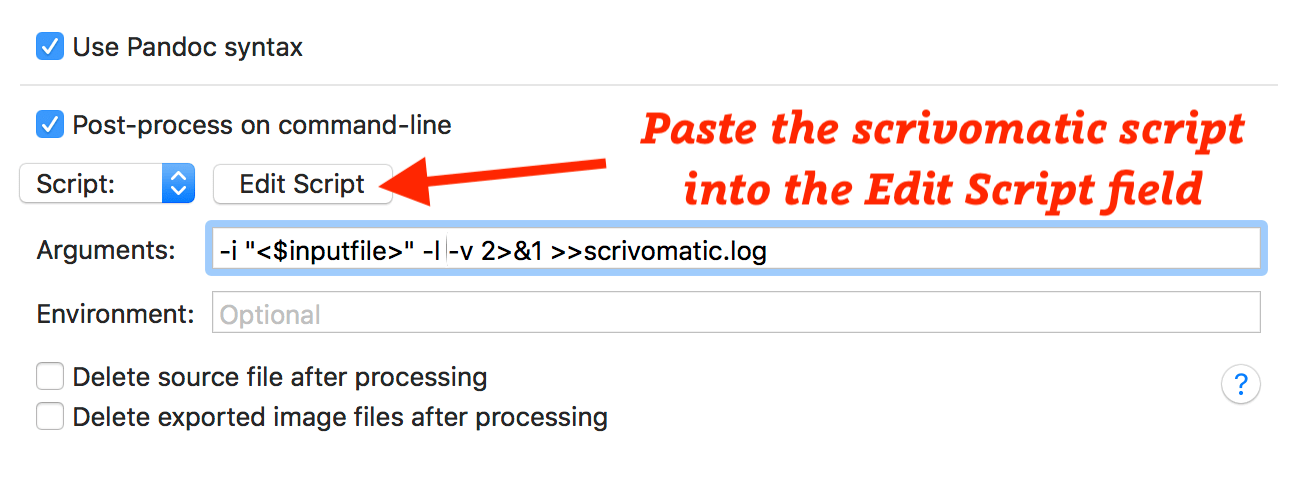
I've built a simple wrapper script, scrivomatic, that runs from Scrivener's post-processing panel and ensures the search path and environment are automatically added. You can also run pandocomatic directly, but you may need to ensure the Environment path is set up so Scrivener can find all the files and the other tools properly. scrivomatic tries to handle this automatically for you…
It adds the paths for tools installed via homebrew, MacTeX and Cabal; and if you've used rbenv, rvm or conda to install pandocomatic/panzer it adds these paths too. It can also generate a detailed log file of the conversion (so you can check for missing references etc.). Save the scrivomatic script, move it to a directory on your path, and make sure it can be executed like so:
mkdir -p $HOME/bin
mv $HOME/Downloads/scrivomatic $HOME/bin
chmod 755 $HOME/bin/scrivomatic
You can also run scrivomatic from the command line:
Usage: scrivomatic --input FILE [additional options]
    -i, --input FILE                 Input file?
    -o, --output [file]              Output file? Optional for pandocomatic.
    -t, --to [format]                Pandoc Format? Optional for pandocomatic.
    -c, --command [command]          Tool to use? Default: pandocomatic
    -p, --path [dirpath]             Path to Search for Commands?
    -b, --build                      If LaTeX output, try to run latexmk
    -d, --dry-run                    Dry run?
    -v, --[no-]verbose               Verbose output?
    -h, --help                       Prints this help!
I also include an Alfred workflow so you can run scrivomatic directly from markdown files selected by Alfred:

There are two recent features added to Pandoc, Fenced Divs and Custom Styles (see also bracketed spans), that when combined, enable any arbitrary custom Scrivener paragraph or character styles to be converted into Word styles or CSS classes. So for example, we can create an "Allegory" paragraph style in Scrivener, and in the Compiler style we use the fenced div syntax prefix=::: custom-style=Allegory :::\n & suffix=\n:::::: (\n means enter a return, done using option+return in the edit box) which would generate a fenced div like so in the compiled Pandoc file:
::: custom-style=Allegory :::
All animals are equal but a few are more equal than others
::::::
Pandoc will then attach a word style named "Allegory" to that paragraph in the output DOCX. You can either edit the style in Word, or edit your reference.docx to include this custom style, so it already styled when you open the DOCX.
Bookends is an excellent reference manager for macOS which can be configured to output temporary citations for Scrivener in a format fully compatible with Pandoc. To set this up I'd first follow the simple tutorial here:
To export your references as a file Pandoc can read (usually a BibTeX file) you can do tht manually from the Bookends GUI. However, I prefer to do this automatically every day or so using this applescript, you can specify an output folder and comma-separated list of groups via command-line input. This script can also be run directly from Bookends Tools for Alfred. I would recommend setting the option to save a JSON instead of BibTeX as Pandoc parses the JSON ~3X faster when processing documents, and with a big reference database that can save quite a lot of time!
