Azure Media Services is a cloud-based platform that enables you to build solutions that achieve broadcast-quality video streaming, enhance accessibility and distribution, analyze content, and much more. Whether you're an app developer, a call center, a government agency, or an entertainment company, Media Services helps you create apps that deliver media experiences of outstanding quality to large audiences on today's most popular mobile devices and browsers.
This repository contains a quickstart to deploy an event-based solution on Azure, where incoming videos will be transformed using a Job in Azure Media Services.
The specific transformation that will be used is called Face Redactor, which is an Azure Media Analytics media processor, that allows you to modify your video in order to blur faces of selected individuals.
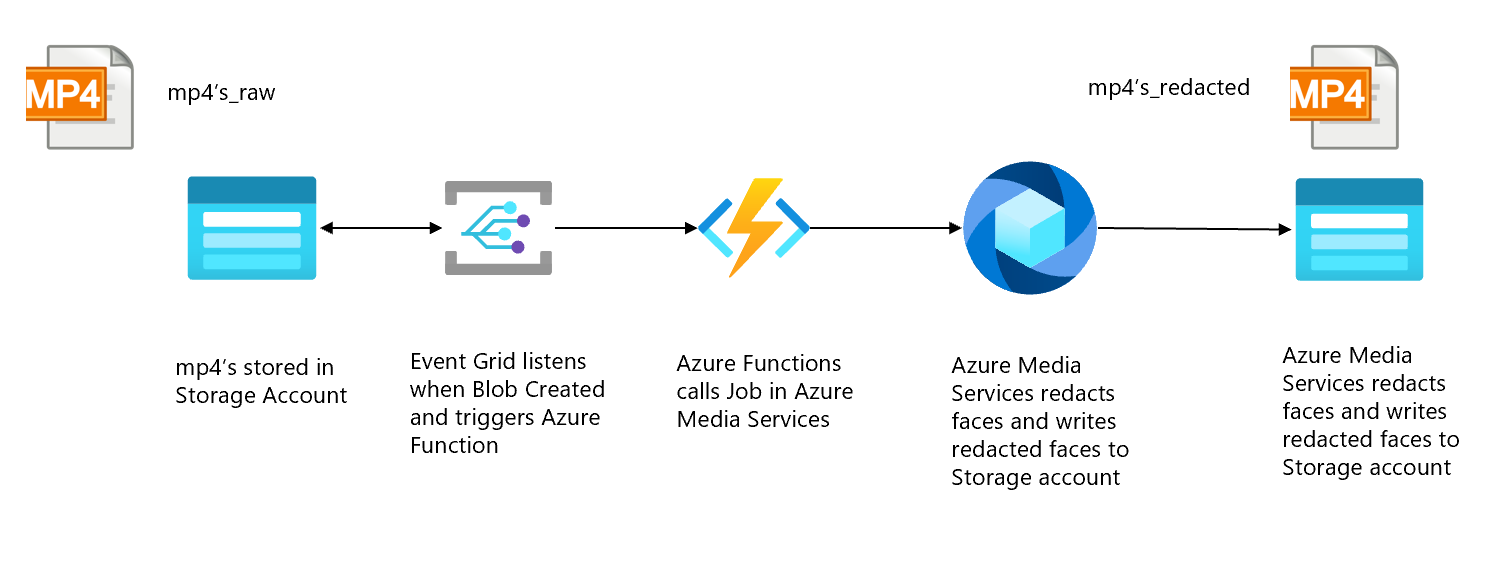
This repository is able to deploy the solution that can be found in the architecture diagram above. It starts with a storage account (Azure Data Lake Storage Gen2), with an Event Listener connected to it (Event Grid), that triggers an Azure Function when new .mp4 files are uploaded to the storage account. The Azure Function will submit a job to a pre-configured Transformation in Azure Media Services. The resulting Redacted video will be stored on a Blob Storage account.

The deployment of this project consists of three seperate steps: deploying the Azure services to setup the overall solution, deploying the function app that submits a job to Azure Media Services when a new file is uploaded, and configuring the Eventgrid triggers. We have created a GitHub Actions workflow that performs these steps. Therefor, this solution can be deployed by simply variables to your GitHub environment. To summarize, these are the steps that need to be executed to deploy this solution:
- Generate Template from this repository
- Create necessary service principal and resource group
- Enable GitHub Actions pipeline
- Add environment variables and Secrets
- Test your solution
Click on the 'Use Template' button to create a copy of this repo to your account. Check this page for instructions on how to use a templatized repo.
Before the Github Actions workflow can be run, a pre-existing resource-group has to be created, as well as a Service principal that has the Contributor + Storage Blob Data Reader Role on the resource group. This Service Principal will be the app that will provision and configure all Azure services on behalf of Github Actions.
- Create a Resource group following this docs page
- Create Service Principal with the contributor role on the resource group by doing the following:
- Fill in the created resource group, subscription-id and an App-name (e.g. spn-githubaction) in below Azure CLI command:
 app_name="<name-of-app>"
 resource_group="<name-of-resource-group>"
 subscription_id="<subscription-id>"

 az ad sp create-for-rbac --name $app_name --role contributor \
                      --scopes /subscriptions/$subscription_id/resourceGroups/$resource_group \
                      --sdk-auth

 object_id=$(az ad sp list --display-name $app_name --query [0].objectId -o tsv)

 az role assignment create --assignee $object_id --role "Storage Blob Data Reader" \
                       --scope /subscriptions/$subscription_id/resourceGroups/$resource_group


# Replace {subscription-id}, {resource-group}, and App-name with the subscription, resource group and app name details. Make sure to use a unique name for the name parameter.- Copy the output for next step. Note, the output should be in the form of:
# The command should output a JSON object similar to this:

{
  "clientId": "<GUID>",
  "clientSecret": "<GUID>",
  "subscriptionId": "<GUID>",
  "tenantId": "<GUID>",
  (...)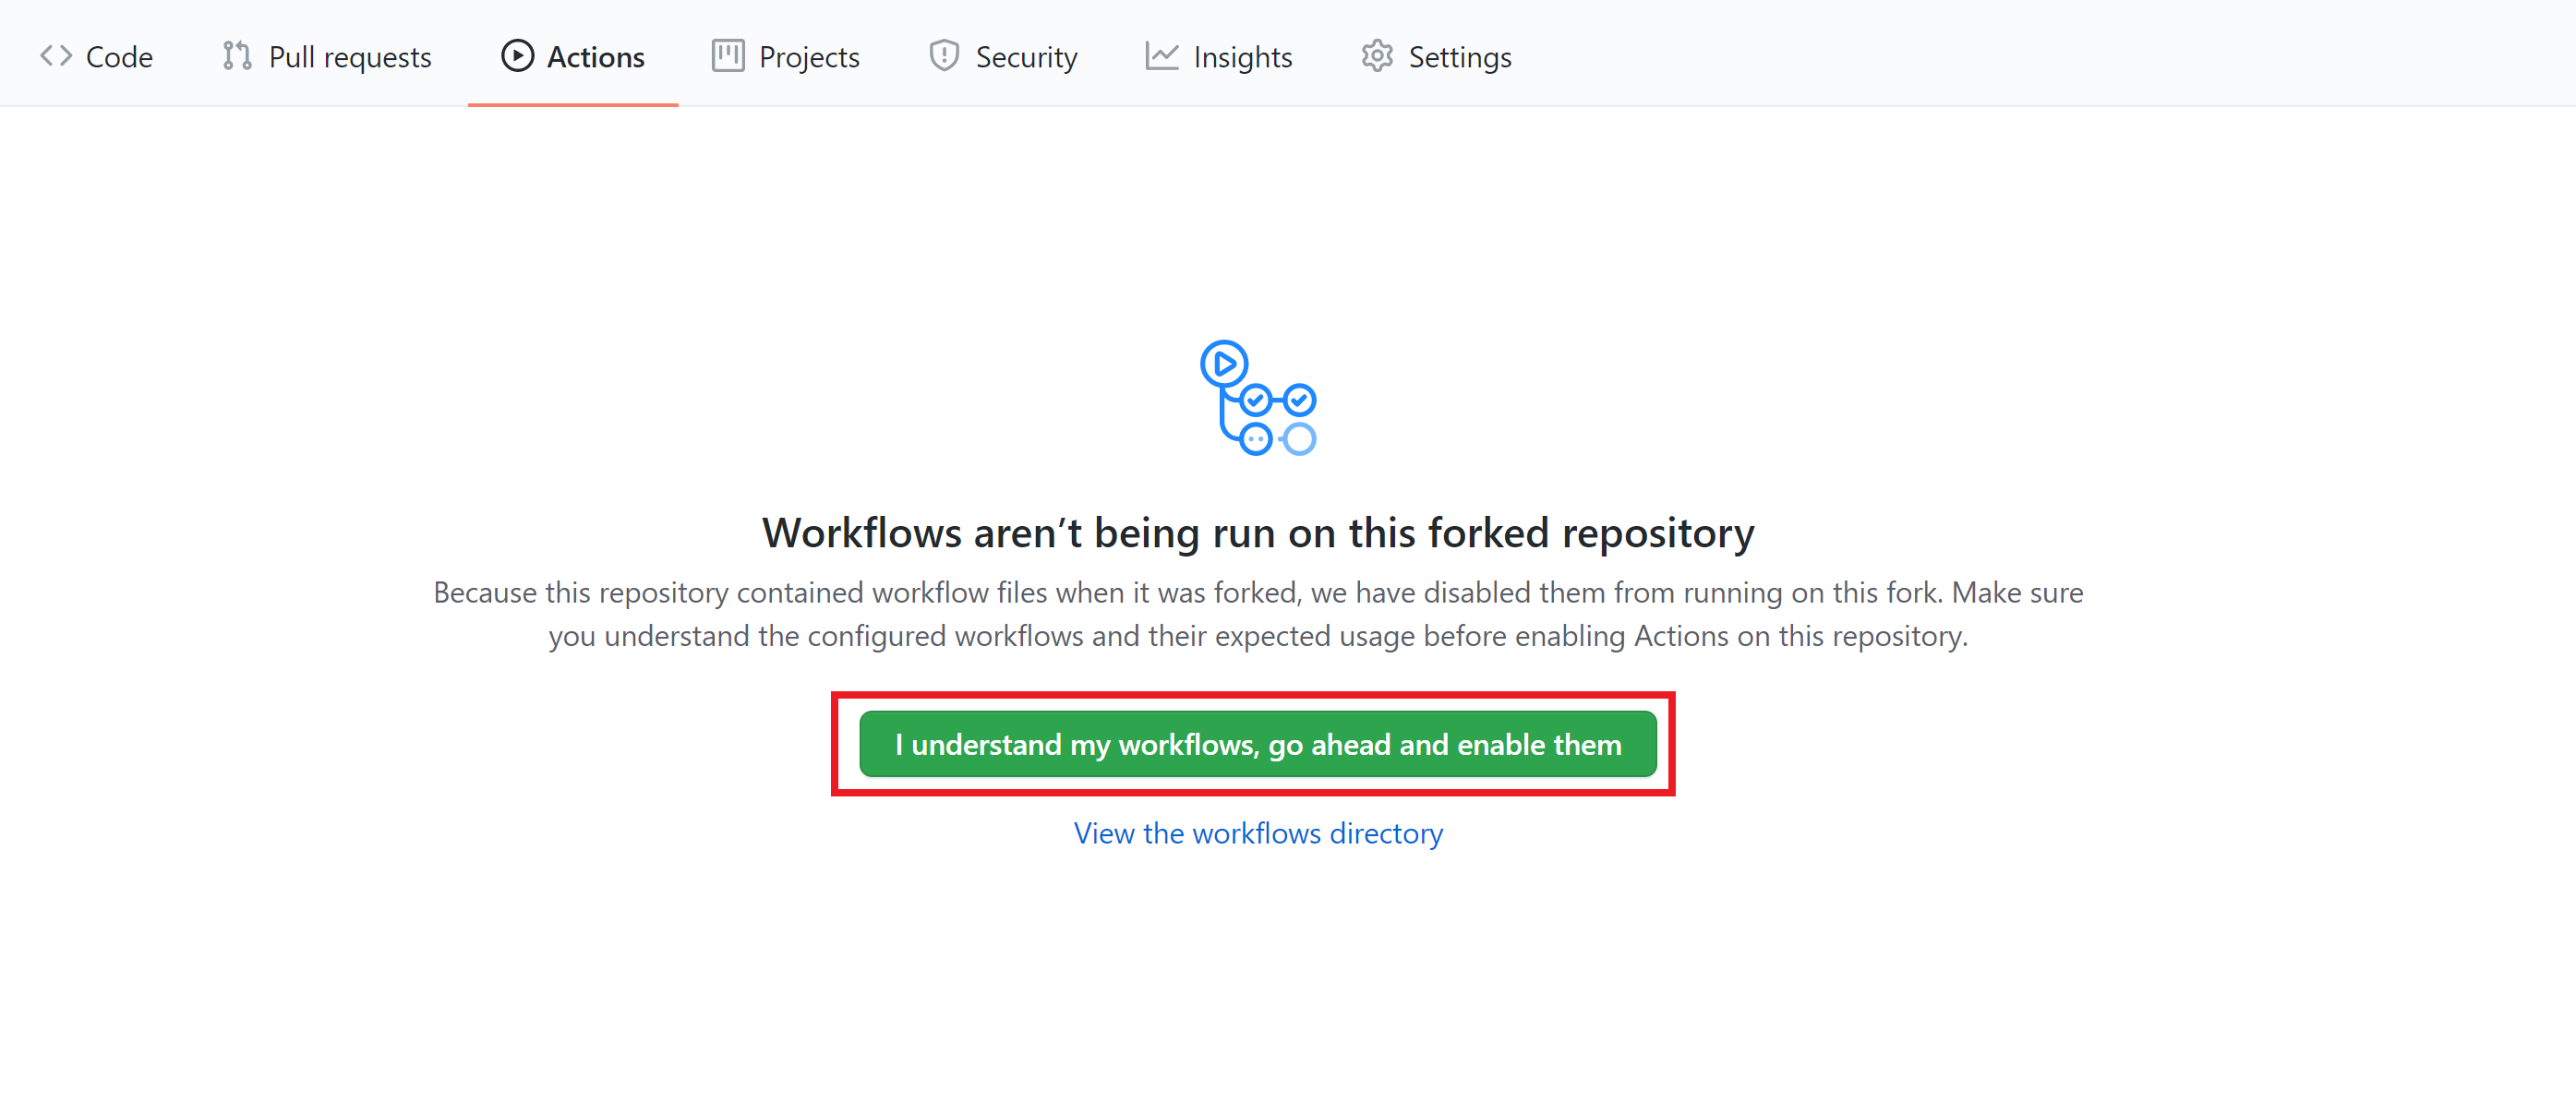
}The Workflow file in this repository contains the steps to execute the deployment of this solution. To start the Workflow, it needs to be enabled for your Forked repo. In order to enable it, go to the Actions tab in your repo and click on 'I understand my workflows, go ahead and enable them'.
- Adding the Secret: The Service Principal details should be stored as a secret so that Github Actions can deploy and configure the necessary services within Azure. Go to the Repo Settings-> Secrets and click on 'Create New Secrets'. Create 4 secrets:
- Create 'AZURE_CREDENTIALS' and paste the output of step 2b (full json). In the Github Action workflow this secret will be used to create a connection to Azure.
- Create 'CLIENT_ID' and paste the value of 'clientId' of step 2b
- Create 'CLIENT_SECRET' and paste the value of 'clientSecret' of step 2b
- Create 'TENANT_ID' and paste the value of 'tenantId' of step 2b
- Define Environment variables in Workflow file: Open the workflow file in the repo (Event-based-FaceRedaction-with-Azure-Media-Services/.github/workflows/main.yml) and click on Edit: Add your specific details in line 21-24:
    env:
      SOLUTION_NAME: '<solution-name>' #all lowercase, numbers allowed, this will be used to create the underlying Azure services
      SUBSCRIPTION_ID: '<subscription-id>' #from step 2.
      LOCATION: "<location>" # e.g. westeurope
      RESOURCE_GROUP: "<resource-group>" #from step 2.
Click on commit to main. Great, you are now set to deploy the full solution! As you enabled the GitHub Actions Workflow in the previous step which gets triggered by the Master branch, the Workflow should start running now. Go to the Actions tab to verify this.
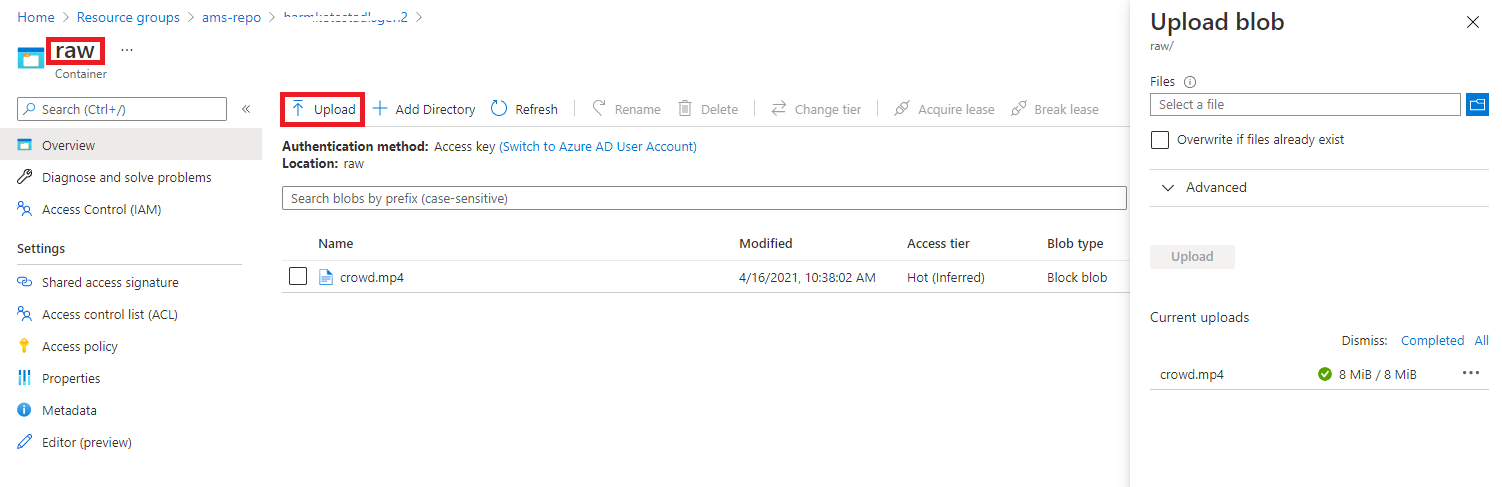
Go the the storage explorer of your ADLS Gen2 in the Azure Portal. Upload a video to the Raw container. If are looking for any test data, download one from this website. See image below for guidance on uploading a video to the ADLS Gen2 storage account:
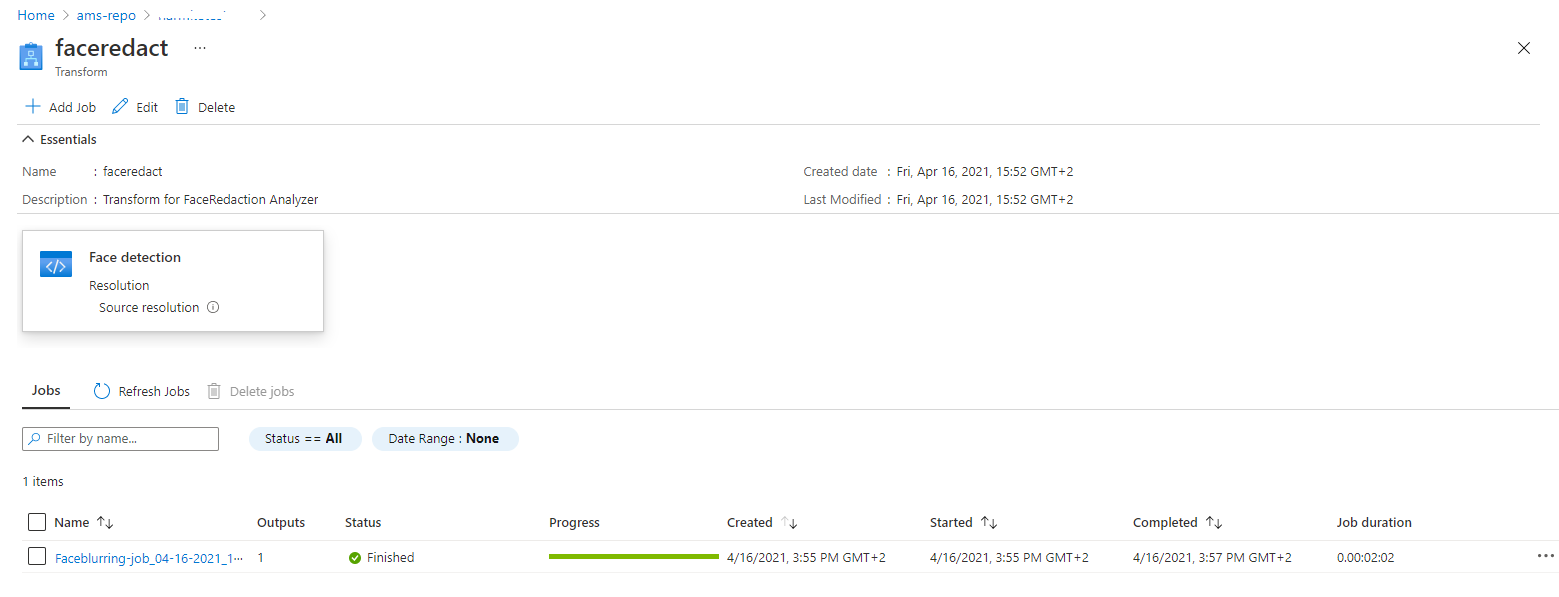
Verify in AMS that a job is created by going to your AMS account -> Transforms + Jobs and select the faceredact transform.
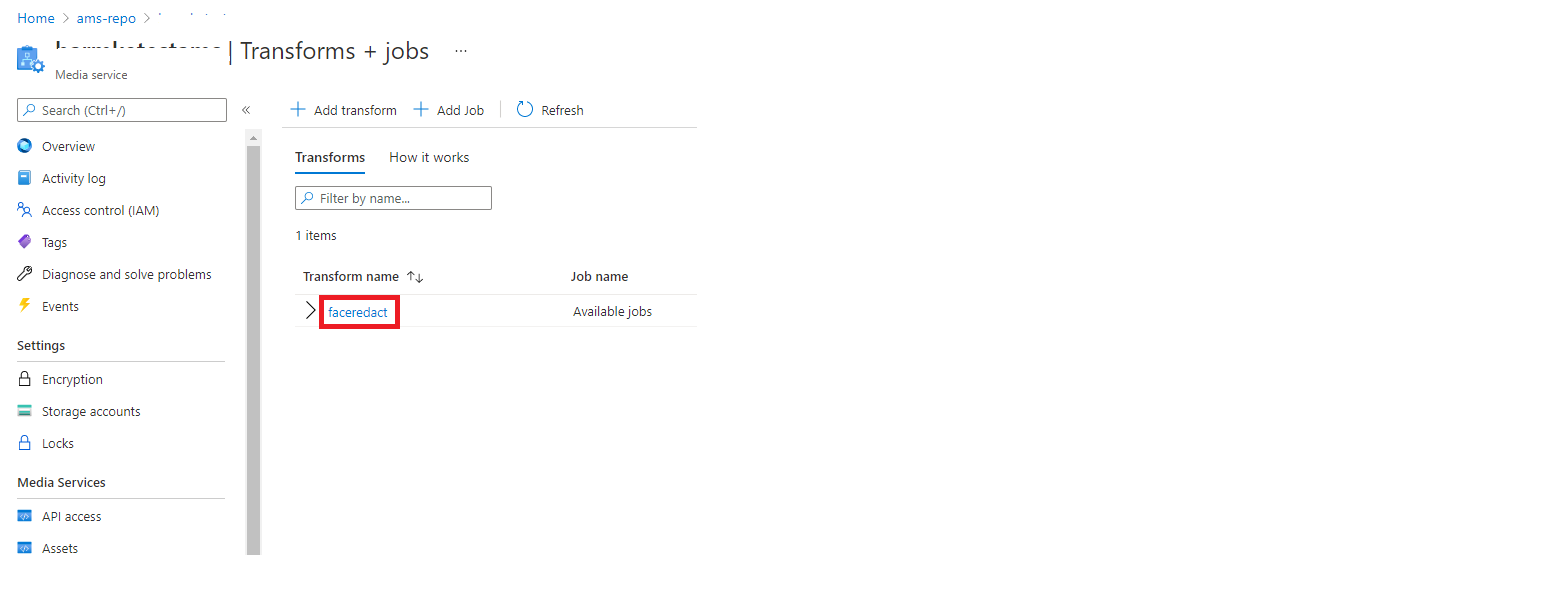
This page should show the job that was fired by the Azure Function. The job can either be finished or still processing.
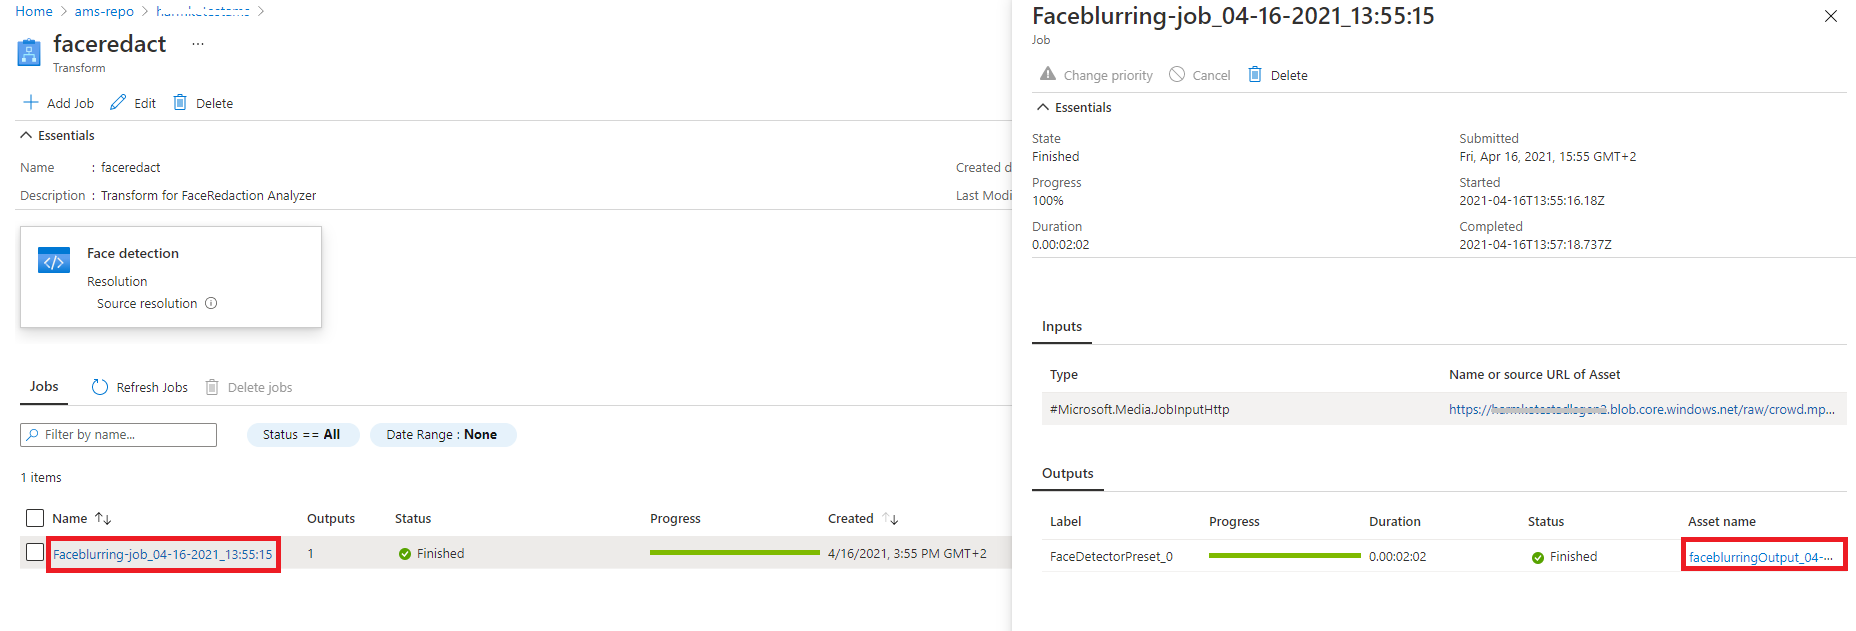
By clicking on the job, you will see some details about the specific job. If you click on the Output asset name and then use the link to the storage container that is linked to it, you should be able to see your processed video when the job is finished.
- Using a Managed Service Identity (MSI) possible for Azure Functions to AMS/ADLSg2 is possible, but the Service Principal can't grant permissions to MSI in tenants (for security reasons). You could manually grant the Storage Blob Contributor role to the MSI of Azure Function on the ADLSg2, and Give the MSI the Contributor role to AMS.
- With this solution the face detection + redaction step are combined. It is possible to have a two-step approach, so you can customize the result of the face detection (e.g. to have smaller blurred face)
- At the time of writing, neither the Azure Media Services v3 python sdk, nor Azure CLI did support the creation of a FaceRedaction Transform. We therefore chose to use the Rest API method to create the transform job.
If you have any suggestions or feedback, please let us know by opening an issue.


