Code Monkey home page Code Monkey logo

ekke's Introduction

EKKE

Greenkeeper badge

Ekke-Ekke-Ekke-Ekke PTANG Zoo Boing! Z' nourrwringmm...

ekke a unique new test runner for React-Native. Unlike other testing frameworks, it doesn't execute your tests in Node.js, with a bunch of mocks, but instead, it orchestrates the bundling and execution of tests directly inside your React-Native application. ekke allows your tests to fully access every API to the platform has to offer.

Why should you adopt Ekke for React-Native testing?

  • Platform independent The test runner does not contain any native code that means that every platform that React-Native supports now, or in the future will work out of the box.
  • Code confidence Tests run in the environment of your production code. No need to rely on imperfect mocks. Tests run on devices to guarantee API's match specifications.
  • Different test runners At its core, Ekke is nothing more than an orchestration tool. We have built-in support for different test runners.
  • Rendering It's not just unit tests. Ekke provides a rendering API that allows you to mount and render components in your test suite.


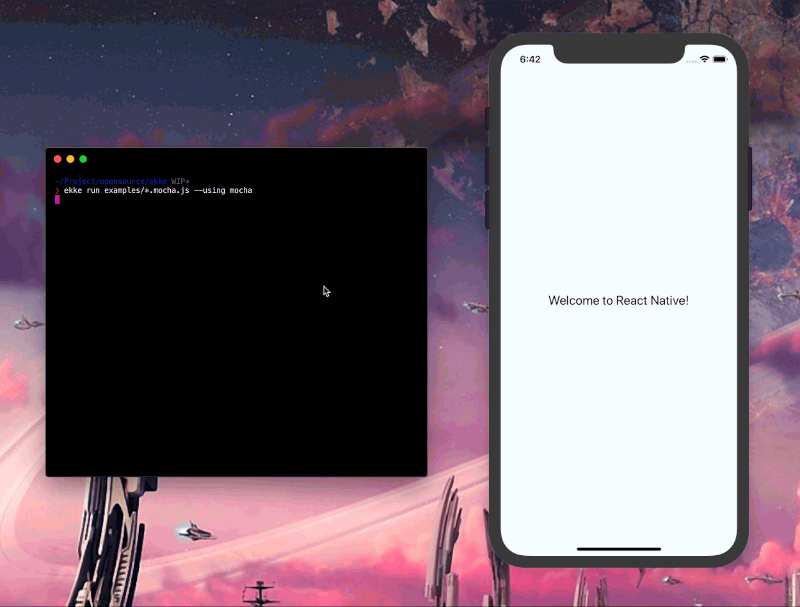
Ekke in action: running a test suite, streaming results back to the CLI

Installation

The module is released in the public NPM Registry and can be installed by running:

npm install --save ekke

After installation, you can integrate ekke into your project.

Table of Contents

Integration

Ekke needs a host application to run. That can either be the application you are currently developing or fresh installation of react-native init.

Not sure what to pick?

  • Application developers Using the application that you're currently developing is recommended. This allows your test suites to execute in precisely the same environment. Also, it will enable your test suites to leverage any NativeModule that your application might be consuming.
  • Library authors It depends on the library you're developing. If you are building a native add-on, or include NativeModules as dependencies, it's advised to create an example application in your project that has all native libraries linked. TODO: What is the alternative here, if there is one?

Integrating is as easy as importing ekke, and including the component in your app!

import { Ekke } from 'ekke';

function App() {
  return (
    <>
      <Ekke />

      <View>
        <Text>Your App Here</Text>
      </View>
    </>
  )
}

You can now run your tests by executing the run command of the ekke CLI:

# Make sure that the simulator of your choice is running.
react-native run-ios # or react-native run-android

ekke run glob/pattern/*.test.js more/test/files.js --using mocha

And now watch the magic unfold on your app.

If you are worried about shipping Ekke in your application, the component is using process.env.NODE_ENV to switch between development and production builds. Production builds will completely remove Ekke from your code. You can also conditionally include it { __DEV__ && <Ekke /> }.

Runners

At its core, Ekke is nothing more than an orchestration tool, it runs Metro bundler with a specific configuration, executes code automatically in the React Native environment, and reports back in the CLI. To run the test, we need to know which test runner you prefer so we can bundle it with the tests. The following runners are available:

mocha

To use Mocha make sure you have the testing framework as well as an assertion framework installed in your project:

npm install --save-dev mocha
npm install --save-dev assume # or any other assert framework, e.g. chai

Once all your dependencies finish installing, you can start writing your tests.

import { describe, it } from 'mocha';
import { render } from 'ekke';
import assume from 'assume';

describe('The best test suite in the world', function () {
  it('is amazing', function () {
    const amazing = 'amazing';

    assume(amazing).is.a('string');
    assume(!!amazing).is.true();
  });
});

Provide mocha as value to the --using flag to select it as test runner.

ekke run test.js --using mocha

The following Mocha options can be customized using the follow CLI flags:

  • --mocha.fgrep Only run tests containing this string. Defaults to ''.
  • --mocha.grep Only run tests matching this string. Defaults to ''.
  • --mocha.invert Inverts grep and fgrep matches. Defaults to false.
  • --mocha.ui Specify user interface. Defaults to bdd.
  • --mocha.reporter Specify reporter to use. Defaults to spec.
  • --mocha.slow Specify "slow" test threshold (in milliseconds). Defaults to 75.
  • --mocha.timeout Specify the test timeout threshold (in milliseconds). Defaults to 2000.
  • --mocha.bail Abort ("bail") after first test failure. Defaults to true.
  • --mocha.color Force-enable color output. Defaults to true.
  • --mocha.inlineDiffs Display actual/expected differences inline within each string. Defaults to true.
ekke run test.js --using mocha --mocha.reporter min --mocha.timeout 5000

Tape

Using tape as the test runner is pretty self-explanatory. You import tape into your test files and write your tests and assertions using provided by the framework.

import { render } from 'ekke';
import test from 'tape';

test('one', function (t) {
  t.plan(2);
  t.ok(true);

  setTimeout(function () {
    t.equal(1+3, 4);
  }, 100);
});

Once the tests are completed, simple tell ekke that you're --using tape to run the tests.

ekke run test.js --using tape

The will run your tests, and output the TAP (Test. Anything. Protocol) to your terminal which you can pipe to any of the Pretty Tap Reporters that you might have installed. For example, if you want to use tap-spec:

ekke run test.js --using tape | tap-spec

API

The API exposes the following methods:

Component

import { Ekke } from 'ekke';

The Ekke component controls the orchestration, execution, and rendering of the test suite. The component can be used as a wrapper, or as a regular component and be included in your application.

The component accepts the following optional properties:

  • interval, String, The component doesn't know when you are using the CLI, so it polls at a given interval, with an HTTP request, to the server that runs in the CLI to figure out if it's active and is waiting for tests to run. The lower the interval, the quicker your tests will be picked up by the component, but also the more performance it takes away from your app. Defaults to 10 seconds.
  • hostname, String, The hostname of your machine that the CLI server is running on. Defaults to localhost on iOS and 10.0.2.2 on Android.
  • port, Number, The port number that the CLI server is running on. Defaults to 1975.
  • alive, Function, Function to execute when the Ekke test runner is activated and is about to run the test suites.
//
// Stand alone.
//
<Ekke />

//
// Or wrap your app with it, you decide what is best for your application.
//
<Ekke>
  <App />
</Ekke>

To see an example of the implementation, take a look at our index.js file. It's what we use to test our code.

render

import { render } from 'ekke';

The render method allows you to render any React-Native component on the screen of the application.

import { View } from 'react-native';
import { render } from 'ekke';
import React from 'react';

describe('test', function () {
  it('renders a red square', function () {
    const ref = React.createRef();
    await render(<View style={{
      backgroundColor: 'red',
      width: 100,
      height: 100
    }} ref={ ref } />);

    //
    // You can now use ref.current to access the rendered view.
    // Not only that, but there's big red square on your app as well.
    //
  });
});

CLI

The ekke CLI is automatically installed in your node_modules when you install ekke in the project as a dependency. We use the CLI to communicate between the <Ekke /> component that you included in your application and the terminal.

The CLI should not be globally installed. Instead, you directly reference the locally installed binary from your package.json.

{
  "name": "your-super-awesome-package",
  "scripts": {
    "test": "ekke run test/*.js --using mocha"
  }
}

And run the scripts using npm.

npm test

# You can use the double dash support from npm to send additional flags:
# npm test -- --watch

Alternatively, you can use the npx command to execute the commands as well without the requirement of global installation of ekke:

npx ekke <commands here>

The following CLI commands are available:

run

ekke run <glob or files to run> --flags

The run command allows you to run your specified tests on the device that included the <Ekke /> React component. When you run the command, we will execute the following:

  • Start up the Metro bundler on the specified hostname and port.
  • Attach a WebSocket server on the created Metro bundler, for communication purposes.
  • Find all the test files you want to include based on the supplied glob.
  • Wait for the poll request from the <Ekke /> component.
  • Bundle all your tests, and the specified library using Metro Bundler.
  • Listen to progress events that are sent by <Ekke /> component over the WebSocket connection.
  • Proxy all the console.*, process.stdout to your terminal.
  • Close the CLI again with error code 0 or 1 depending on if your tests pass.

The run command assumes that all CLI arguments after the run command are the test files that need to execute inside React-Native. We allow single or multiple files, a glob pattern, or a combination of files and globs.

# Executes test/1.js, test/2.js, and then test/2.js using the mocha runner.
ekke run test/1.js test/2.js test/3.js --using mocha

# The same above, but done using a glob pattern to fetch all .js files
# from the test directory
ekke run test/*.js --using mocha

# Executes test/1.js and then all the .test.js files
ekke run test/1.js test/*.test.js --using tape

You can use the following CLI flags to change the behavior of the command:

  • --using {runner} This tells Ekke which runner should be used to execute your tests. Defaults to mocha See Runners for all runners.
  • --watch By default, we close the process with either an exit code 0 or 1 as an indication of the test results (0 passes, 1 failure). If you do not want the process to exit, you can use the --watch flag to keep the CLI process alive. Defaults to false.
  • --reset-cache The Metro Bundler caching system is enabled by default so that tests run in a performant way and don't always rebuild. Using this flag will disable the cache. Defaults to false.
  • --cache-location We already made sure that the Metro Bundler cache of your test doesn't collide with your test cache, but if you like to store it somewhere else you can change it with this flag. Defaults to os.tempdir()/ekke-cache.
  • --no-silent We silence the output of the Metro bundler by default, this allows you to see the Metro bundler output again. Defaults to false.
  • --hostname The hostname we should attach our Metro Bundler on. The hostname should be accessible by React-Native application. Defaults to localhost.
  • --port The port number we should use for the Metro Bundler, we don't want to clash with the Metro bundler of your react-native start command so it should be different, but still accessible by your React-Native application. Defaults to 1975 (The year Monty Python and the Holy Grail got released)
  • --require Files that should be required before your test suites are required Defaults to ¯_(ツ)_/¯, nothing

In addition to these default flags, any flag that you prefix with the name of the runner will be considered as options and used as configuration:

ekke run test.js --using mocha --mocha.timeout 3000

See the Runners for their specific configuration flags.

help

Display a list of all the available command their supported CLI flags. The help message is visible when you run ekke without, an unknown, or the help command:


ekke (v1.0.2)
Ekke-Ekke-Ekke-Ekke-PTANG. Zoo-Boing. Z' nourrwringmm...

COMMANDS:

run      Run the given glob of test files.
         --port           Port number that Metro Bundler should use.
         --hostname       Hostname that Metro Bundler should use.
         --using          Name of the test runner to use.
         --watch          Don't exit when the tests complete but keep listening.
         --no-silent      Do not suppress the output of Metro.
         --require        Require module (before tests are executed).
         --reset-cache    Clear the Metro cache.
         --cache-location Change the Metro cache location.
help             Displays this help message.
         --no-color       Disable colors in help message.

EXAMPLES:

$ ekke run ./test/*.test.js --using mocha

The output contains colors by default if you wish to remove those you can use the --no-color flag.

Debugging

Both the CLI and the react-native code bases use diagnostics under the hood for logging purposes. The logs are disabled by default but can be enabled by using the DEBUG feature flags. They both log under the ekke:* namespace.

The Ekke CLI

DEBUG=ekke* ekke <your command here>

React Native Component

import { AsyncStorage } from 'react-native';

AsyncStorage.setItem('debug', 'ekke*', function () {
  //
  // Reload your app, and the debug logs will now be enabled.
  //
});

For more detailed information about diagnostics, please see their project page.

Development

  • Fork Fork the repository to create a copy to your own GitHub account.
  • Clone Clone the newly created GitHub repo to your local machine.
  • Branch Create a fresh new branch from the master branch.
  • Install Run npm install to install dependencies and devDependencies.
  • Setup Run npm run setup to create development specific folders.
  • Hack Make your changes. Write tests covering your changes.
  • Test Run both npm test and npm test:ekke to ensure nothing got broken.
  • Push Commit and push your changes to fork.
  • Pull Request Create a pull request from your created branch to our master.
  • Review We'll review your change, and ask for updates if need.
  • Merge Virtual high fives are exchanged when your PR lands.

License

MIT

ekke's People

Contributors

3rd-eden avatar captainnic avatar dependabot[bot] avatar greenkeeper[bot] avatar johman10 avatar lucasbento avatar msluther avatar

Stargazers

 avatar  avatar  avatar  avatar  avatar  avatar  avatar  avatar  avatar  avatar  avatar  avatar  avatar  avatar  avatar  avatar  avatar  avatar  avatar  avatar  avatar  avatar  avatar  avatar  avatar  avatar  avatar  avatar  avatar  avatar  avatar  avatar  avatar  avatar  avatar  avatar  avatar  avatar  avatar  avatar  avatar  avatar  avatar  avatar  avatar  avatar  avatar  avatar  avatar  avatar  avatar  avatar  avatar  avatar  avatar  avatar  avatar  avatar  avatar  avatar  avatar  avatar  avatar  avatar  avatar  avatar  avatar  avatar  avatar  avatar  avatar  avatar  avatar  avatar  avatar  avatar  avatar  avatar  avatar  avatar  avatar  avatar  avatar  avatar  avatar  avatar  avatar  avatar  avatar  avatar  avatar  avatar  avatar  avatar  avatar  avatar  avatar  avatar  avatar  avatar

Watchers

 avatar  avatar  avatar  avatar  avatar  avatar  avatar  avatar  avatar  avatar  avatar  avatar  avatar  avatar  avatar  avatar  avatar  avatar  avatar  avatar  avatar  avatar

ekke's Issues

Action required: Greenkeeper could not be activated 🚨

🚨 You need to enable Continuous Integration on Greenkeeper branches of this repository. 🚨

To enable Greenkeeper, you need to make sure that a commit status is reported on all branches. This is required by Greenkeeper because it uses your CI build statuses to figure out when to notify you about breaking changes.

Since we didn’t receive a CI status on the greenkeeper/initial branch, it’s possible that you don’t have CI set up yet. We recommend using Travis CI, but Greenkeeper will work with every other CI service as well.

If you have already set up a CI for this repository, you might need to check how it’s configured. Make sure it is set to run on all new branches. If you don’t want it to run on absolutely every branch, you can whitelist branches starting with greenkeeper/.

Once you have installed and configured CI on this repository correctly, you’ll need to re-trigger Greenkeeper’s initial pull request. To do this, please click the 'fix repo' button on account.greenkeeper.io.

Plugin API

Why do we need a plugin system?

There is a lot of amazing functionality that can be built on top of ekke. It runs inside React-Native but communicates with Nodejs using WebSocket connection. So in reality, you can have best of both worlds. My go-to example for a plugin is: screenshots. With ekke we have a render() method that renders your component on screen. We could implement a screenshot API by calling the adb shell screencap -p command on the CLI, run visual diffing against it using pixelmatch and stream back the result for an assertion. Or maybe you just want to create a plugin that allows you to interact with the file system to read files or even data directly from React-Native.

As neat as all these features are, they should not belong in the core of ekke, but we should provide a programmable API that makes this possible. In fact, if we do this correctly, even our test runners could technically be plugins, but included by default.

Plugin requirements

It needs to have an API that can communicate, we already have a WebSocket bridge which we can expose. This way plugins can:

  • File System interaction storing files, retrieving files.
  • Starting / Stopping servers, we don't have HTTP servers in RN.
  • Executing of CLI processes, maybe you want to interact with the adb command and create a screenshot of the device.
  • Anything you would do in Node.js basically

It's not just communication with Node.js that is required, plugins should be able to modify every part of our orchestration:

  • Modify our babel configuration. e.g. adding plugins and presets.
  • Modify the created Metro configuration. Allow them to override our defaults.
  • Introduce new methods to our API/CLI.
  • Include files in the test bundle. So it requires it's own libraries that need to be bundled.
  • Execute before, after, test execution. Setup additional hooks, polyfills, anything.
  • Intercept, and modify test runners. Maybe introduce new config, or call additional API methods.
  • Intercept error/test failures.

The plugin API should be simple, async, and event-based. It's would not be uncommon that multiple plugins leverage the same API and by making it even based, each individual plugin can subscribe to the events. This also allows us to make the bridge function, event-based, so they can subscribe to the events they execute.

Plugin API when required in Node.js (use main in the package.json)
export default function myPlugin({ modify, bridge, register }) {
  modify('babel', async function (babel) {
    return require('babel-merge')(babel, customconfig);
  });

  modify('metro.config', async function (metro) {
    return require('metro-config').merge(metro, { custom });
  });

  bridge('screenshot', async function (id, reply) {
    const { old, new } = await makescreenshot(id);
    const diff = await compare(old, new);

    await reply(diff);
  });

  //
  // Registers a new method on the `API`.
  //
  register('method', async function () {

  });
} 
Plugin API when required in React-Native (use react-native in the package.json)
export default function myPlugin({ subscribe, bridge, register }) {
  modify('setup', async (runner) {
    // do stuff
  });

  //
  // Introduces new method on for the `plugin()` API.
  //
  register('screenshot', async function (element, name) {
      const id = name || (element.type +'@'+ JSON.stringify(props));

      await render(element);
      return await bridge('screenshot', id); 
    }
  }); 
});  
Plugin API as consumed by users.
import { render, bridge, plugin } from 'ekke';

const { screenshot } = plugin('example');

it('takes a screenshot', async function () {
  await render(<Component />);

  const diff = await screenshot(<Component />);
  assume(diff).is.a('object')
});  

Acceptance Criteria

  • Create a { bridge } method that can be used to communicate with the CLI.
  • Support a --plugin <name> flag in our CLI/API that will require and initialize our plugins.
  • Create an async interface where plugins as defined above.
  • Extensively document the plugin API, and provide at least 1 working example.
  • The Node and ekke API's are unit tested

Action required: Greenkeeper could not be activated 🚨

🚨 You need to enable Continuous Integration on Greenkeeper branches of this repository. 🚨

To enable Greenkeeper, you need to make sure that a commit status is reported on all branches. This is required by Greenkeeper because it uses your CI build statuses to figure out when to notify you about breaking changes.

Since we didn’t receive a CI status on the greenkeeper/initial branch, it’s possible that you don’t have CI set up yet. We recommend using Travis CI, but Greenkeeper will work with every other CI service as well.

If you have already set up a CI for this repository, you might need to check how it’s configured. Make sure it is set to run on all new branches. If you don’t want it to run on absolutely every branch, you can whitelist branches starting with greenkeeper/.

Once you have installed and configured CI on this repository correctly, you’ll need to re-trigger Greenkeeper’s initial pull request. To do this, please click the 'fix repo' button on account.greenkeeper.io.

Nothing happens

Hi.
I made an app to try use Ekke and I'm having a problem that when I run it nothing happens.

image

Waiting minutes and nothing changes in console, what could be happening?

Use the React-Native-Community Circle-CI orb

We are currently using the base Node.js image (#10) to run a small portion of our tests. The react-native-circleci-orb should allow us to start up an Android simulator and execute ekke to run our full test suite.

Acceptance Criteria

  • The allow the use of third-party orbs in our organization.
  • Our .circleci/config.yml has been upgraded to use the react-native-circleci-orb
  • CCI runs our npm run setup method to create the required development folders.
  • CCI creates the Android simulator.
  • CCI starts the Android simulator.
  • CCI builds the application that got created with npm run setup.
  • We run npm run test:all to execute our ekke and node based tests.

Simple app fails with Cannot find module ... jest/hasteImpl

Ekke looks fabulous! I can't find any other system that lets me test my (native) SQL code with React Native - thank you.

While I got Ekke working many months ago, I fail to do so now. Whenever I run it, it fails immediately with:

Error: Cannot find module '/private/tmp/jsNodeBug/node_modules/react-native/jest/hasteImpl'
    at Function.Module._resolveFilename (internal/modules/cjs/loader.js:636:15)
    at Function.Module._load (internal/modules/cjs/loader.js:562:25)
    at Module.require (internal/modules/cjs/loader.js:692:17)

You can find a simple app that reproduces this problem here.

You can find the full exception when DEBUG is enabled, here

I'd appreciate any help - thank you!

Generate coverage information

As our tests are executing inside of React-Native common used coverage tools such as nyc cannot be used to instrument our code. A custom solution needs to be created. We should be able to leverage existing tools todo the heavy lifting for us.

All the code that is executed by Metro bundler is already getting processed by babel. This would allow us to inject instrumentation into the code using thehttps://github.com/istanbuljs/babel-plugin-istanbul package. The instrumentation data can then be transferred using our established WebSocket connection and coverage information can then be assembled once the test complete.

The only thing we need to consider is if we want this work to be available as part of the core or as a seperate plugin and keep ekke's internals as clean as possible.

Acceptance Criteria

  • Introduces the babel plugin to instrument the users' code.
  • Sends the coverage information over the WebSocket connection to the CLI.
  • Assembles and reports coverage information once tests complete.
  • Is documented and has unit tests. (Consider documenting how users can merge 2 coverage reports if they use both node.js based tests and ekke)

Use a custom path for the Metro cache

We currently share the Metro cache with every React-Native application that is installed on the users' system as we inherit the default configuration from the metro-config module. This means when we start our tests and clear the cache (which is enabled by default), we also clear the cache of our host application. This can be easily solved if we use a custom cache location.

Acceptance Criteria

  • Configure a custom Metro File Cache in our custom configuration.
  • Configure the new Metro cache to a different, customizable location.
  • Verify that when we run ekke we do not clear the cache of our host application.
  • The new configuration is documented and has unit tests.

Create a `jest` based runner

This ticket tracks the creation of a jest based runner. In order to integrate a test runner our system makes the following assumptions:

  • There is an API that can be required.
  • Importing of test files prepares or executes the tests.
  • There is an API, method that we can execute to run the tests or listen to test completion.
  • No child process / forking / spawning, or file system operation supported.

Currently jest executes the tests through their jest CLI. There is no programmatic API documented that we can use. This doesn't mean it's impossible to integrate. In the last few months, they started extracting bit's of the CLI into a dedicated jest-core package that would eventually become an API jestjs/jest#7696 this work is currently tracked in jestjs/jest#5048. When this work is completed it should become a lot easier to integrate jest as test runner.

Acceptance Criteria

  • Users can select jest as test runner.
  • Custom jest configuration can be supplied using --jest.{key} {value} CLI flags.
  • Example is added to our examples folder.
  • Documentation and new unit tests have been added.

Action required: Greenkeeper could not be activated 🚨

🚨 You need to enable Continuous Integration on Greenkeeper branches of this repository. 🚨

To enable Greenkeeper, you need to make sure that a commit status is reported on all branches. This is required by Greenkeeper because it uses your CI build statuses to figure out when to notify you about breaking changes.

Since we didn’t receive a CI status on the greenkeeper/initial branch, it’s possible that you don’t have CI set up yet. We recommend using Travis CI, but Greenkeeper will work with every other CI service as well.

If you have already set up a CI for this repository, you might need to check how it’s configured. Make sure it is set to run on all new branches. If you don’t want it to run on absolutely every branch, you can whitelist branches starting with greenkeeper/.

Once you have installed and configured CI on this repository correctly, you’ll need to re-trigger Greenkeeper’s initial pull request. To do this, please click the 'fix repo' button on account.greenkeeper.io.

Recommend Projects

  • React photo React

    A declarative, efficient, and flexible JavaScript library for building user interfaces.

  • Vue.js photo Vue.js

    🖖 Vue.js is a progressive, incrementally-adoptable JavaScript framework for building UI on the web.

  • Typescript photo Typescript

    TypeScript is a superset of JavaScript that compiles to clean JavaScript output.

  • TensorFlow photo TensorFlow

    An Open Source Machine Learning Framework for Everyone

  • Django photo Django

    The Web framework for perfectionists with deadlines.

  • D3 photo D3

    Bring data to life with SVG, Canvas and HTML. 📊📈🎉

Recommend Topics

  • javascript

    JavaScript (JS) is a lightweight interpreted programming language with first-class functions.

  • web

    Some thing interesting about web. New door for the world.

  • server

    A server is a program made to process requests and deliver data to clients.

  • Machine learning

    Machine learning is a way of modeling and interpreting data that allows a piece of software to respond intelligently.

  • Game

    Some thing interesting about game, make everyone happy.

Recommend Org

  • Facebook photo Facebook

    We are working to build community through open source technology. NB: members must have two-factor auth.

  • Microsoft photo Microsoft

    Open source projects and samples from Microsoft.

  • Google photo Google

    Google ❤️ Open Source for everyone.

  • D3 photo D3

    Data-Driven Documents codes.