
As a summary of our CRUD journey, we will work on creating an app for movies and celebrities. The goal of this exercise is to practice CRUD on at least one of the models (building the full CRUD for the movie model is mandatory) and documents relationships (between the two models). So let's see what are some user stories related to the celebrity model:
- The user should be able to:
1. Add new celebrities
2. See the list of celebrities
In the second part of the application, when you already have a couple of celebrities in your database, let's figure out what we will do regarding the movie model. As we said, we will have a full CRUD on this model, which means the user can:
3. Add new movies
4. See the list of all movies
5. See the details of a specific movie, including its cast of celebrities
6. Update existing movies
7. Delete movies
Now that we know the overview of the app, let's proceed to create it.
Hint: Although this lab might seem overly guided, it is the first time you are creating a full-stack app on your own so we wanted to make sure all steps are covered and you can come back to this lab's solution as a reference at any point later.
Let's go!
- Fork this repo
- Clone this repo
- Upon completion, run the following commands:
$ git add .
$ git commit -m "done"
$ git push origin master
- Create Pull Request so your TAs can check up your work.
After forking and cloning the project, you will have to add a .env file and add in it the following line:
PORT=3000
And you have to install all the dependencies:
$ npm installRun the app and you are ready to start 🚀
In order to have everything organized, we will first create a couple of folders and files.
- Routes: In our
routesfolder, let's create separate files for our celebrities and movies. The naming is up to you, but we will use the following:routes/celebrities.routes.jsandroutes/movies.routes.js. You can add below starter router code to both of them and remember to link these two new files to eitherapp.jsorroutes/index.jsso your server has access to them.
// starter code in both routes/celebrities.routes.js and routes/movies.routes.js
const router = require("express").Router();

// all your routes here

module.exports = router;-
Views: To keep things nice and clean, we will also create separate folders for
celebritiesandmovies:views/celebritiesandviews/movies. Also, we will create a couple of files in each folder:-
views/celebrities/celebrities.hbs -
views/celebrities/new-celebrity.hbs -
views/movies/movies.hbs -
views/movies/new-movie.hbs -
views/movies/movie-details.hbs -
views/movies/edit-movie.hbs
-
Obviously, naming is a matter of preference so we used very descriptive names for routes and views.
Our first step is to create the Celebrity model and add some celebrities to our database.
The Celebrity model should have:
name- String (like Tom Cruise, Beyonce, Daffy Duck,, etc.)occupation- String (what the celebrity does, why they are famous. For example actor, singer, comedian, or you can put unknown if your celebrity is someone like Kim Kardashian)catchPhrase- String (every celebrity needs a good catchphrase. Well maybe not all of them have one in real life, but all of our celebrities will have a catchphrase. This can be pretty much anything.)
Go ahead and locate the Celebrity.model.js model file in the models folder. Using schema, create the Celebrity model with the above-mentioned properties. Don't forget to export the model.
Now that we have defined Celebrity model, let's make it so the user can add new celebrities to the database.
| Route | HTTP Verb | Description |
|---|---|---|
/celebrities/create |
GET | Show a form to create a celebrity |
/celebrities/create |
POST | Send the data from the form to this route to create the celebrity and save it to the database |
- In the routes file (
routes/celebrities.routes.js) create the following GET route:/celebrities/create - In that route we have to render the
celebrities/new-celebrityview - In that view file:
- Add an
<h2>for the page's heading. - Add a
<form>tag that makes a POST request to/celebrities/create. - Add
<input>tags inside the form so the user can fill in values for each attribute of the celebrity. Make an input forname,occupation, andcatchPhrase - Add a
<button>tag in the form so the user can submit the form once they are done filling it out.
- Add an
- Create the
/celebrities/createPOST route inroutes/celebrities.routes.js. - In that route we have to create an instance of the
Celebritymodel (don't forget, we should get all the info from the form through req.body)- If there is an error, render the
celebrities/new-celebrityview so the user can try again and - If there is no error, redirect to the page with the list of celebrities. This route will be created in the next iteration of
/celebrities
- If there is an error, render the
- In the
views/index.hbsview file:- Add a link that goes to the page you just created with the form to create a new celebrity.
Now, when we've got some celebrities in the database, we can start working with them in our Express app. Let's display a list of all the celebrities.
Here's the route we will be using:
| Route | HTTP Verb | Description |
|---|---|---|
/celebrities |
GET | Show all celebrities |
- Create the
/celebritiesGET route inroutes/celebrities.routes.js. - In the route:
- Use
find()method on theCelebritymodel to retrieve all the celebrities - If everything is okay, render the
celebrities/celebrities.hbsview and pass the array of celebrities into the view as a variable - If there's an error, catch it
- Use
- In the
views/celebrities/celebrities.hbsview file:- Add an
<h2>tag for the page's heading. - Use an hbs
#eachloop to display tags with each celebrity'sname.
- Add an
- In the
views/index.hbs(homepage) file:- Add a link that goes to the
/celebritiesroute.
- Add a link that goes to the
Celebrities - Done! At least for now. 😉
Now that we've started all this good work, let's keep up strong and build all the routes for the Movie model. But first, let's create the Movie model.
The Movie model should have:
title- Stringgenre- Stringplot- Stringcast- Array of object IDs referencing the Celebrity model (basically, the array of celebrities' IDs)
Go back and review what you did to create the Celebrity model. You'll need to create a file for the model, and in that file, you'll need to create a schema for the model as well. Don't forget, you have to export the Movie model.
Okay, the next step is to make it so the user can add new movies to the database.
| Route | HTTP Verb | Description |
|---|---|---|
/movies/create |
GET | Show a form to create a movie |
/movies/create |
POST | Send the data from the form to this route to create the movie and save it to the database |
Review how you did this for the Celebrity model.
- Create 2 new routes, one to render a page with the form on it, and one to send the data to after the form is filled out
- In the GET route that displays the form to create a new movie (which renders the
movies/new-movie.hbs), make sure you pass all the celebrities from your database so your users can choose which ones are in the cast of the movie you're just creating (hint: You will have to use select multiple tag)
- In the GET route that displays the form to create a new movie (which renders the
- Remember that the user should see the cast name in the option tags, but the information that should be transmitted (
value) is the_idwe will use for thecastattribute of the movie. - Make sure the form is making a POST request to the other route you just created (
/movies/create) - In your post route, create an object with all the info you just received from the form. (Remember,
req.body) - Use this object to create a new movie in the database and redirect back to the page with your list of all movies
- Make sure to add a link to the form on the movies index page so the user can easier navigate
Now that we've got some movies in the database, let's make a page where we list all our movies, just like we did with the Celebrity model.
Here's the route we will be using:
| Route | HTTP Verb | Description |
|---|---|---|
/movies |
GET | Show all movies |
Go back and review how you did this for the celebrities. You'll need to:
- Create a GET route that will render the file in which we will display movies (
movies/movies.hbs) - Use a database query to retrieve all the movies from your database and render the view
- Use a hbs
#eachloop to display all your movie titles on that page - Add a link to the page you just created on the home page so the user can navigate to it.
We've got a list of all movies that display each of their titles, but what if we want to see the other details? In our movies/movies.hbs view with our list of movies, let's add links so that the user can click on any movie's title, and go to a details page of each movie. On this page, we will show all the details of that movie.
Here's the route we will be using:
| Route | HTTP Verb | Description |
|---|---|---|
/movies/:id |
GET | Show a specific movie |
- We need
/:idpart to change dynamically as we click on different movies' titles. This being said, as part of the loop that displays each movie's title, add a link that goes to the/movies/:idroute with the:idreplaced by the actual movie's id 🔑 - Create the
/movies/:idGET route inroutes/movies.routes.js. - In the route:
- On the
Moviemodel call thefindOne()orfindById()method to retrieve the details of a specific movie by itsid- Don't forget you have
castas the array of celebrityids, and we need topopulate()in order to get the full data about the celebrities 🎯
- Don't forget you have
- If everything is fine (.then()), render the
movies/movie-detailsview and pass the variable with the movie's details into the view - If there's an error, catch it.
- On the
- In the
views/movies/movie-details.hbsview file:- Add an
<h2>for the page's heading. - Display tags with the movie's
title,genreandplot. - Use an hbs
#eachloop to display the cast'sname,occupationandcatchPhrase
- Add an
Now that we have a list of movies, a movie details page, and a page to create new movies, we only have 2 features left to implement: editing movies and deleting them. Since deleting is simpler, let's start with that.
| Route | HTTP Verb | Description |
|---|---|---|
/movies/:id/delete |
POST | Delete a specific movie |
- In the
movies/movie-details.hbsfile:- Add a
<form>tag that makes a POST request to/movies/:id/deletewhere the:idis replaced by the actualidof the movie. - Add a
<button>tag inside the form so that it can be submitted.
- Add a
- Create the
/movies/:id/deletePOST route in yourroutes/movies.routes.jsfile - In the route:
- Use the
Moviemodel'sfindByIdAndRemove()method to delete the specific movie by itsid. - If everything is good (
.then()), redirect to the list of movies page - If there's an error, catch it
- Use the
The final piece of our CRUD puzzle: editing existing movies.
Here are the routes we will be using:
| Route | HTTP Verb | Description |
|---|---|---|
/movies/:id/edit |
GET | Show a form to edit a movie |
/movies/:id/edit |
POST | Send the data from the form to this route to update the specific movie |
- Create the
/movies/:id/editGET route inroutes/movies.routes.js. - In that route:
- Call the
Moviemodel’sfindOne()orfindById()method to retrieve a specific movie by its id - Call the
Celebritymodel'sfind()to retrieve all celebrities for the cast. - If everything is good, render the
movies/edit-movieview - Pass the variable with the movie's details and all celebrities into the view
- Call the
- In the
movies/edit-movie.hbsview file:- Add an
<h2>tag for the page's heading. - Add a
<form>tag that makes a POST request to/movies/:idwith the:idreplaced by the actual movie's id. - Add
<input>tags inside the form for each attribute of the movie.- Hint: When you render the edit form, make sure each of the input fields is pre-filled with the current value of the attribute for that movie
- Add
<select>and<option>tags that will handle the cast attribute. - BONUS: Make the current cast members selected so the user knows who is in the cast currently.
- Add a
<button>tag inside the form so that the user can submit the form once they are done editing.
- Add an
- Create a
/movies/:idPOST route in theroutes/movies.routes.jsfile - In that route:
- Create an object with the movie's model keys and its values should come from the form submission (which is
req.body) - Now you can apply different methods -
update()orfindByIdAndUpdate()to find the movie and send the updated values to the database. - If there is no error, redirect back to the movie details page.
- Create an object with the movie's model keys and its values should come from the form submission (which is
And we are done! Now all movies CRUD features are implemented with a relationship between movies and celebrities. As a BONUS, feel free to also add details view, edit and delete for the celebrities.
- See the details of a specific celebrity
- Update existing celebrities
- Delete celebrities
That's it! 🏆
Happy Coding! ❤️
I am stuck and don't know how to solve the problem or where to start. What should I do?
If you are stuck in your code and don't know how to solve the problem or where to start, you should take a step back and try to form a clear question about the specific issue you are facing. This will help you narrow down the problem and come up with potential solutions.
For example, is it a concept that you don't understand, or are you receiving an error message that you don't know how to fix? It is usually helpful to try to state the problem as clearly as possible, including any error messages you are receiving. This can help you communicate the issue to others and potentially get help from classmates or online resources.
Once you have a clear understanding of the problem, you will be able to start working toward the solution.
When I try to run the app, I get an error "command not found: nodemon"
Make sure you have
nodemon installed on your machine:
npm install -g nodemonThis will install nodemon globally on your system, making it available to all of your projects.
I got the error: "Cannot find module "dotenv" error in Node.js". How can I resolve it?
When you get the error "Cannot find module 'dotenv'" in a Node.js application, it usually means that the "dotenv" package has not been installed in your project yet. The dotenv is a package that is used to load environment variables from a .env file.
To fix the error, you should install the dotenv package by running the following command in the root directory of your project:
npm install dotenvThis will install the dotenv package and add it to the package.json file as a project dependency.
After the package is installed, you can use it by importing it at the top of your file. Remember to import it at the top, before other packages:
require("dotenv").config();Also, you should check that there is a .env file in the root directory of your project.
I got the error: "Cannot find module" Node.js". How can I resolve it?
The error "Cannot find module" in a Node.js application means that the module you are trying to import or use does not exist in your project or cannot be found by Node.js. There are a few things you can try to resolve the issue:
-
Dependencies are not installed: Make sure that all dependencies are installed. To do this, run the command
npm installin the root folder of your project. This will install all of the dependencies listed in the project'spackage.jsonfile, and ensure that all of the modules that your Node'js application requires are available. -
Module is not installed: Make sure that the package you are trying to use is listed in the project's
package.jsonand that it is installed. To do this, run the commandnpm install <package_name>, replacing the<package_name>with the name of the package. This will add the package to the list of dependencies in thepackage.jsonfile, and install it in the project. -
Module is not imported: Make sure that you've imported the module/package correctly and that the
requirestatement is spelled correctly and available in the correct place in your code. -
Wrong file path: If you are importing another file as a module, make sure that the file you are trying to require is located in the correct folder and that you are using the correct file path.
-
Wrong module/package name: Check the spelling of the package name you are trying to import.
Why are my CSS styles not loading after linking the stylesheet?
There are a few reasons why your CSS styles might not be loading after linking the stylesheet:
- Incorrect file path: Make sure that the file path for the stylesheet in the
linktag of your Handlebars template is correct. If the path is incorrect, the browser will not be able to locate the stylesheet and the styles will not be applied.
For example, if the file structure of your project is as follows:
- views/
    - layout.hbs
    - index.hbs

- public/
    - stylesheets/
        - style.css
...
The correct file path for the stylesheet in the link tag of the layout.hbs file would be:
<link rel="stylesheet" href="/stylesheets/style.css">
Important: The href path starts with a /, representing the path starting from the base folder where the static files are being served from, in this case, the public/ folder.
-
Incorrect file name: Make sure that you are referring to the file by its right name in the
hrefof thelinktag. -
Middleware not configured correctly: Make sure that you have the
express.staticmiddleware, that serves static files correctly configured in your Express app and that the right folder path and name is specified. If this middleware is not set up correctly, the server will not send the stylesheet when requested.
- Restart the server: Sometimes, even if you made the correct changes, the browser might still be loading an old version of the file. You should try restarting your Express server. This will ensure that the new changes are loaded and being served by the server, making sure the browser will load the most recent version of the stylesheet."
Why are my images not loading/displaying on the page?
There are a few reasons why your images might not be loading after linking the file:
- Incorrect file path: Make sure that the file path for the image in the
imgtag of your Handlebars template is correct. If the path is incorrect, the browser will not be able to locate the stylesheet and the styles will not be applied.
For example, if the file structure of your project is as follows:
- views/
    - layout.hbs
    - index.hbs

- public/
    - images/
        - dog.jpg
...
The correct file path for loading the image in the index.hbs file would be:
<img alt="dog" src="/images/dog.jpg" />Important: The src path starts with a /, representing the path starting from the base folder where the static files are being served from, in this case, the public/ folder.
-
Incorrect file name: Make sure that you are referring to the file by its right name in the
srcof theimgtag. -
Middleware not configured correctly: Make sure that you have the
express.staticmiddleware, that serves static files correctly configured in your Express app and that the right folder path and name are specified. If this middleware is not set up correctly, the server will not send the images when requested. -
Restart the server: Sometimes, even if you made the correct changes, the browser might still be loading an old version of the file. You should try restarting your Express server. This will ensure that the new changes are loaded and served by the server.
My GET form is not working properly. What should I do?
Here are the things you should check in order to fix your GET form:
- Check that the path for your GET route in Express matches the
actionandmethodattributes in the form. For example, if you have a routeGET/search:
app.get('/search', (req, res) => {
  // form handling logic
})
Your form action attribute should have the same path and the method should be the same:
<form action="/search" method="GET">- Check the data you are receiving from the form on the
req.queryby usingconsole.log(). For example, if you have a routeGET/search, you can add aconsole.log()like this:
app.get('/search', (req, res) => {
  // Print the data coming from the form
  console.log(req.query);
});- Check that the
formtag is properly formatted and that it has an opening and a closing tag. Example:
<form action="/search" method="GET">

  <!-- Form inputs, labels, button -->

</form>- Check that the submit button is configured properly to submit the form when clicked. Make sure that the button is located inside of the form tag and that it has a
type="submit"attribute. Example:
<form action="/search" method="GET">
  <label>Enter search prompt</label>
  <input type="text" name="prompt">

  <button type="submit"> Search </button>
</form>My links are not working properly. Should I use a relative or an absolute path?
When linking to other pages within your Express app, as a general rule you should use relative paths that start with a forward slash /.
This way you ensure that the links will work correctly both in your development environment and when the app is deployed.
For example, instead of linking to a page with an absolute path like this:
<a href="http://yourdomain.com/contact"> Contact </a>You should use a relative path starting with a forward slash / like this:
<a href="/contact"> Contact </a>If you are embedding values in your Handlebars template, you should still use the relative path that starts with a forward slash / like this:
I got the error "Error: listen EADDRINUSE: Address already in use". How do I fix it?
This error means that the port is taken by another process that is still running on that port. To fix the issue, you need to kill the process using the port and then run the command again. Here's how to do it:
To kill the process running on port 3000, run the following command in the terminal:
sudo kill -9 $(lsof -t -i:3000) Important: Replace the above example port 3000 with the port number of the process you are trying to kill.
To kill the running process on Windows using the Task Manager do the following:
- Open the Task Manager by pressing: Ctrl + Shift + Esc
- Find the Node process you want to terminate.
- Right-click and select End Task
To kill the running process on Windows using the Command Prompt do the following:
- Open the windows Start menu
- Search for CMD in the search bar
- In the search results, right-click on Command Prompt and select Run as administrator. This will open the Command Prompt terminal.
- In the Command Prompt terminal, run the following command to find the process ID:
netstat -ano|findstr "PID :3000"If the process happens to be running on another port, simply replace
3000with the number the port number the process is running on.
This will return the process id (PID). You should then run the following command using the process id (PID) you got in the previous step to terminate the process:
taskkill /PID 12345 /fImportant: Replace the above example PID 12345, with the process id (PID) you got in the previous step.
I got the error "Port is already in use". How do I fix it?
This error means that the port is taken by another process that is still running on that port. To fix the issue, you need to kill the process using the port and then run the command again. Here's how to do it:
To kill the process running on port 3000, run the following command in the terminal:
sudo kill -9 $(lsof -t -i:3000) Important: Replace the above example port 3000 with the port number of the process you are trying to kill.
To kill the running process on Windows using the Task Manager do the following:
- Open the Task Manager by pressing: Ctrl + Shift + Esc
- Find the Node process you want to terminate.
- Right-click and select End Task
To kill the running process on Windows using the Command Prompt do the following:
- Open the windows Start menu
- Search for CMD in the search bar
- In the search results, right-click on Command Prompt and select Run as administrator. This will open the Command Prompt terminal.
- In the Command Prompt terminal, run the following command to find the process ID:
```bash
netstat -ano|findstr "PID :3000"
```

> If the process happens to be running on another port, simply replace `3000` with the number the port number the process is running on.

This will return the process id (PID). You should then run the following command using the process id (PID) you got in the previous step to terminate the process:

```bash
taskkill /PID 12345 /f
```

**Important:** Replace the above example PID *12345*, with the process id (PID) you got in the previous step.
I got the error: "Error: connect ECONNREFUSED ::1:27017". What should I do?
This error means that the Node.js application is unable to connect to a MongoDB instance running on the local (same) machine. There are a few things you should look at to troubleshoot this:
- Check the database connection string: Check that the connection string is correct. The database connection string should be in the format:
mongodb://127.0.0.1:27017/databaseName- Verify that MongoDB is running on your machine: Check that MongoDB is running on your machine. If it is not running, restart the service according to the following instructions:
On Mac:
Check if MongoDB is running on your machine, by running the command:
brew services listYou should see the service mongodb-community listed as started. If not, run the following command to start it:
brew services start mongodb-communityOn Ubuntu:
You can start the mongod process by issuing the following command:
sudo systemctl start mongodIf you receive an error similar to the following when starting mongod:
Failed to start mongod.service: Unit mongod.service not found.
Run the following command first:
sudo systemctl daemon-reloadThen run the start command above again.
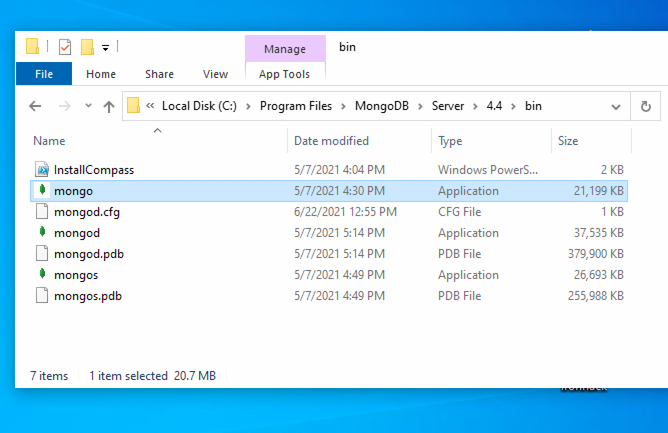
On Windows:
To open the MongoDB process on Windows, you will need to do these steps:
-
Go to your Program Files in your C: drive - the local disk
-
In Program Files go to the MongoDB folder
-
Inside the MongoDB folder, follow this path
Server/4.4/bin. The version number on your system (4.4) may be slightly different for the newer installations. -
Double-click on the file named mongod.exe.
Check the image inside
Why is my database empty even though I am able to connect?
It is normal for the database to be empty if you have not inserted any data into it. If you want to confirm that your connection to the database is working correctly, you can try inserting a simple document into a collection and then querying the collection or checking the database to see if the document was added.
I get the error "MongoDB is not running on the provided host and port" when trying to connect with MongoDB Compass. What should I do?
If you are trying to connect to a MongoDB instance running locally, you should first check that MongoDB is running on your machine. If it is not running, restart the service according to the following instructions:
On Mac:
Check if MongoDB is running on your machine, by running the command:
brew services listYou should see the service mongodb-community listed as started. If not, run the following command to start it:
brew services start mongodb-communityOn Ubuntu:
You can start the mongod process by issuing the following command:
sudo systemctl start mongodIf you receive an error similar to the following when starting mongod:
Failed to start mongod.service: Unit mongod.service not found.
Run the following command first:
sudo systemctl daemon-reloadThen run the start command above again.
On Windows:
To open the MongoDB process on Windows, you will need to do these steps:
-
Go to your Program Files in your C: drive - the local disk
-
In Program Files go to the MongoDB folder
-
Inside the MongoDB folder, follow this path
Server/4.4/bin. The version number on your system (4.4) may be slightly different for the newer installations. -
Double-click on the file named mongod.exe.
Check the image inside
How to create a Mongoose model?
The mongoose model serves as a blueprint for creating and managing documents within MongoDB collections. The mongoose model is an overlay on top of one MongoDB collection, that we use to query and interact with that database collection.
Here is an example of creating a User model to manage documents in the users collection:
// IMPORT MONGOOSE
const mongoose = require("mongoose");

// CREATE A SCHEMA - defines the shape of the documents
const userSchema = new mongoose.Schema({
  firstName: String,
  lastName: String
});

// CREATE THE MODEL
const User = mongoose.model('User', schema);

// EXPORT THE MODEL
module.exports = User;
In the above example, we created and exported a User model, so that it can be imported and used anywhere in the application for managing the database collection users.
Let's break down the above example and the steps in creating a mongoose model:
- Import mongoose: The first step is to import the
mongooselibrary. - Create a schema: The next step is to create a schema, which defines the shape of the documents that will be stored in the
userscollection. In the above example, the schema has two fieldsfirstNameandlastNamewhich are both strings. - Create the model: The last step is to create the model. This is done using the method
mongoose.model(), which takes two arguments: the name of the model, in this case'User'and the schema it should use. Mongoose automatically pluralizes and converts to lowercase the provided model name and uses it as the name of the collection. In this case, the string'User'is automatically converted into a collection name ->users. - Export the model: After the model is created, it needs to be exported so it can be used in other parts of the application.
I got the error: "[ERR_HTTP_HEADERS_SENT]: Cannot set headers after they are sent to the client". How do I resolve it?
The error [ERR_HTTP_HEADERS_SENT]: Cannot set headers after they are sent to the client occurs when you try to send a response after the response has already been sent. This means that you are calling res.send() or res.render() multiple times in your route, instead of only once at the end of the request.
To fix the issue, check the route that threw the error and verify that you are only calling res.send() or res.render() once in the route in question, after all, database operations and other logic have been completed.
You can start by trying to identify all the res.send() or res.render() calls made in the route code.
This error commonly arises from having nested conditionals or Promises and having multiple calls to res.send() or res.render() in the route logic. To troubleshoot it, it is advisable to check these parts of the route code for any logic errors.
How do I resolve the Mongoose error "ValidationError: Path ... is required."?
This error occurs when you try to save a document to the database without a value for a field that is marked as required in the model. To fix this error, make sure that you are providing a value for all required fields when creating or updating a document. You can verify that you are providing the correct values by using the console.log to inspect the data before saving it to the database.
I am getting an error: "not defined". How do I fix it?
The "ReferenceError: variable is not defined" error in JavaScript occurs when you try to access a variable or a function that has not been defined yet or is out of scope.
To fix the issue, check that you have defined the variable or function that you are trying to use and double-check the spelling to make sure you are using the correct name.
In case the variable or a function is defined in another file, make sure that the file has been imported or loaded correctly.
I am unable to push changes to the repository. What should I do?
There are a couple of possible reasons why you may be unable to push changes to a Git repository:
- You have not committed your changes: Before you can push your changes to the repository, you need to commit them using the
git commitcommand. Make sure you have committed your changes and try pushing again. To do this, run the following terminal commands from the project folder:
git add .
git commit -m "Your commit message"
git push- You do not have permission to push to the repository: If you have cloned the repository directly from the main Ironhack repository without making a Fork first, you do not have write access to the repository. To check which remote repository you have cloned, run the following terminal command from the project folder:
git remote -vIf the link shown is the same as the main Ironhack repository, you will need to fork the repository to your GitHub account first, and then clone your fork to your local machine to be able to push the changes.
Note: You may want to make a copy of the code you have locally, to avoid losing it in the process.


