This is a Space Engineers in-game script for logging ore locations. Currently the Ore Detector allows a player to "scan" for ore deposits they can mine.
The small ship block has a distance of 50m while the large ship block has a distance of 150m.
Unfortunately these distances are too short to be useful and it is super easy to miss pockets of ore. Ore Finder Plus [OFP] leverages the Ore Detector Raycast mod to allow a Raycast collision with the ore from the detector. In short the mode will allow the Ore Detector to fire a
small ray into a material (planet, asteroid, etc) and will report back the ore deposits it hits. This in-game script creates a logging system around that raycast.
With Ore Finder Plus you can:
- Have a heads up display of ore deposits discovered
- List all GPS coordinates for ore deposits
- Import all GPS points
- Increased distances (default 1KM detection range)
V1.5 Features:
- Now the ability to edit all settings in the OFP Menu (scan distance, enable/disable, etc)
- The script will automatically save and restore settings between sessions
- 3 Different Scan modes
- Forward Scan - v1.2 default mode which send a 2D ray out the front of the ore detector at the designated distance
- 360 Scan - This will scan 360 degrees around the ore detector recording any ore it hits.
- Forward Plane Scan - This scan will project a ray from -5 to 5 degrees on the azimuth and -5 to 5 degrees on the elevation creating a pyramid projected from the front of the ore detector. This is faster than 360 scan but only sees whats in front.
- Ability to change scanning speed
- New status screen and mini status screen
- Tested with Most mods for extending range of the basic ore detector as well as different ore deposits (Like Better Stone) successfully.
- Now supports Cockpit LCD's
- New Error handling to detect missing required mods
The great thing about Ore Detector Raycast and Ore Finder Plus is that this doesnt "break" the immersion of the game. This Mod and Script is not over powered. You, as a player, still have to scan the planet or asteroid there is no "scan the world" button.
- Ore Detector somewhere on the grid. Currently only the first one found is used.
- Programming Block running this script
- LCD Panel or Cockpit with the [OFP] designated tag.
Once the above is met you will need to add a few commands to your hot bar.
- up - Add the programming block from above to your hot bar with the argument of up. This will navigate the menu items up
- down - Add the programming block from above to your hot bar with the argument of down. This will navigate the menu items down
- apply - Add the programming block from above to your hot bar with the argument of apply. This will select the current menu item
- menu - Add the programming block from above to your hot bar with the argument of menu. This is a quick key to go back to the main menu.
- disable - Add the programming block from above to your hot bar with the argument of disable. This will disable OFP and the Ore Detector
- enable - Add the programming block from above to your hot bar with the argument of enable. This will enable OFP and the Ore Detector
- scan - Add the programming block from above to your hot bar with the argument of scan. This will cause a 1 time scan of the area with your current distance and scan settings.
To configure an LCD to be used by OFP you need to add the OFP tag to its name example: MyText Panel [OFP] Once this is done a custom data section will be added to that screen allowing you to change its operation
[OreFinderPlus]
; Edit the below to change how this screen reacts.
; Options:
; default = Allow this screen to navigate all menus
; ore = Always show ore status
; coordinates = Always show coordinate screen
; status = shows the status of current (or single) scan
; ministatus = shows scan status on small screens
Screen = ministatus
Setting the **Screen** option to Ore or Coordinates will force that screen to only display that. You should have at least one LCD set to default.
    private static string OFP_TAG = "OFP";
    string ignoreList = "Stone,Ice"; (Case is important)
    //Deposit Range is the potential size of a deposit of ore. The Below size is in meters.
    //If you start getting the same ore deposits tagged with multiple GPS coordinates
    //then make this number larger.
    int depositRange = 200
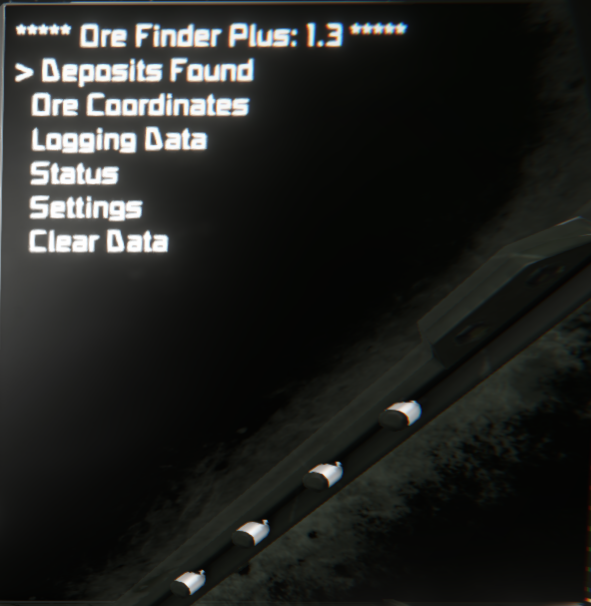
- Main Page: This is the main menu which allows navigation
- Deposits Found: This is a summary screen showing ore found
- Ore Coordinates: This screen shows all the ore found in GPS coordinates format. IMPORTANT To get these coordinates into your GPS system you will press K and navigate to the LCD showing the coordinates. Click Edit Text. Once that windows opens up the GPS points are automatically added to your GPS system. Navigate to the GPS tab and click Show on HUD if you want to see the location.
- Logging Data: This screen shows raw data being logged on the distances between ore deposits. This isnt required but is good for troubleshooting.
- Clear Data: This option will clear the found list of ore and the coordinates screen.
- OFP Enabled: [True/False] This option will not only disable the ore detector but will also disable the process that happens every tick. This can be done to allow your ore detector to "store" more charge on its raycast. It can store upt o 100K distance charge. This may allow you to do a "single" scan quicker as you have a store of energy.
- Scan Mode: (360 Scan, Forward Plane Scan, Forward Scan).
- 360 Scan - OFP will scan in a sphere 360 degrees around the ore detector. To save time there is a default stepping of 18 degrees in the elevation and azimuth. Azimuth will scan 360 degrees and elevation will scan 180. This allows for a full sphere of scanning.
- Forward Plane Scan - The forward plane scan will scan from 5 degrees left to 5 degrees right and 5 degrees down to 5 degrees up in the direction the ore detector is facing. This will create a virtual pyramid of scanning in the forward direction.
- Forward Scan - This is the old style of scanning but still included. This will only send out a beam directly out of the front of the ore detector. This works well but is hard to line up with ore deposits and its every easy to miss pockets of ore.
- Quick Scanning: [True/False] The ore detector has a "charge". The charge is how far the ray from the raycast can shoot out at a given time. According to the mod created by Racher it will generate 2.0/10000 meters per tick. 1000 ticks is 1 second. So every second you can scan about 2K distance. However OFP fires every 10 ticks and 100 ticks. SO there is a strong chance that you've used up your charge when you go to fire your next ray. If you set Quick Scan to False then OFP will wait until you have enough charge to reach your designated distance. If you set Quick Scan to True then OFP will fire off the scan with whatever charge is available. The up side of quick scan is that you dont wait for charge and the scan will go faster. The downside is that you are potentially missing pockets of ore as you arent sending out the full ray. The way I see this used would be if you're flying around perhaps you quick scan. But if you have OFP on a base (mobile or not) doing a DEEP scan of an area then keep Quick Scan off to make sure you always fire the ray as far as possible. For example. We have a base on the moon. We've setup a ore detector and OFP. Set the distance to 5K and did a 360 scan with Quick Scan off. This may take hours but will give a great understanding of the ore in the area.
- Distance: [Default 1000] If you're in the settings menu you can click "apply" to the distance option. You'll notice that the icon changes next to the Distance menu option. Now that you've selected this item you can use the standard up and down menu options to change the value up or down by 100m per click. Once you have the value where you want it then click apply again and you'll deselect this item and it will be set immediately.
-
Menu Screen
-
Deposits Found

-
Ore Coordinates

-
Logging Data

-
Status

-
Settings

-
Mini Scan Status

-
Clear Data

-
Cockpit LCDs


