Use this repo for the Azure Databricks Fundamentals Workshop
Welcome to the workhop. The purpose of the workshop is to bring you up to speed on some of the Data Engineering, Data Science, and Data Analysis capabilities of Azure Databricks. You will be using resources in Azure for this workshop. Each of you will recieve a userid and password to access the resources. Please consult your instuctor if you have any questions or blockers.
The Workshop is broken into two parts:
- Data Engineering and Data Science

- Data Analysis
Prior to starting the hands-on activites you will need to complete Step 1.
During Step 1 you will log into a VM that is deployed on Azure Labservice. This will ensure that everyone has the same capabilites by using a standard Window 11 VM that already has the software you need installed.
Sections:
Step 1 Login to Azure Lab Services
Step 3 Data Science Simple Starter
Step 5 Introducing Microsoft Fabric
Here you will to register, start, and login to your Windows 11 desktop that you will use during the workshop.
- Click on this Registration Link for Azure Lab Services
Refer to the paper you get during the workshop for your userid and password.
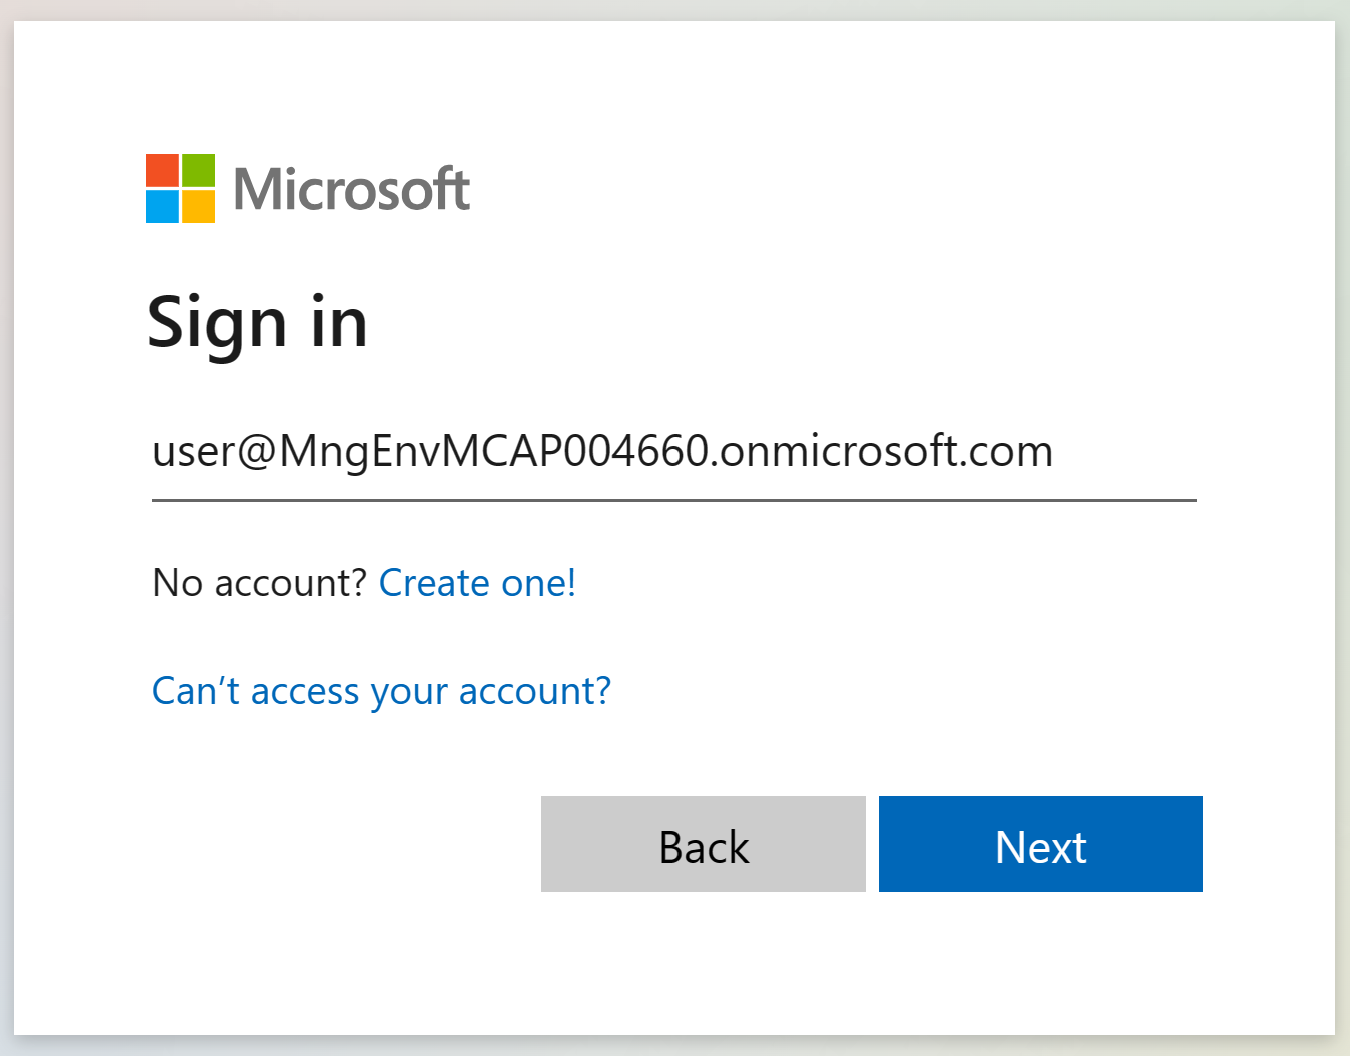
you may be using a organization similar to this @MngEnvMCAP004660.onmicrosoft.com
Enter your userid and click Next
Enter your password and click Sign in
Note: You may be prompted for multifactor auth. Check with your instructor.
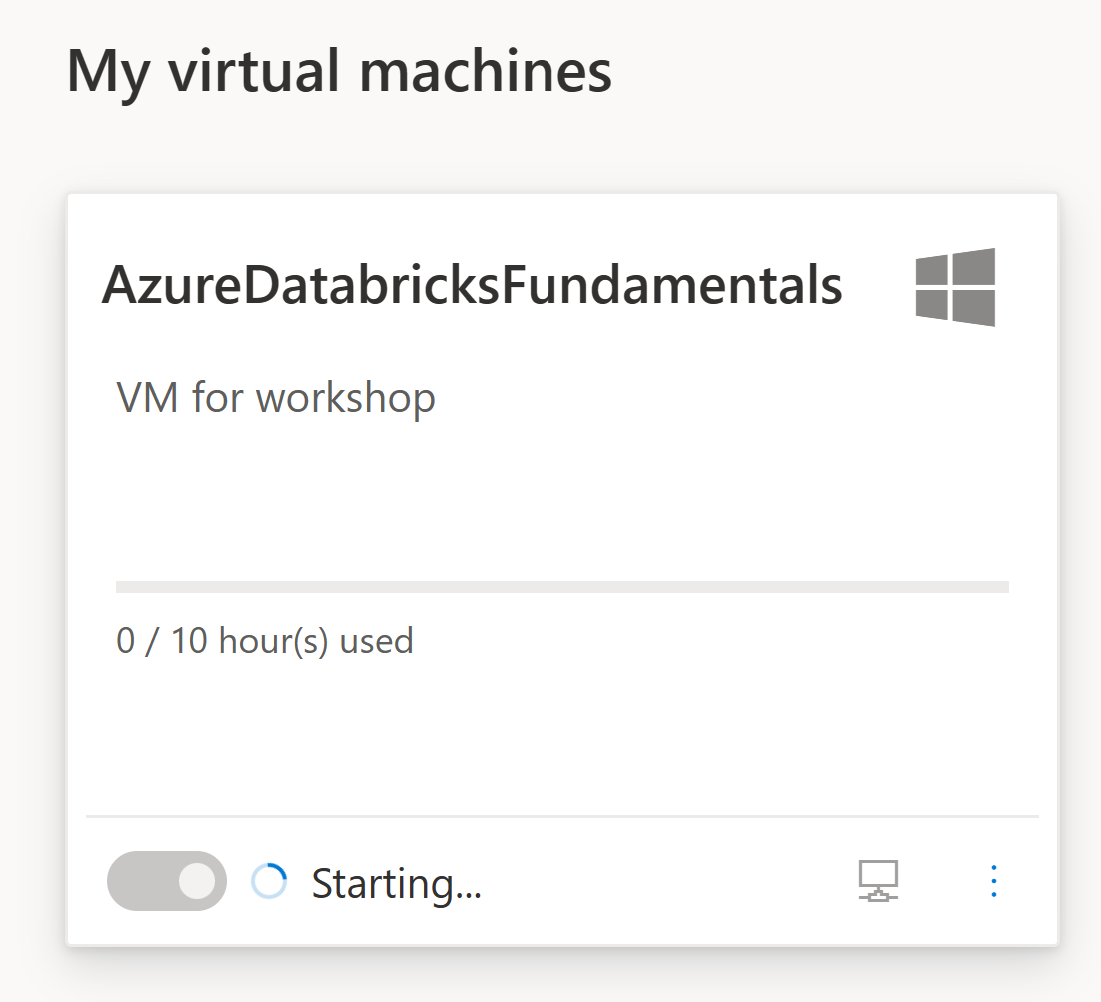
You should endup at a screen that looks like this.
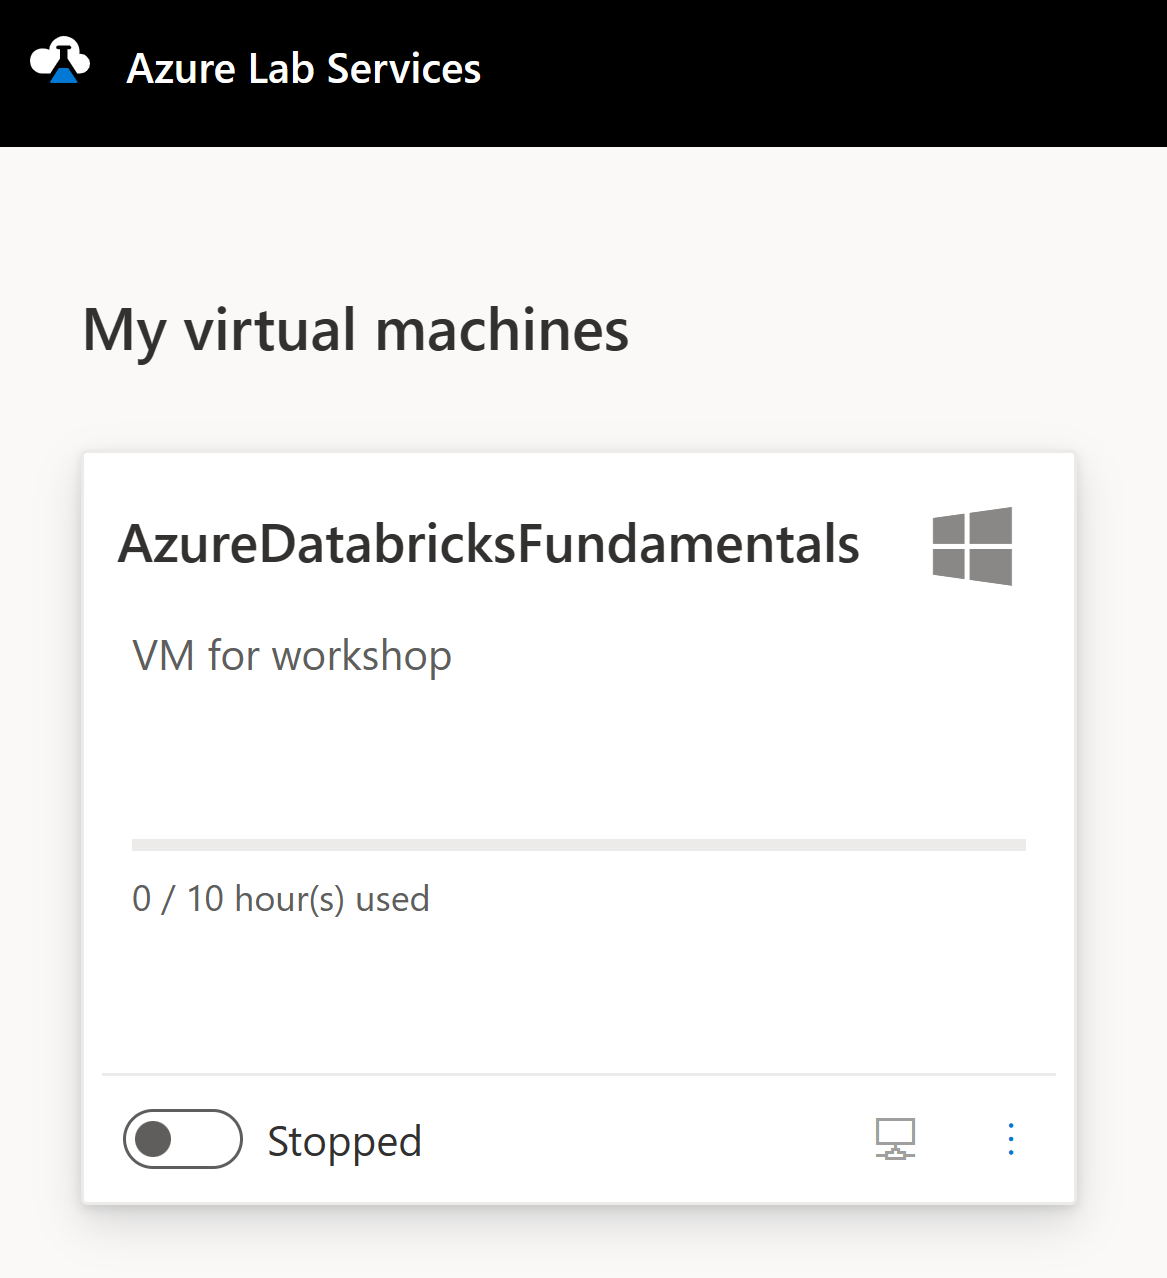
Click on the stopped toggle on the VM to start your VM
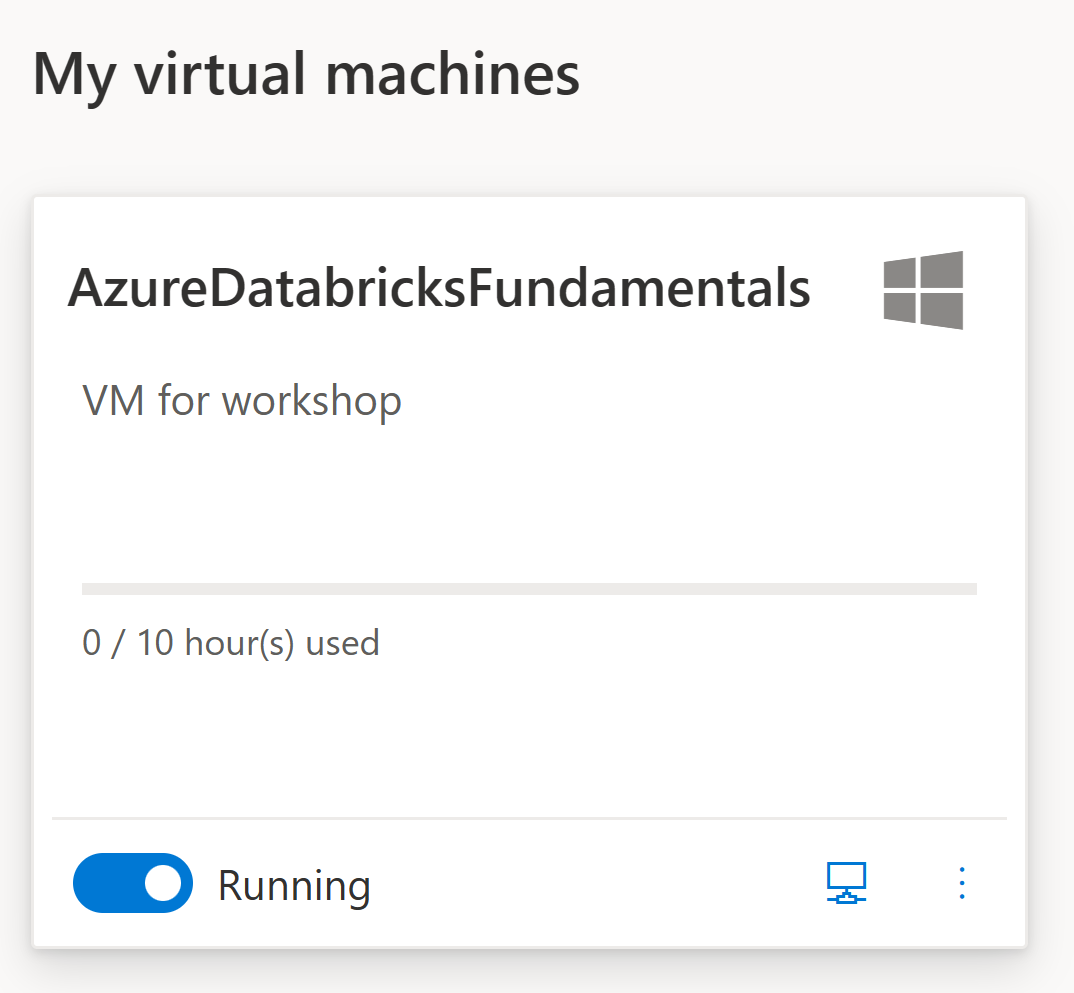
Once it says that it is Running click on the icon that looks like a monitor
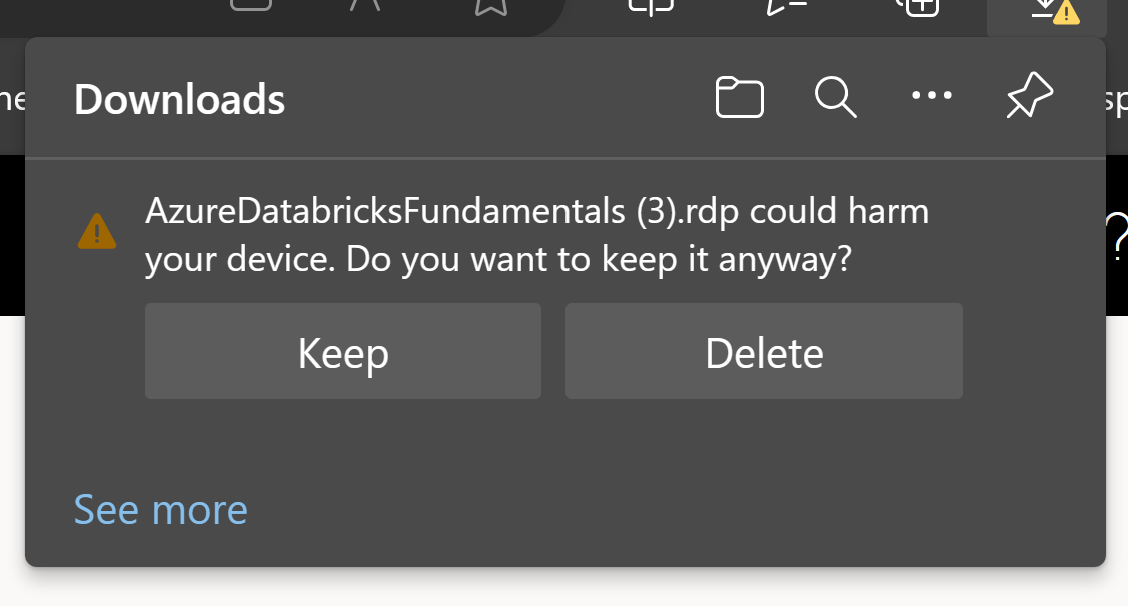
Keep the download if you browser prompts you.
Open the RDP file and click Connect
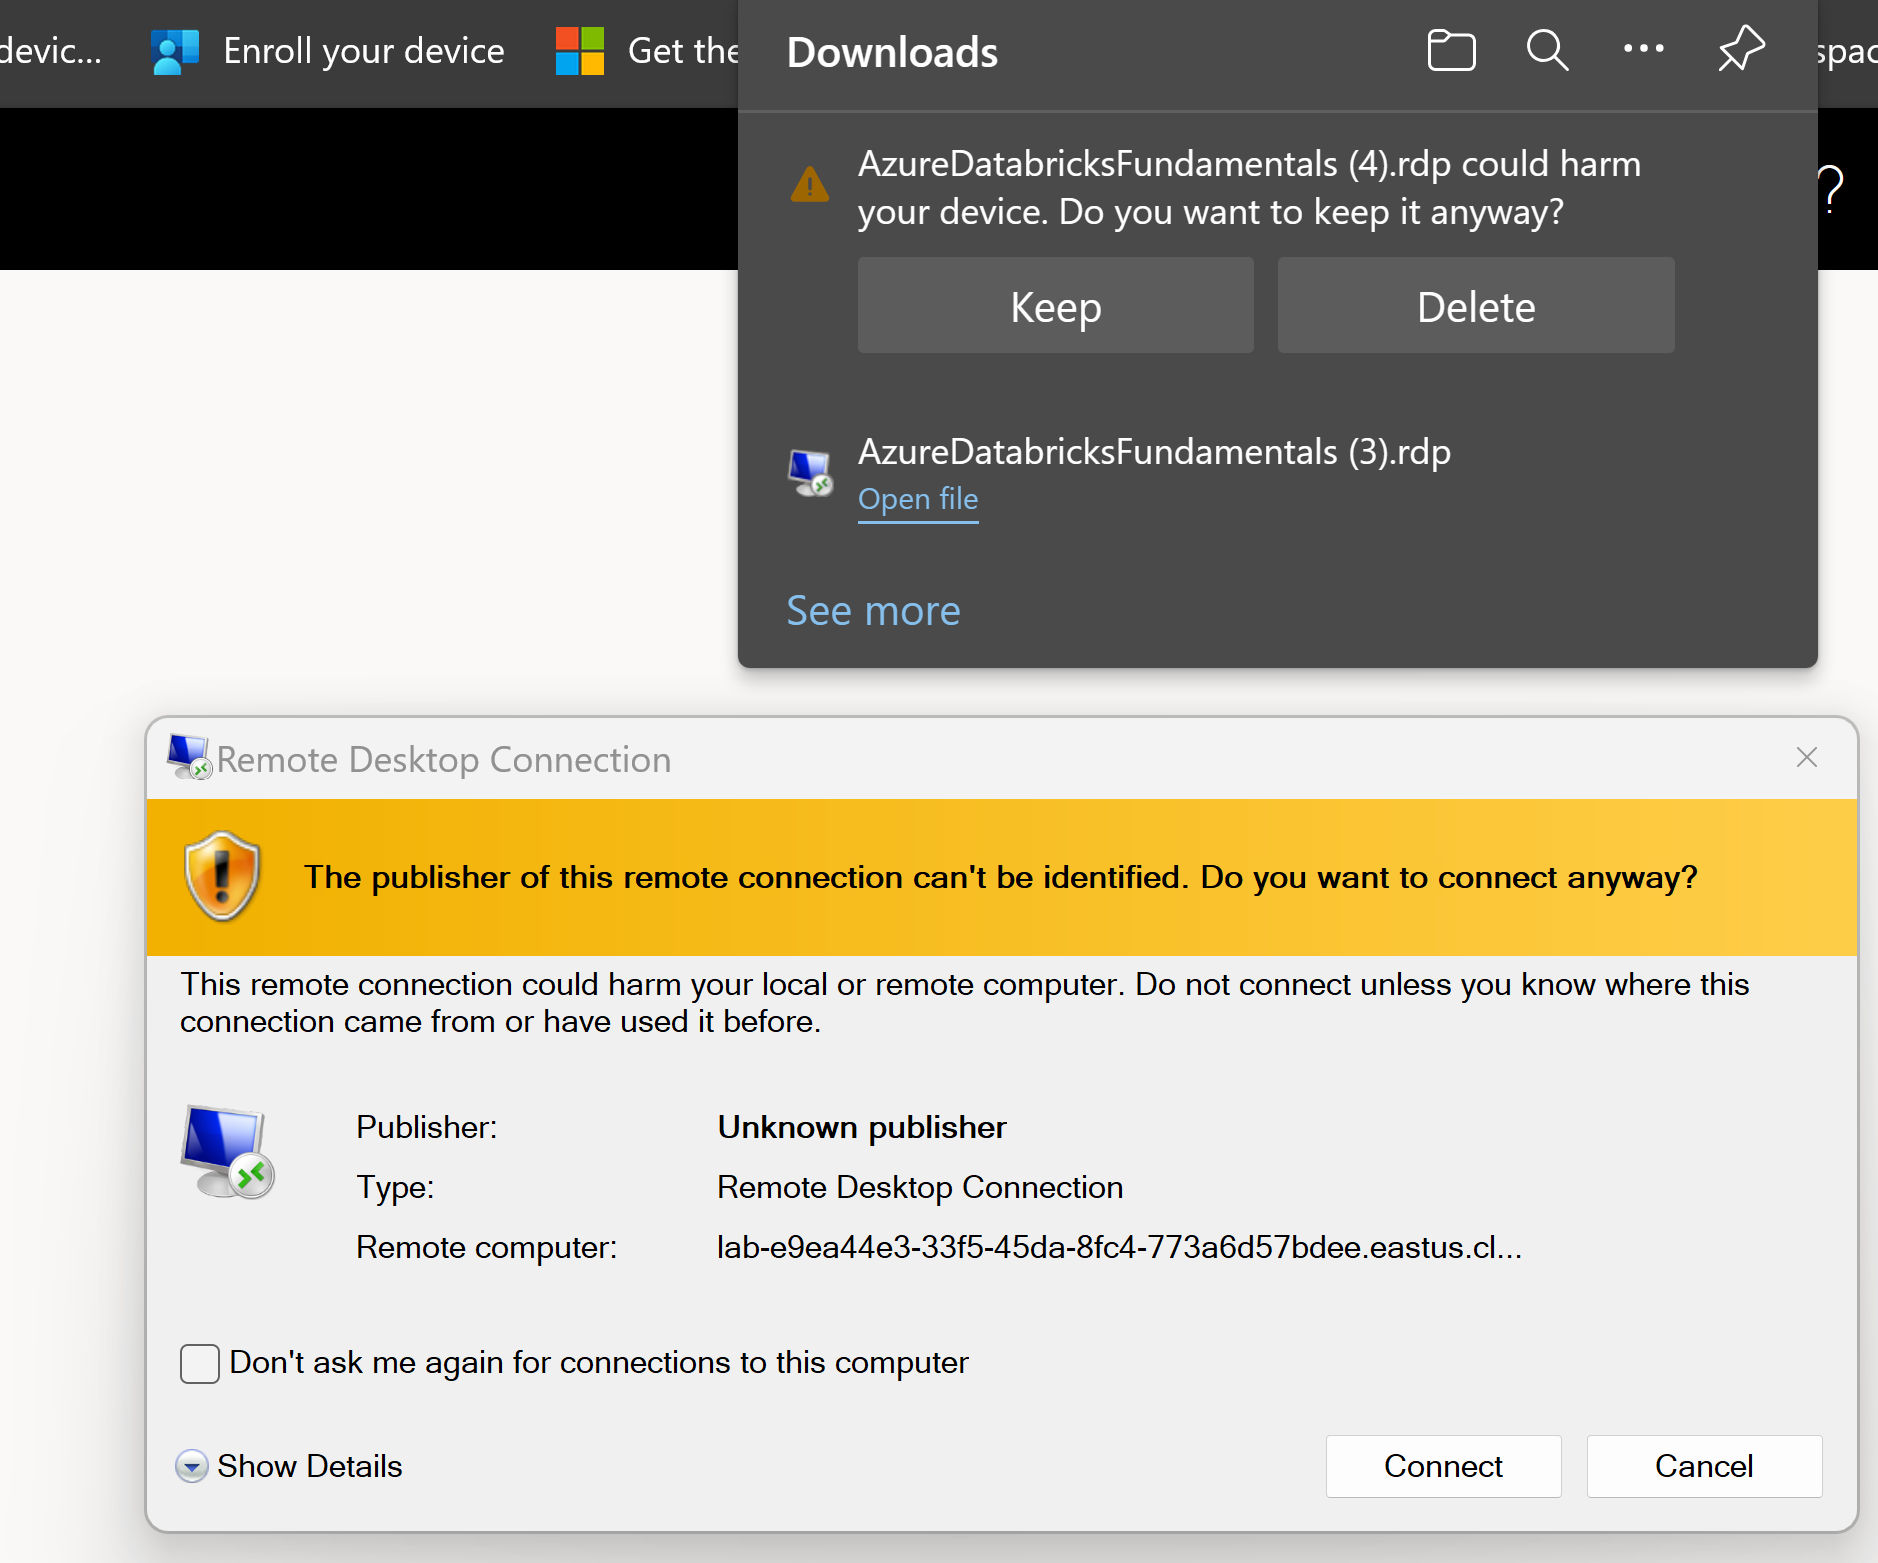
Enter the password provided by your instructor and click OK
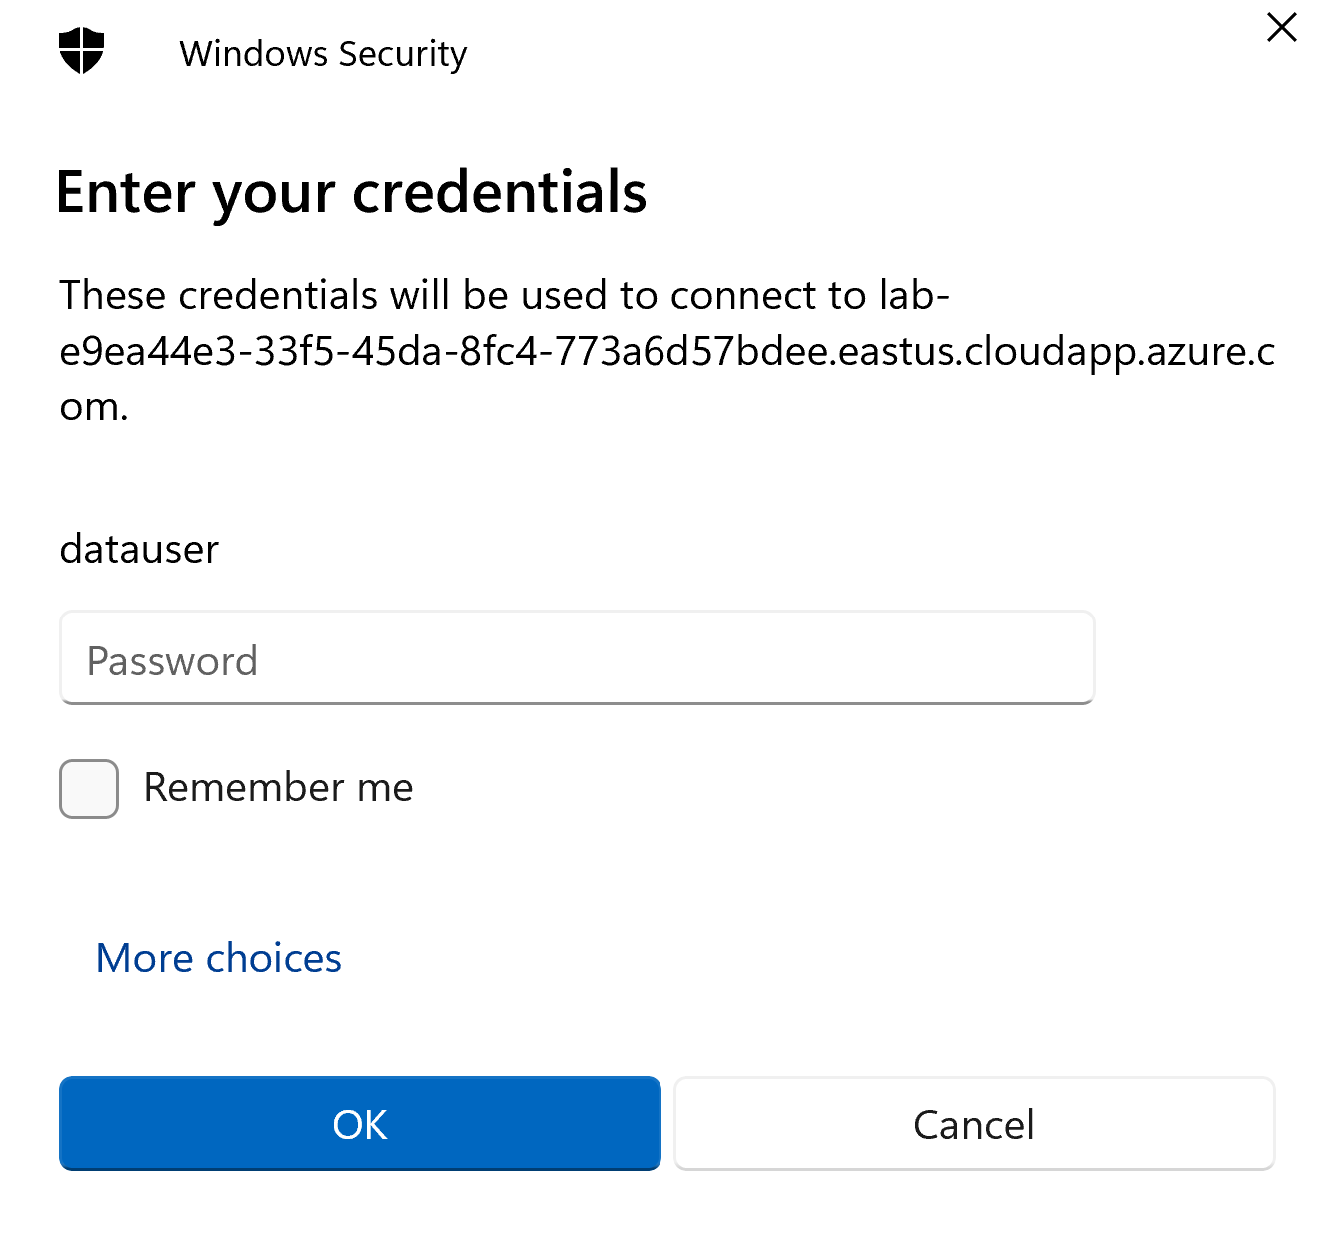
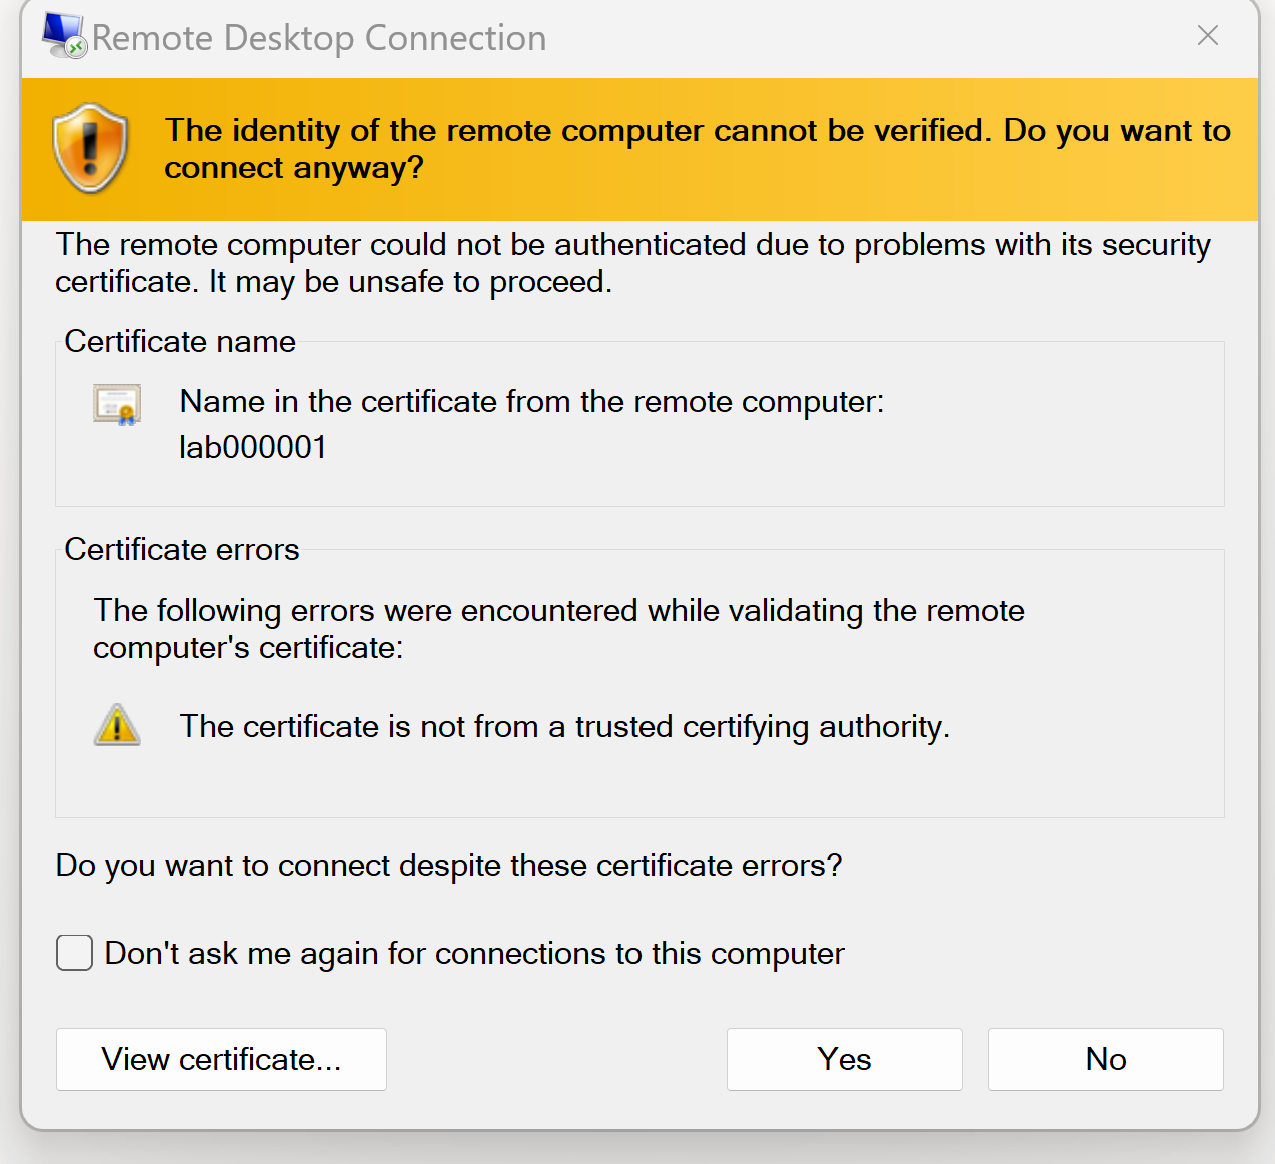
Click Yes
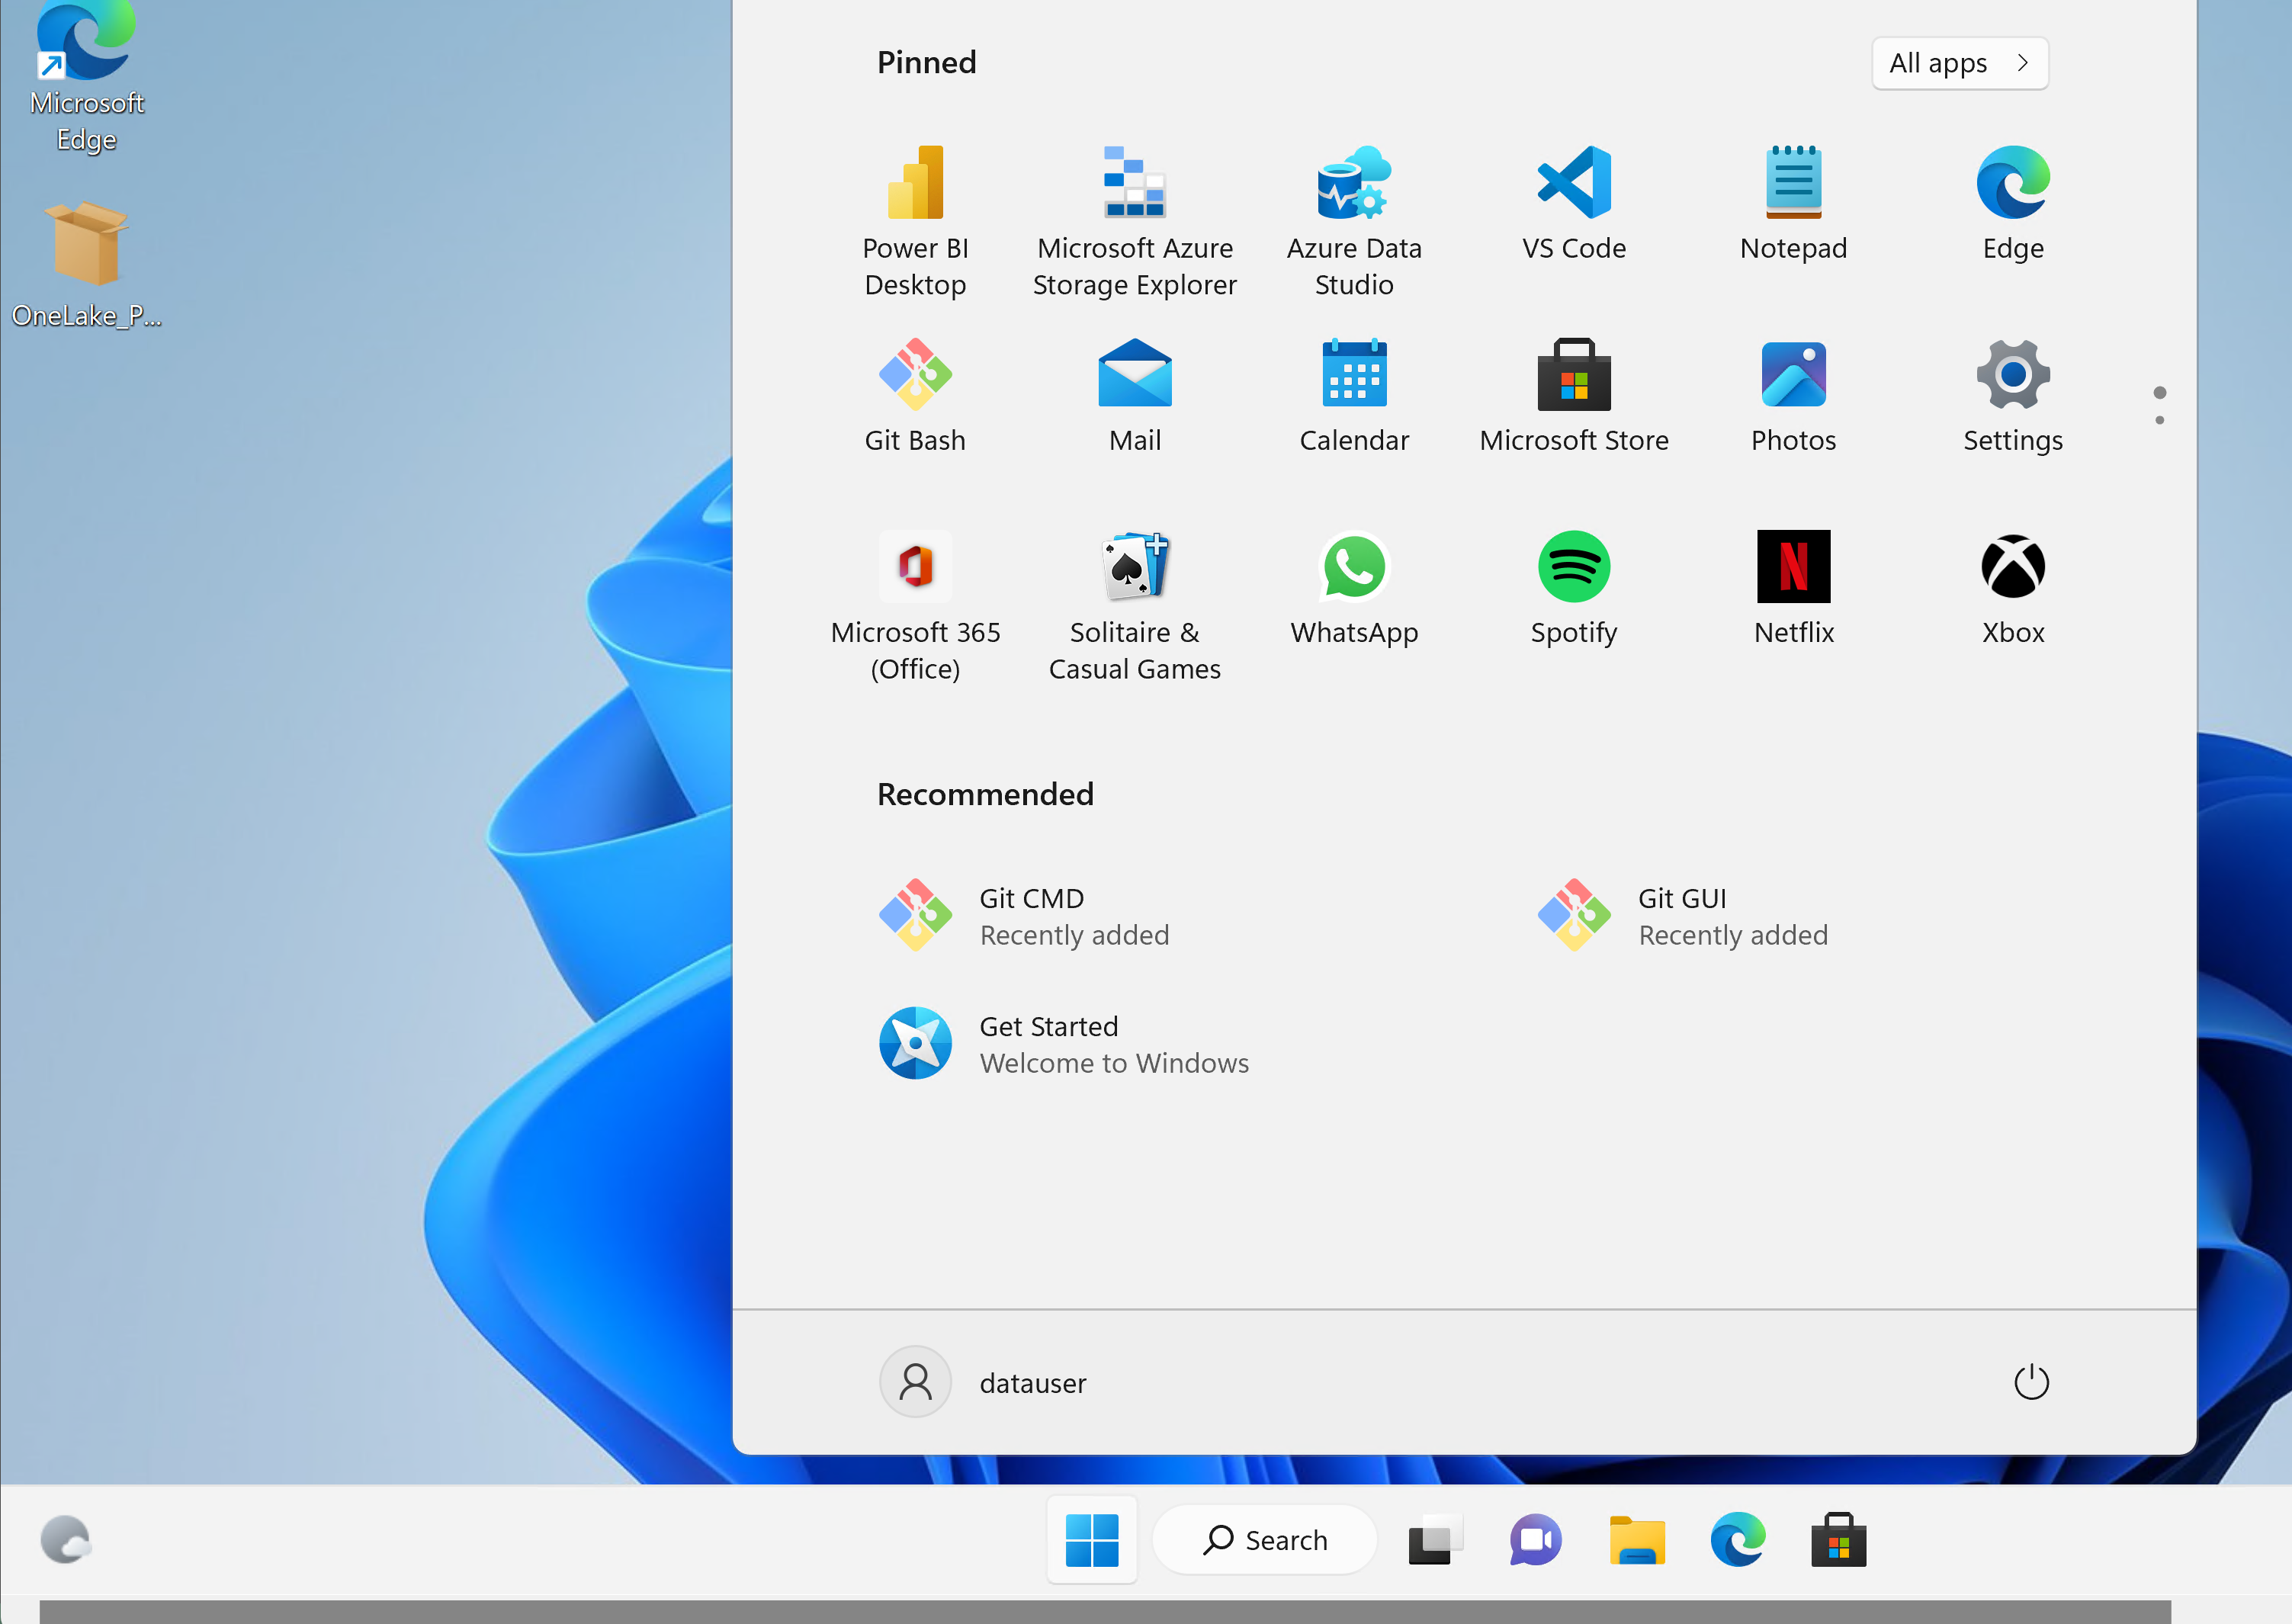
Your Windows desktop should look like this. Notice the following applications that you will use during the workshop:
- Power BI Desktop
- Microsoft Azure Storage Explorer
- Git (to clone this repository to your VM)
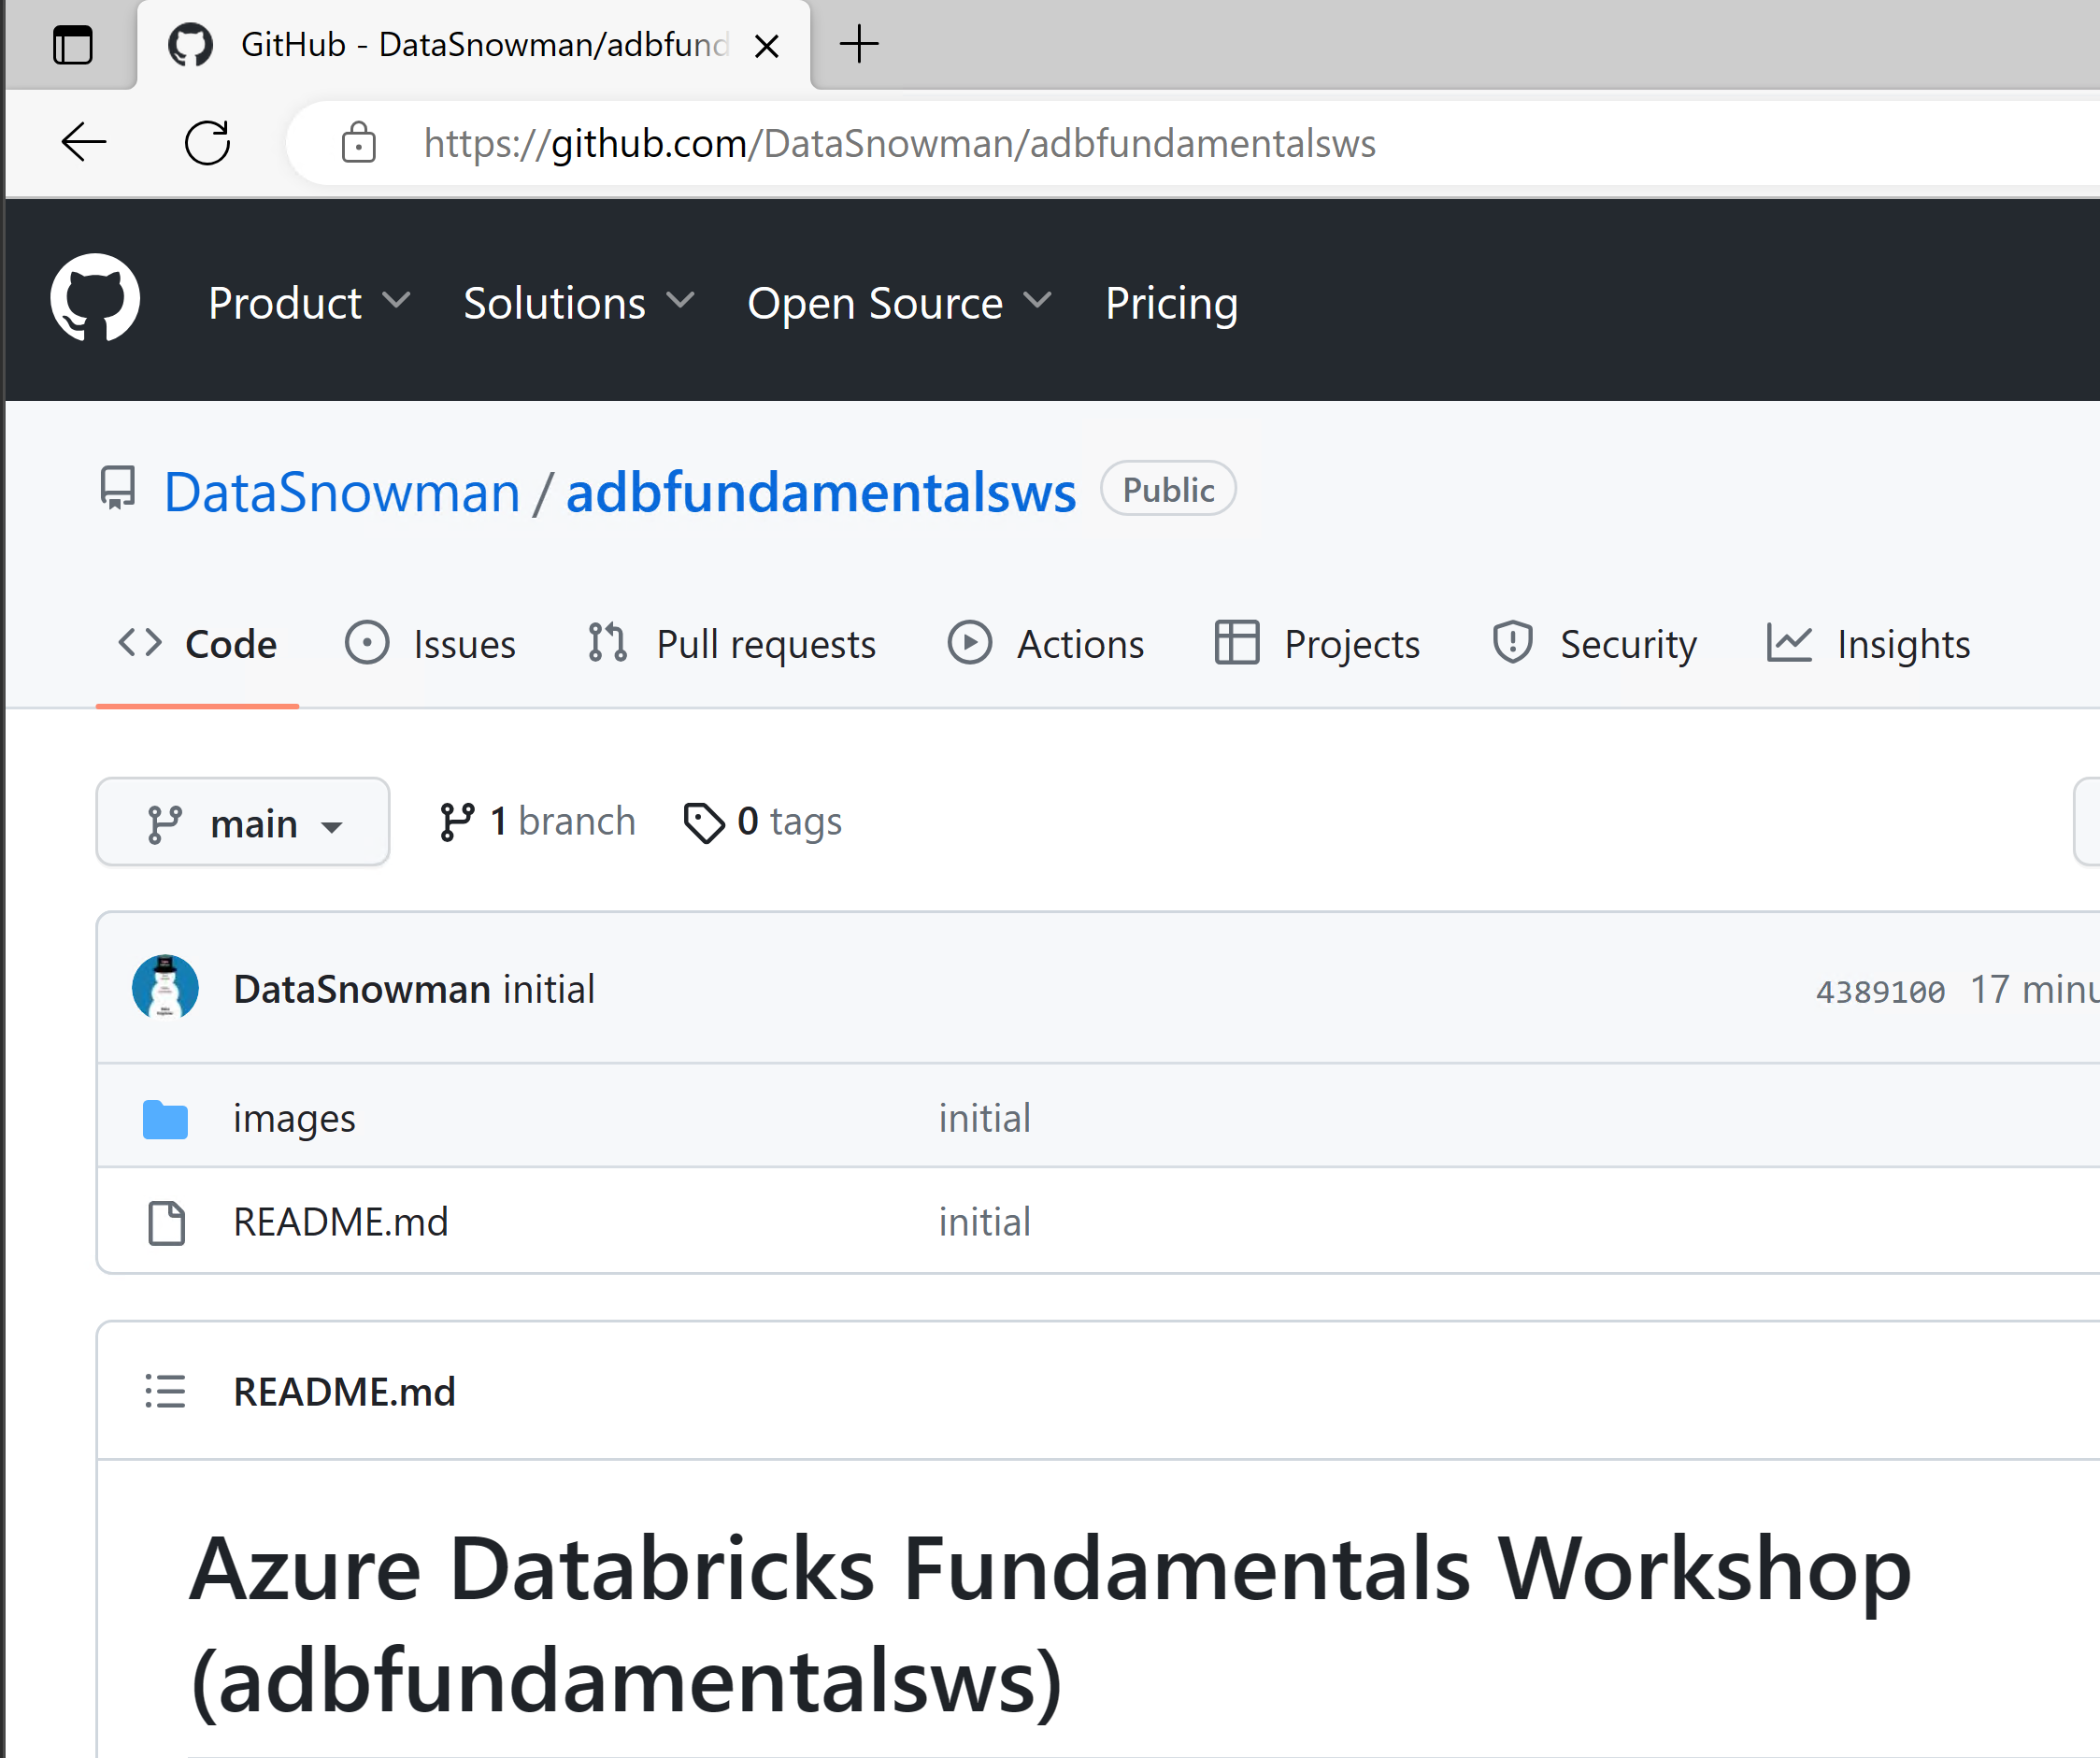
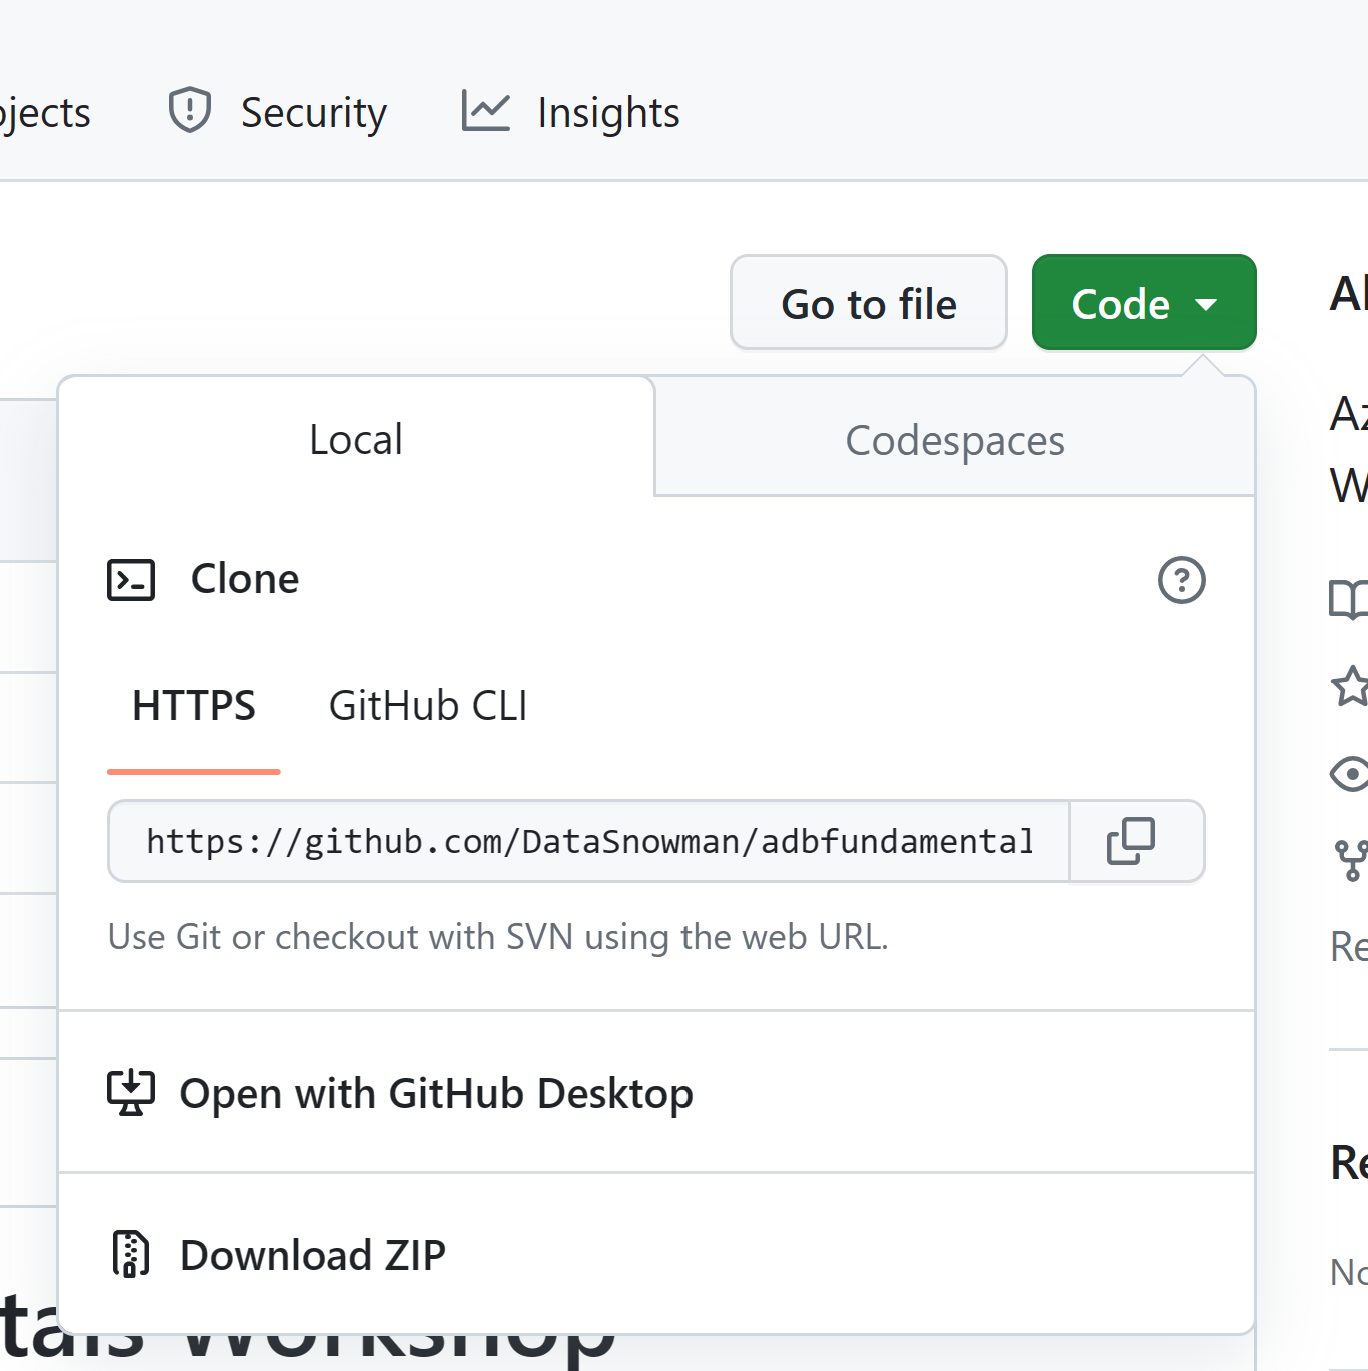
Open up the Microsoft Edge browser on the desktop and open up this GitHub Repo to follow the rest of the directions from that remote desktop VM. If you prefer to cut and paste it here is the link
https://github.com/DataSnowman/adbfundamentalsws
During this section of the workshop we will focus on reviewing and looking at a couple of Databricks Notebooks and using them for Data Engineering activities.
Click on this link to access the Databricks environment for the workshop
When the sign in pops up click Sign in with Azure AD
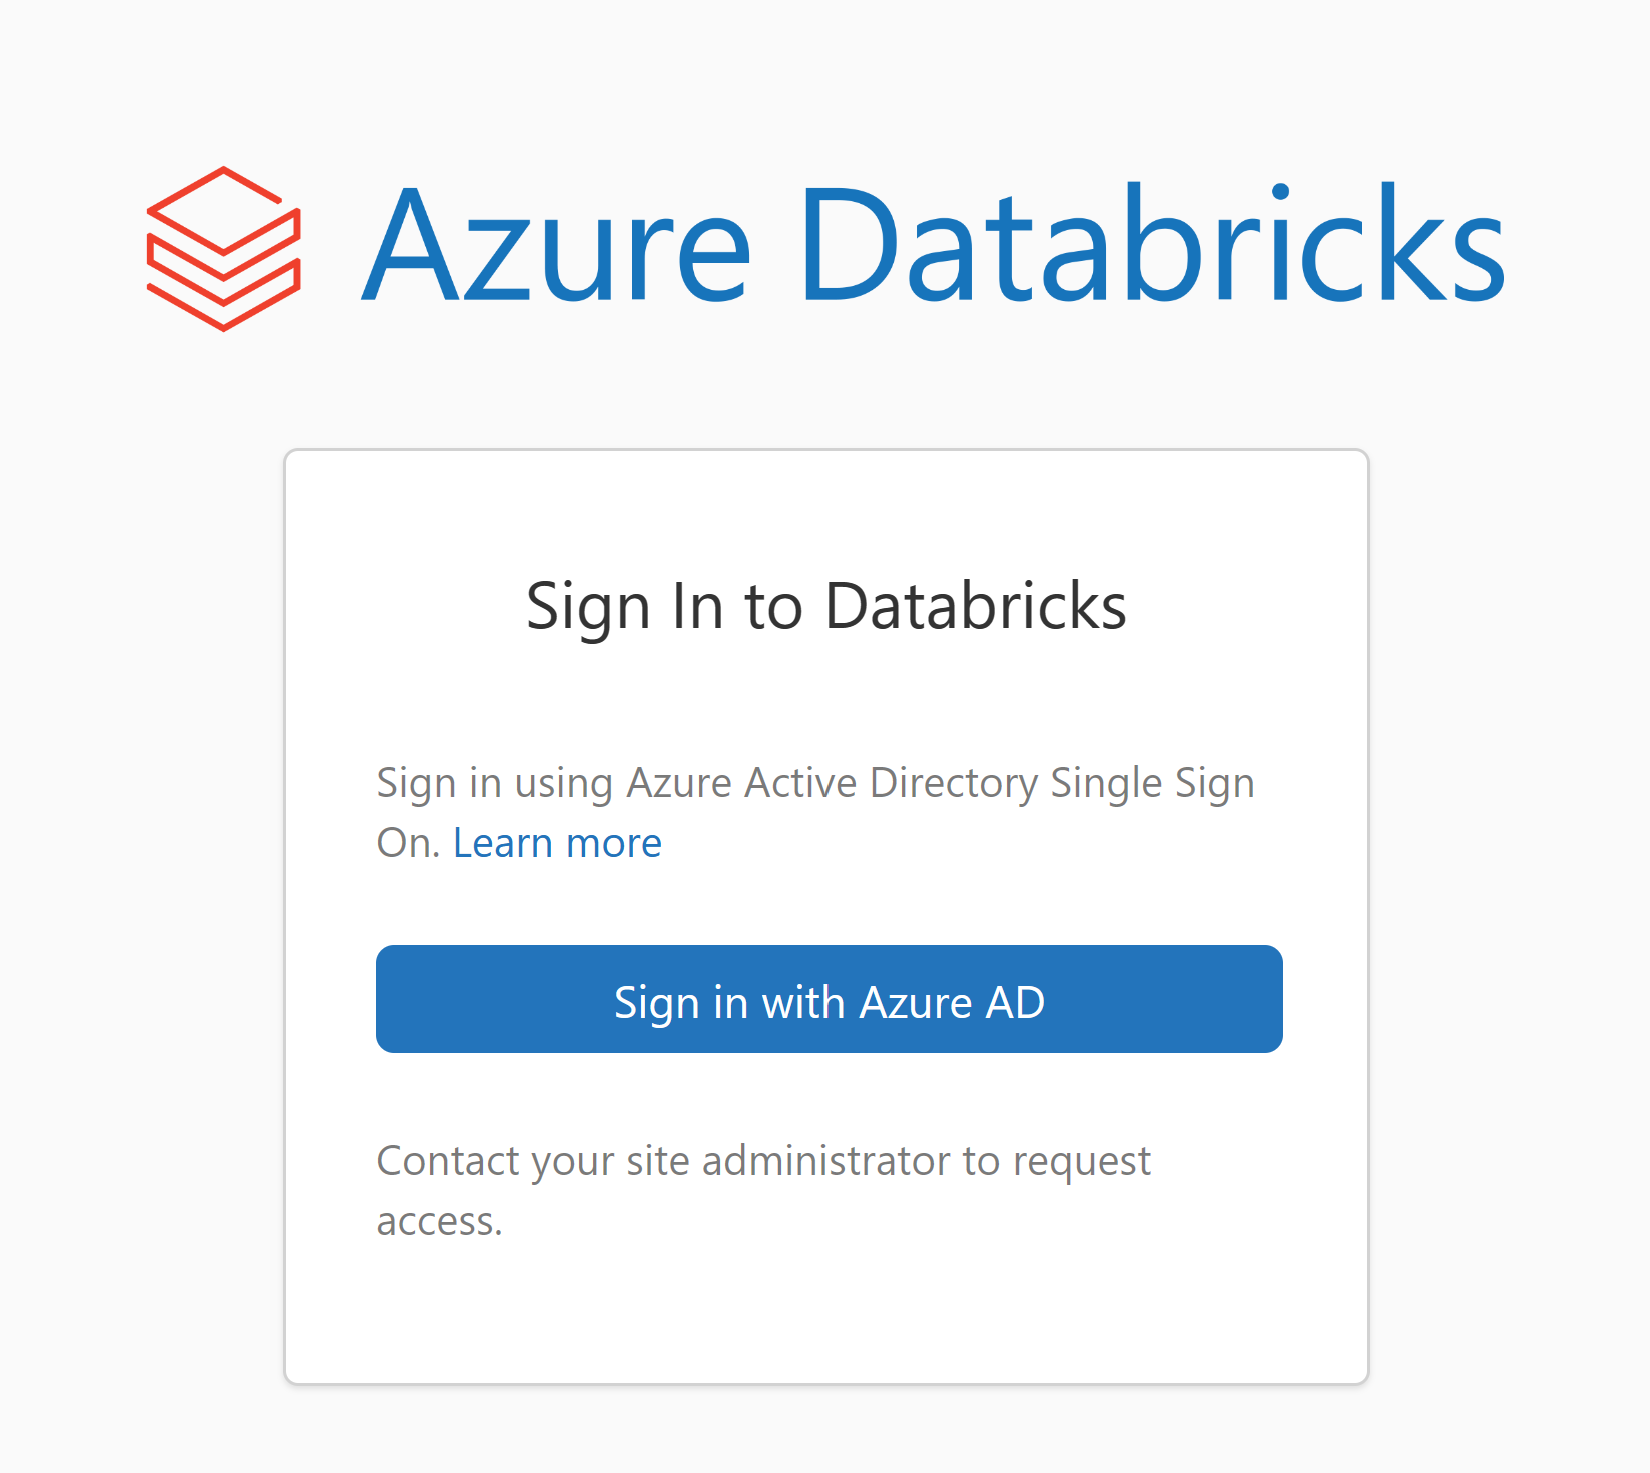
Note: You may be prompted for multifactor auth. Check with your instructor.
Your Azure Databricks Screen will look like this
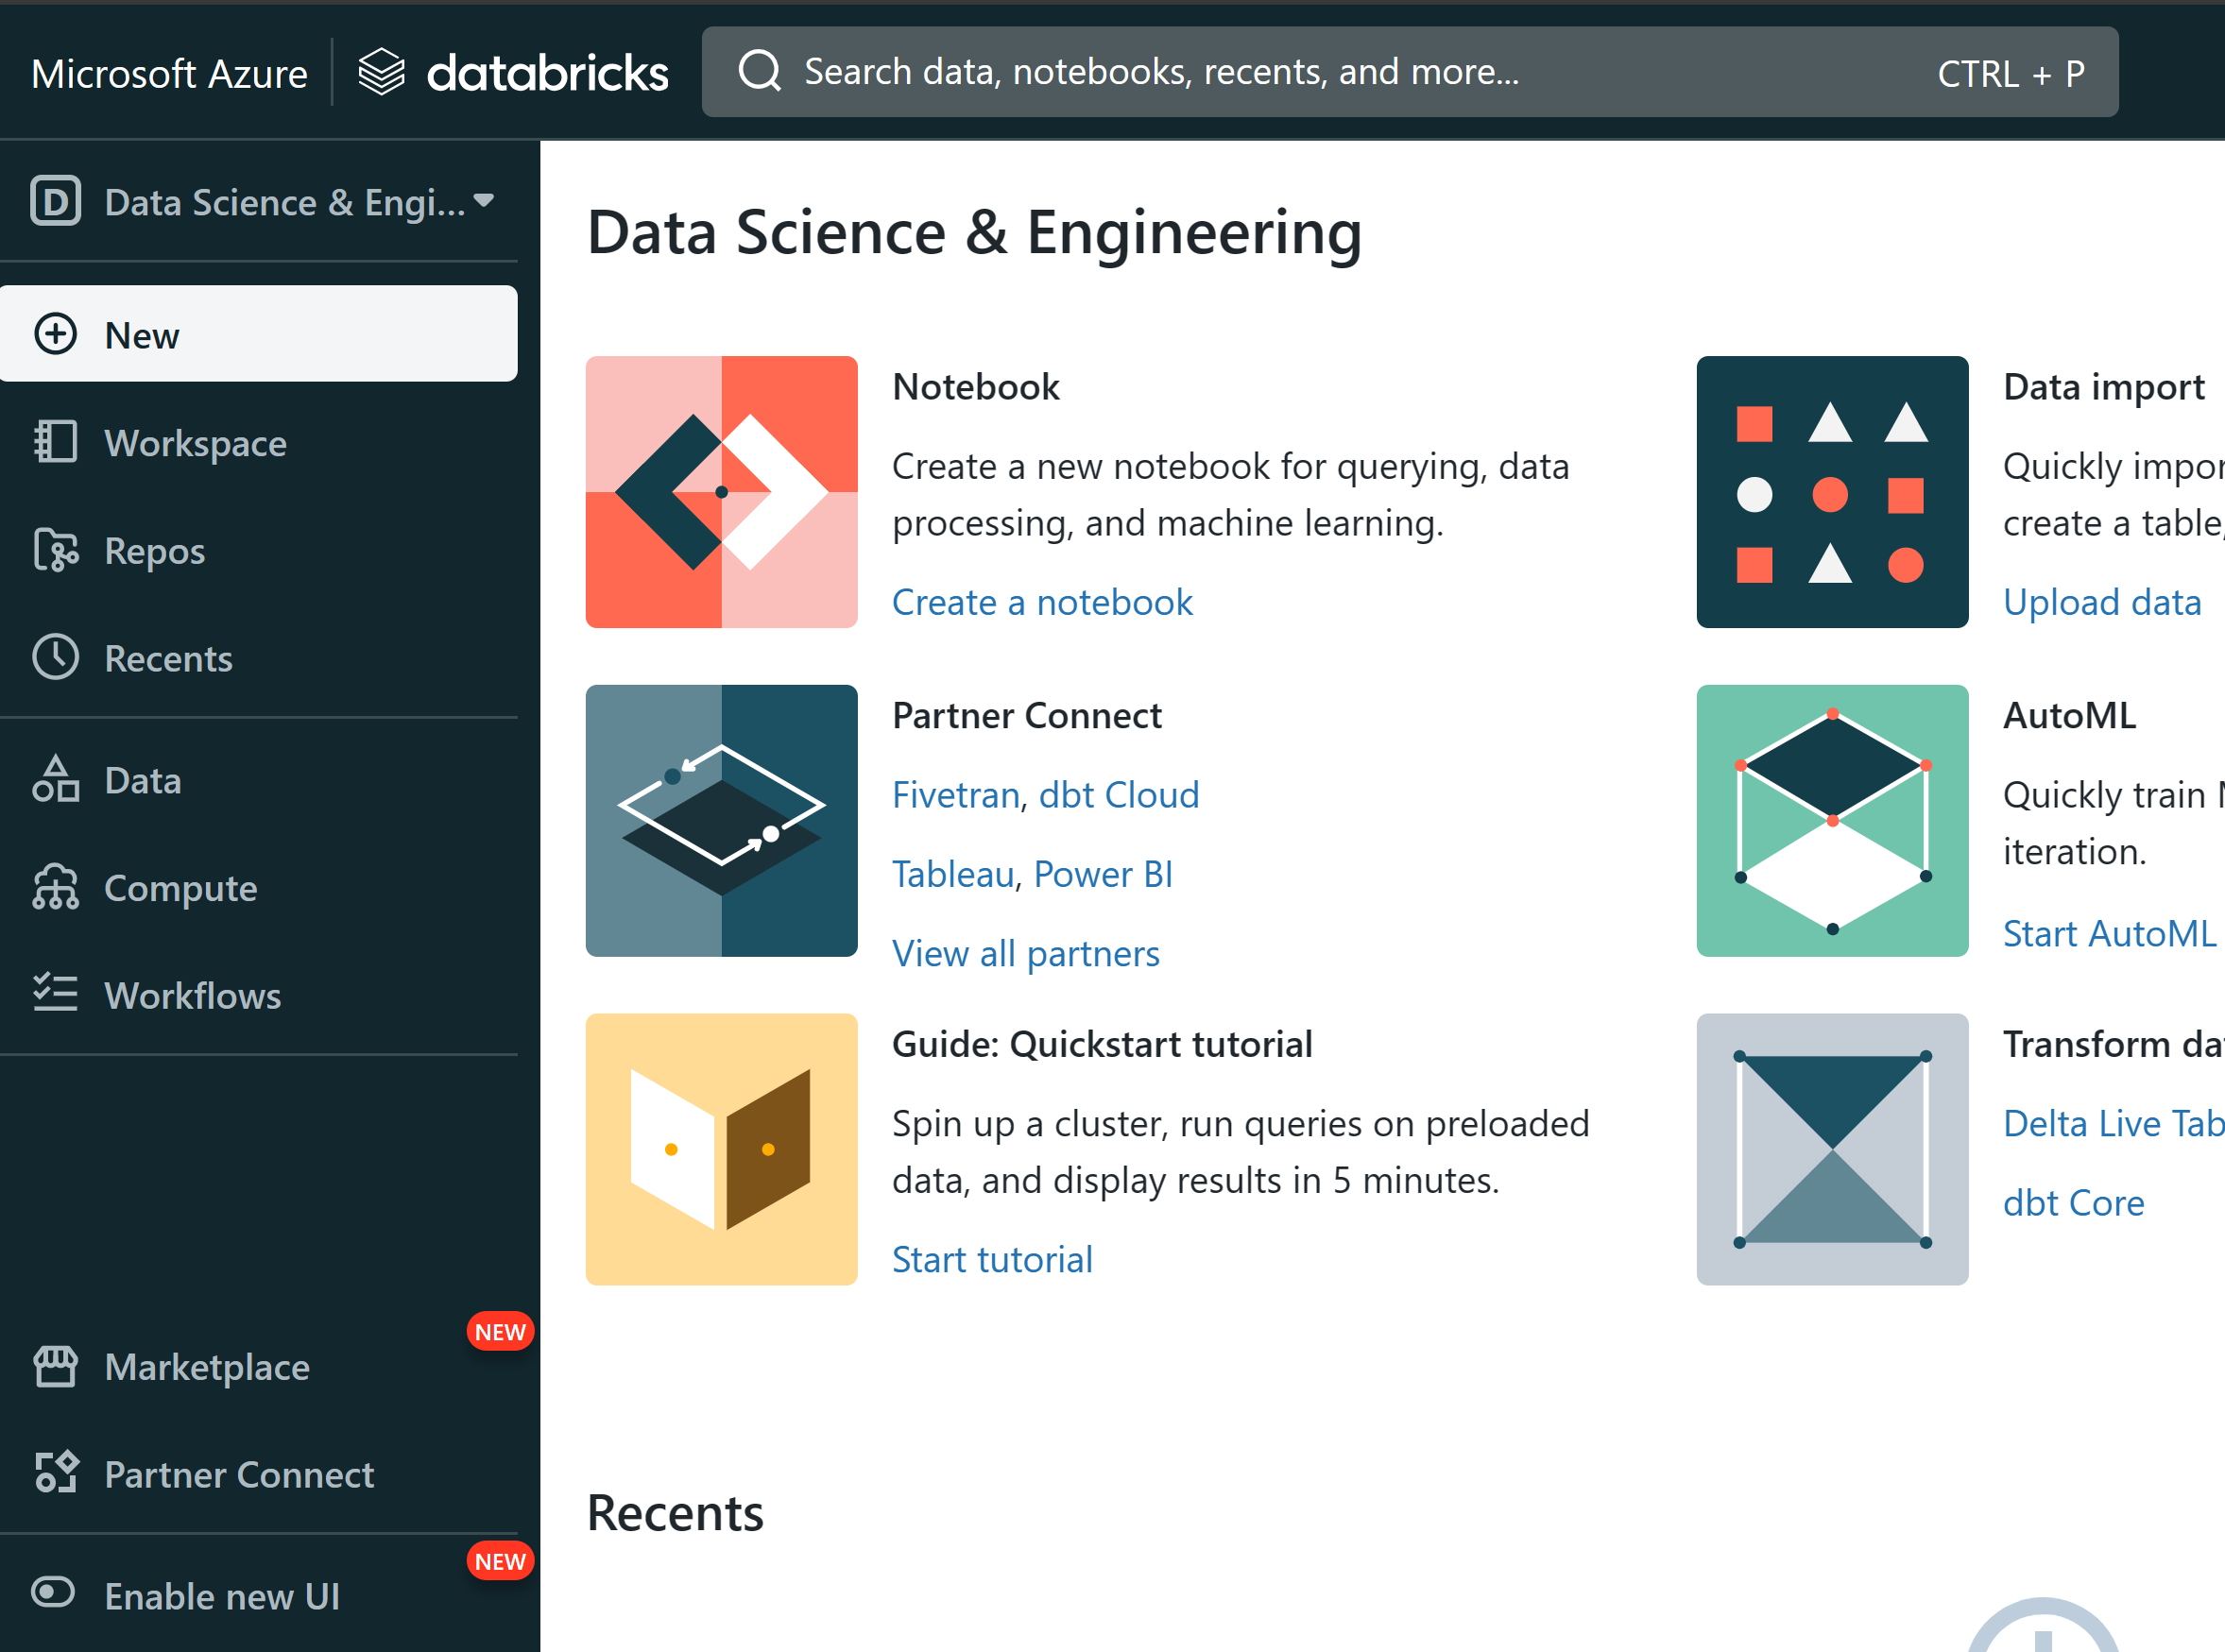
In like the new UI so you might want to click the Enable new UI toggle
We will review the items available on the left nav panel
For the workshop today we will focus on:
- Workspace
- Data
- Compute
- SQL Editor
- SQL Warehouses
- Partner Connect
To start this please clone or download a zip of the GitHub Repo we are using in the workshop
Git is installed on the VM so you can open a command prompt and paste in the following:
git clone https://github.com/DataSnowman/adbfundamentalsws.git
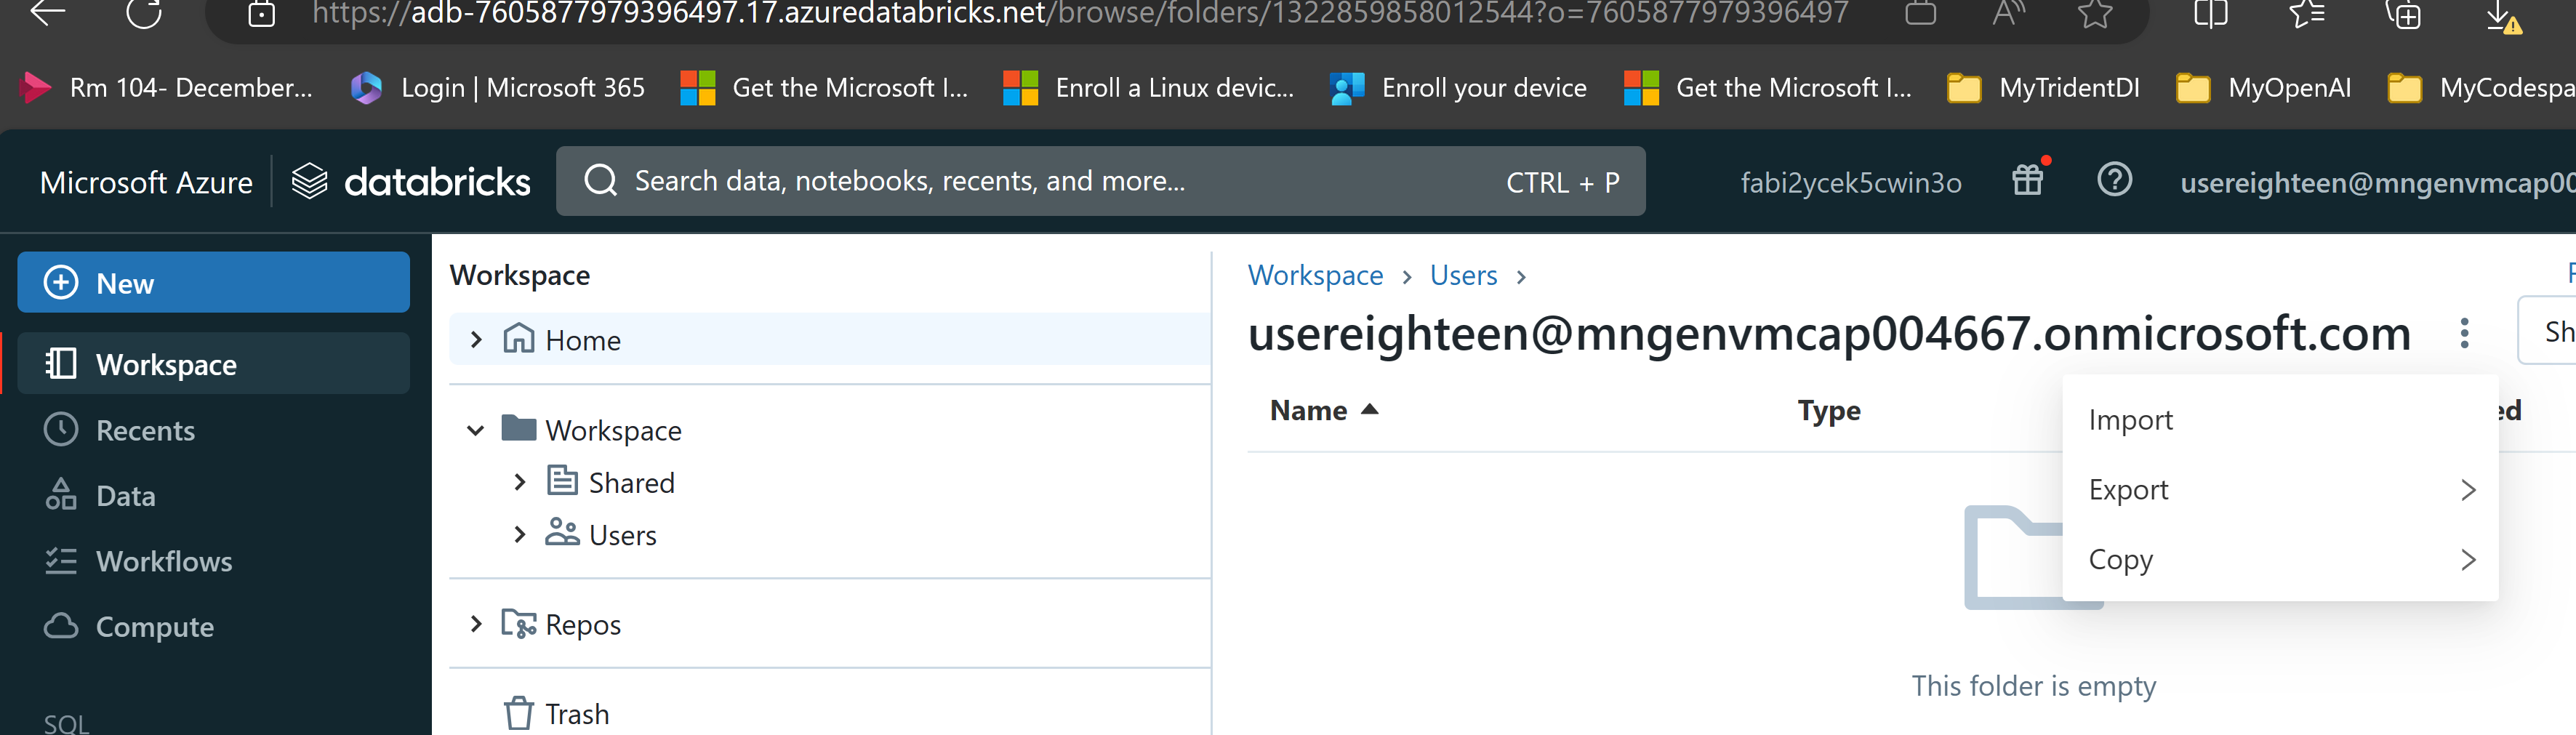
Go into your Workspace in Databricks and navigate to the three dots to the right of your username and select import
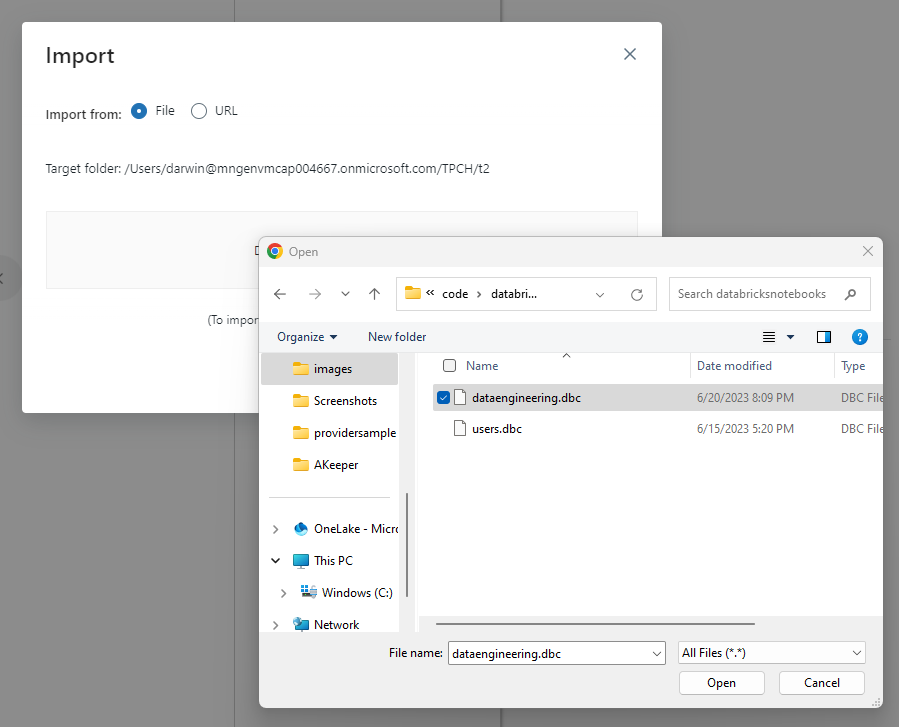
Click on browse and navigate to where you cloned or downloaded the zip of the repo and select the dataengineering.dbc file and click Open
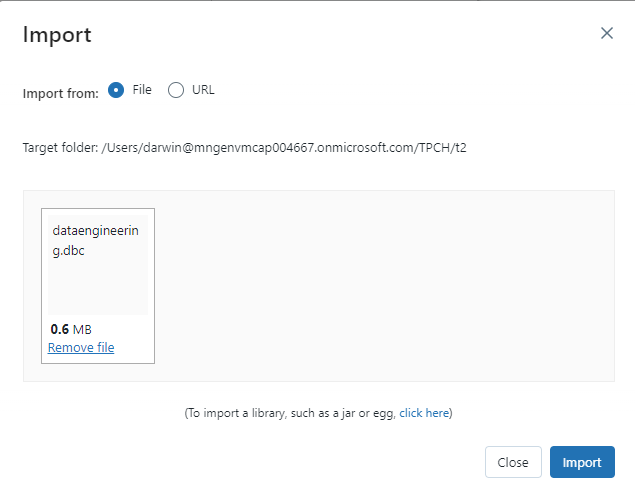
Click Import
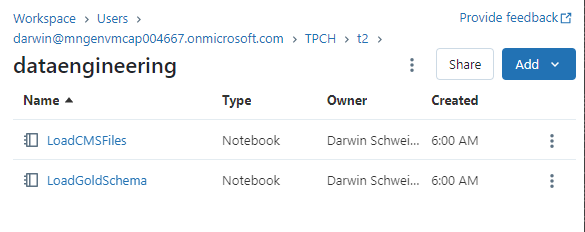
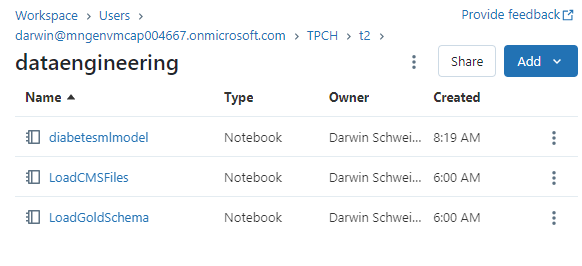
Open the dataengineering folder and you should see these two notebooks
Open the first notebook LoadCMSFiles
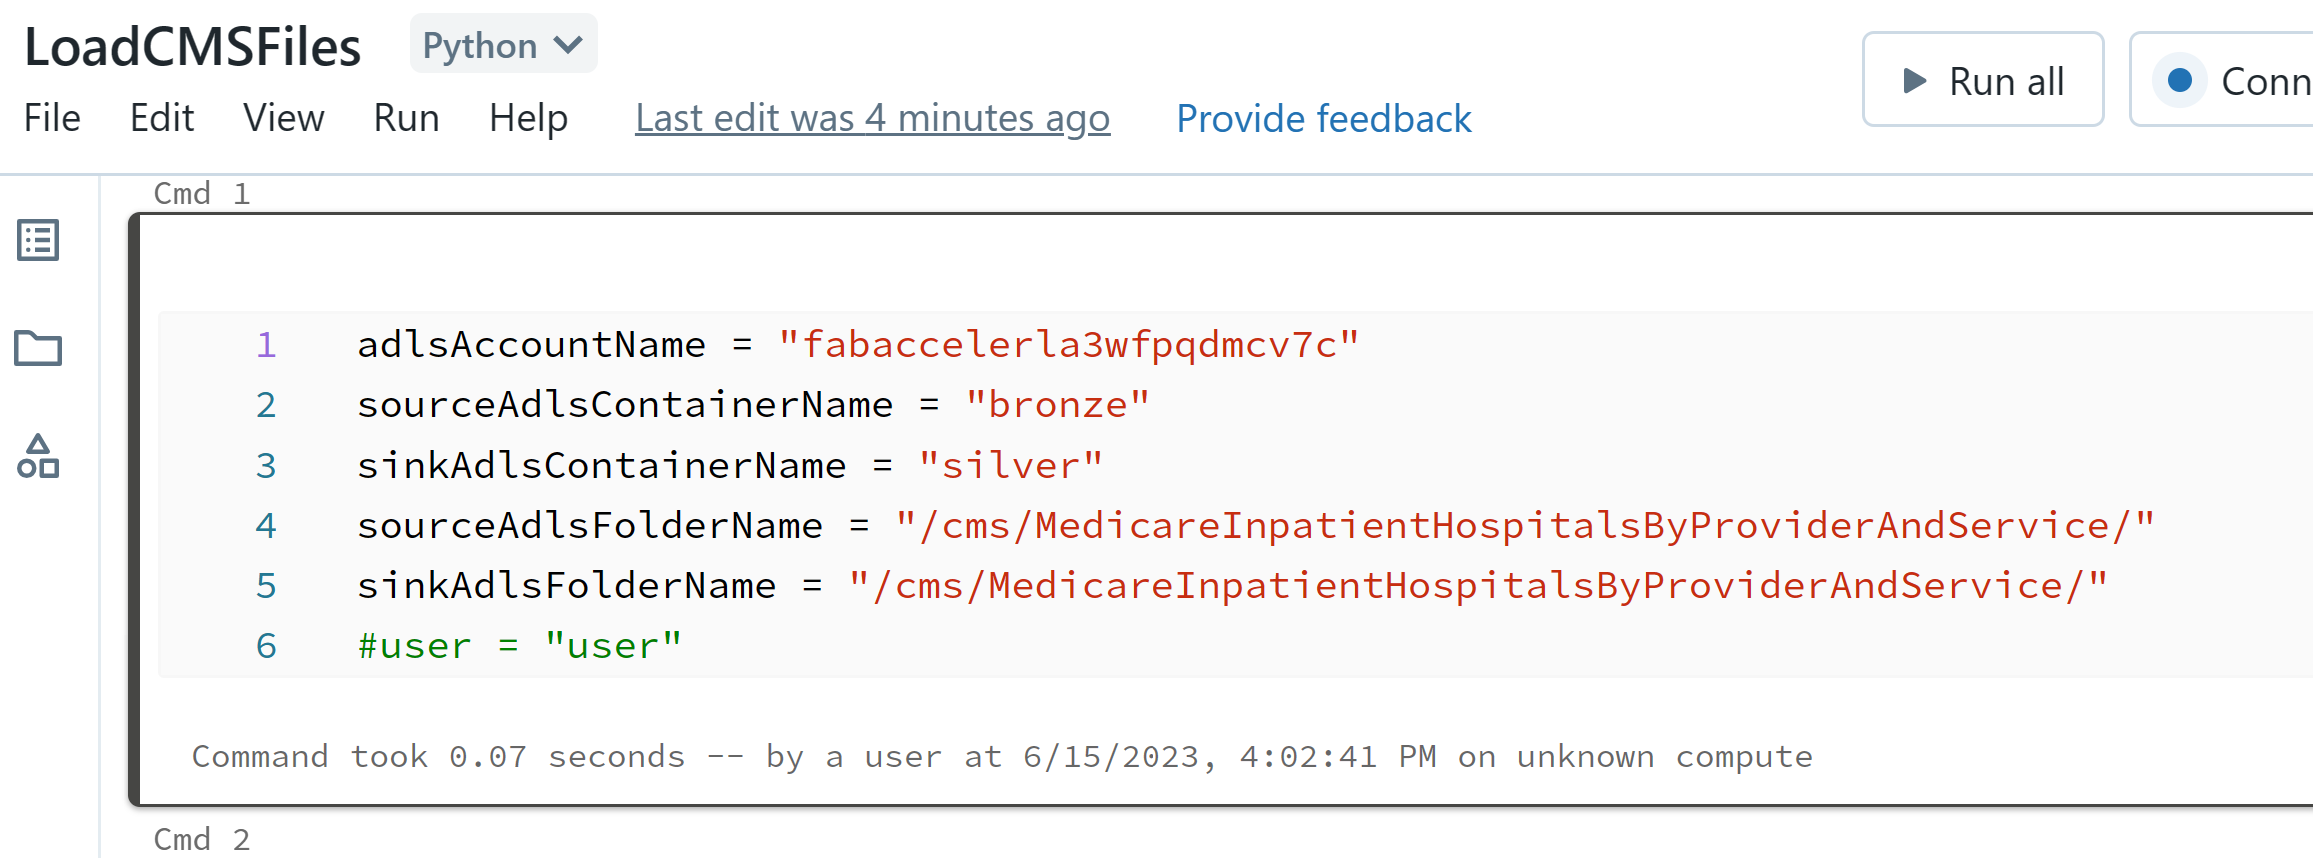
In the first cell modify the uncomment (remove the #) last item so it is your username
user = ""
example would be (besure to use your user so you don't colide with another user)
user = "usereighteen"
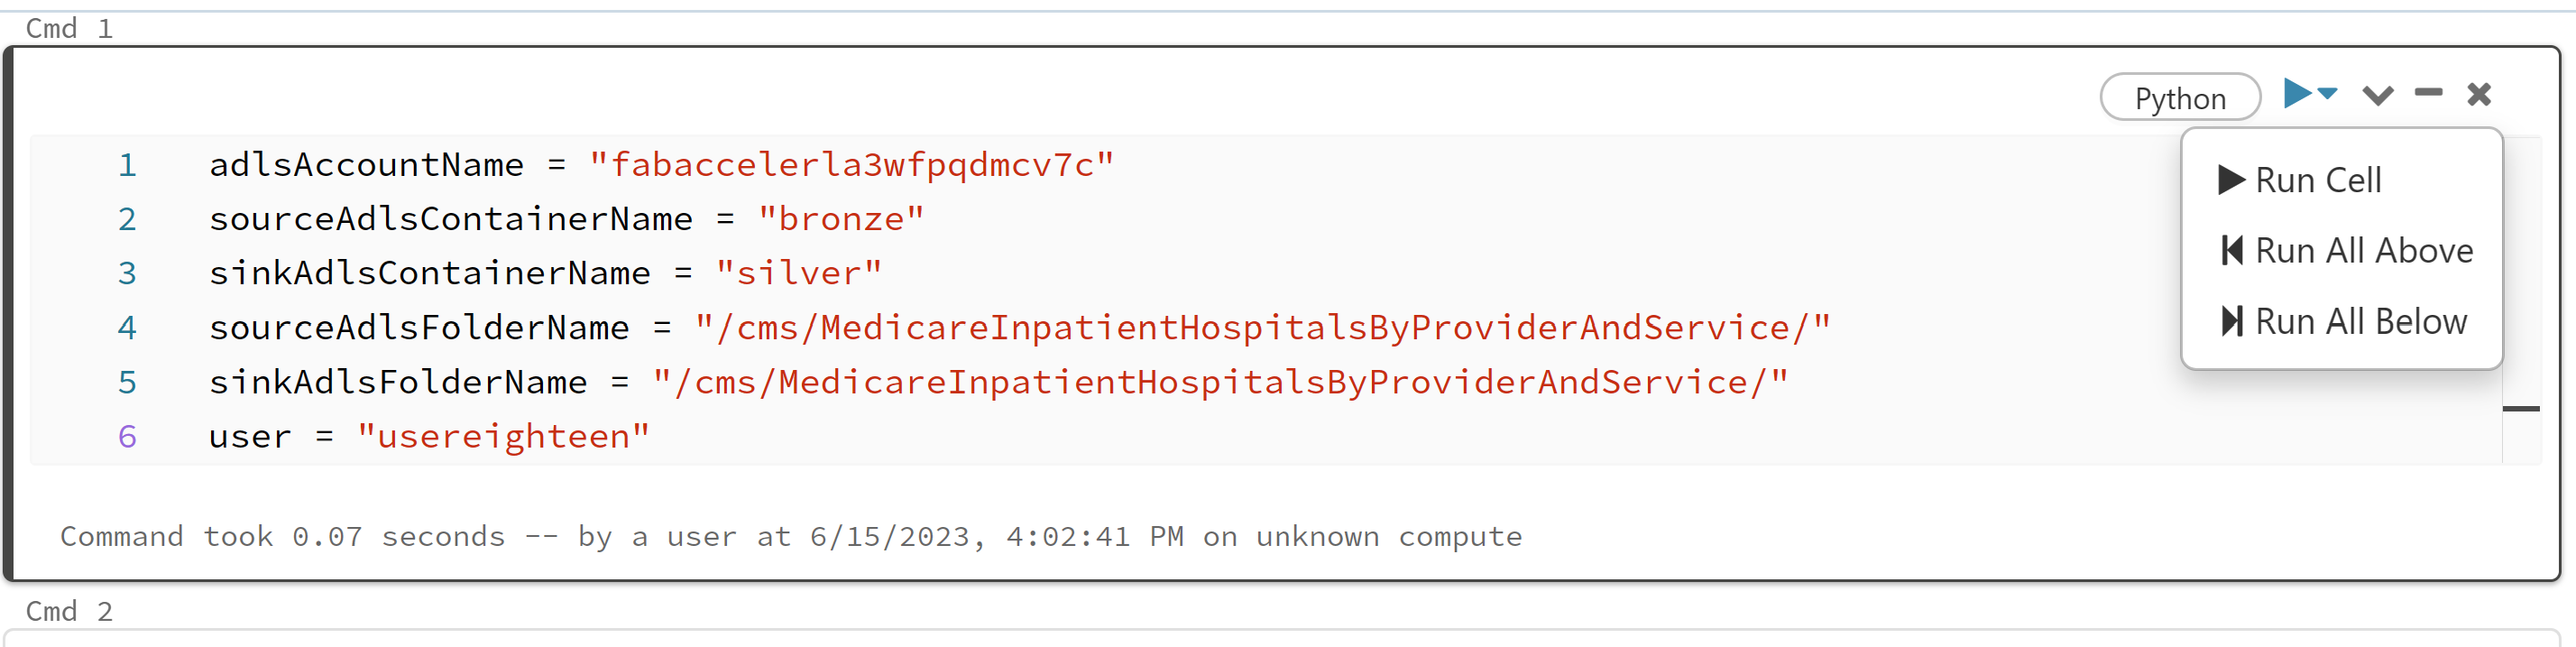
IMPORTANT Let review what is going on in the notebook and please run one cell at a time
Before you run anything you need to attach the notebook to the cluster. Find the WorkshopNIS cluster and click Attach

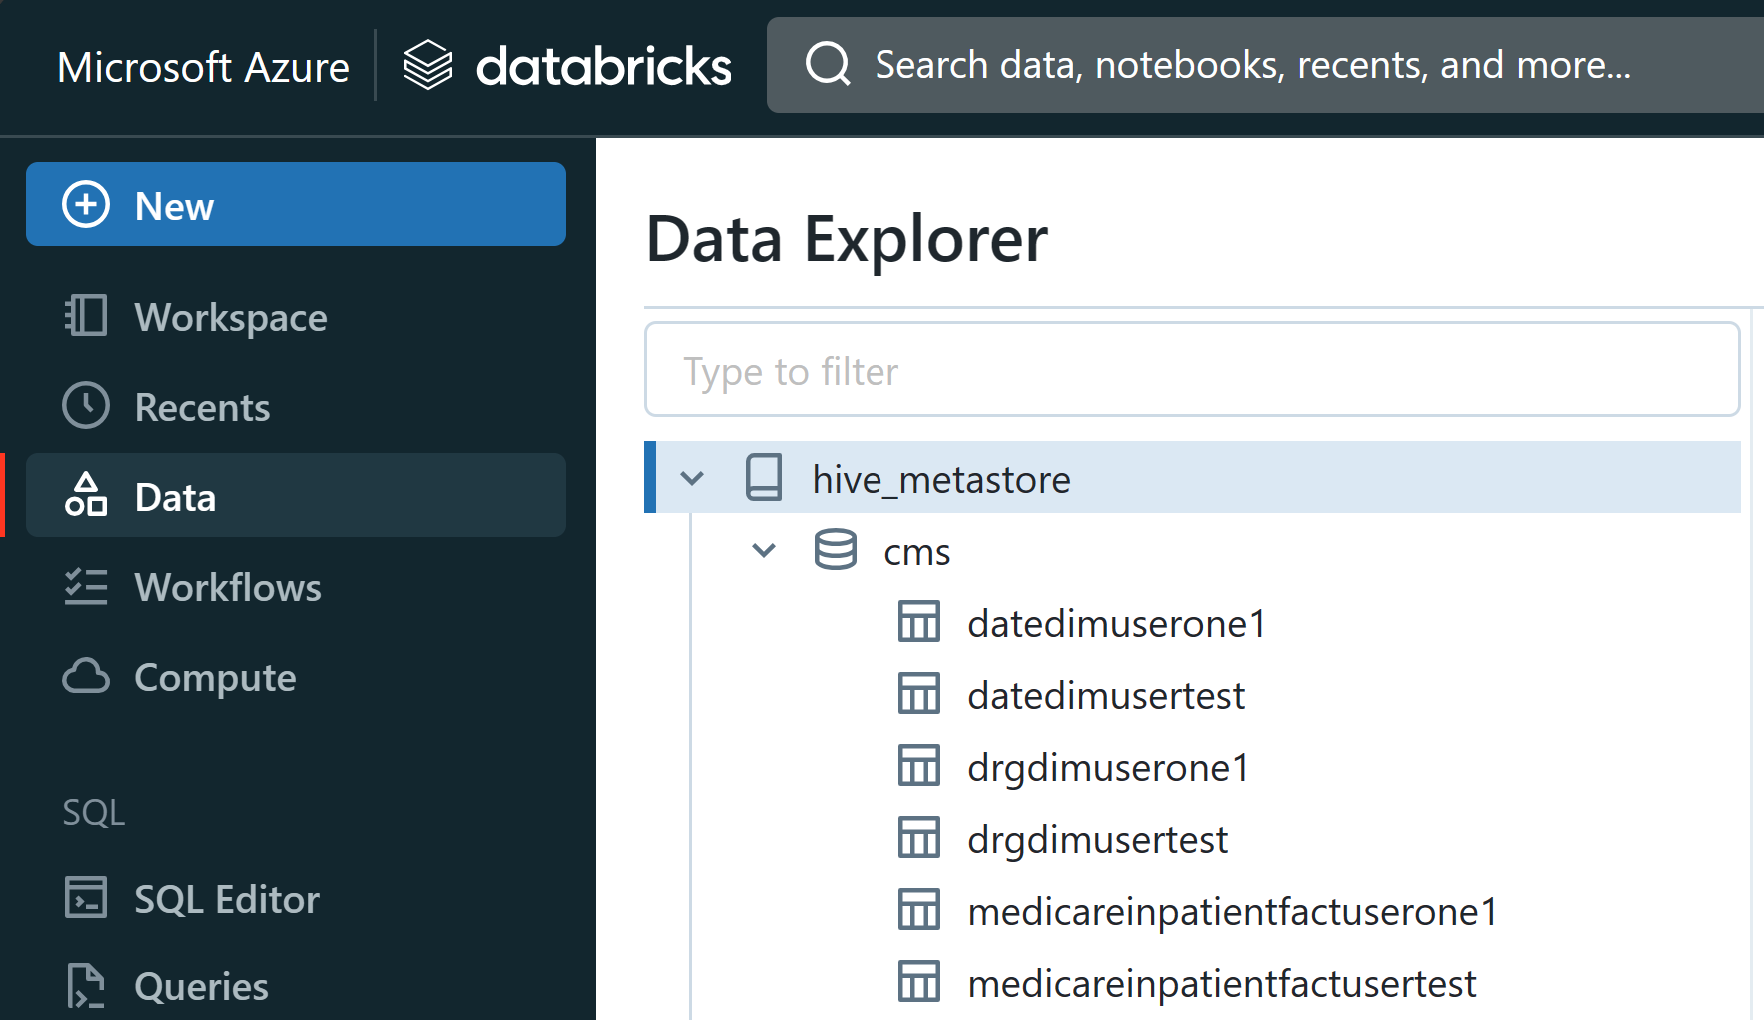
When you complete running each cell there should be delta tables in the Data section of the Leftnav
Open up Microsoft Azure Storage Explorer to check your Storage accounts to find the input source data in Bronze
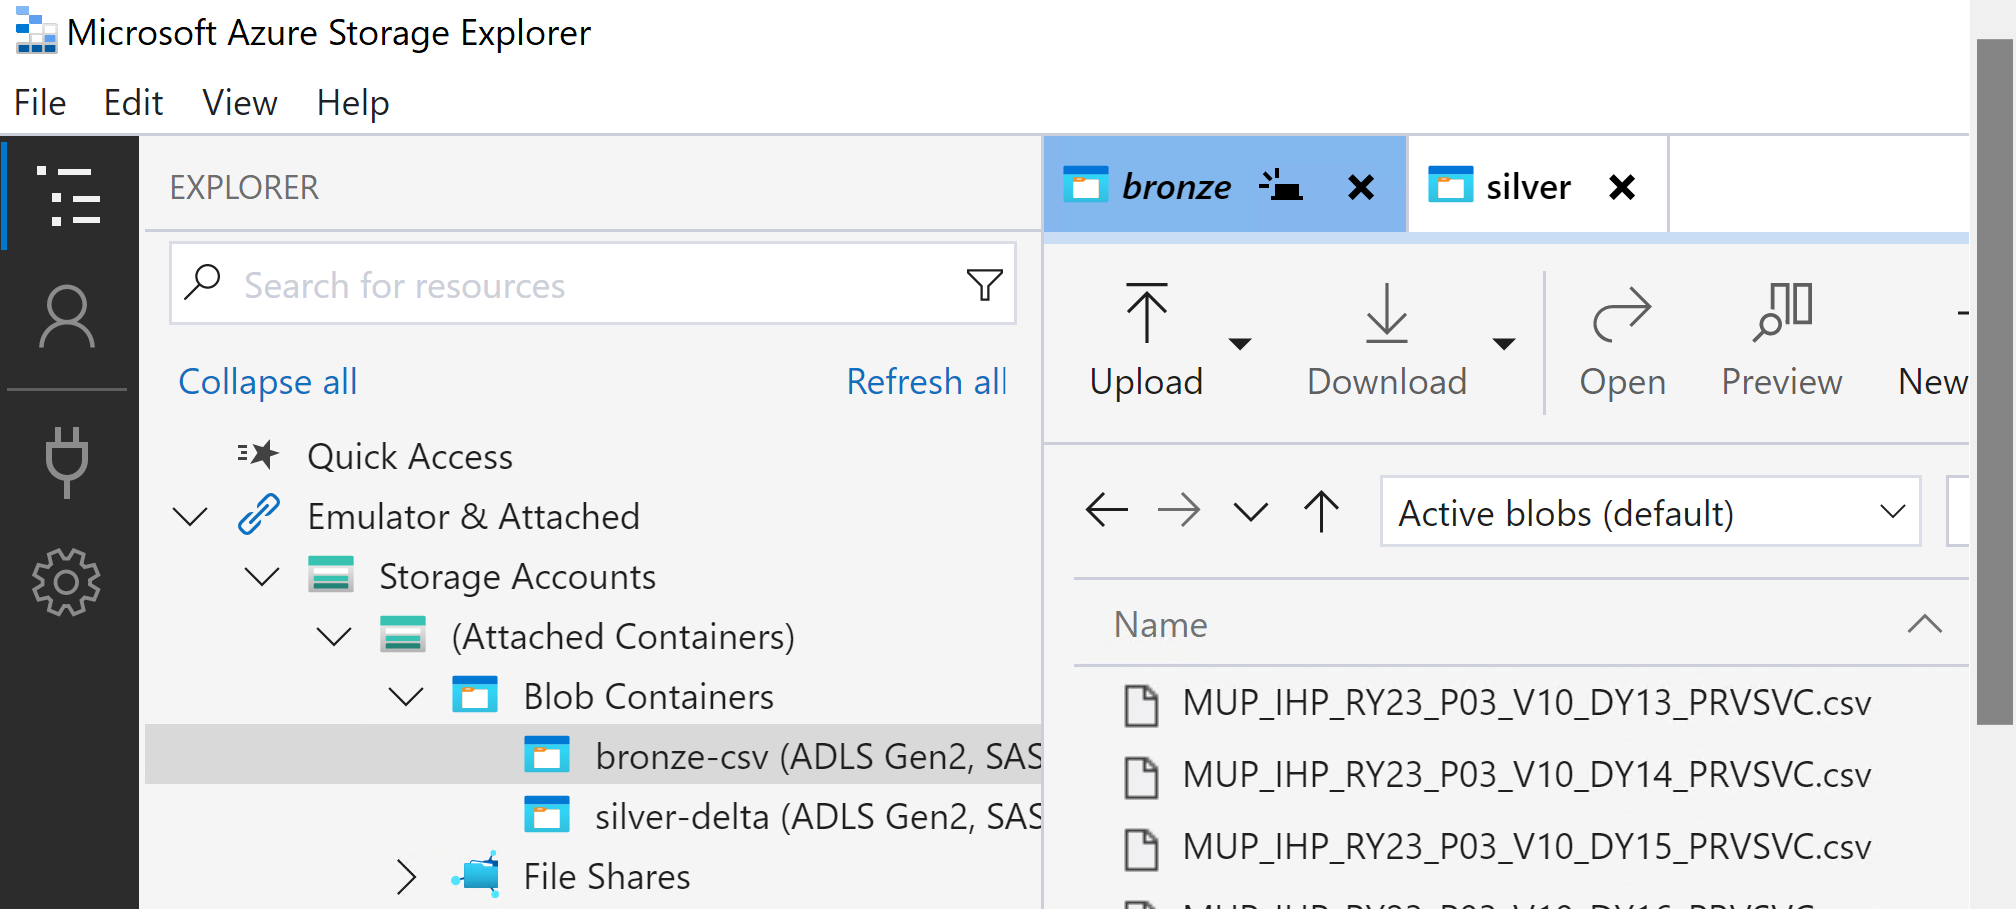
The output of the notebook will be in Silver
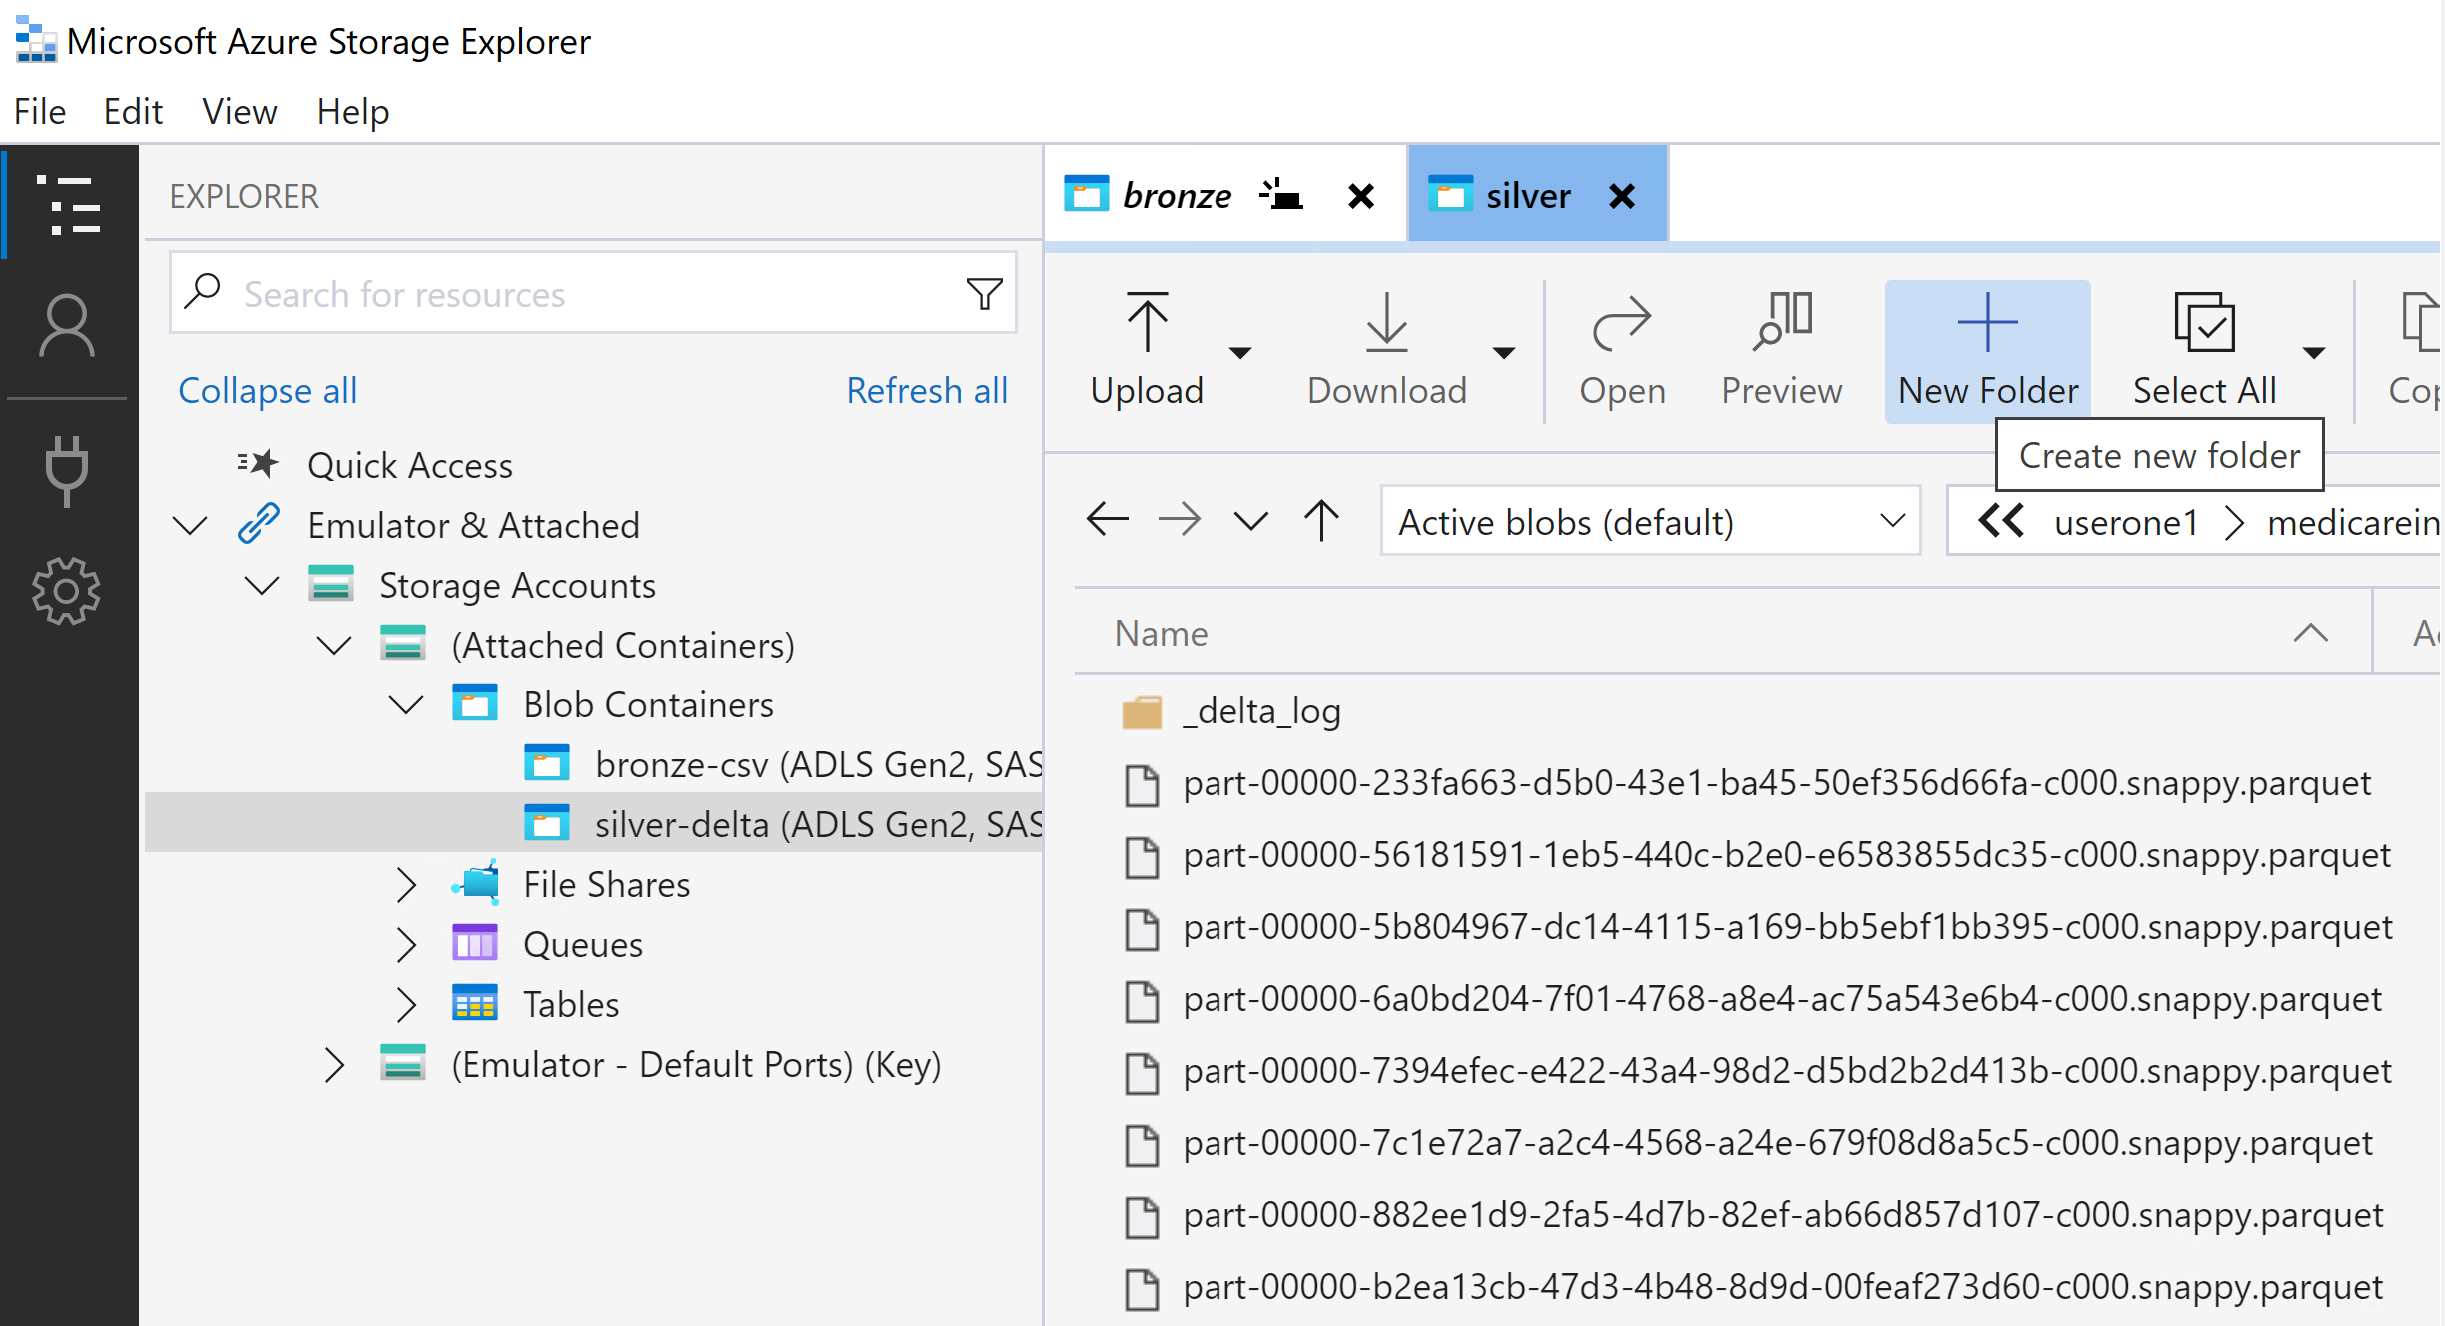
Congrats: You just completed moving source csv files in the bronze container and wrote the data as Delta/Parquet output to the silver container. You created a Delta table that references those files.
Now you are going to take that Delta/Parquet data created in the first notebook and create three Delta tables:
- Datedim
- DRGdim
- MedicareInpatientFact
Open the second notebook LoadGoldSchema

As in the other notebook, in the first cell modify the uncomment (remove the #) last item so it is your username
user = ""
example would be (besure to use your user so you don't colide with another user)
user = "usereighteen"
IMPORTANT Let review what is going on in the notebook and please run one cell at a time
When you complete running the each cell there should be delta tables in the Data section of the Leftnav
Check your Storage accounts to find the input source data in Silver
The output of the notebook will be in gold folder in the Silver container
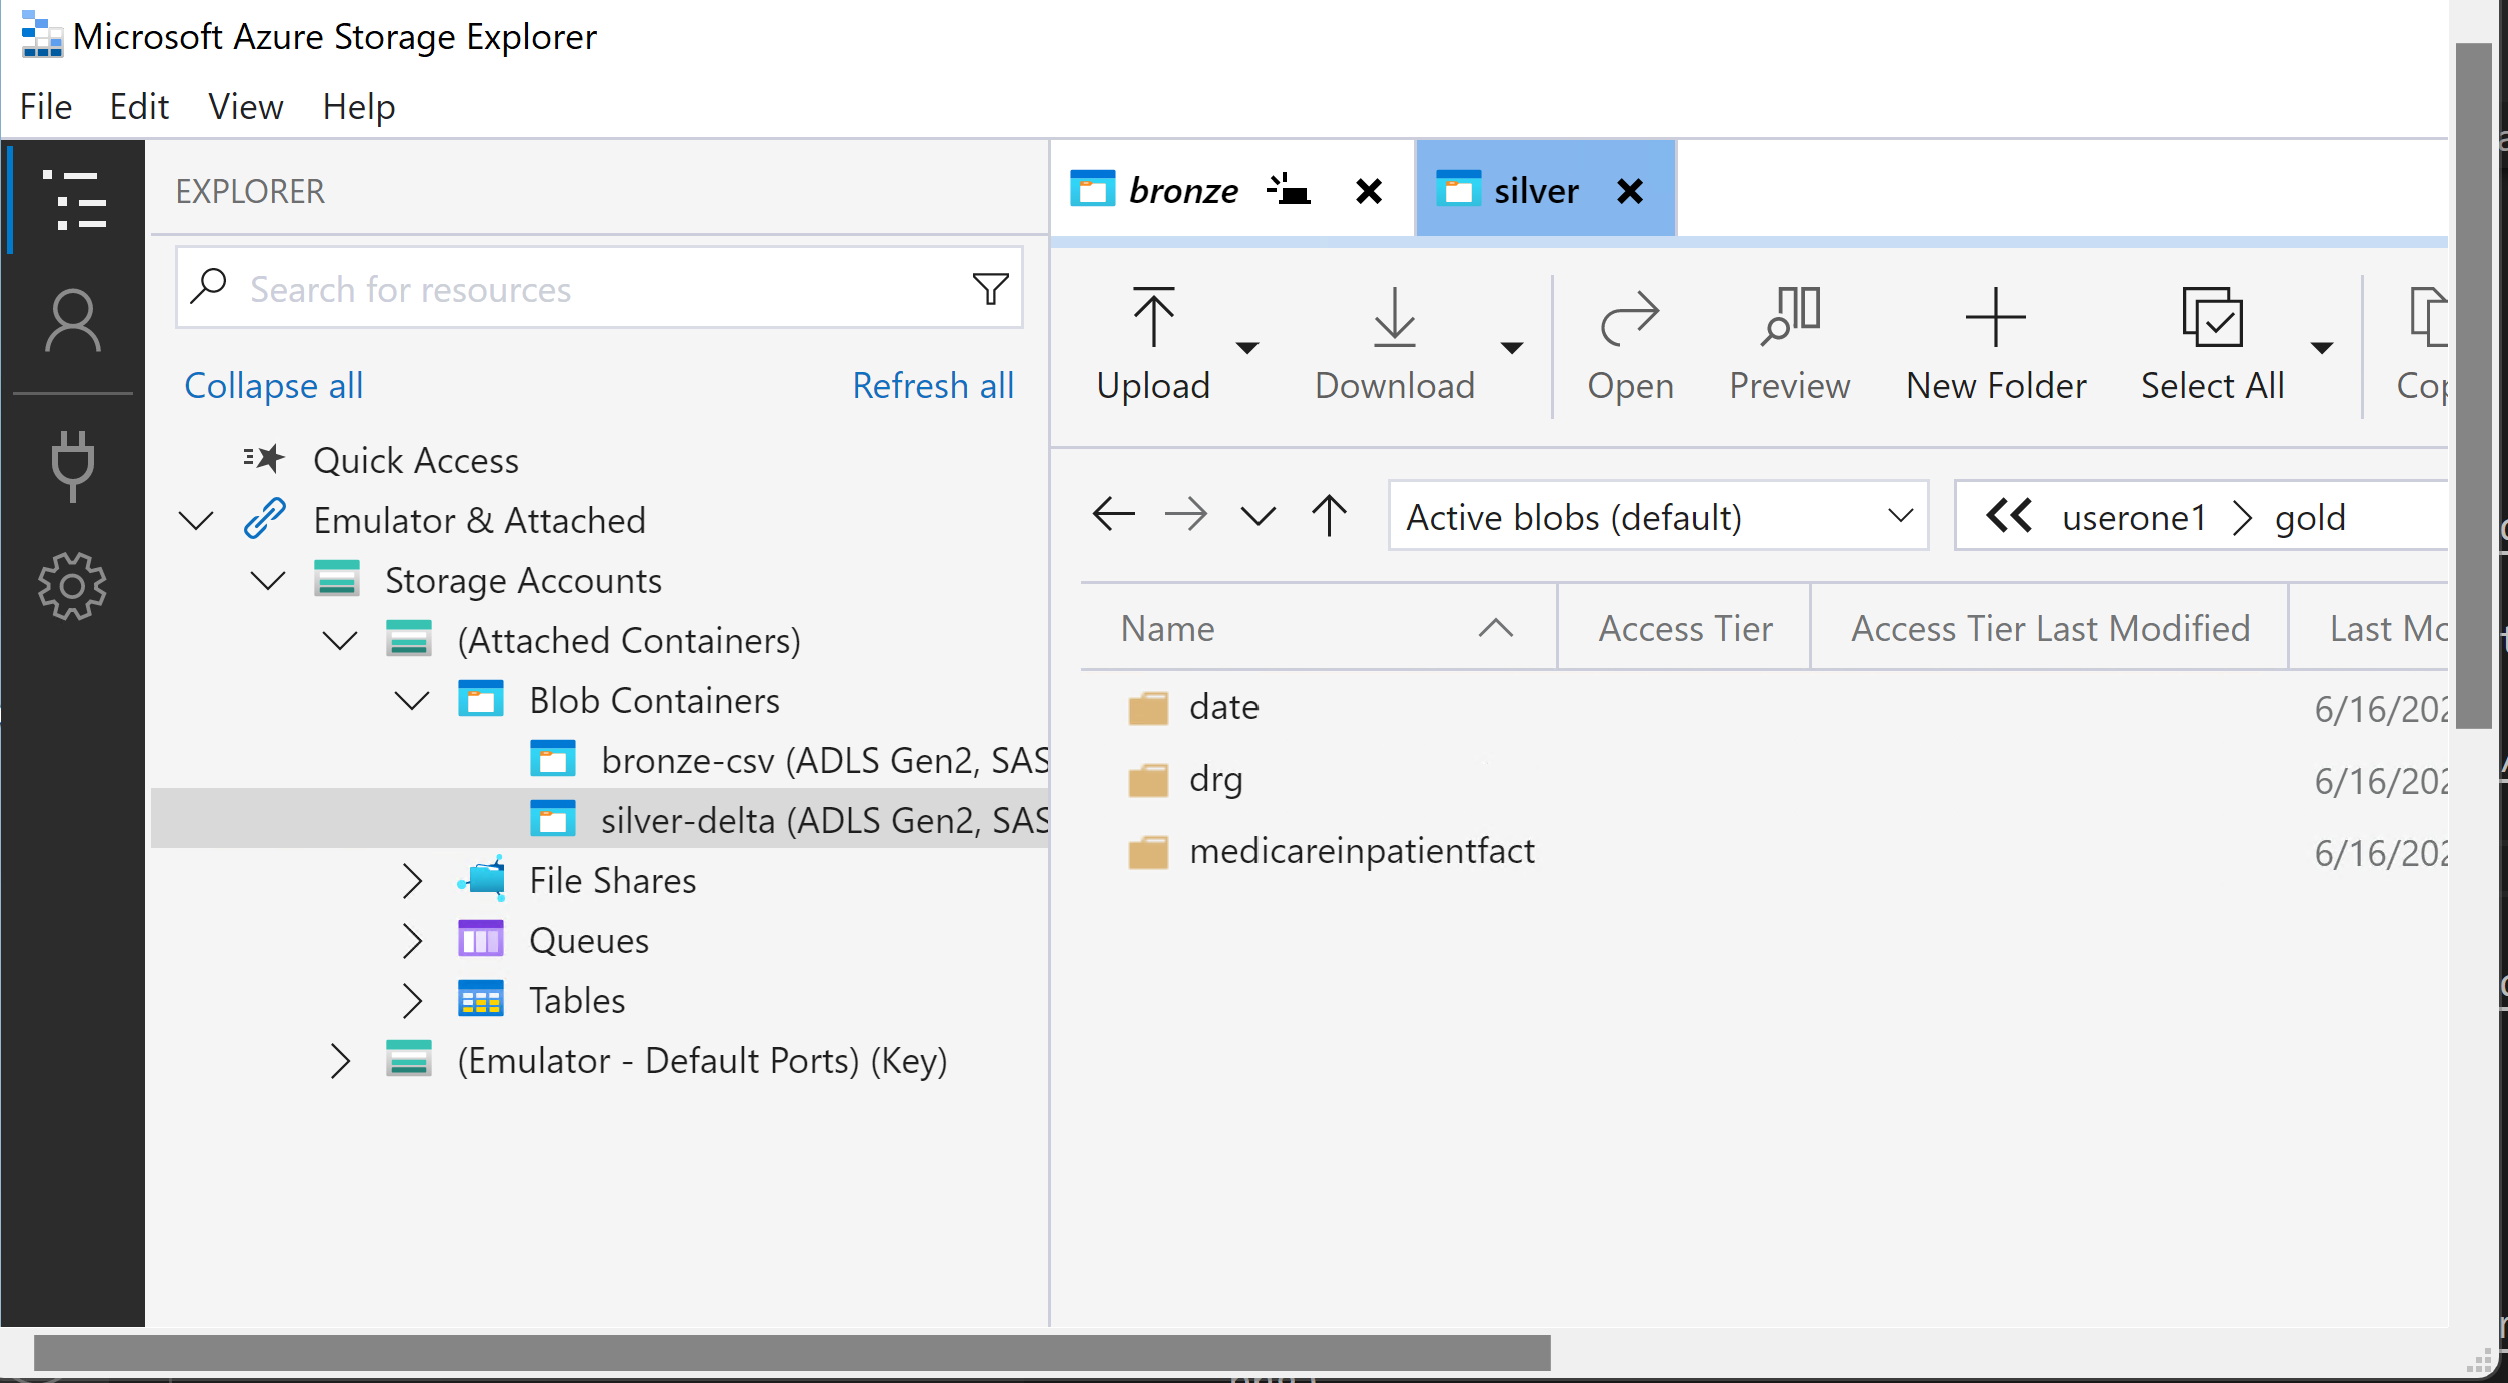
Congrats: You just completed creating the Delta/Parquet output that we will use in the Data Analysis section later in the workshop.
Lets now look at the Data Science capabilities in Azure Databricks.
Go into your Workspace in Databricks and navigate to the three dots to the right of your username and select import
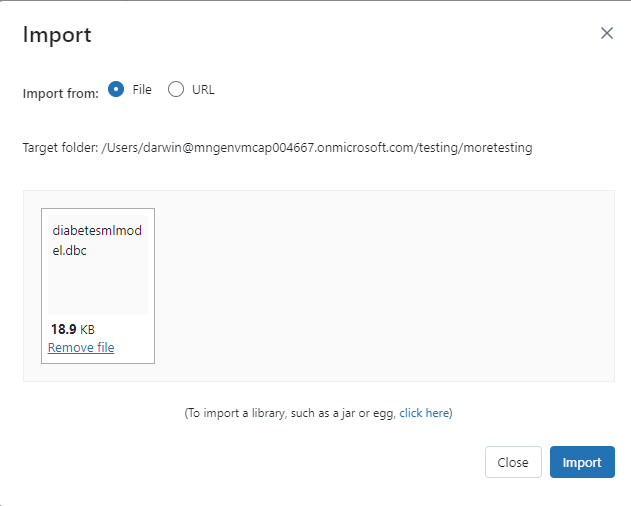
Click on browse and navigate to where you cloned or downloaded the zip of the repo and select the diabetesmlmodel.dbc file and click Open
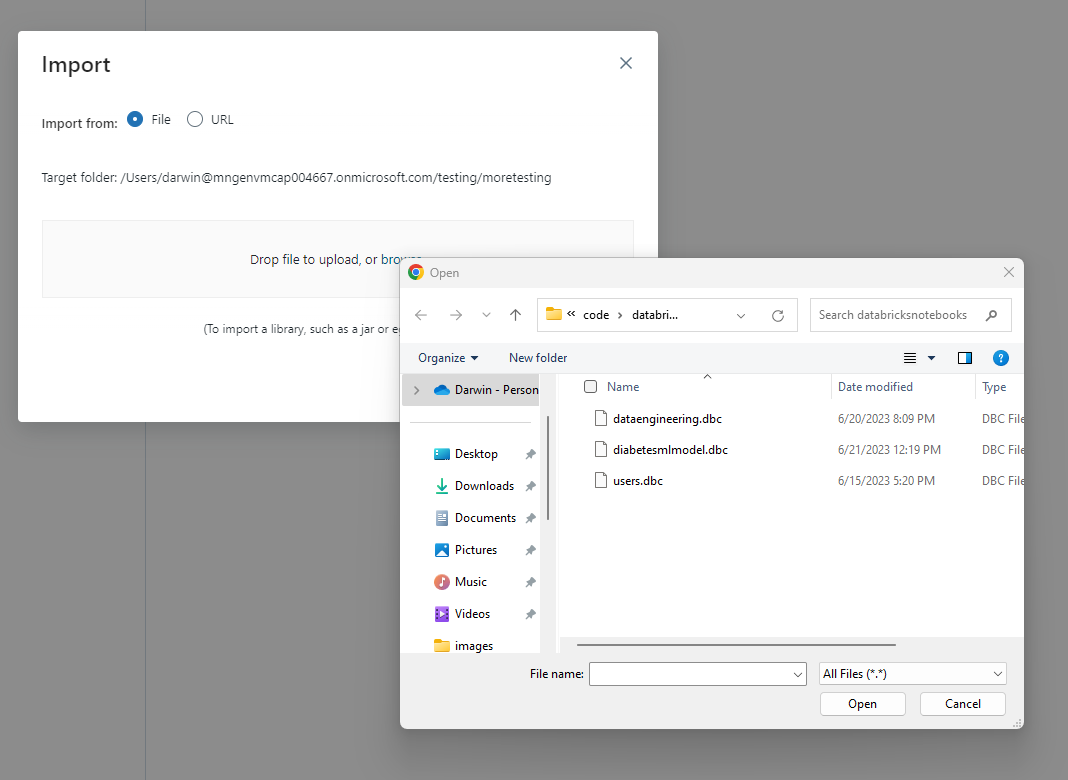
Click Import
Open the dataengineering folder and you should see these the new notebook. You could of also created a new folder in you Databricks workspace call datascience and import the notebook into that folder.
Open the diabetesmlmodel notebook
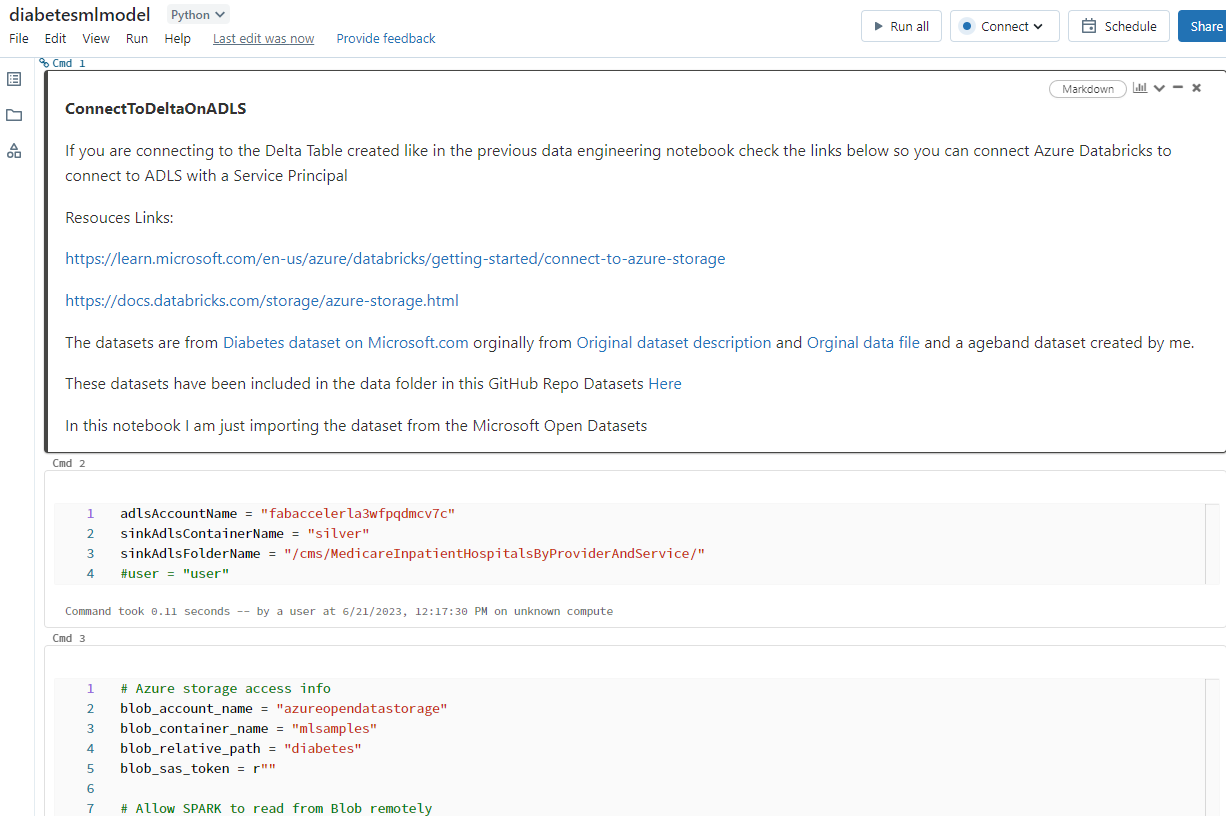
In the first cell modify the uncomment (remove the #) last item so it is your username
user = ""
example would be (besure to use your user so you don't colide with another user)
user = "usereighteen"

IMPORTANT Let review what is going on in the notebook and please run one cell at a time
When you complete running the each cell there should be a delta table in the Data section of the Leftnav called diabetesageadb<username> (your username will be concatinated on the end of the table name so you can find your table amongst the other users tables)
Let's stop hear and take a break before we resume. The diabetes notebook demonstrated a bunch of ways of accessing the data and the creation of a machine learning model. This is just a start put be aware that much of the Machine Learning and Deep Learning that creates AI Models like ChatGPT use Python. You have just run three PySpark notebooks that emerse you in what Data Engineers and Data Scientists work with.
We are now going to leverage the Delta tables we created in the Data Engineering section.
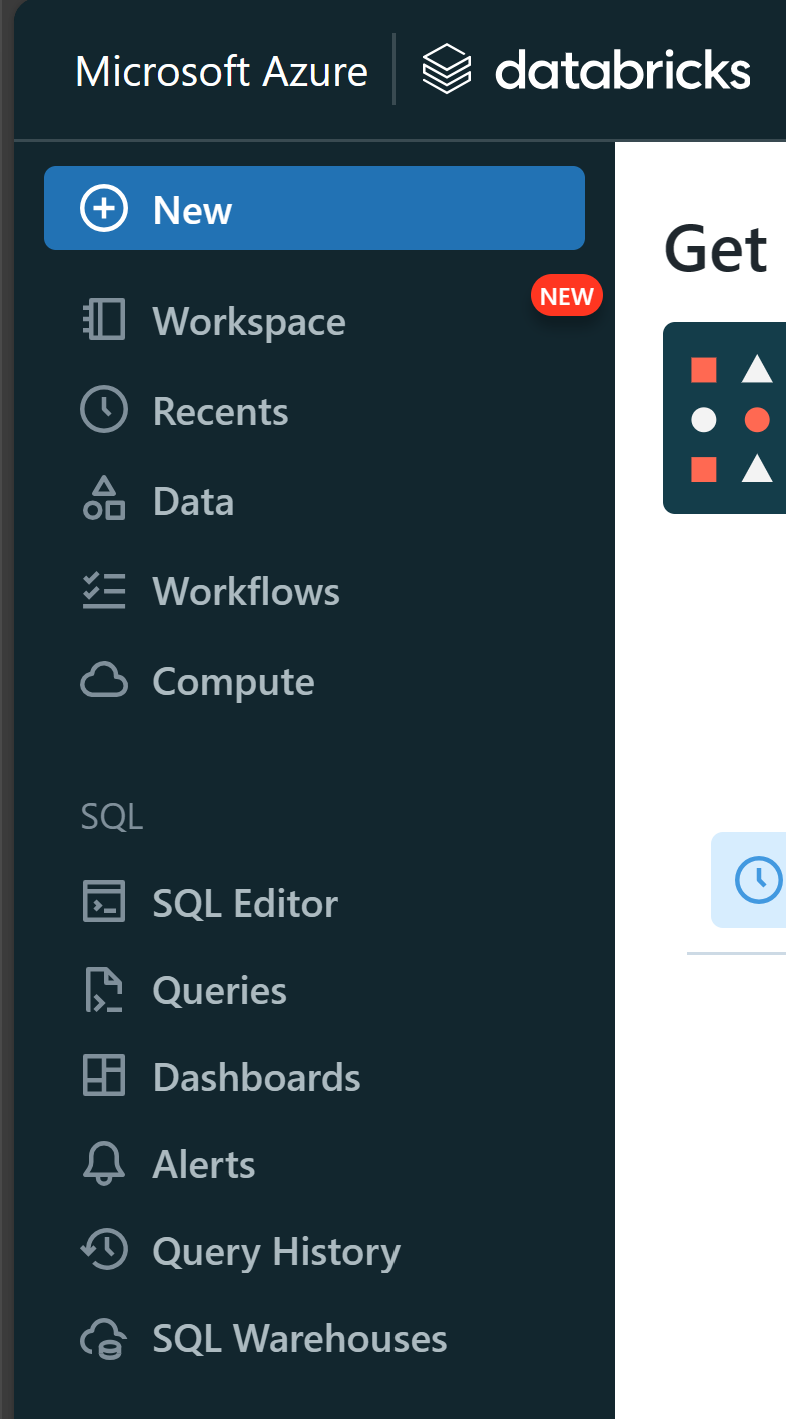
Navigate to the SQL Editor in the Left Nav
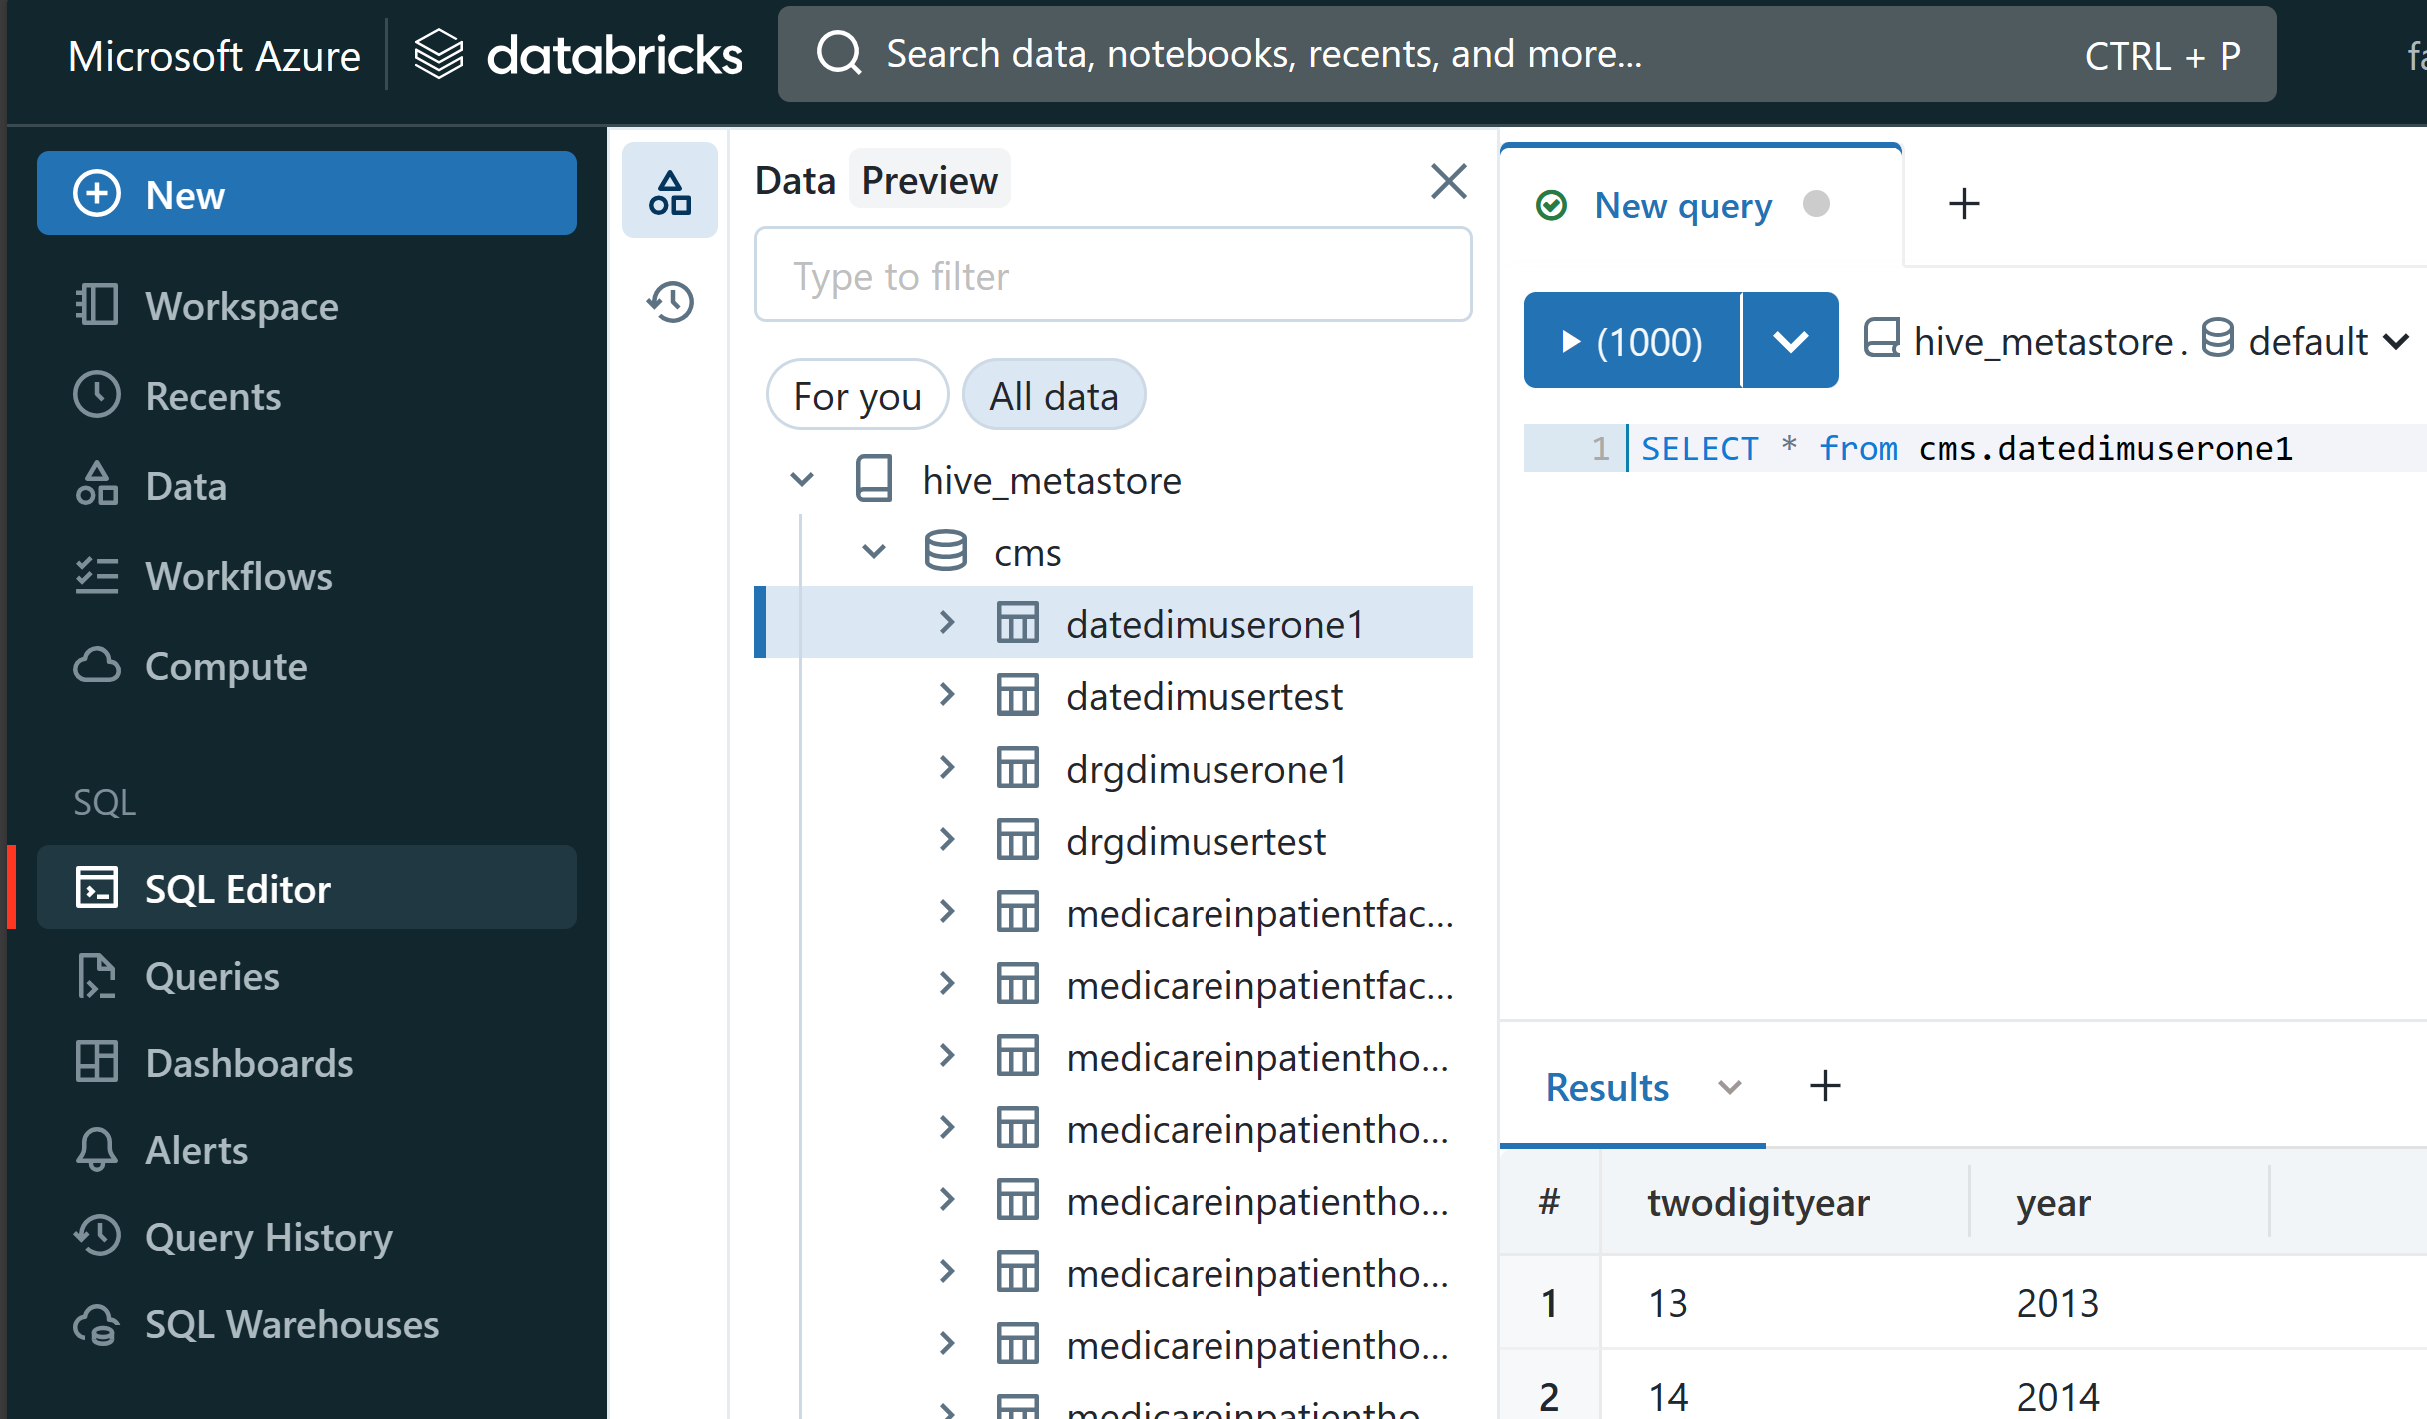
Run some queries. Here is a sample query
SELECT * FROM cms.datedimuserone1
Note that you will need to put your username on the end of SELECT * FROM cms.datedim<username>
Try some adhoc queries of your own. Here is another example to try:
select distinct DRG_Cd, DRG_Desc from cms.medicareinpatienthospitals order by DRG_Cd
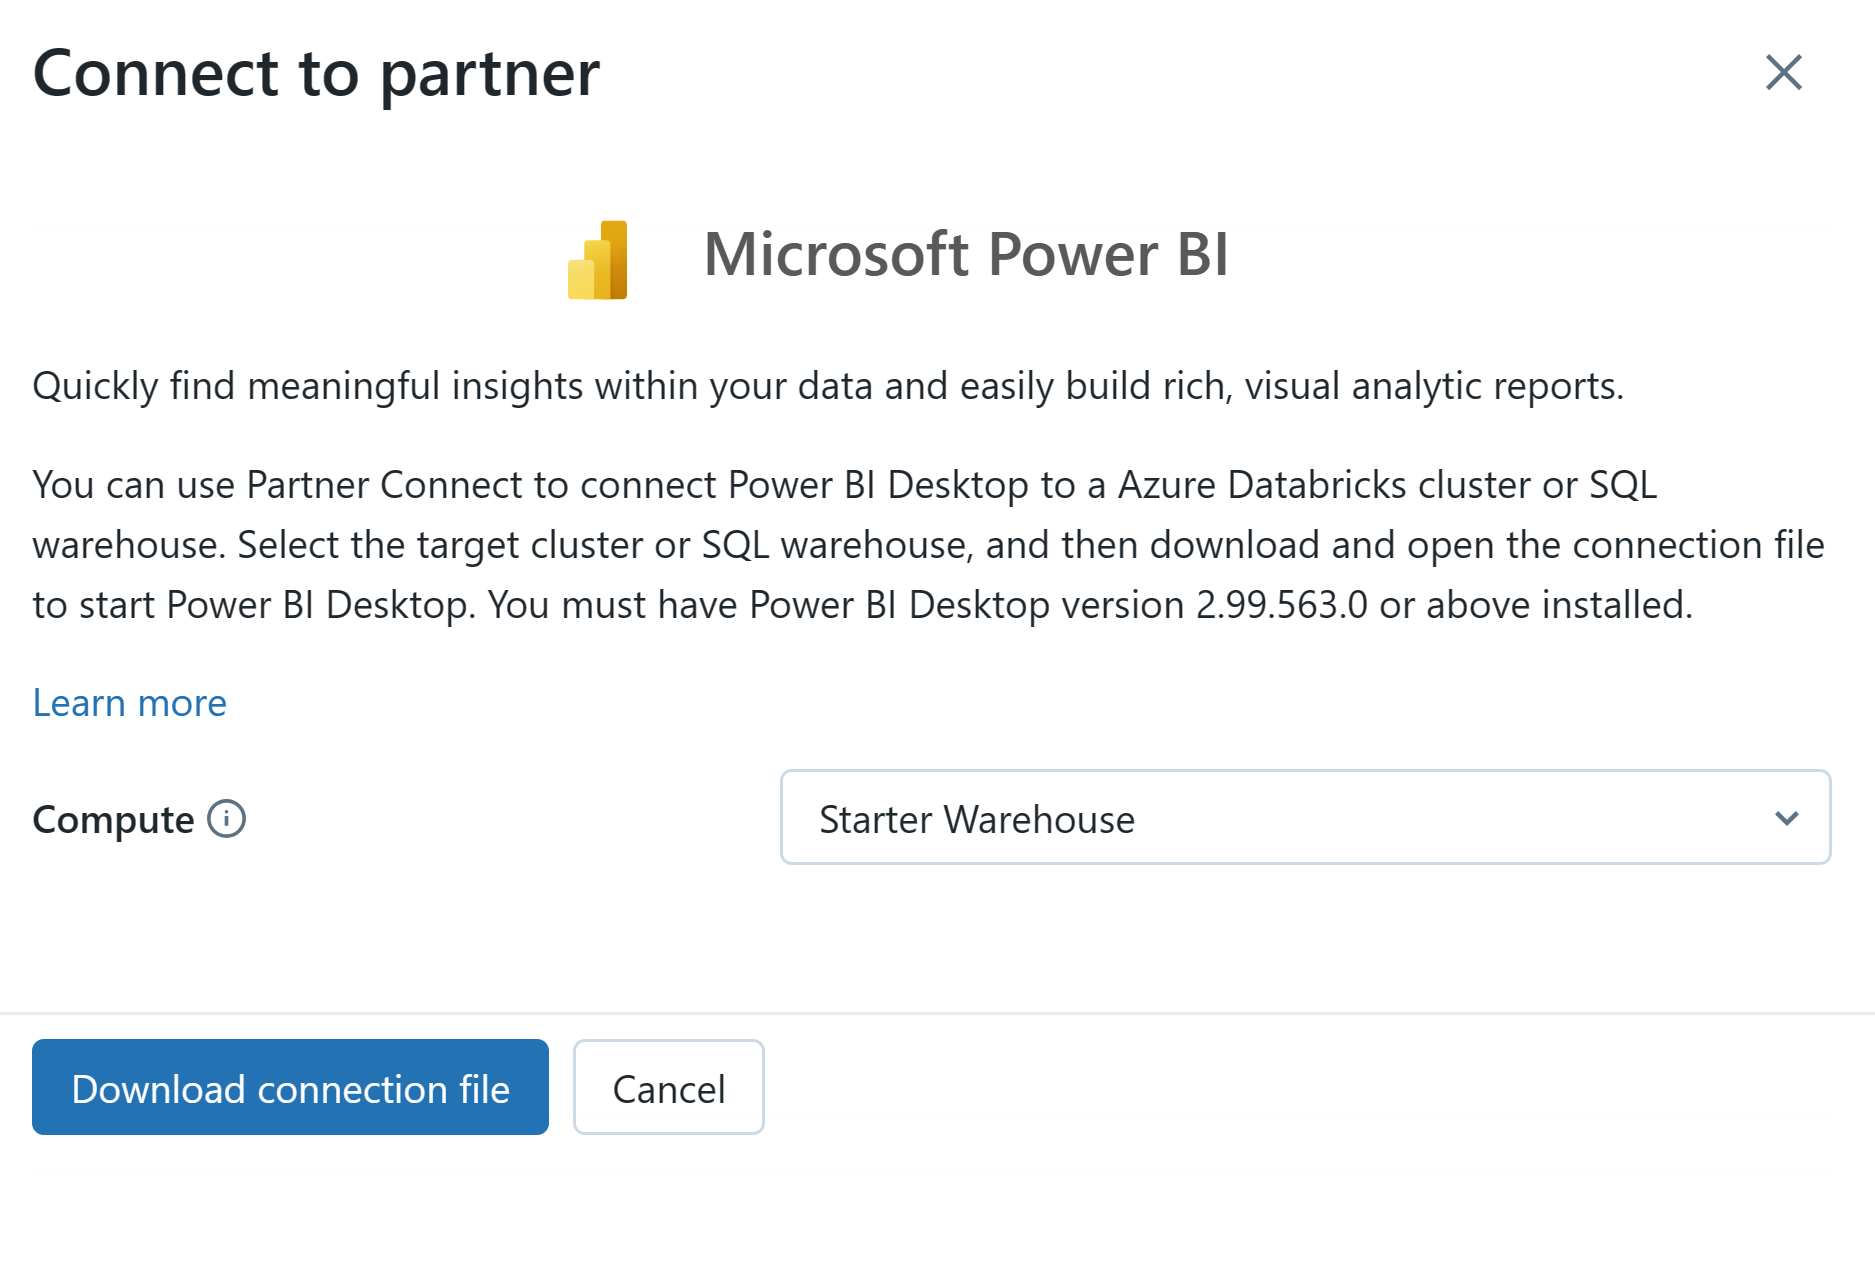
Now lets try to access these delta tables in Power BI desktop
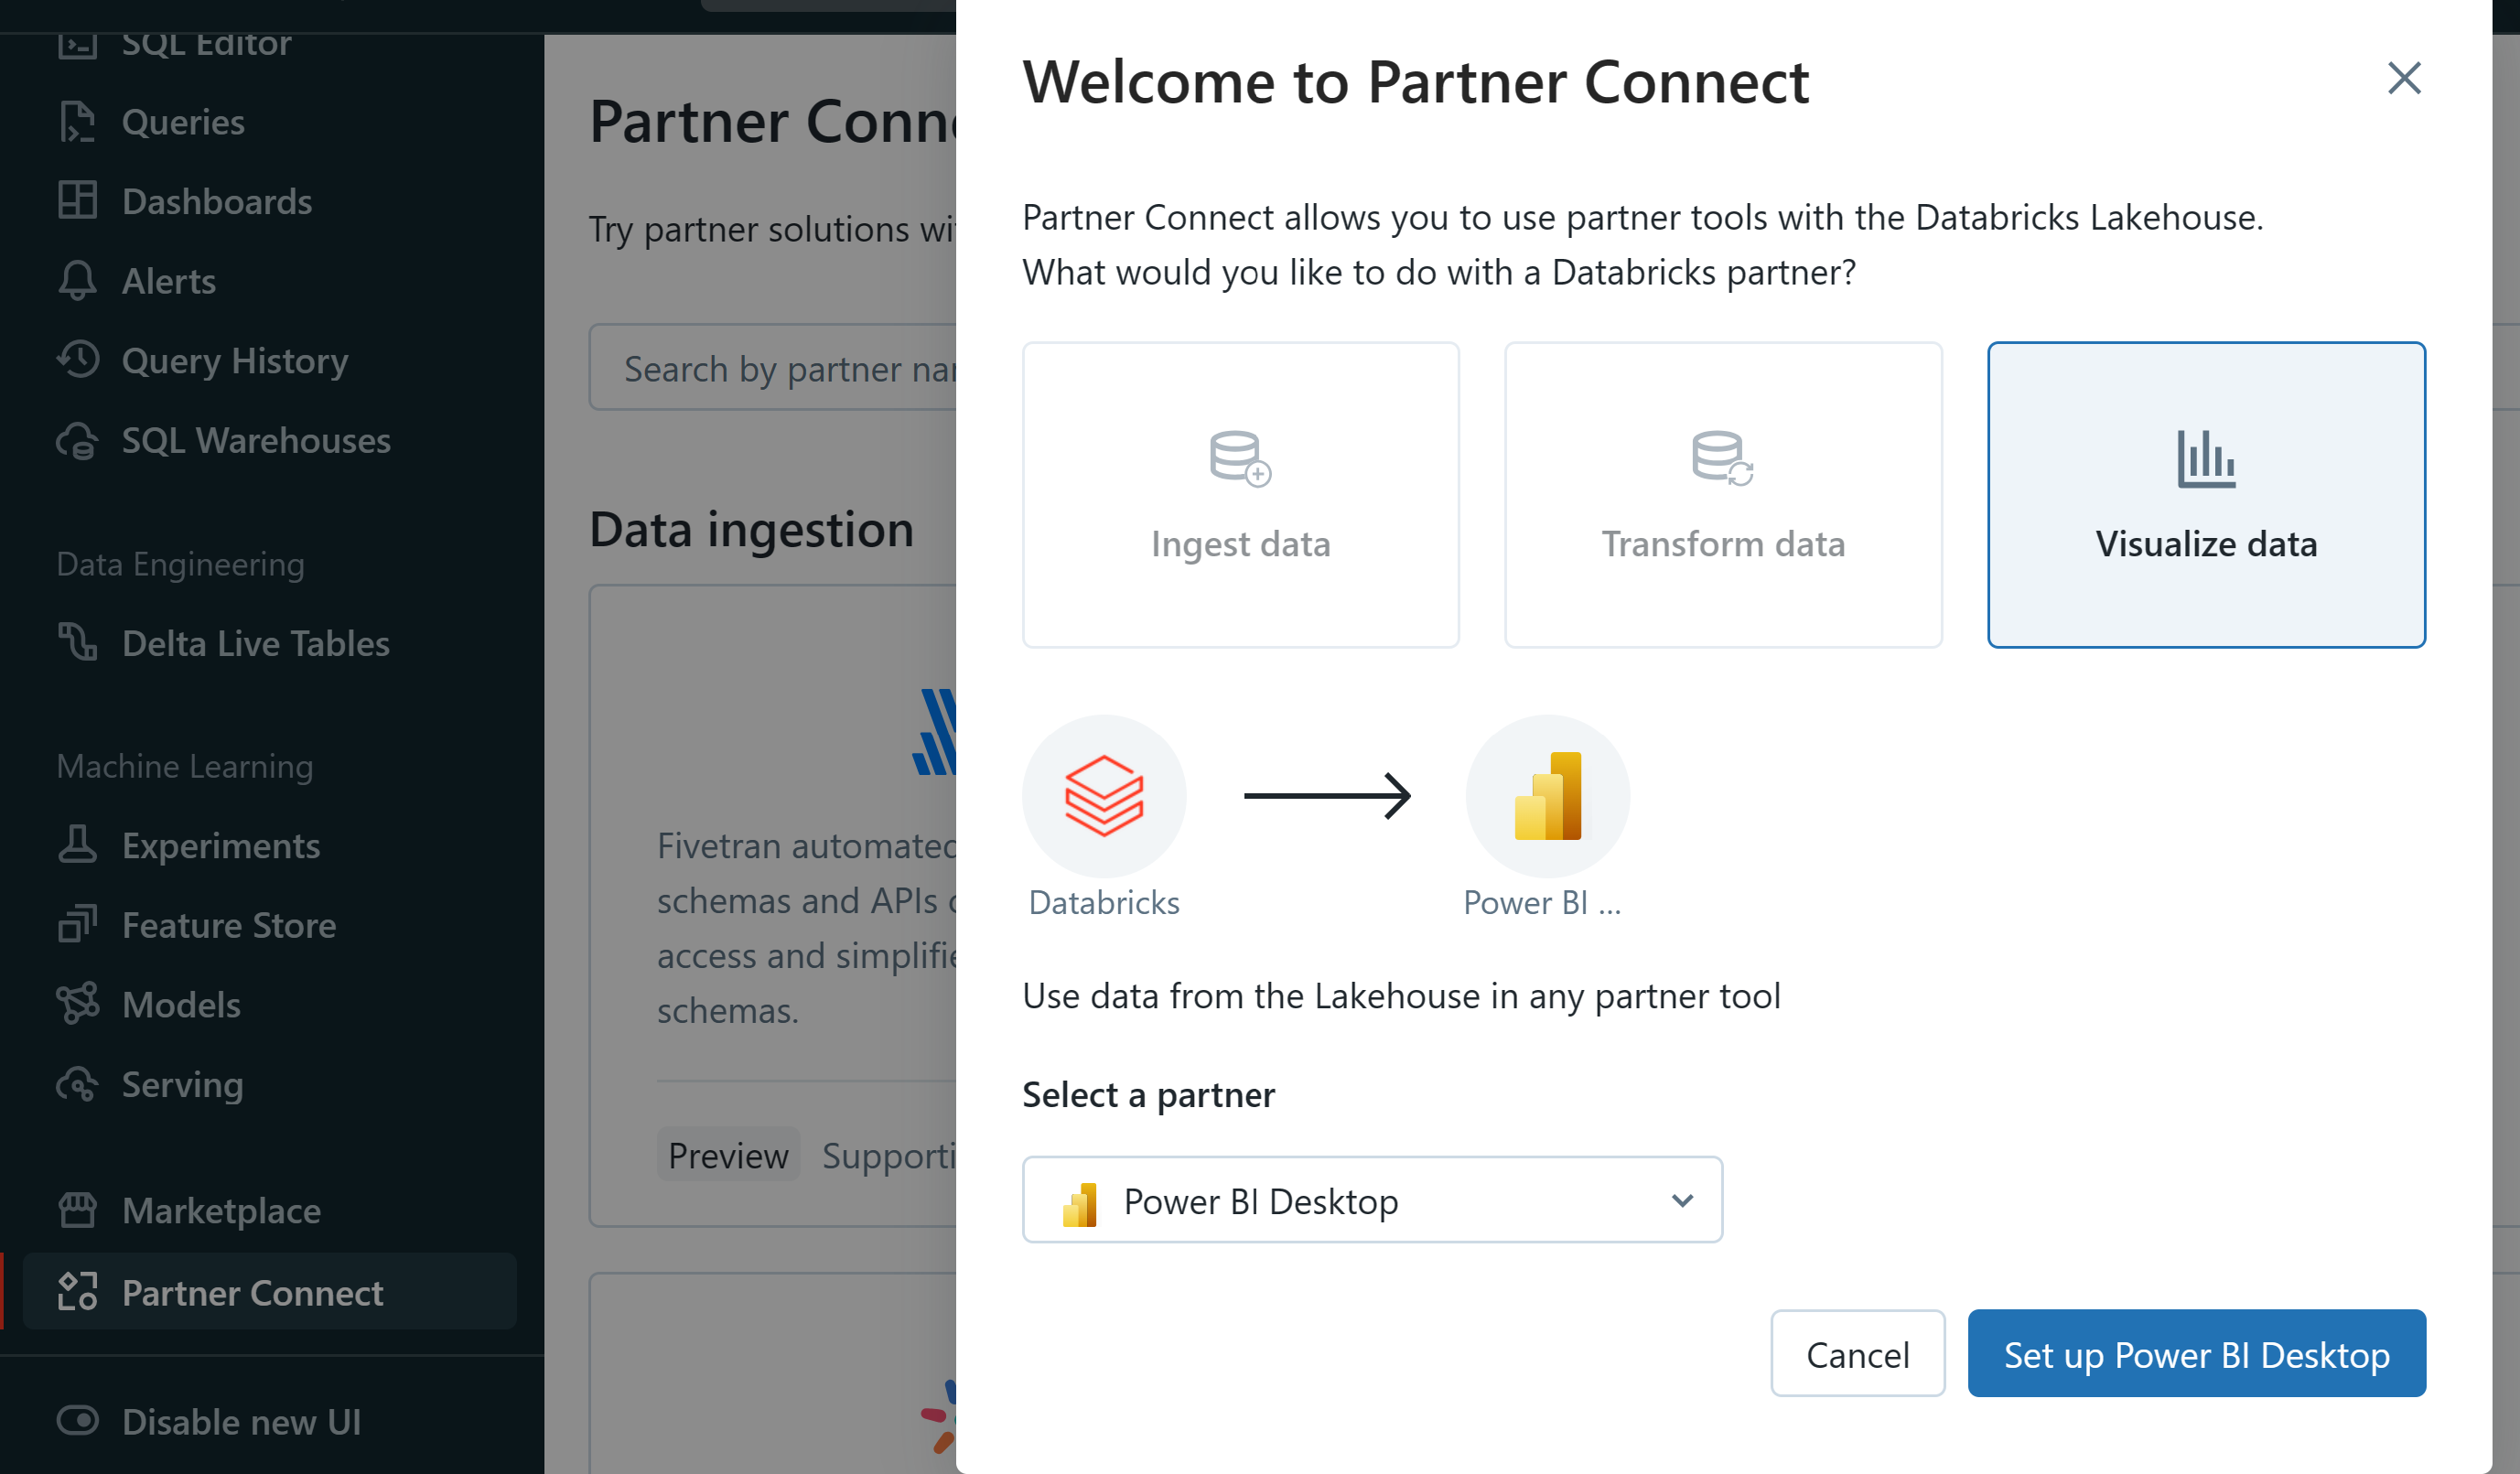
Navigate to Partner Connect in the Left Nav and click on Setup Power BI Desktop
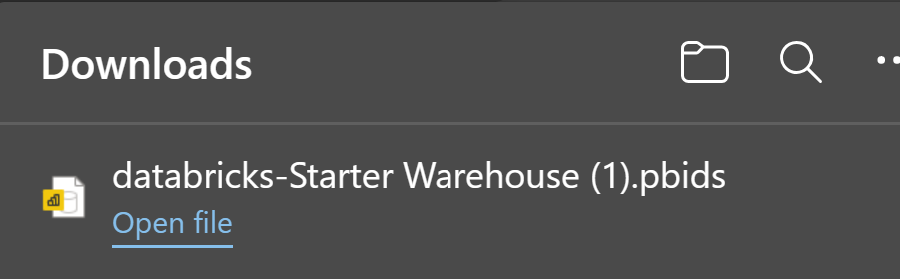
Click on Download connection file
Click on openfile
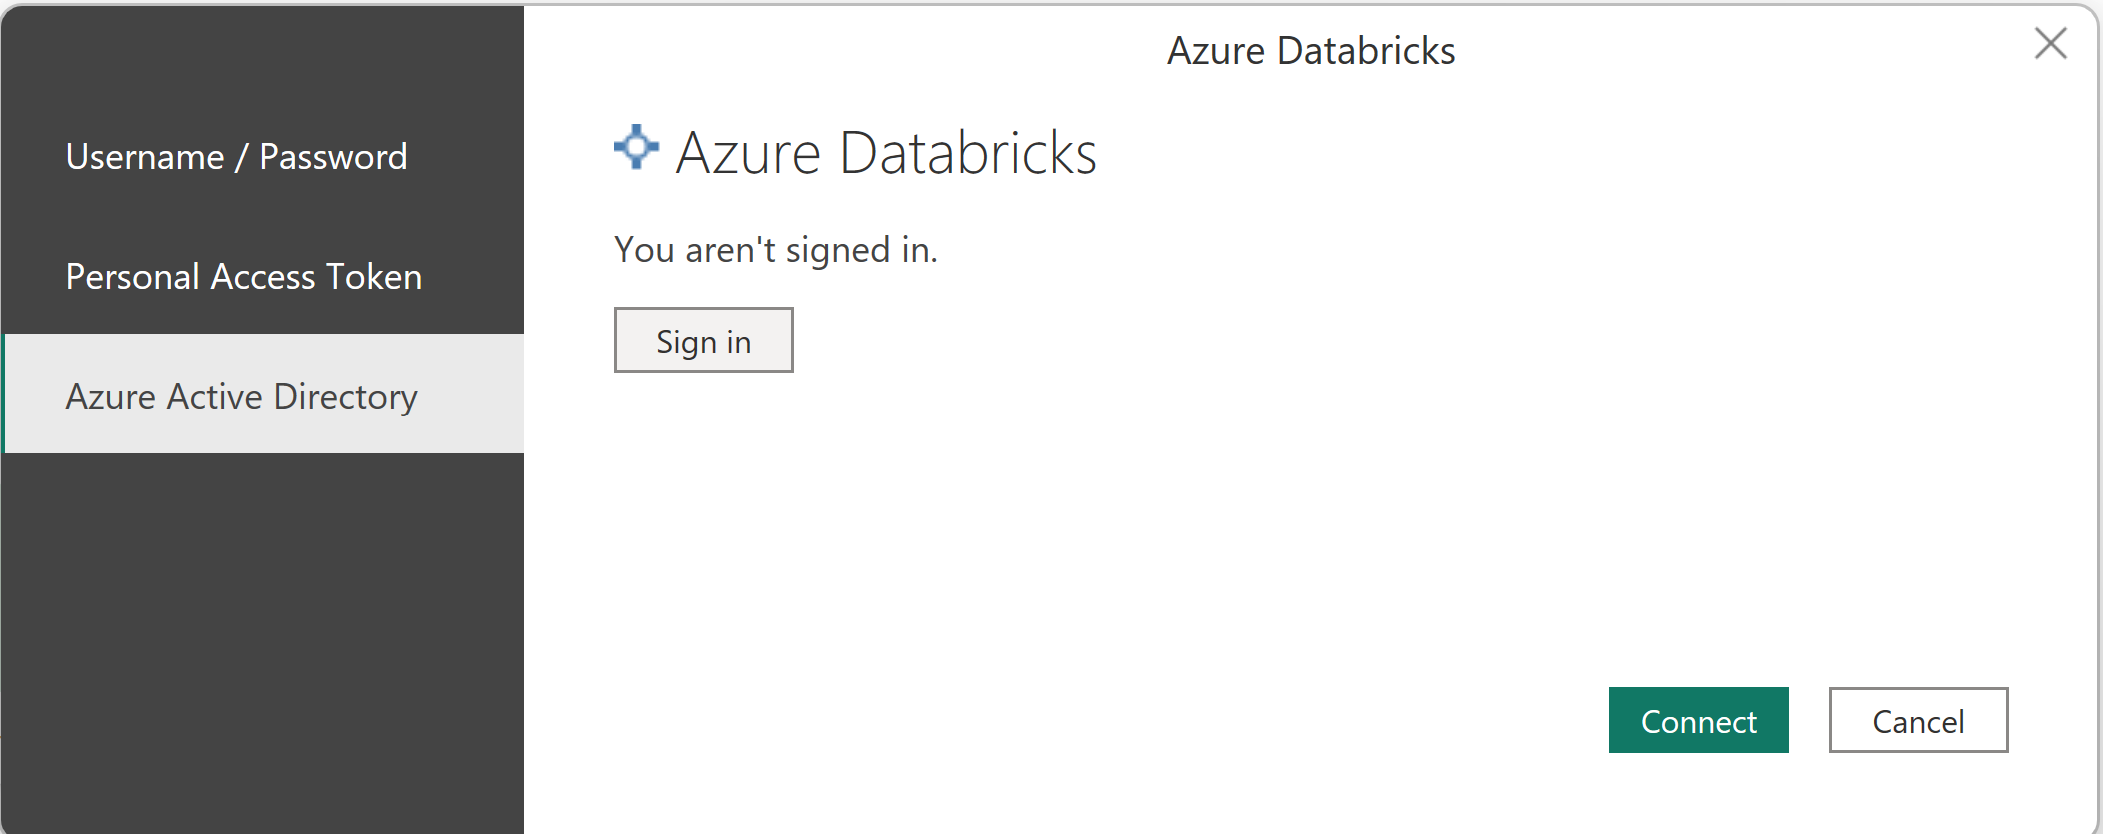
Make sure you select Azure Active Directory and then click on Sign in and enter your username and password. Then click Connect
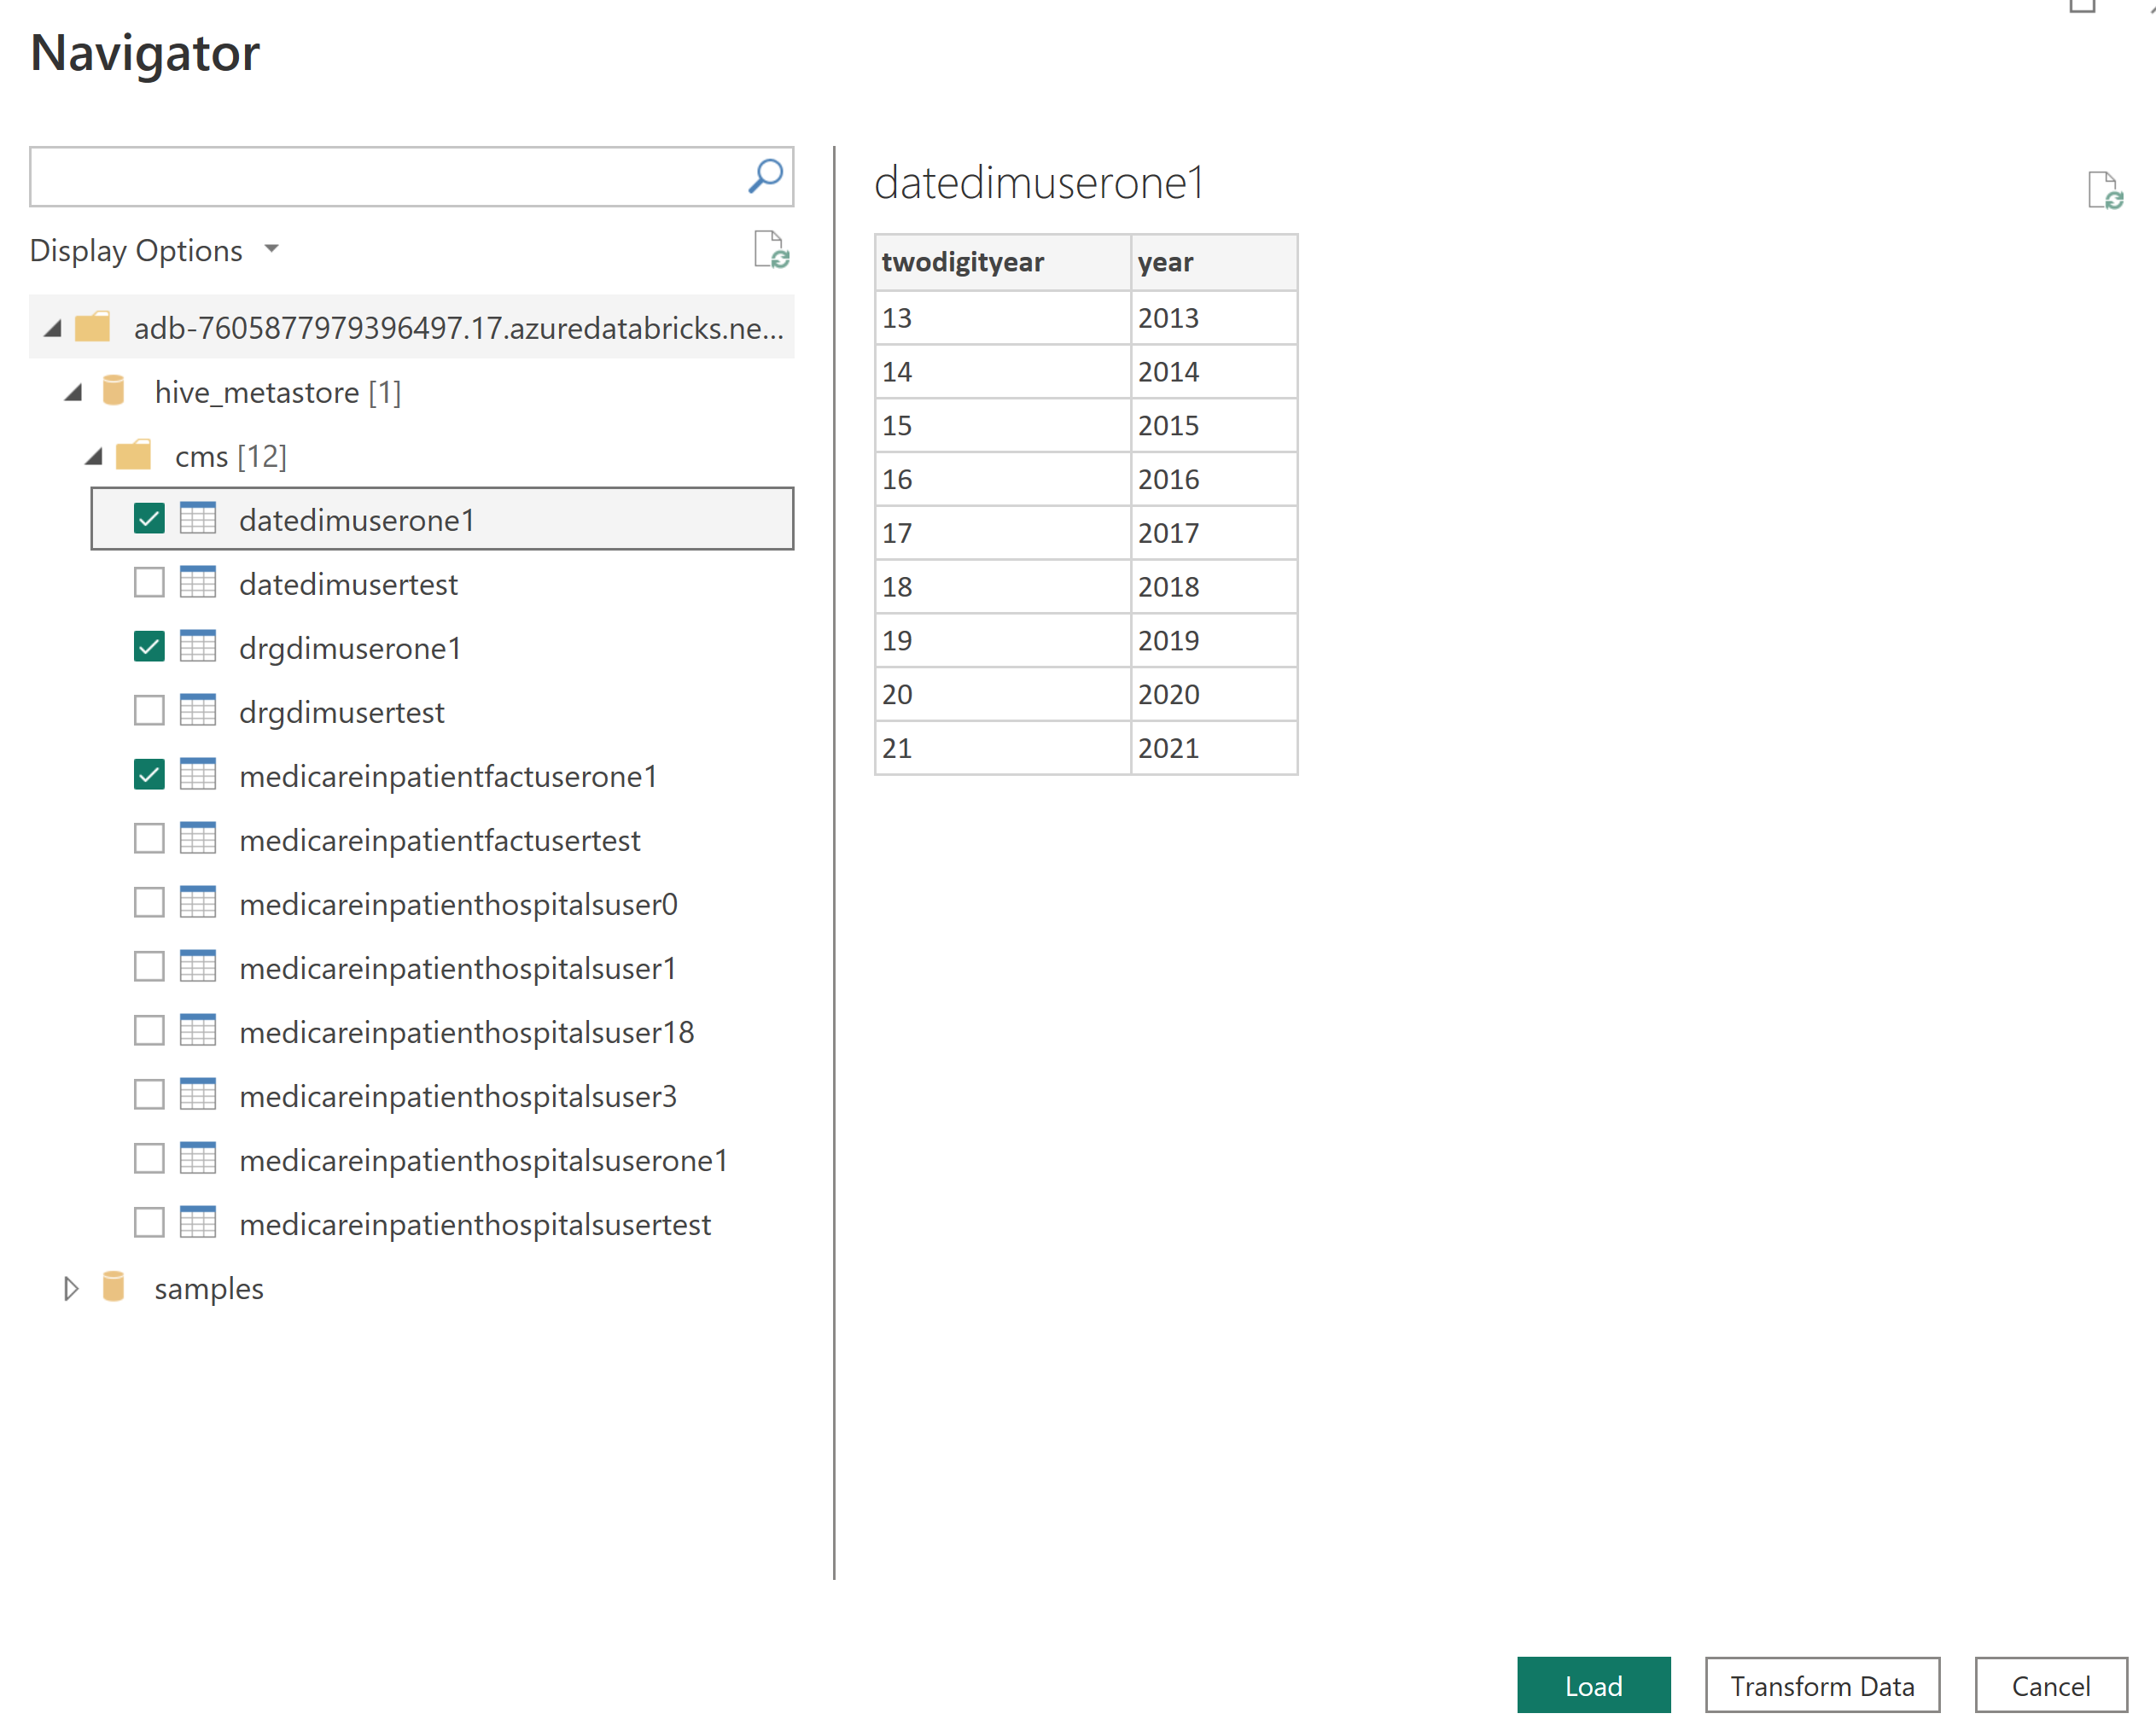
Select your tables and click Load
Create the joins in your model
Start Building a Power BI Report
`Please ask any questions you have about using Power BI. Our focus today is Azure Databricks but many Data Analysts and Business users are comfortable using Power BI. Power BI can access the Delta table you created in all the previous steps.
Now we are going to connect to the Delta tables we just created in the workshop by creating a Shortcut to the Delta files in Azure Data Lake Storage Gen2 using Microsoft Fabric.
Login to Microsoft Fabric in your browser on your lab services VM by opening another tab by clicking on the following link Microsoft Fabric. Here is the link if you need to cut and paste it into the browser
https://fabric.microsoft.com/
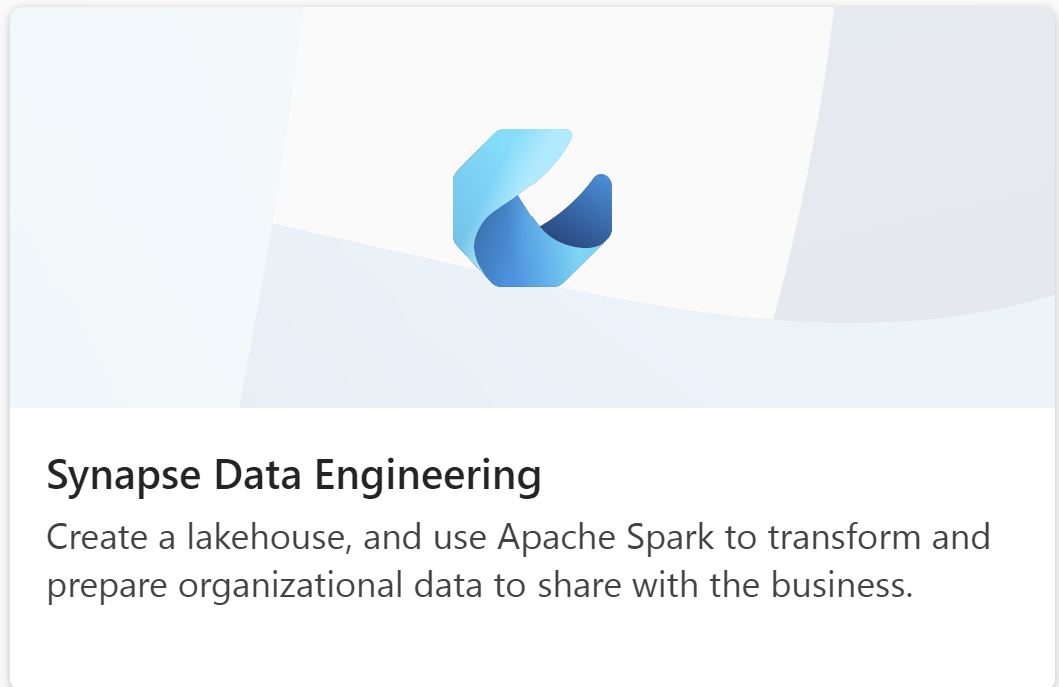
Click on Synapse Data Engineering
Find your workspace by clicking on Workspaces on the left nav.

Your workspace should look like this:
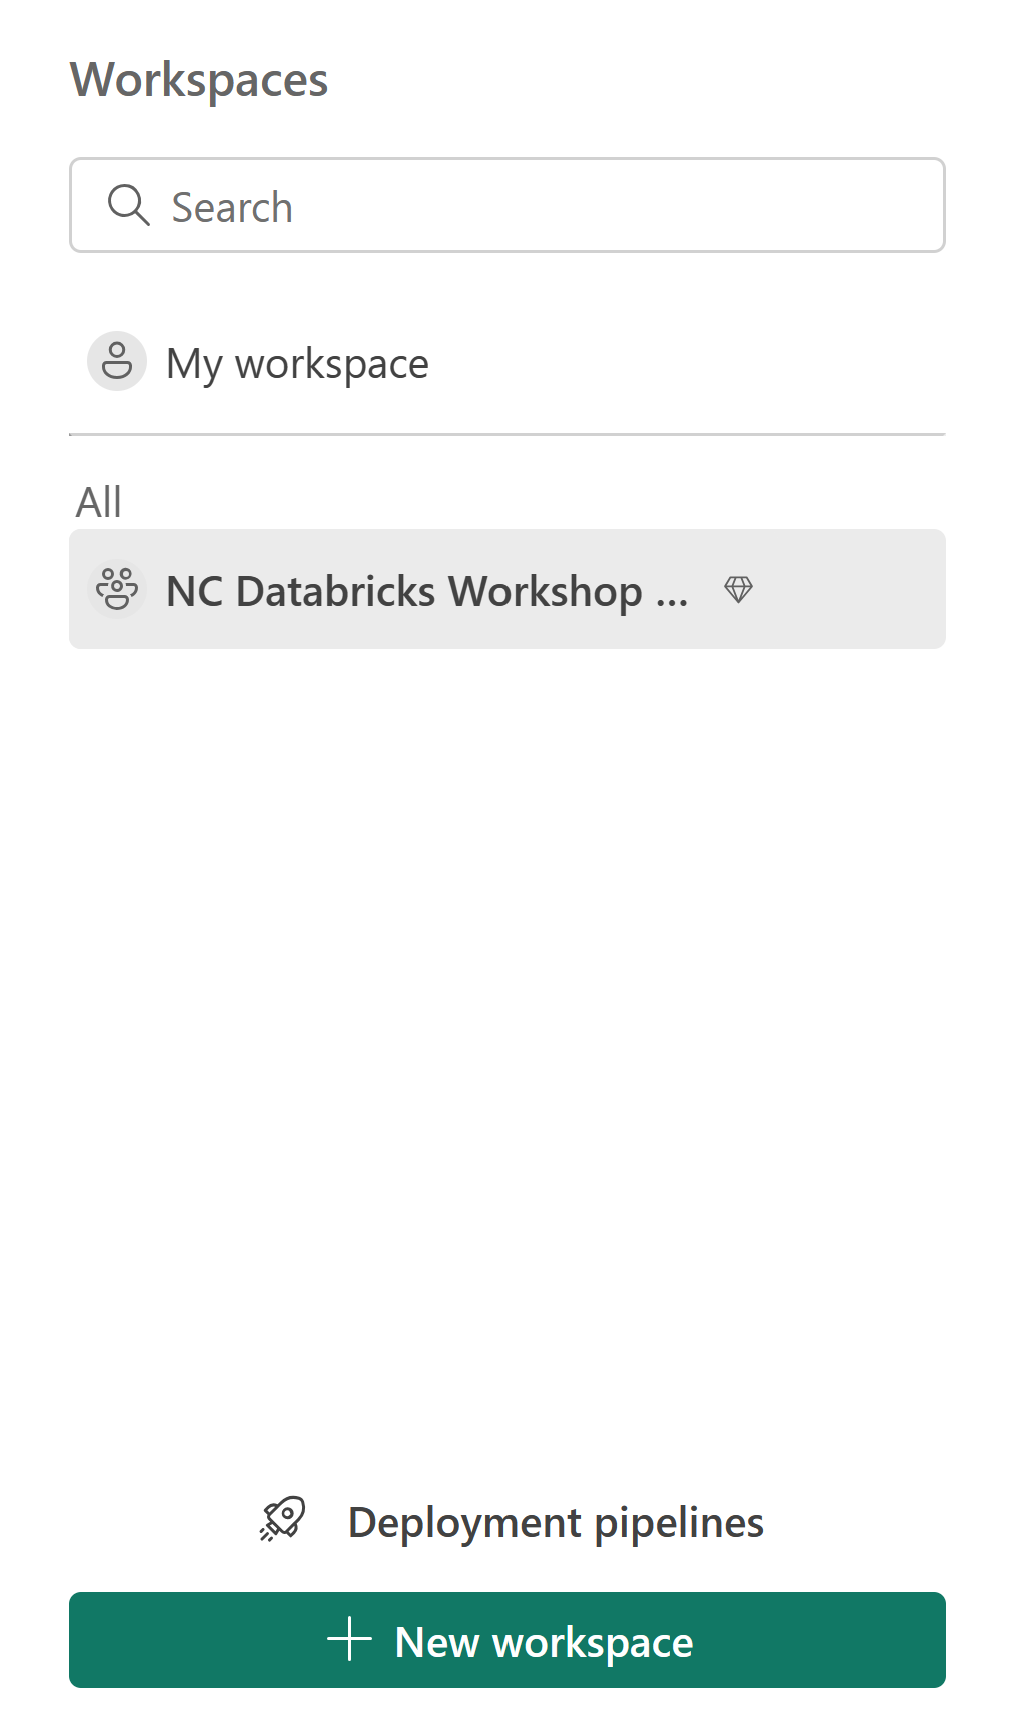
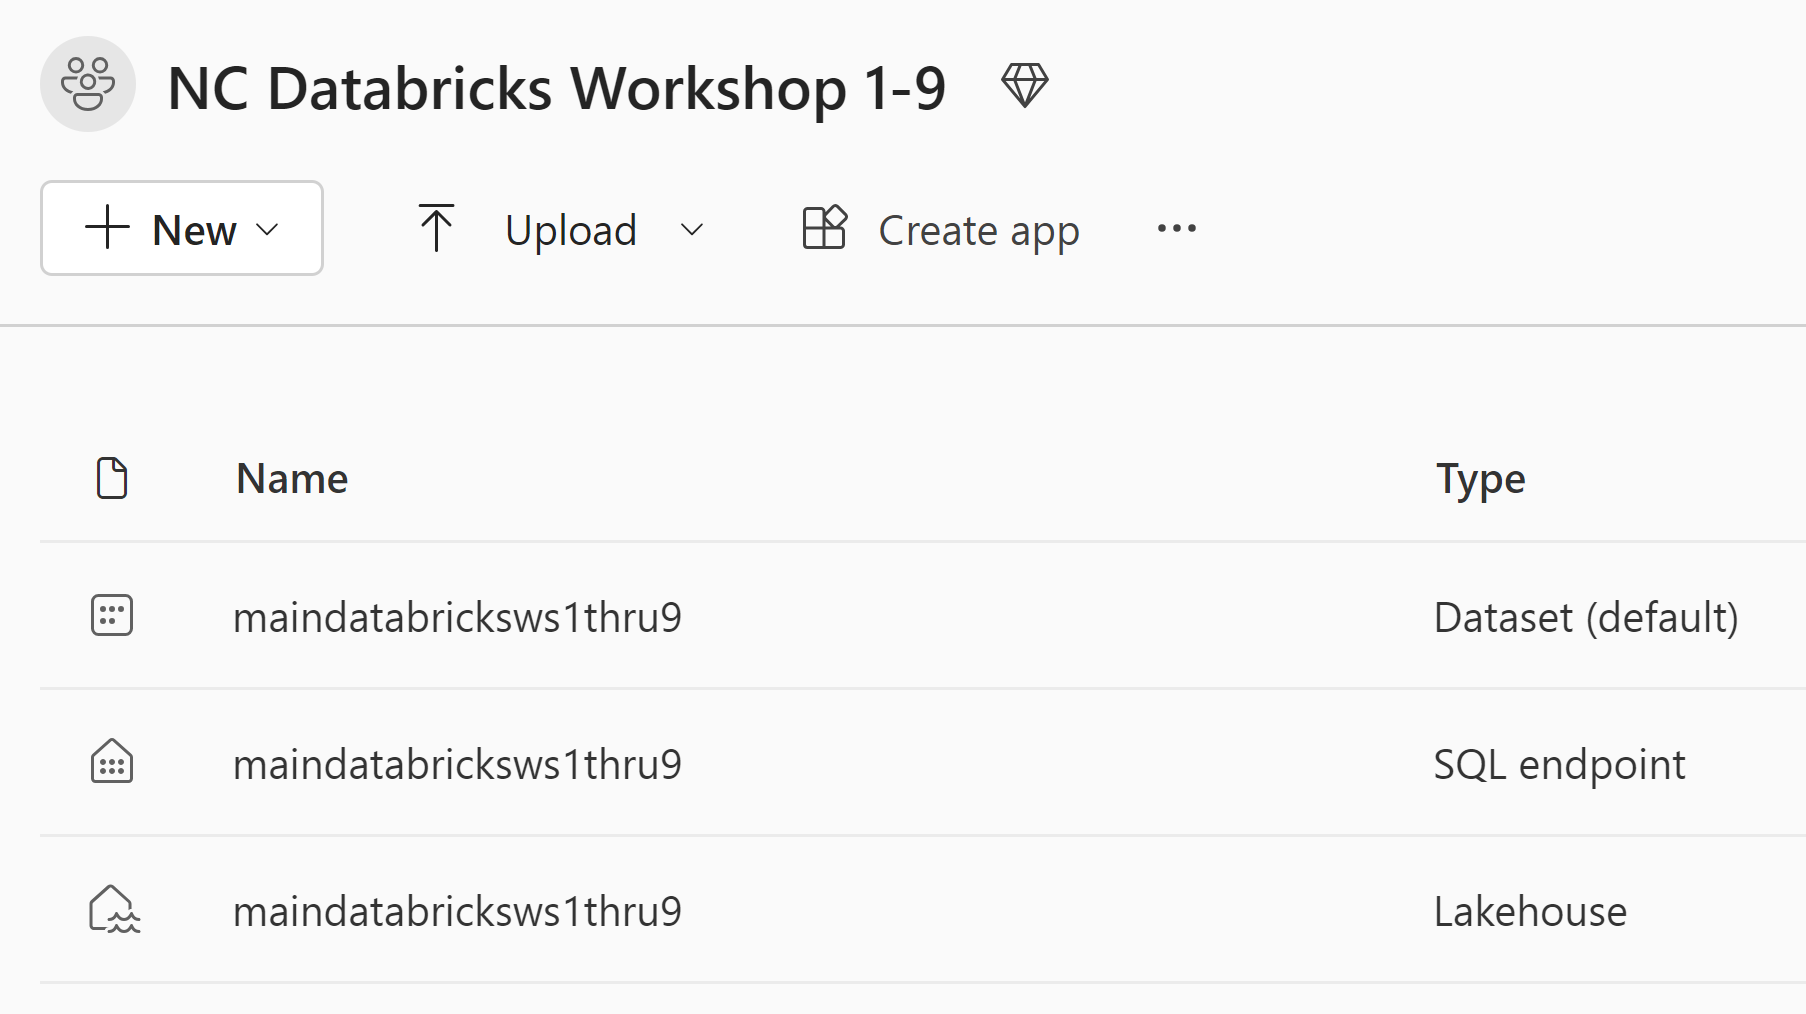
Your will either be in NC Databricks Workshop 1-9
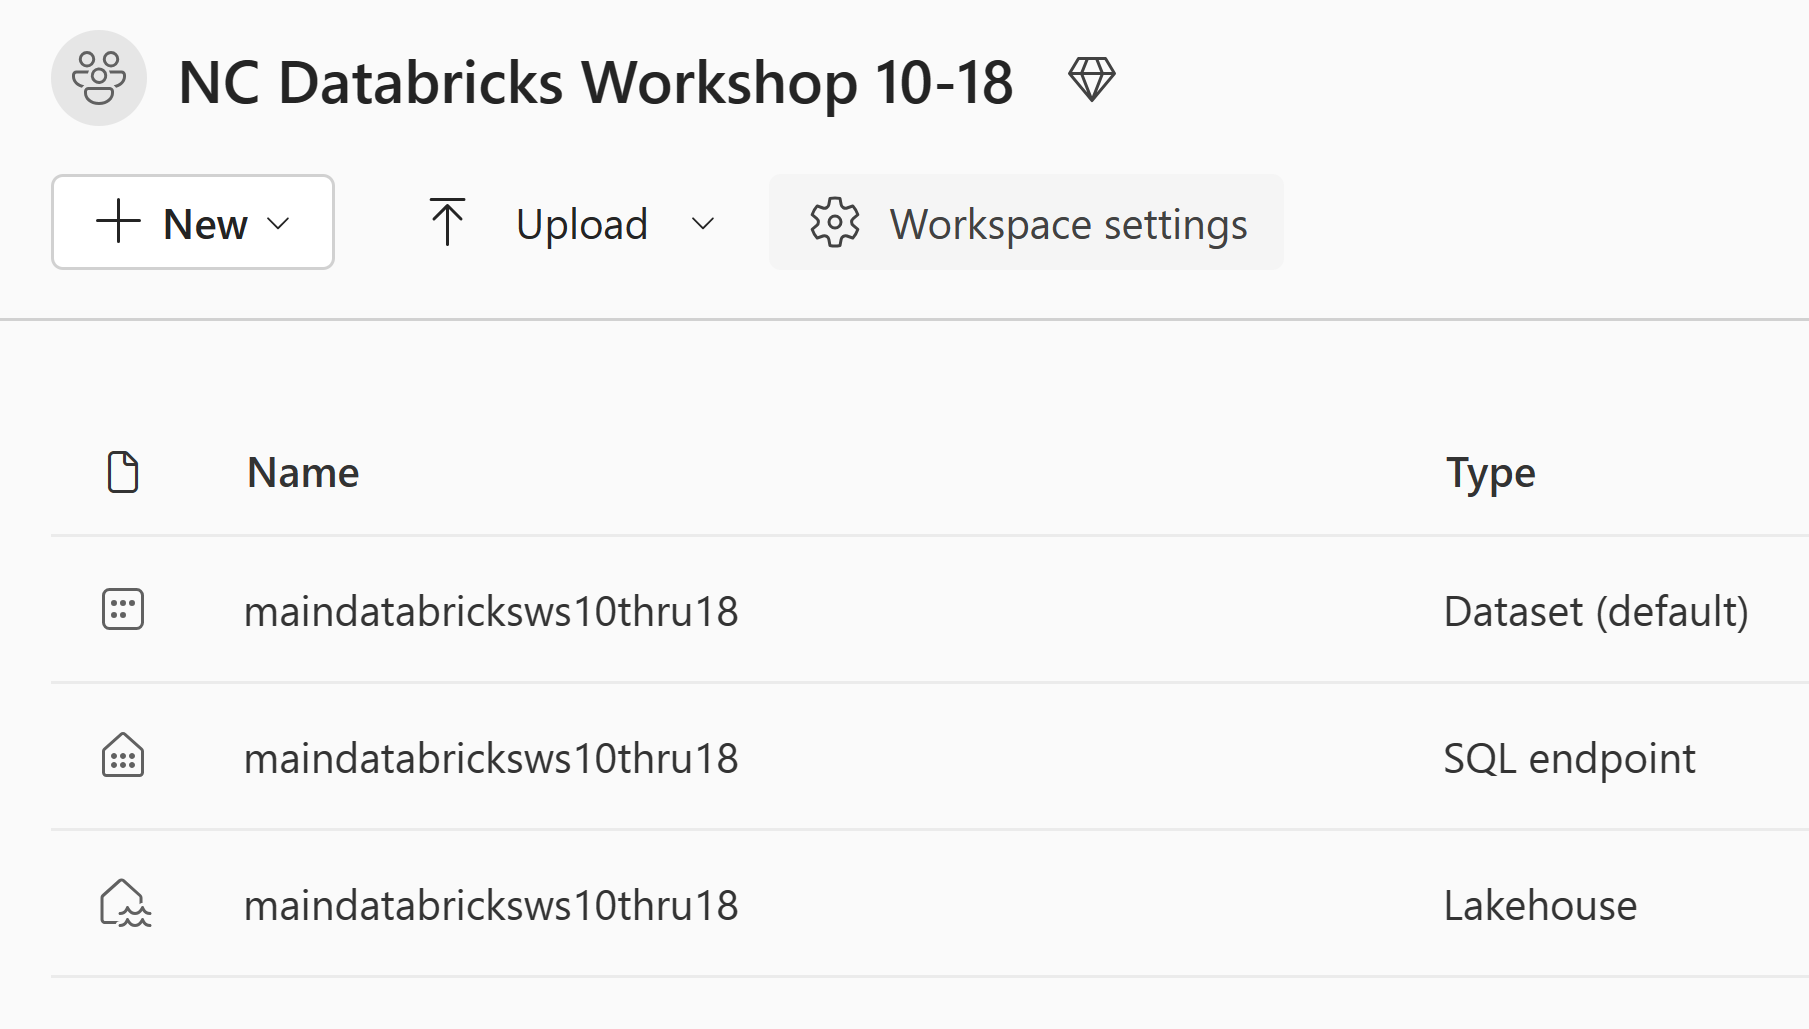
Or NC Databricks Workshop 10-18
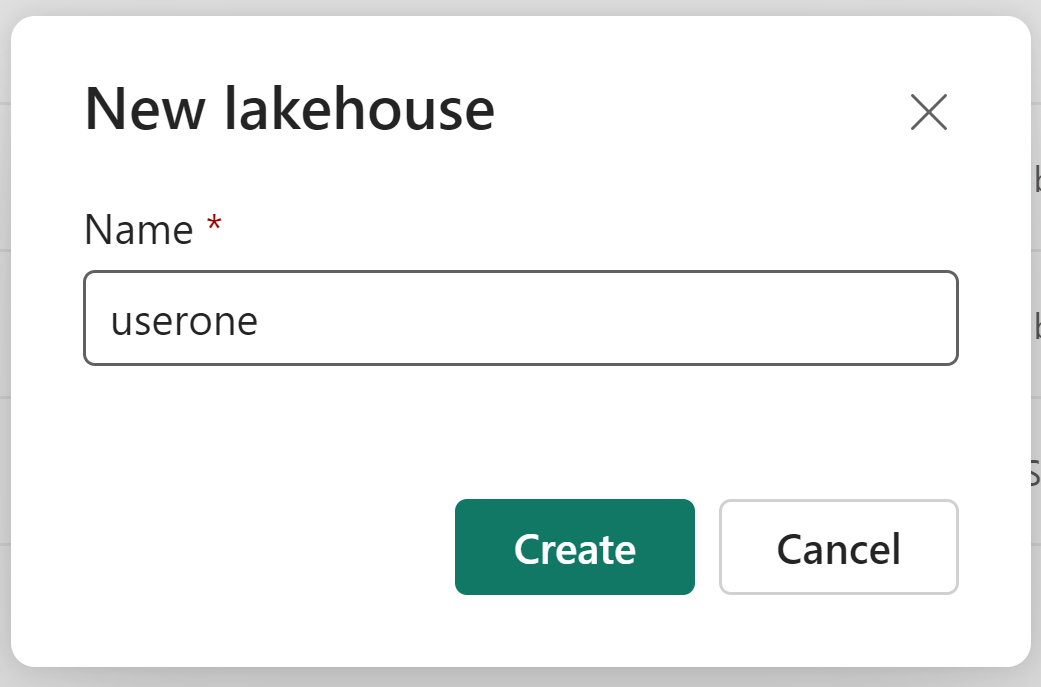
Create a Lakehouse by clicking on +New and chosing Lakehouse. Lakehouse (Preview) while still in public preview
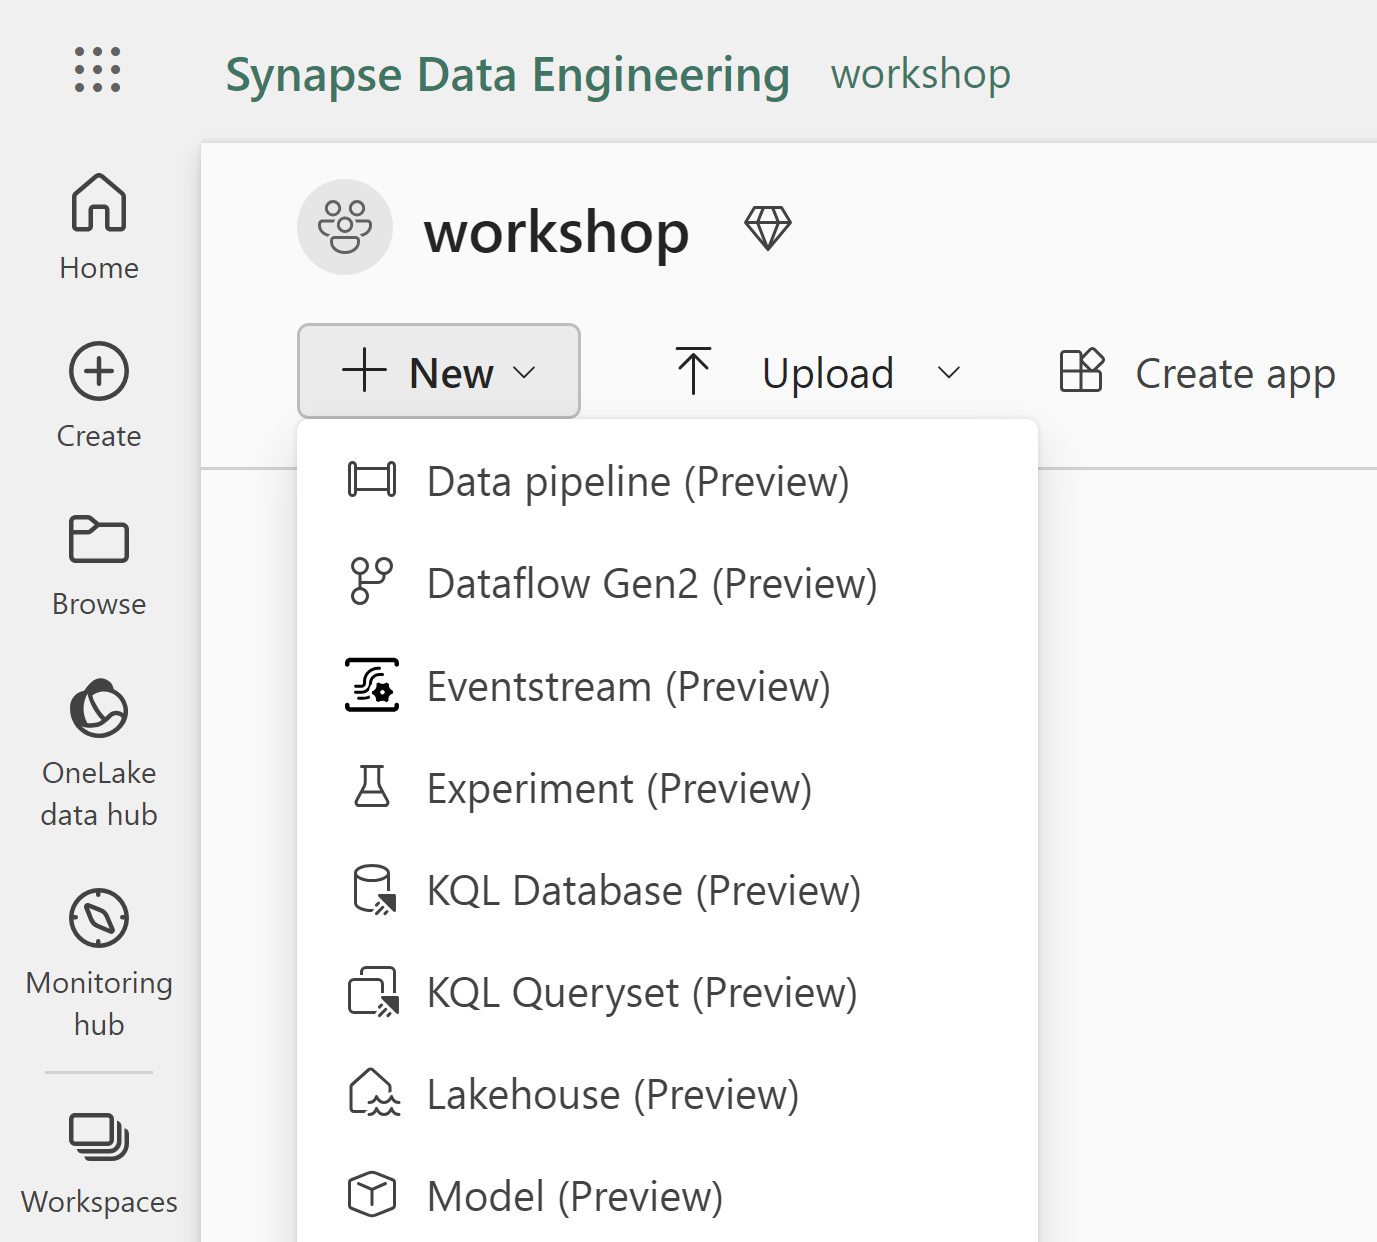
As we have been doing all day please name it user<number>. Click Create
An examlpe would be "userone", "Usertwo", etc
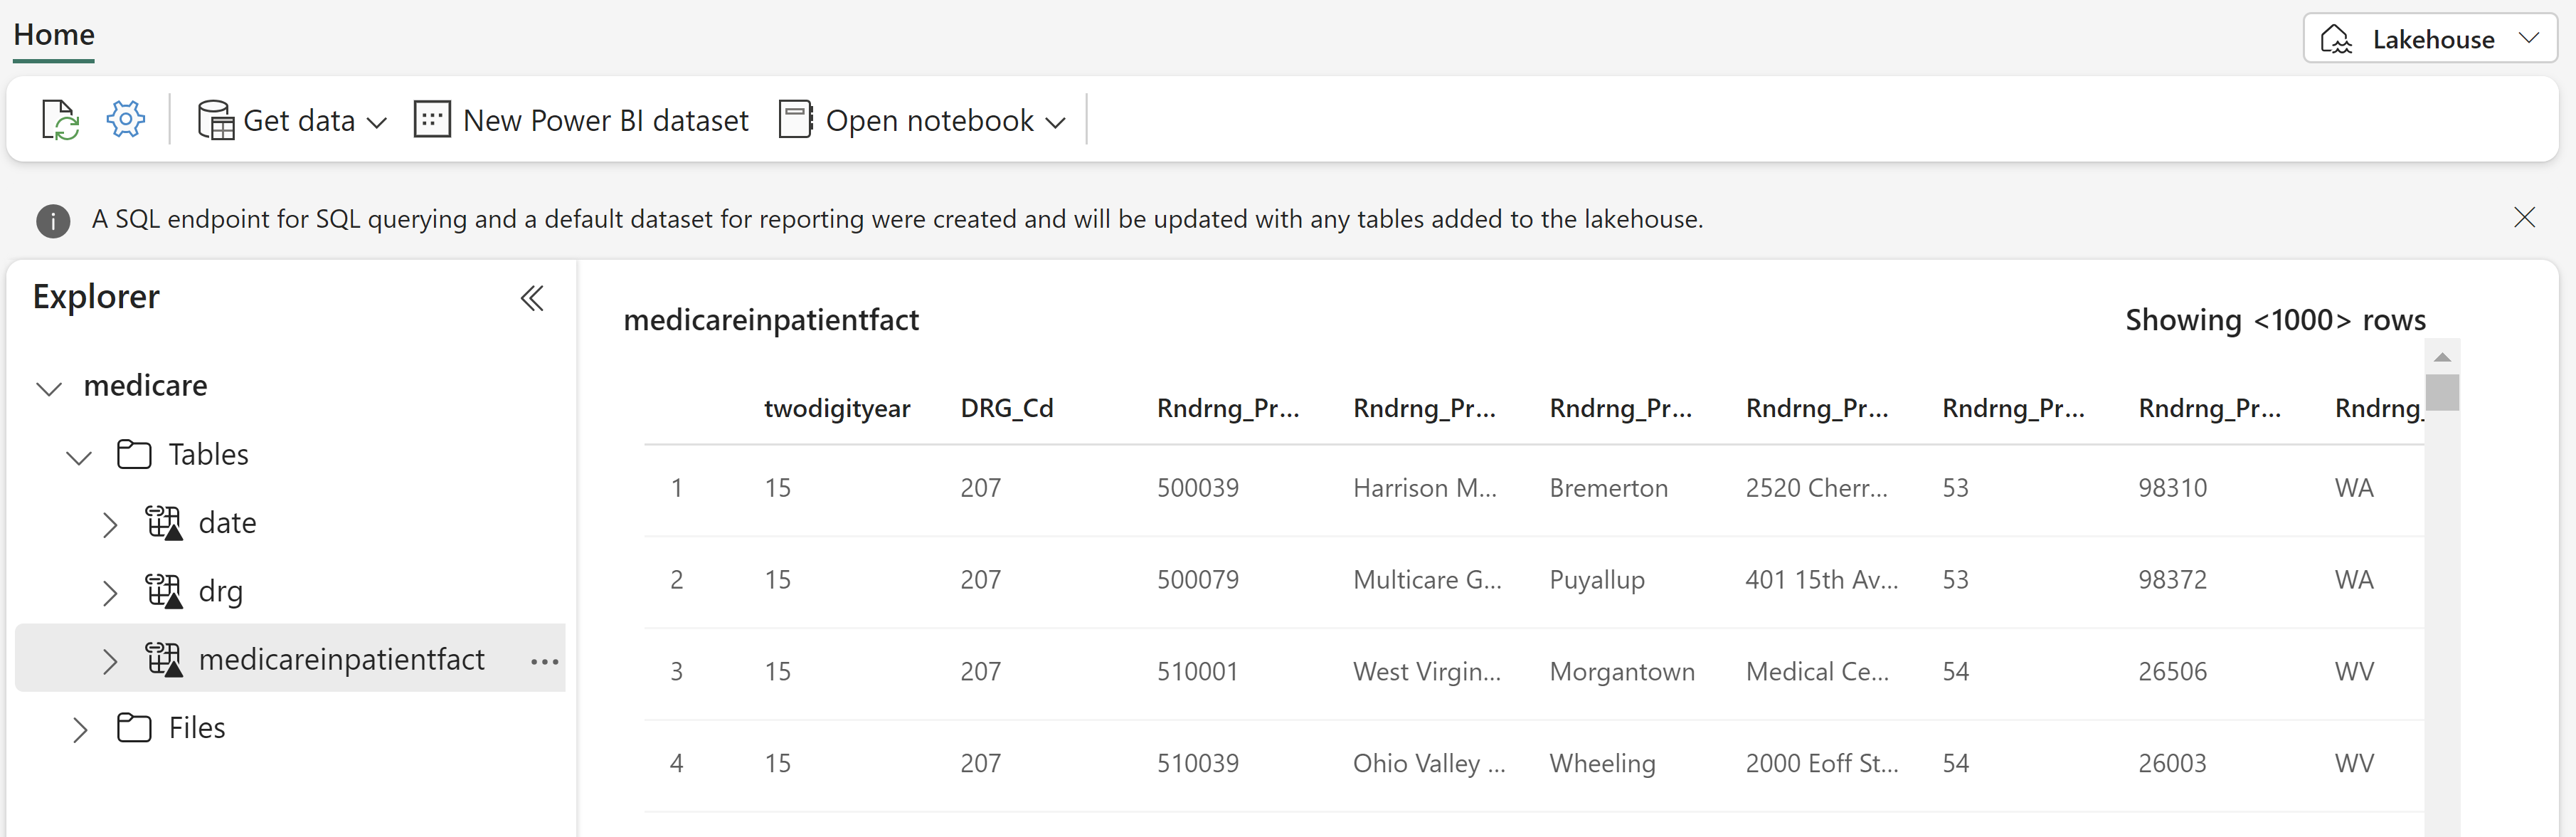
You should now have an empty Lakehouse that looks something like this:
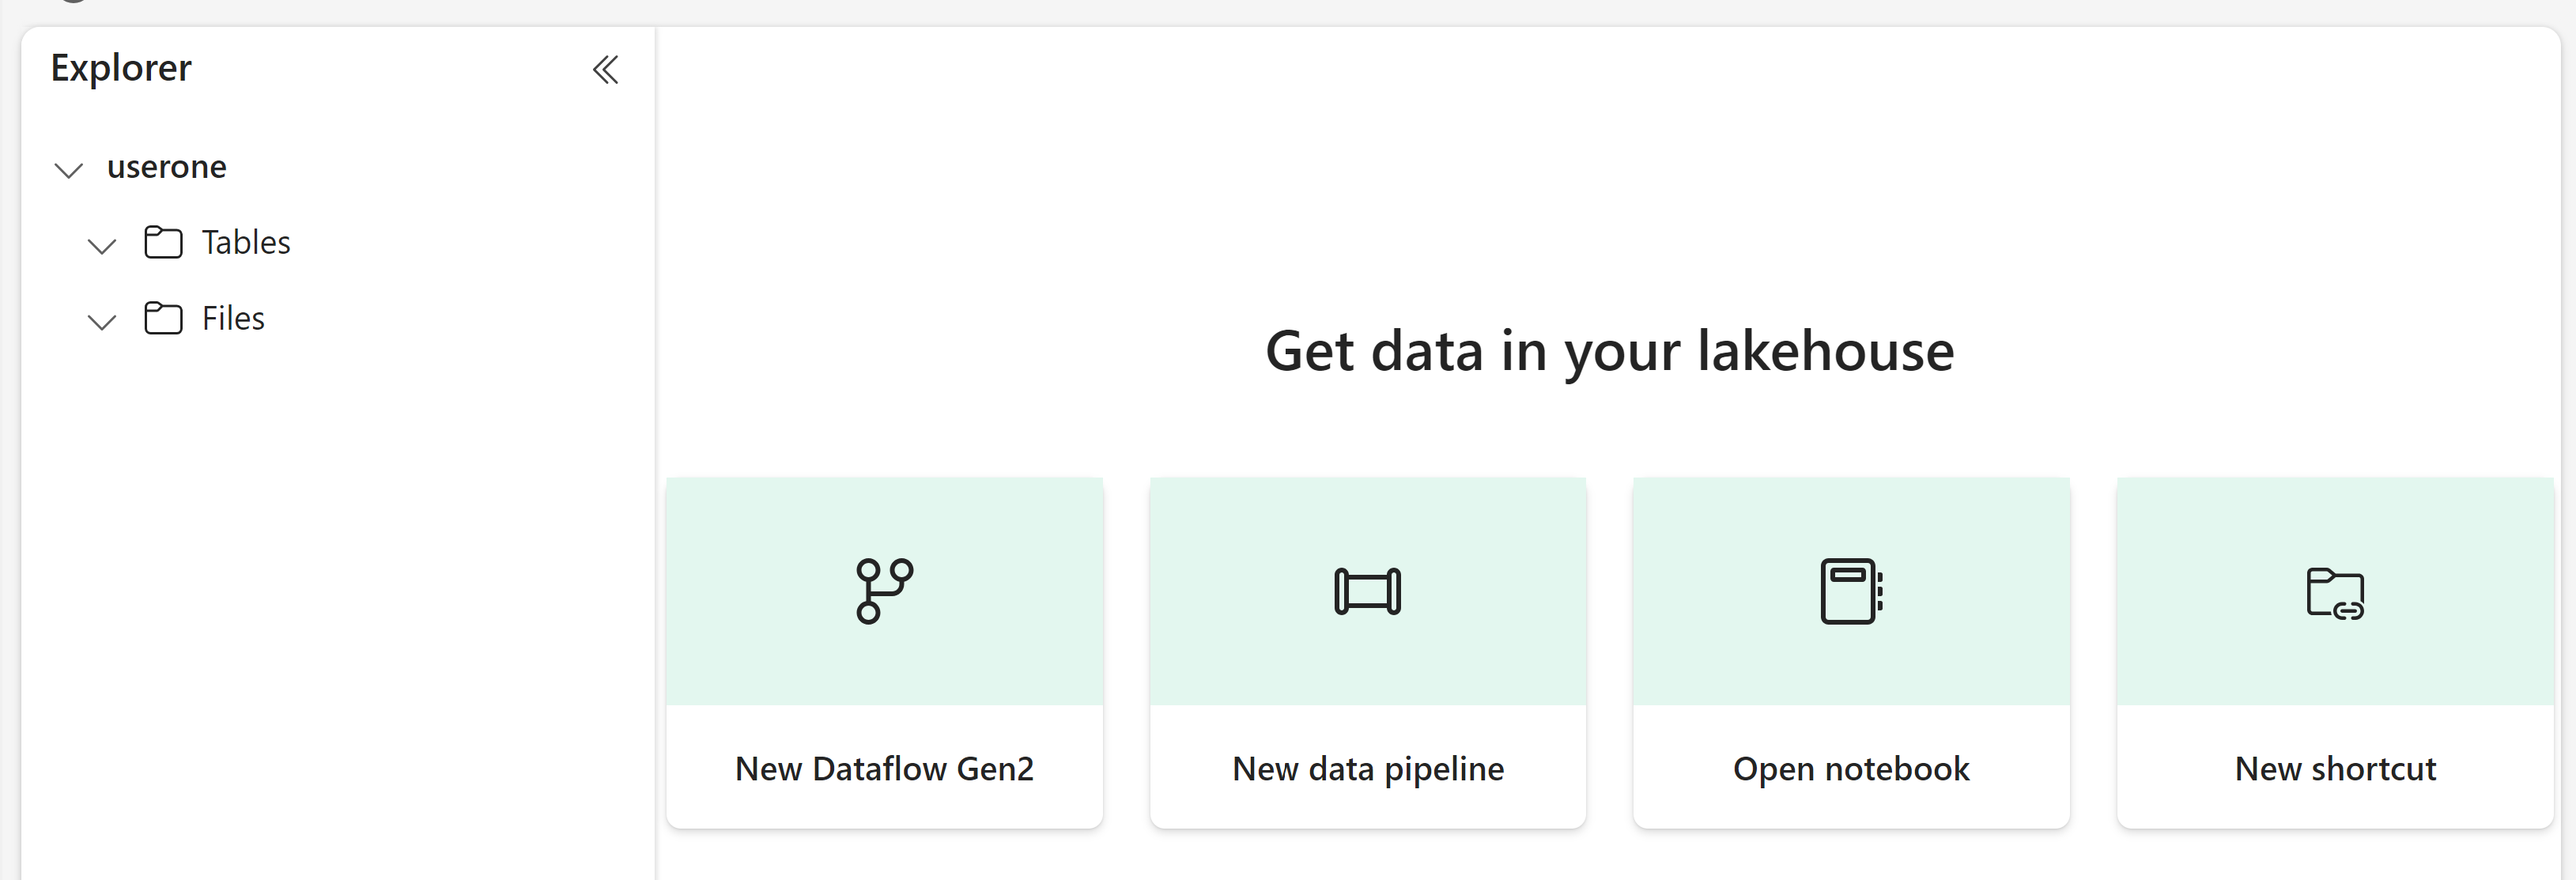
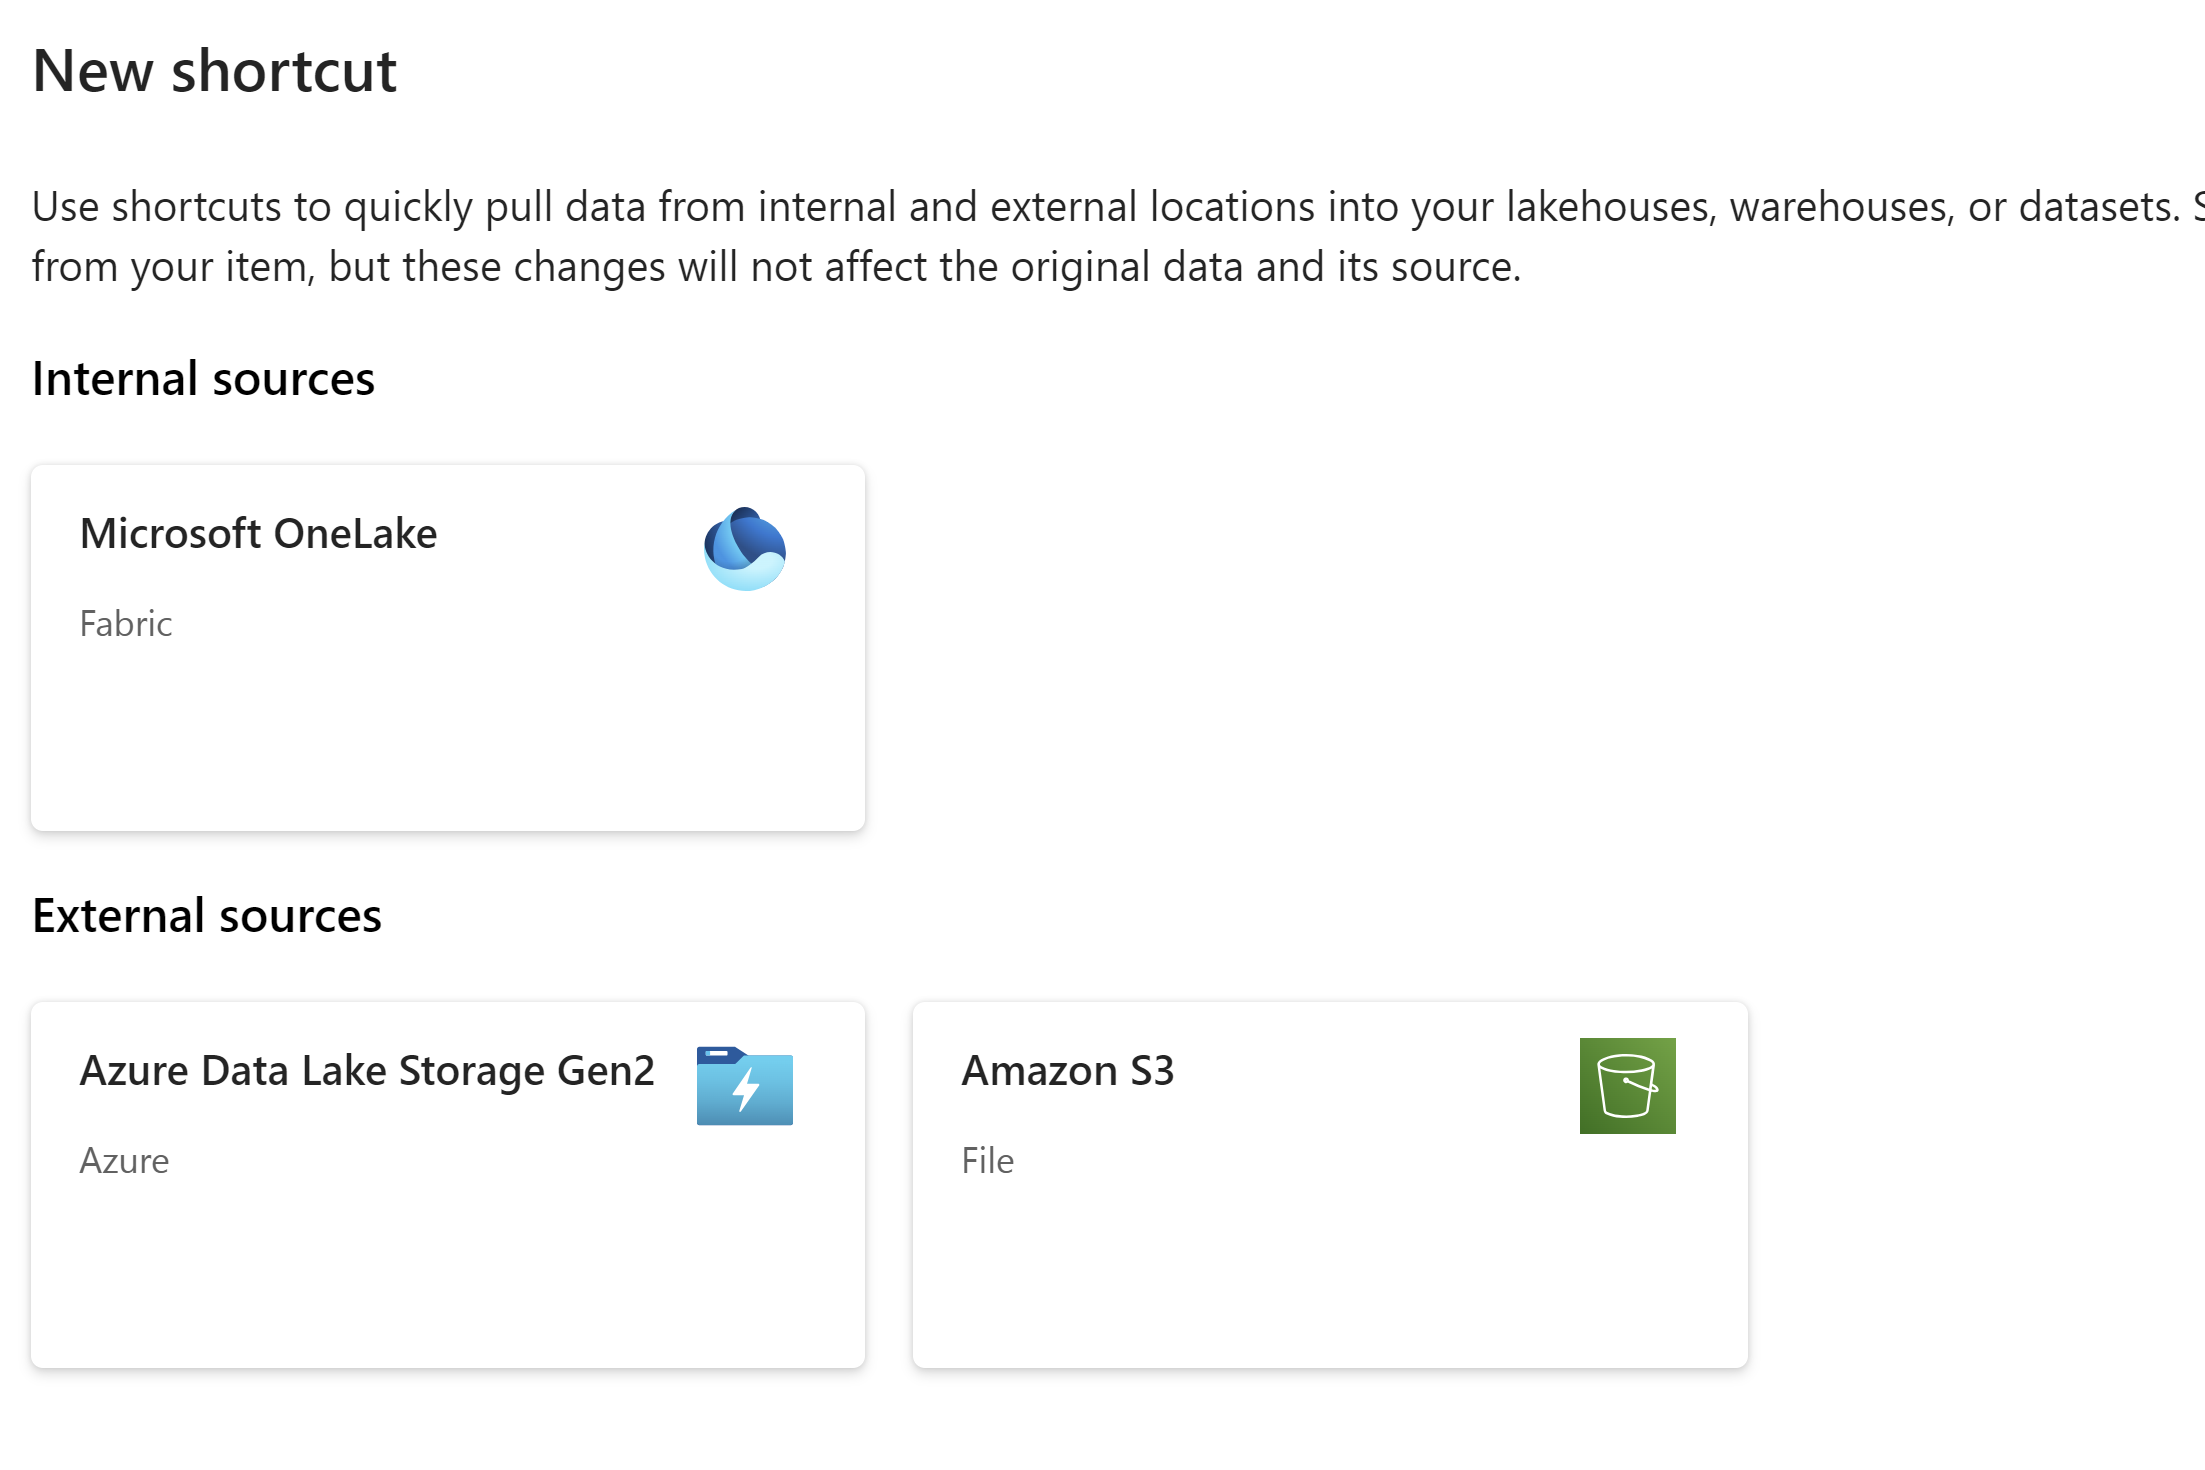
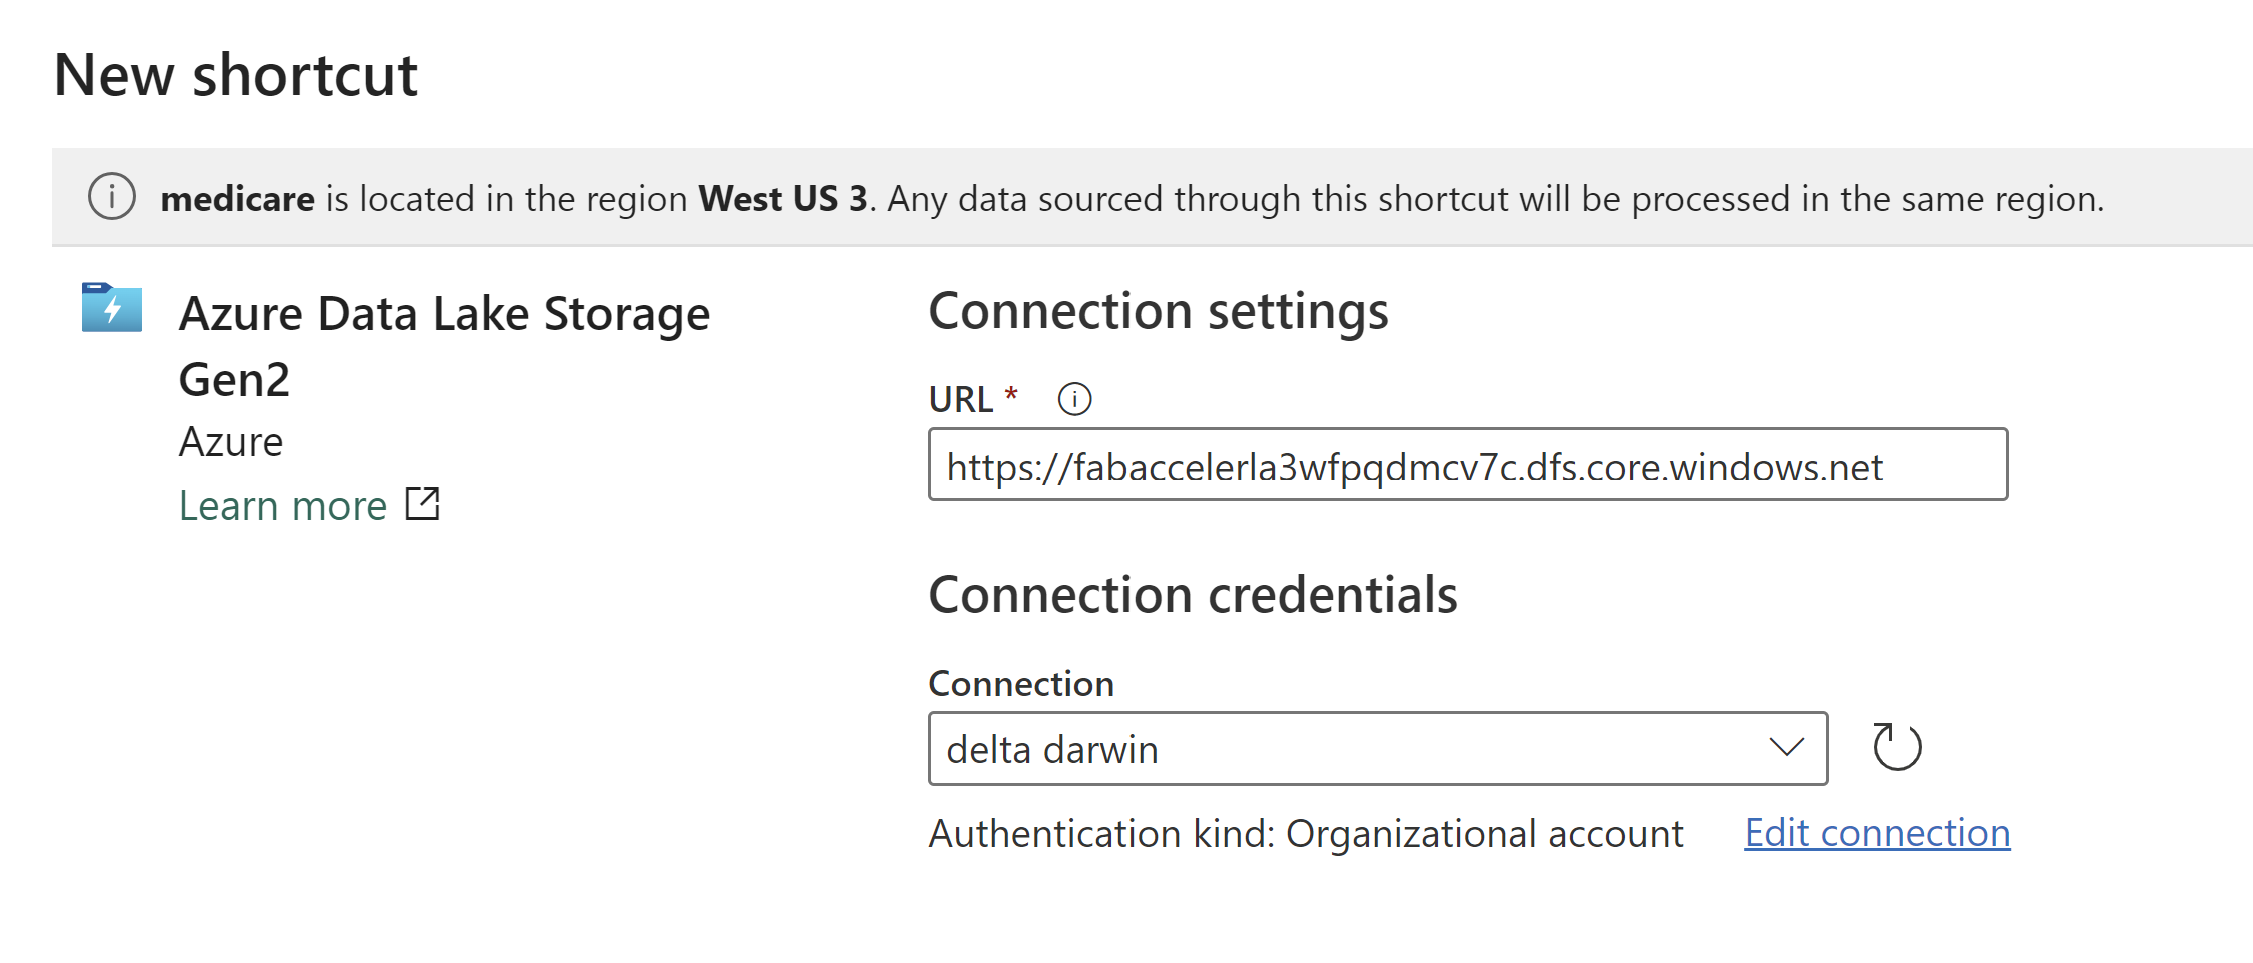
Click on New shortcut

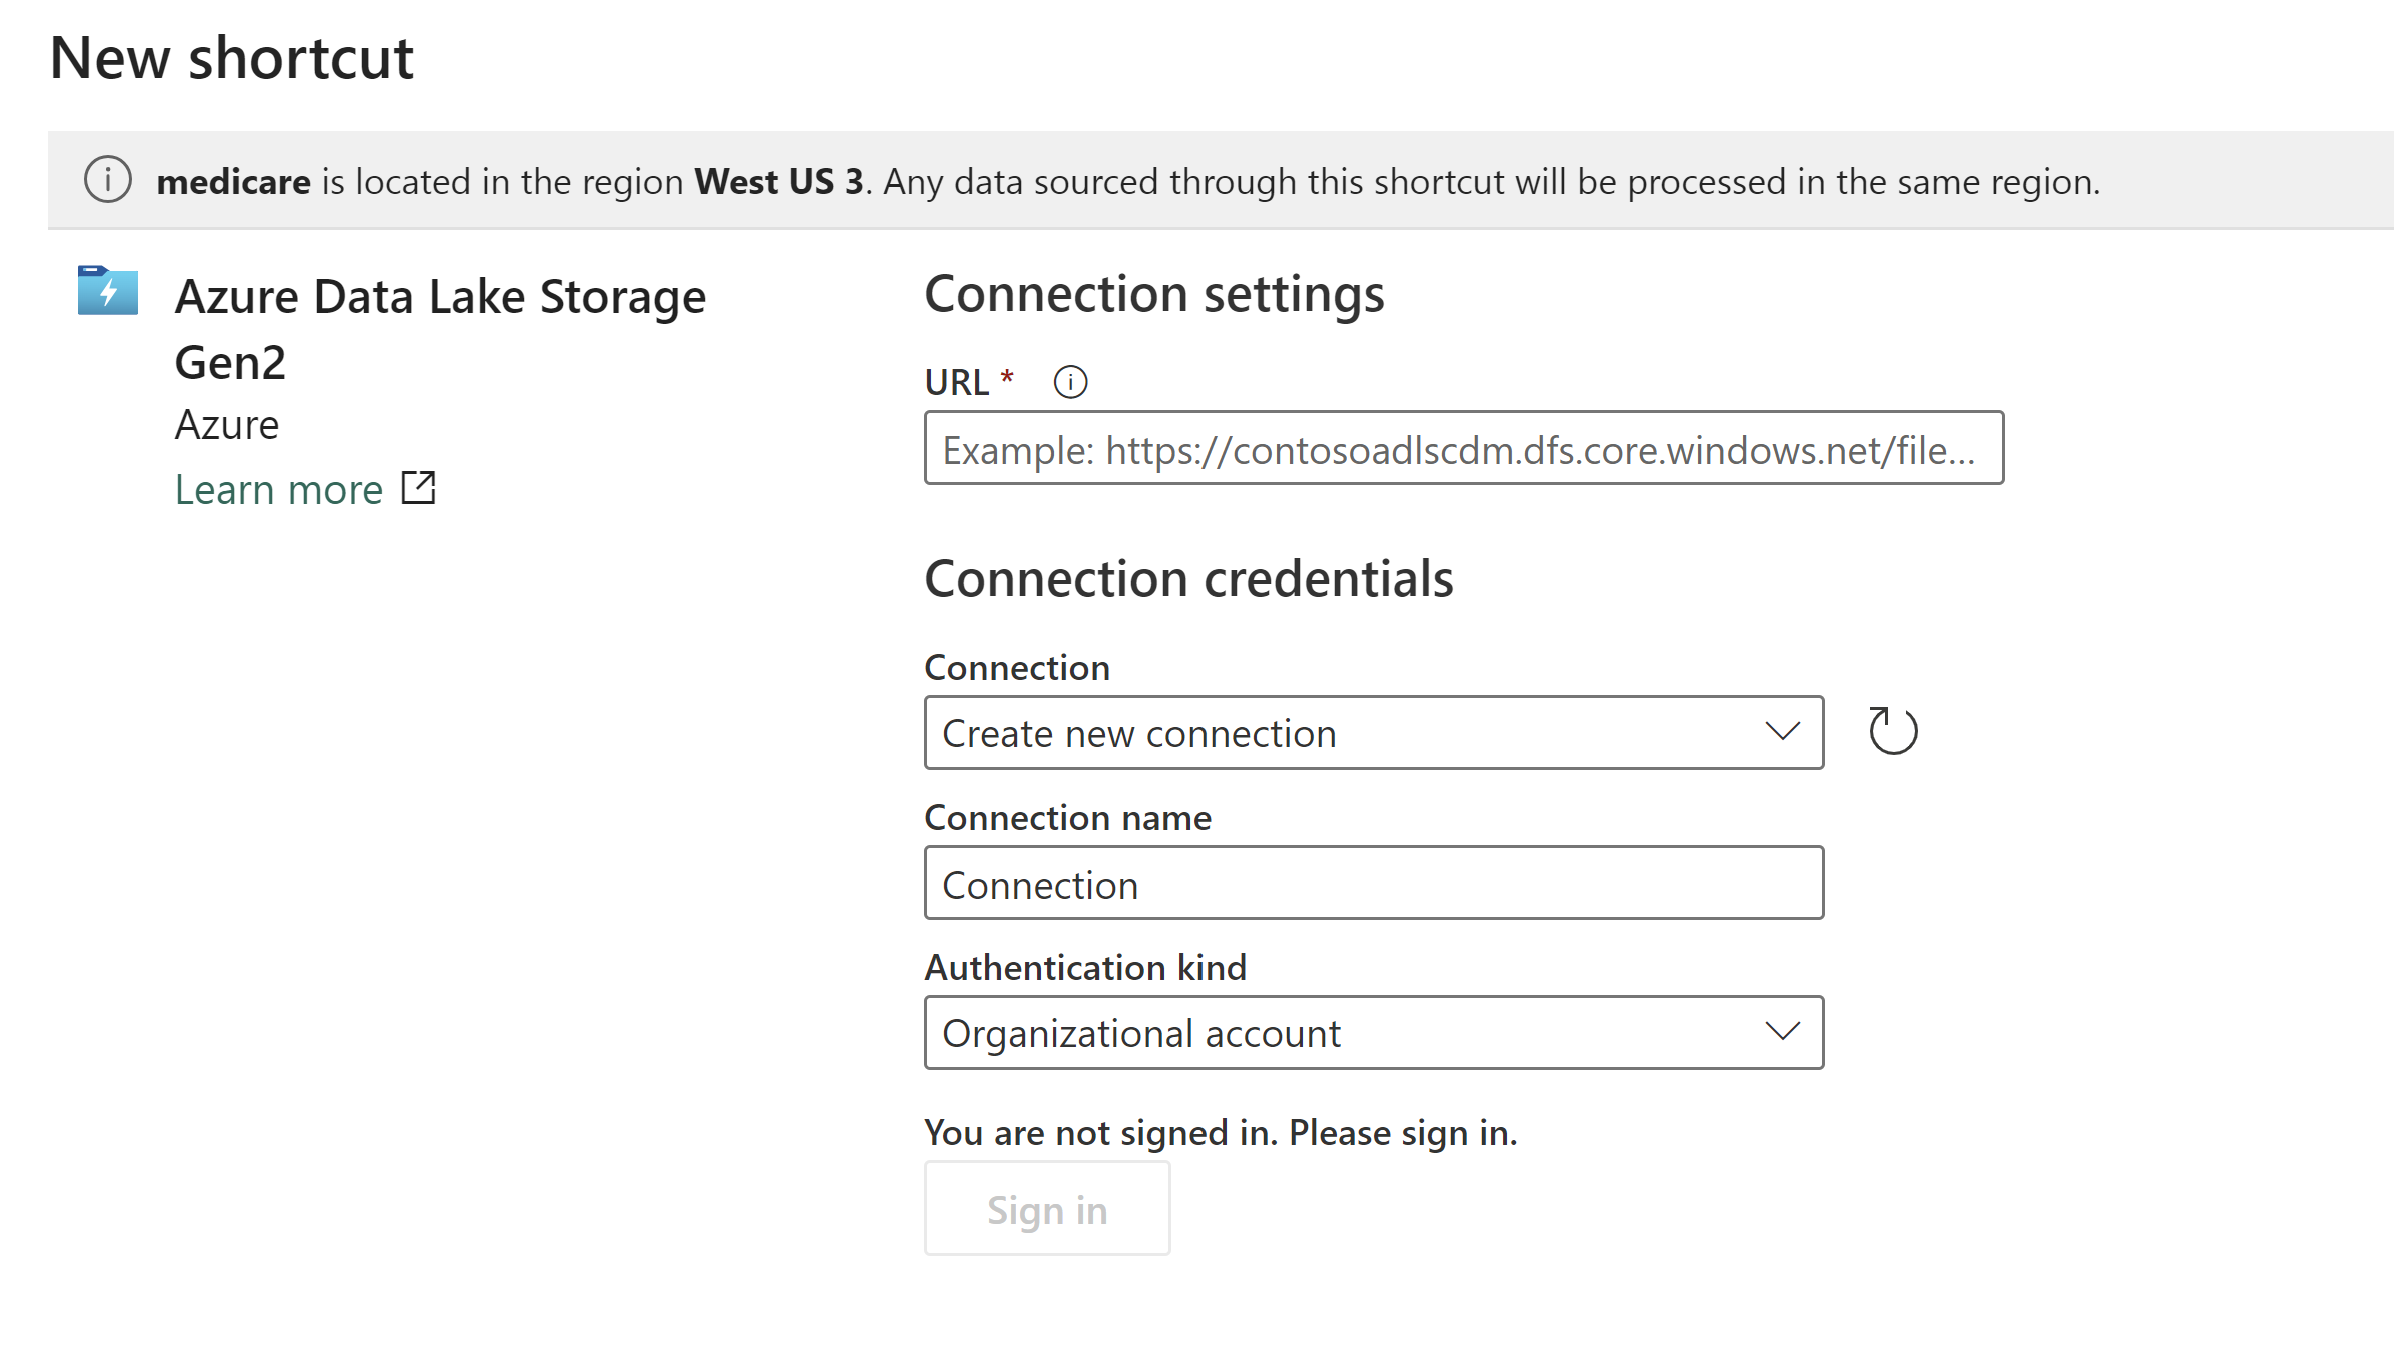
Click on Azure Data Lake Storage Gen2
Now you need to create a connection string
Go back to Azure Storage Explorer and find your gold schema

Right click on a folder and scroll down to properties and select properties
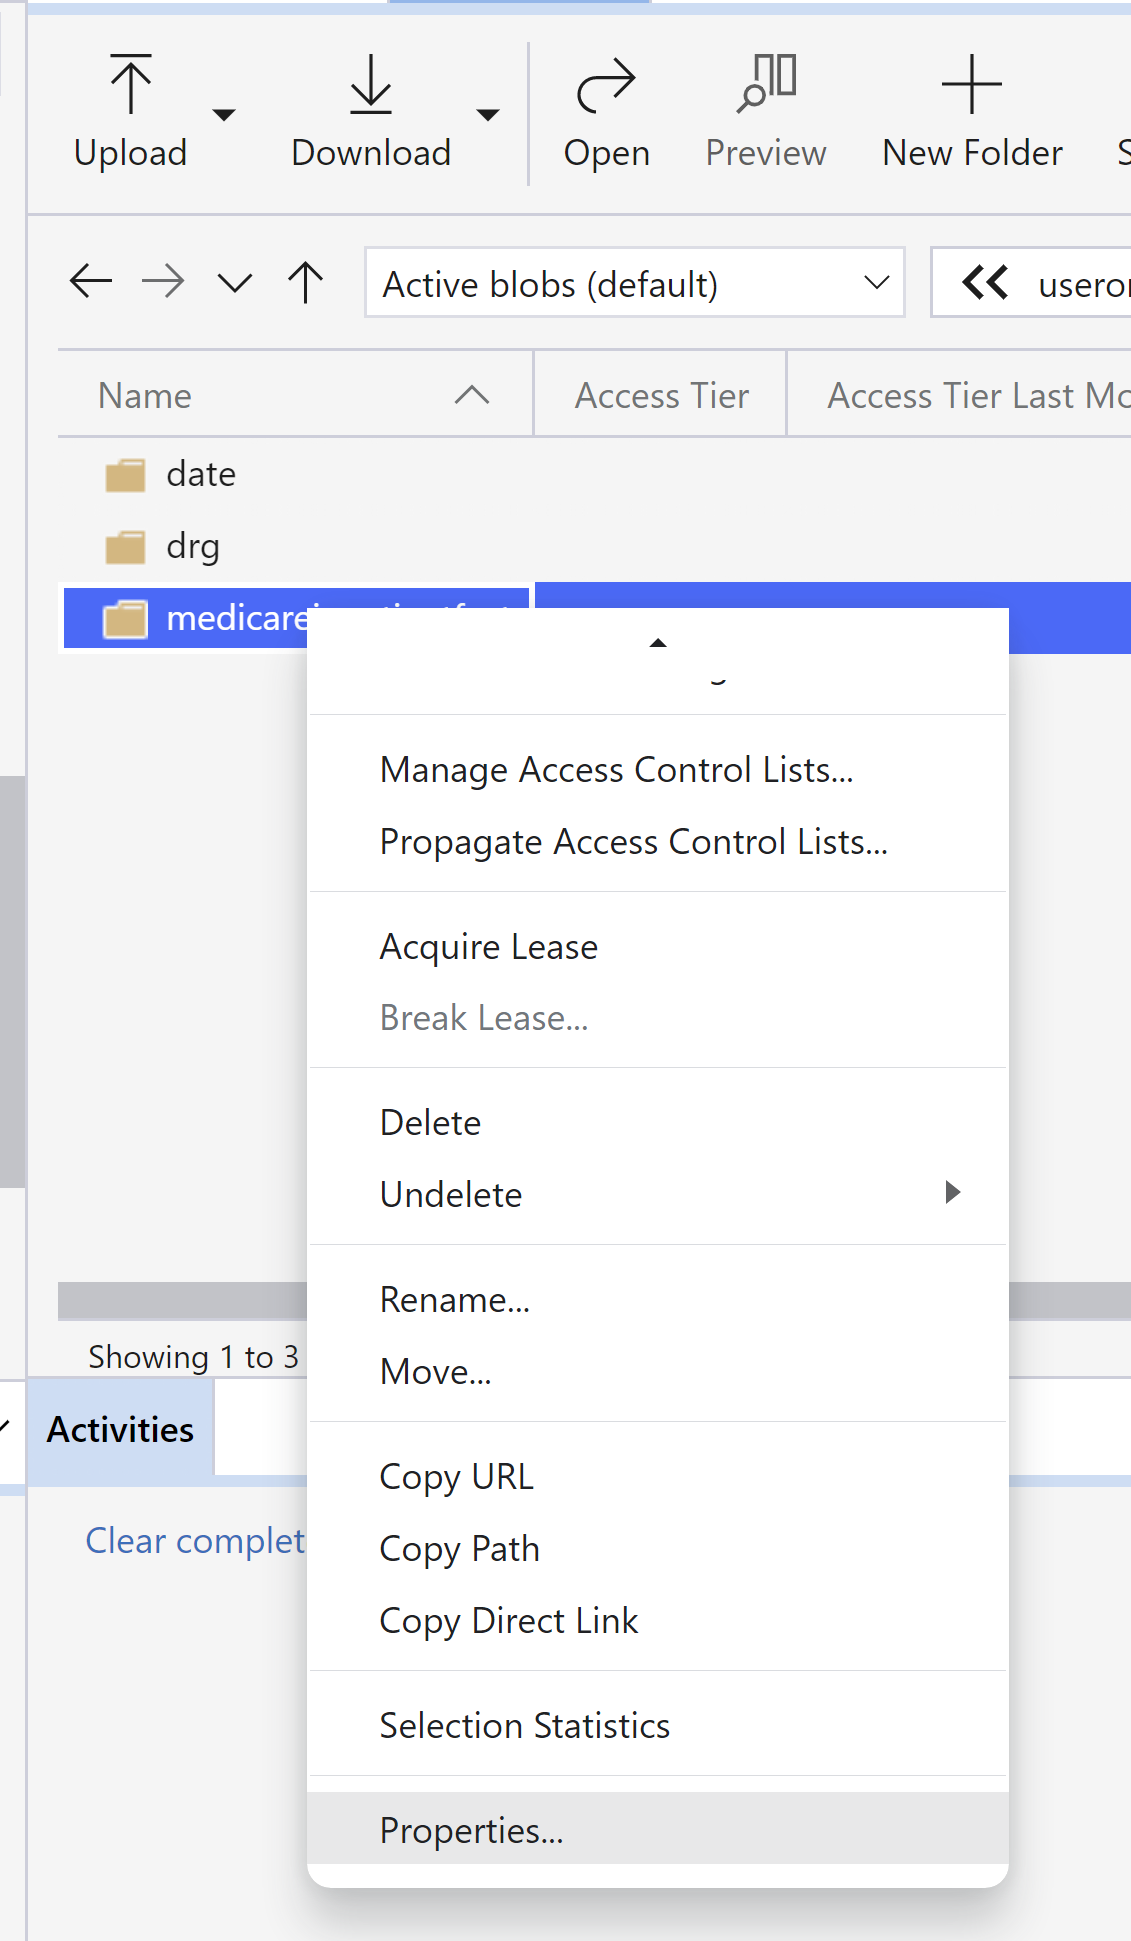
Select the DFS URL
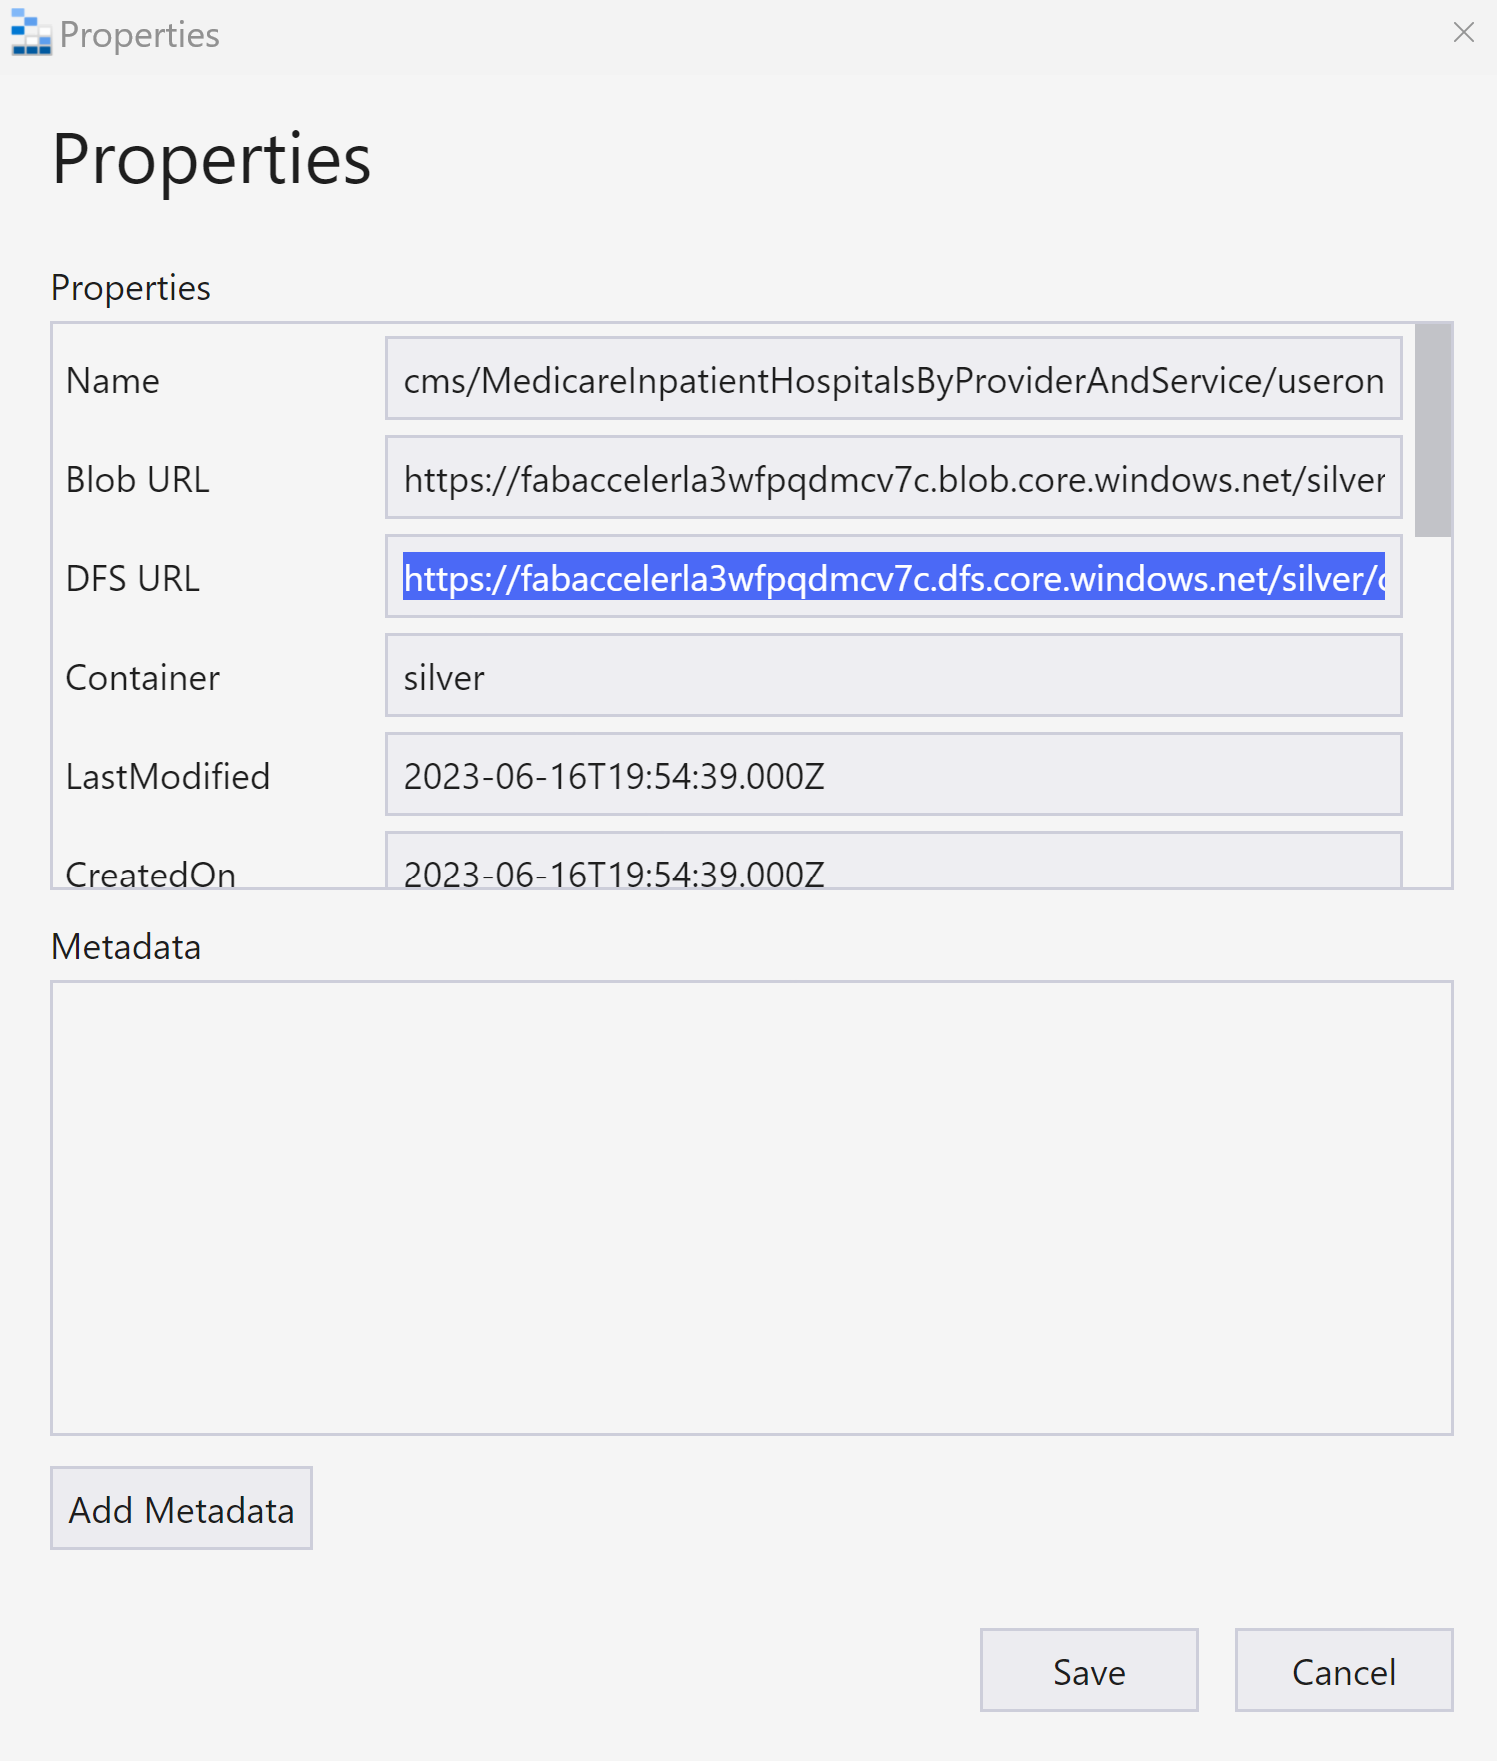
It should look something like this:
https://fabaccelerla3wfpqdmcv7c.dfs.core.windows.net/silver/cms/MedicareInpatientHospitalsByProviderAndService/userone1/gold/medicareinpatientfact
For the URL enter just the storage account
https://fabaccelerla3wfpqdmcv7c.dfs.core.windows.net
Then click Next
In the Shortcut setting enter the Shortcut name (the name of the folder which represents the delta table for example) and the Subpath. Something like this:
Shortcut Name: medicareinpatientfact
URL: /silver/cms/MedicareInpatientHospitalsByProviderAndService/userone/gold/medicareinpatientfact
The path for your folder will vary
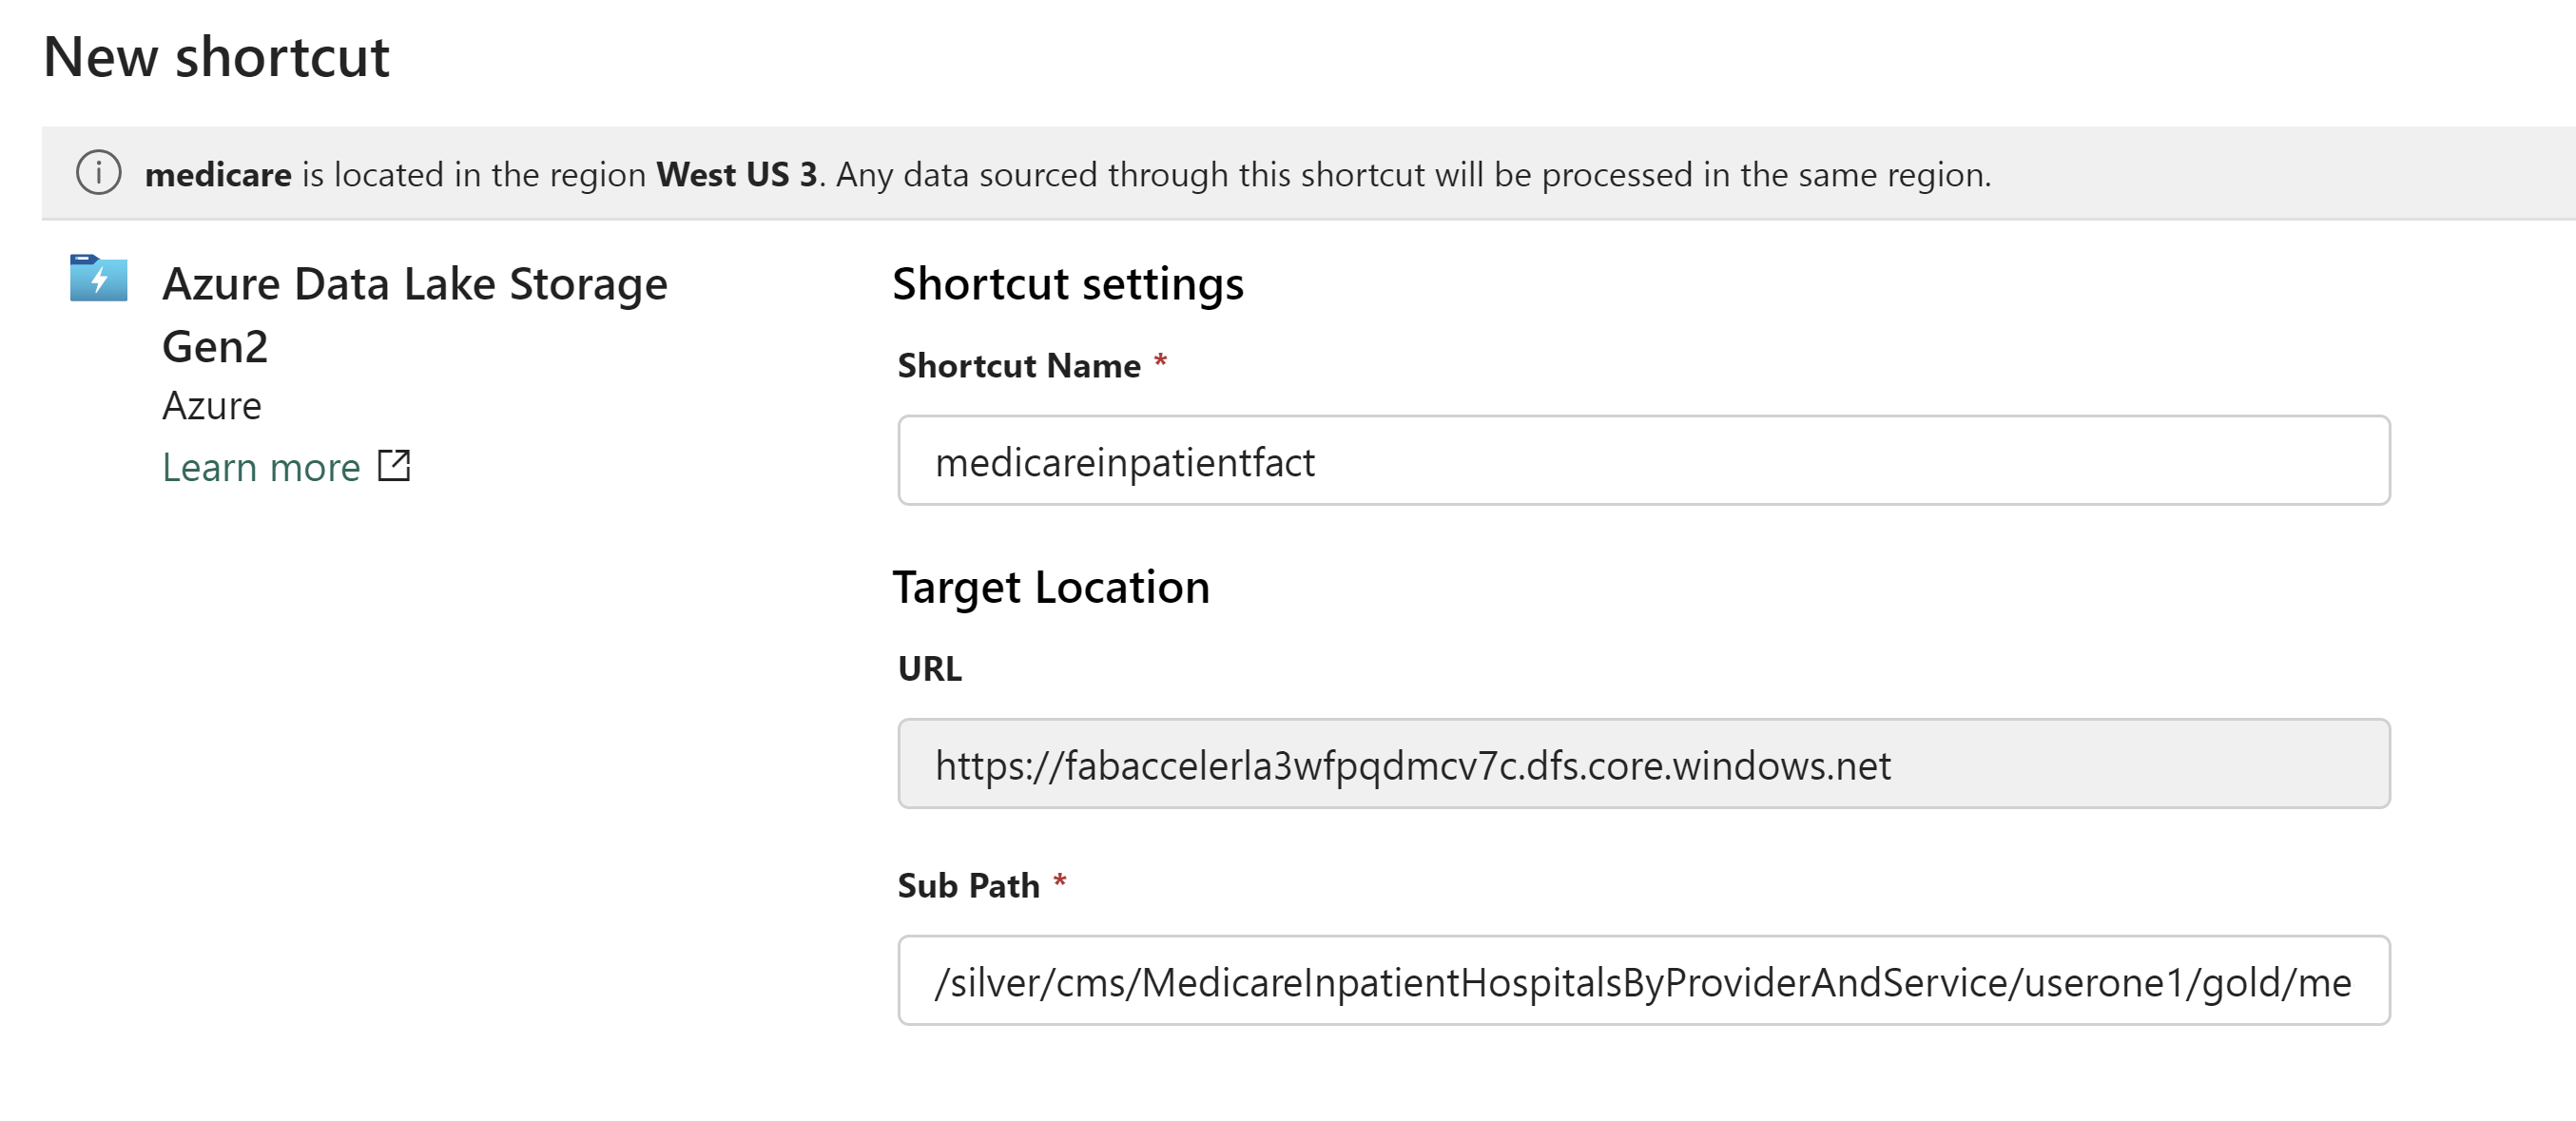
Click Create
Now create shortcuts for the data and drg tables using the same process. The Storage URL will be the same as above and each Subpath will just need the last folder name changed.
You now should have the following 3 tables in your Lakehouse:
While you are in your lakehouse you can go to the top right corner and switch to the SQL Endpoint
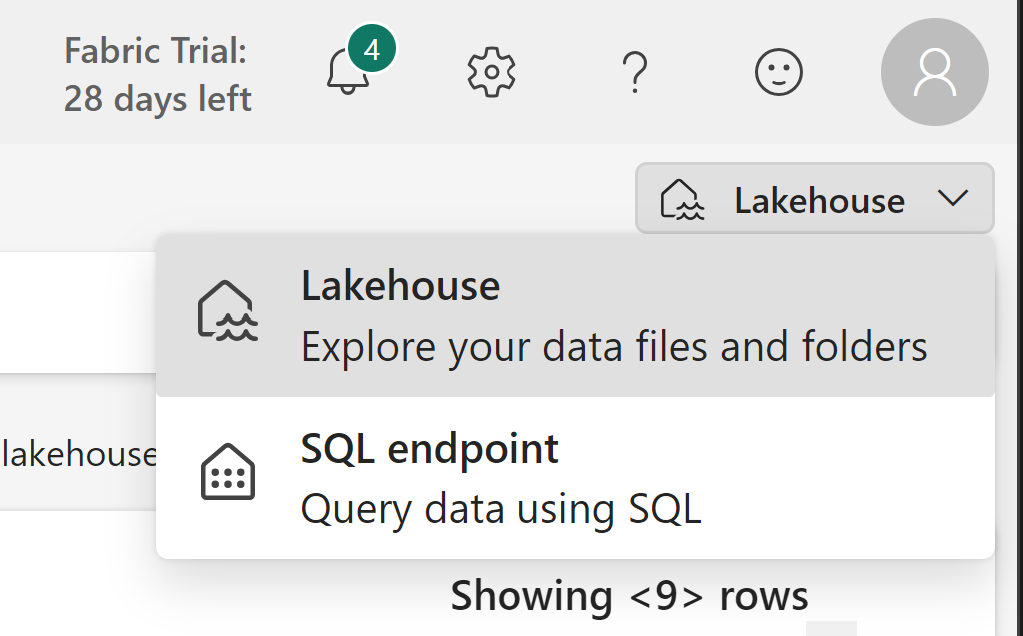
You now should be in the Home screen of the SQL Endpoint

Click on New SQL query and try some SQL statements. These are T-SQL queries like you would run in SQL Server, but you are querying the Delta tables you created shortcuts to in your Lakehouse.
SELECT count(*)
FROM [medicarereports].[dbo].[medicareinpatientproviderfact]
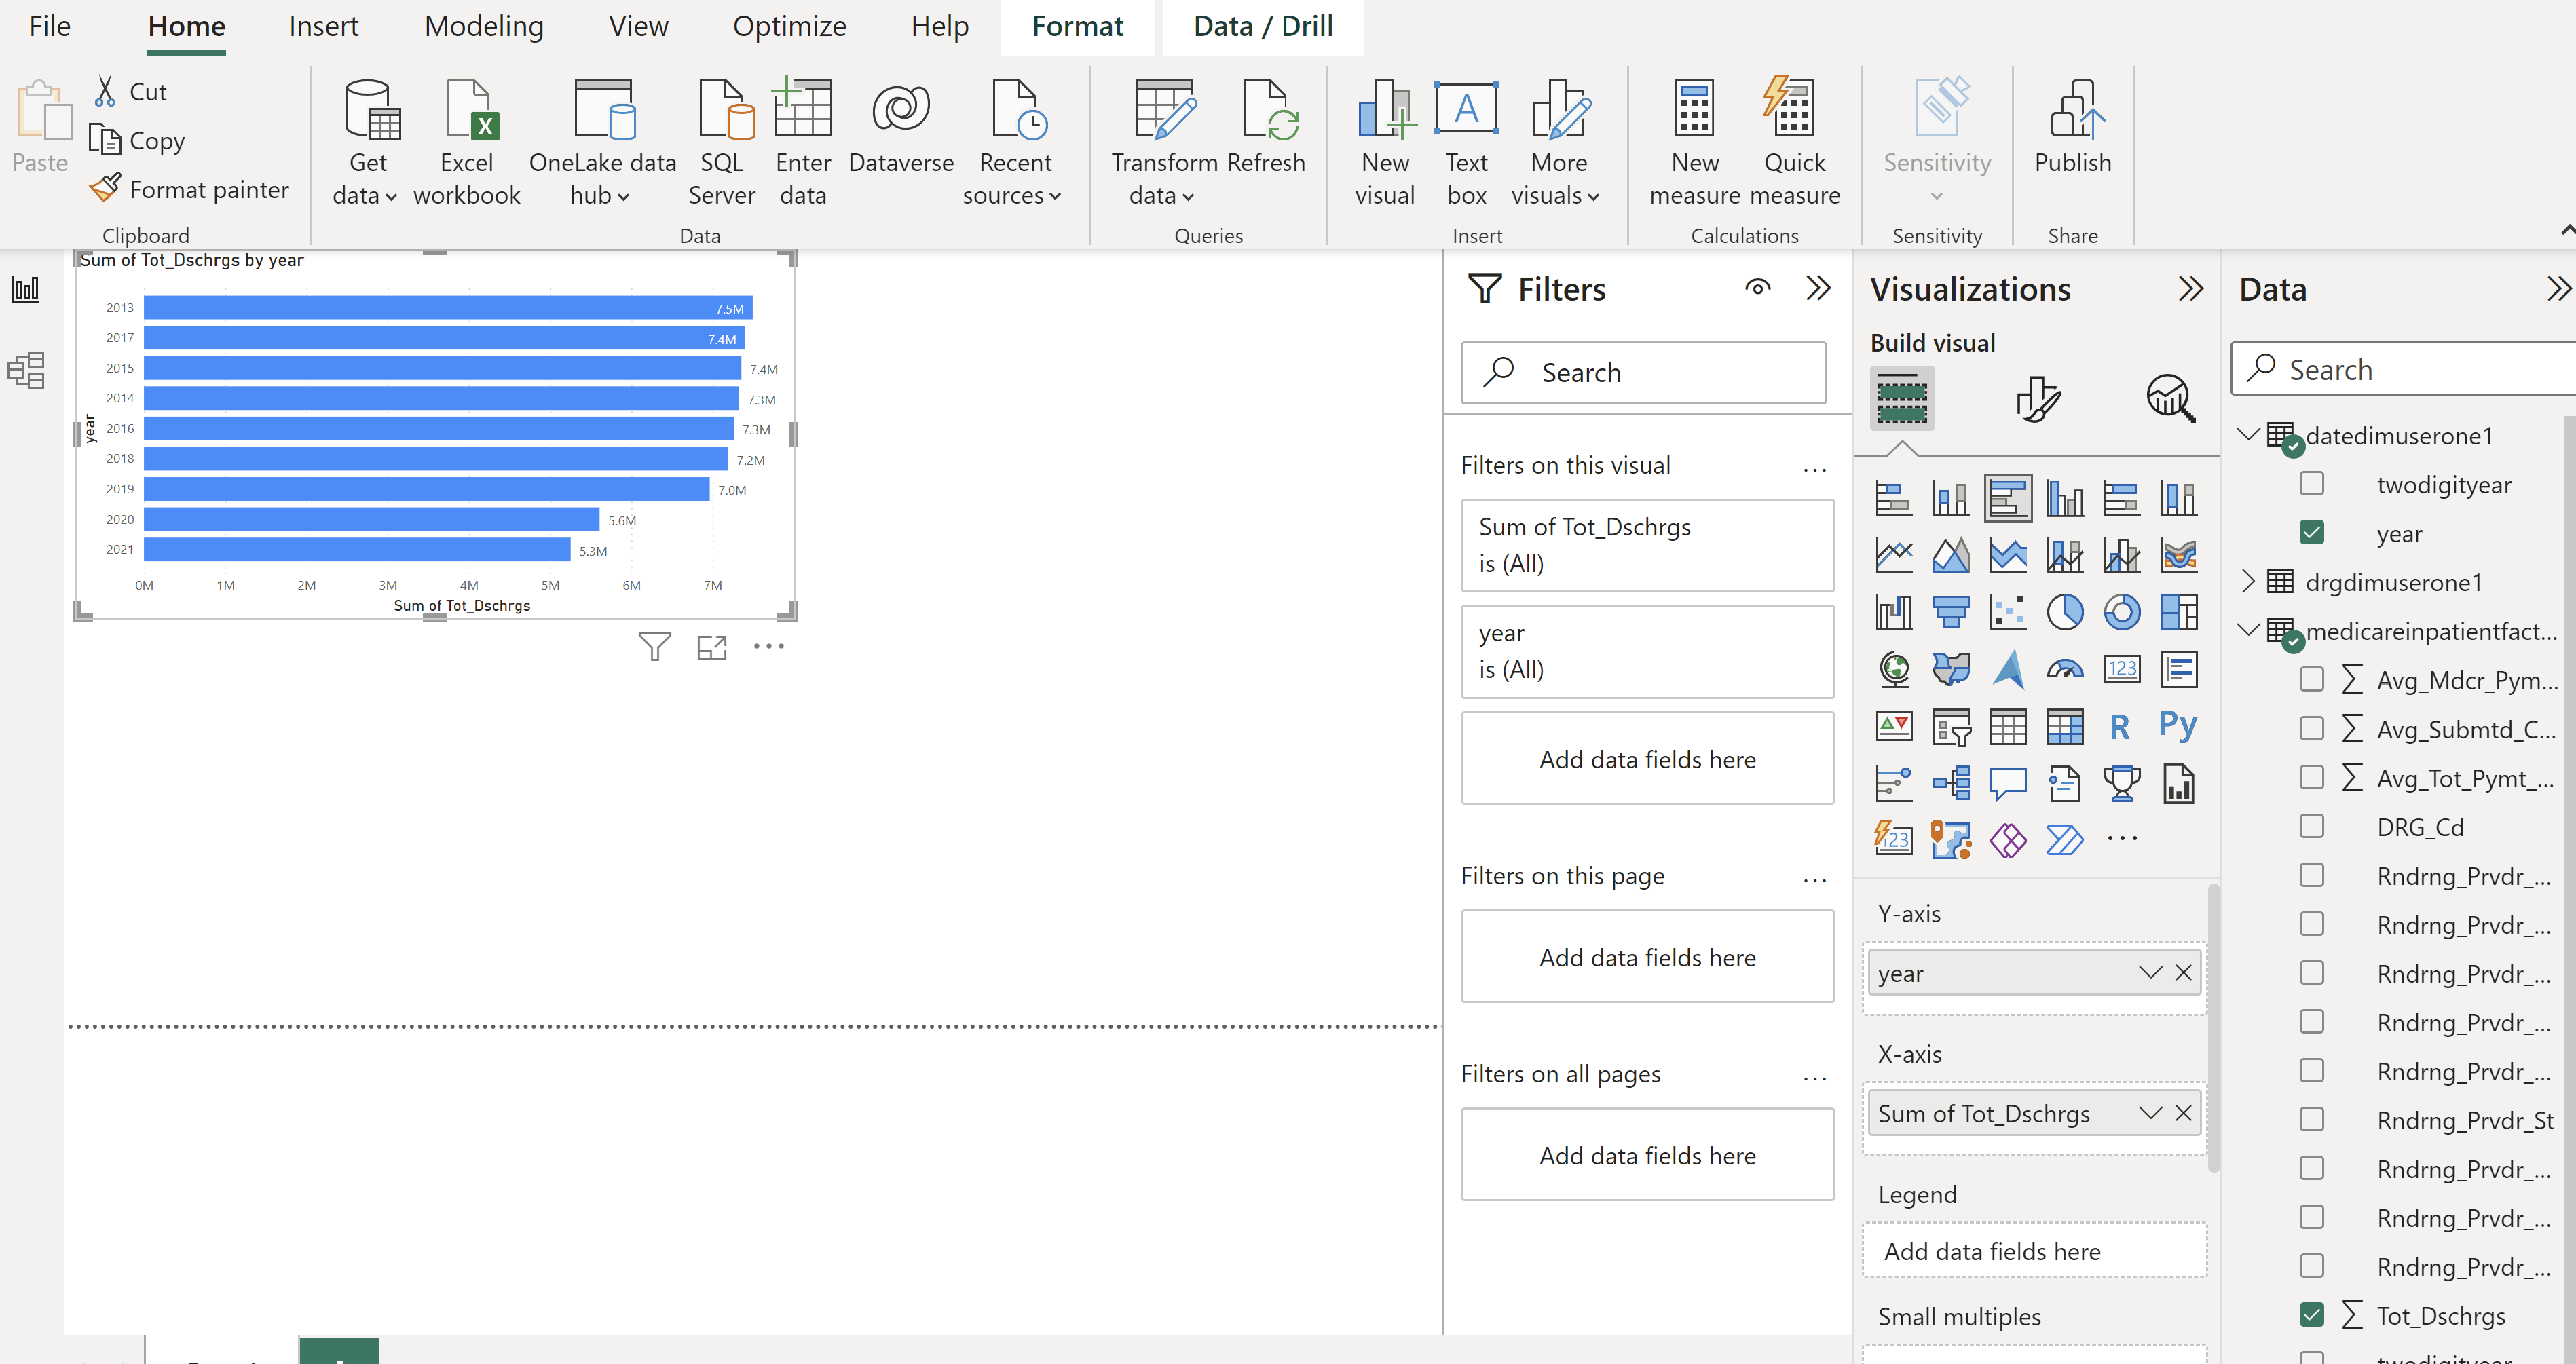
SELECT year, count(twodigityear) as records from MedicareInpatientHospitalsByProviderAndService group by year
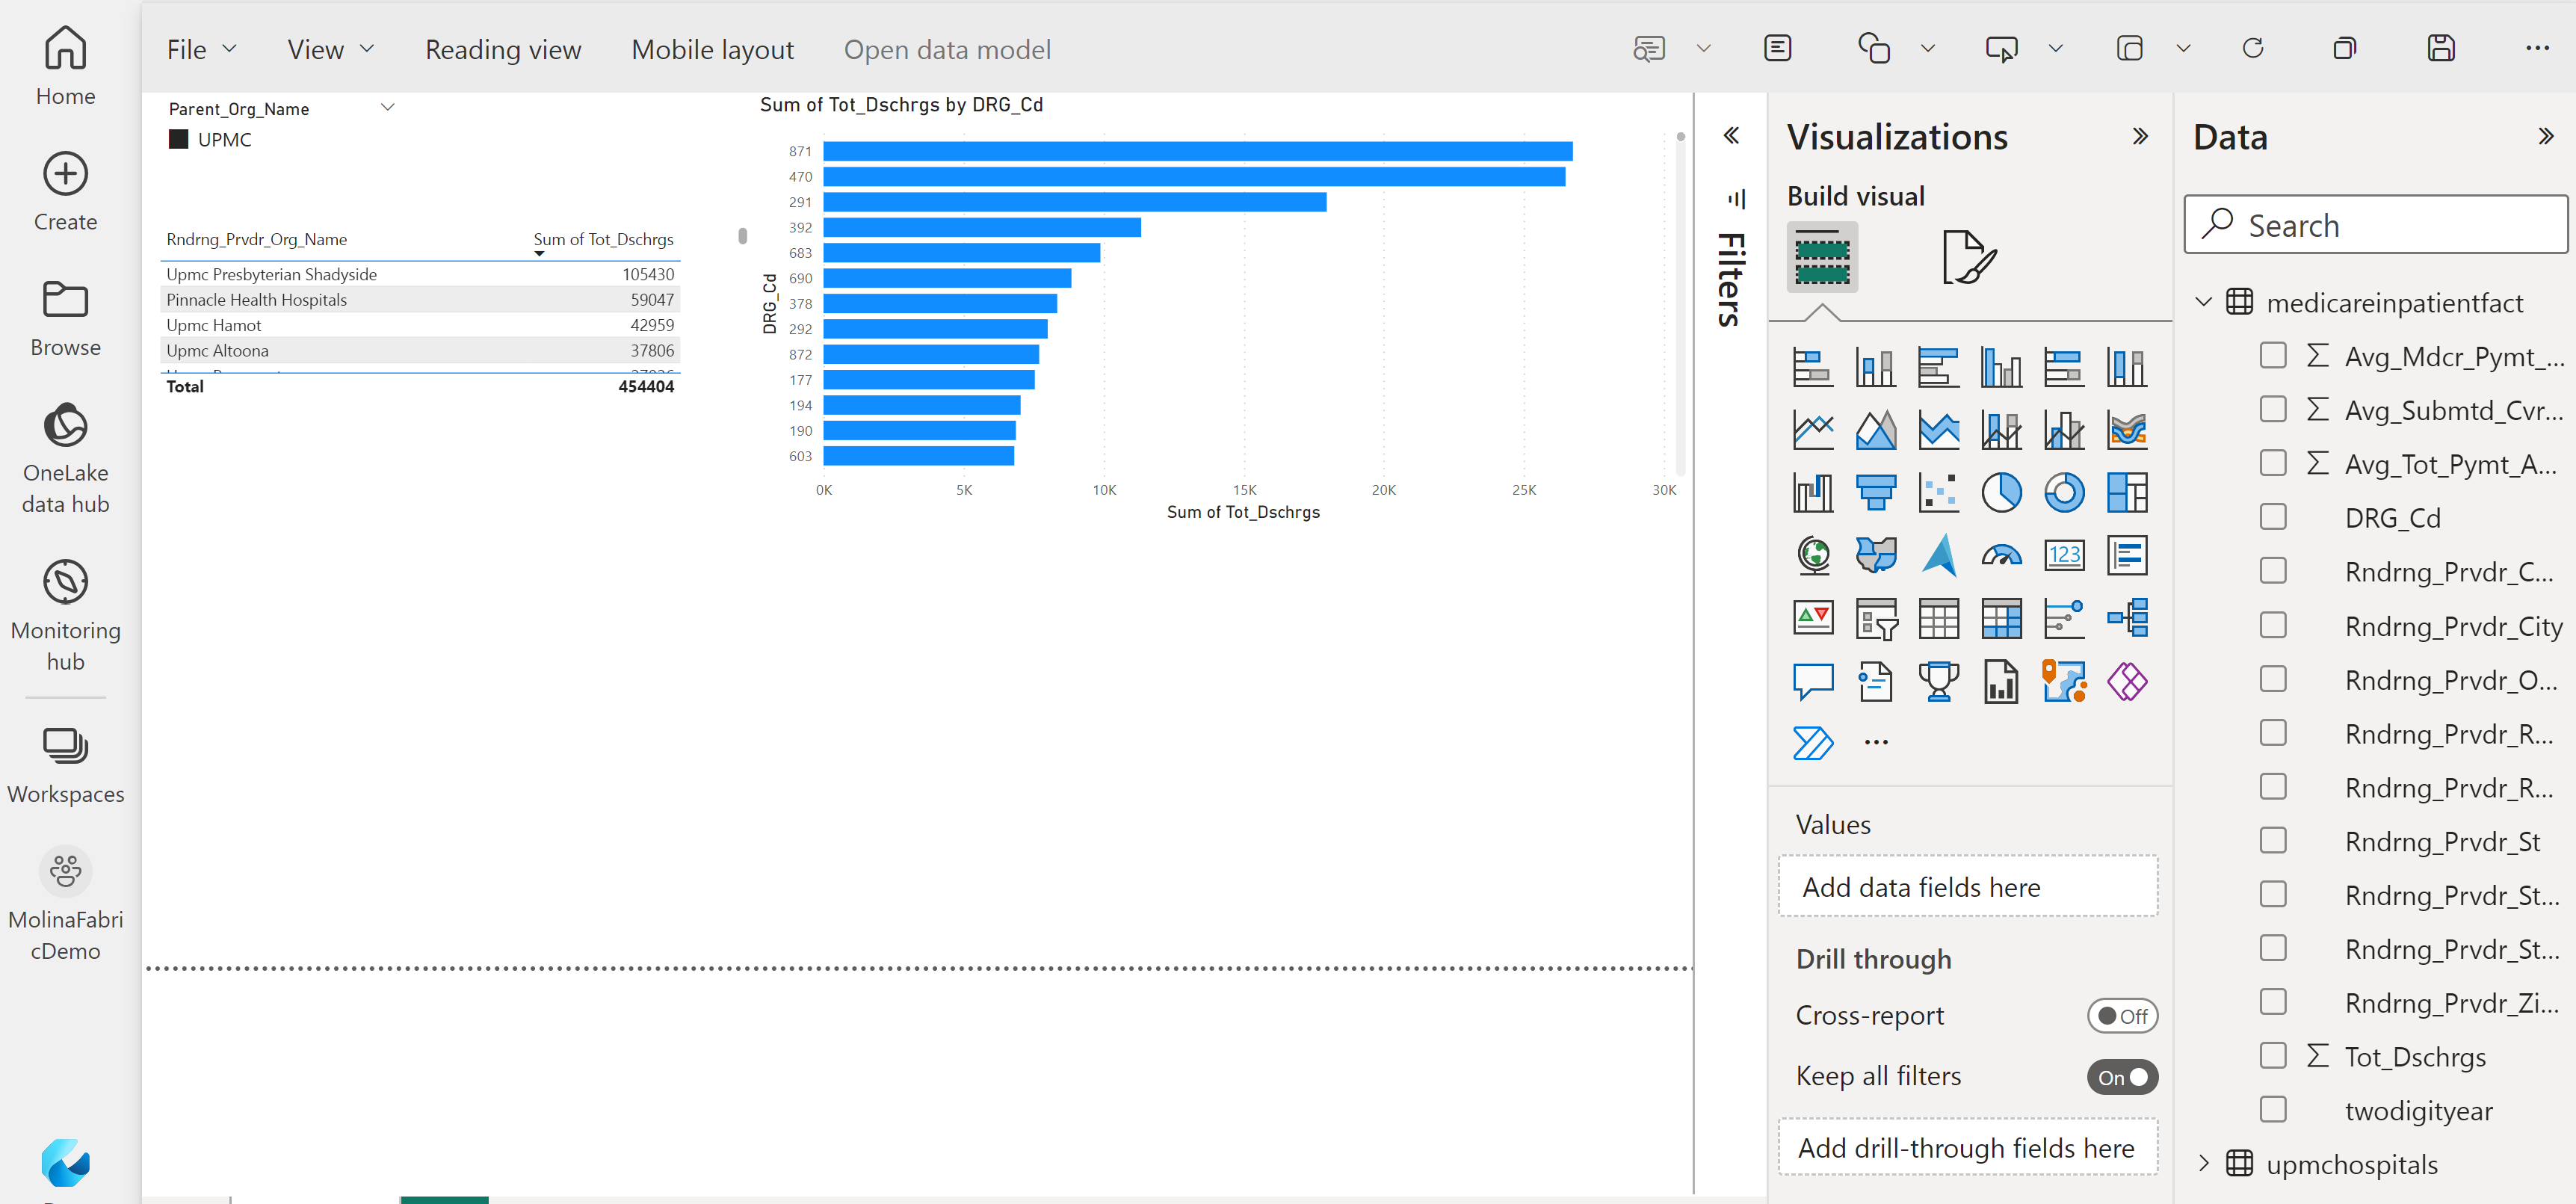
select [Rndrng_Prvdr_CCN],[Rndrng_Prvdr_Org_Name], sum(Tot_Dschrgs) AS Discharges from medicareinpatienthospitals where [Rndrng_Prvdr_Org_Name] like ('%Upmc%') group by [Rndrng_Prvdr_CCN], [Rndrng_Prvdr_Org_Name] order by Discharges desc
This last query was used to create a list of UPMC hospitals. We will now use a csv of that list to create a personal Delta table back in our Lakehouse.
Go to the top right corner and switch to the Lakehouse
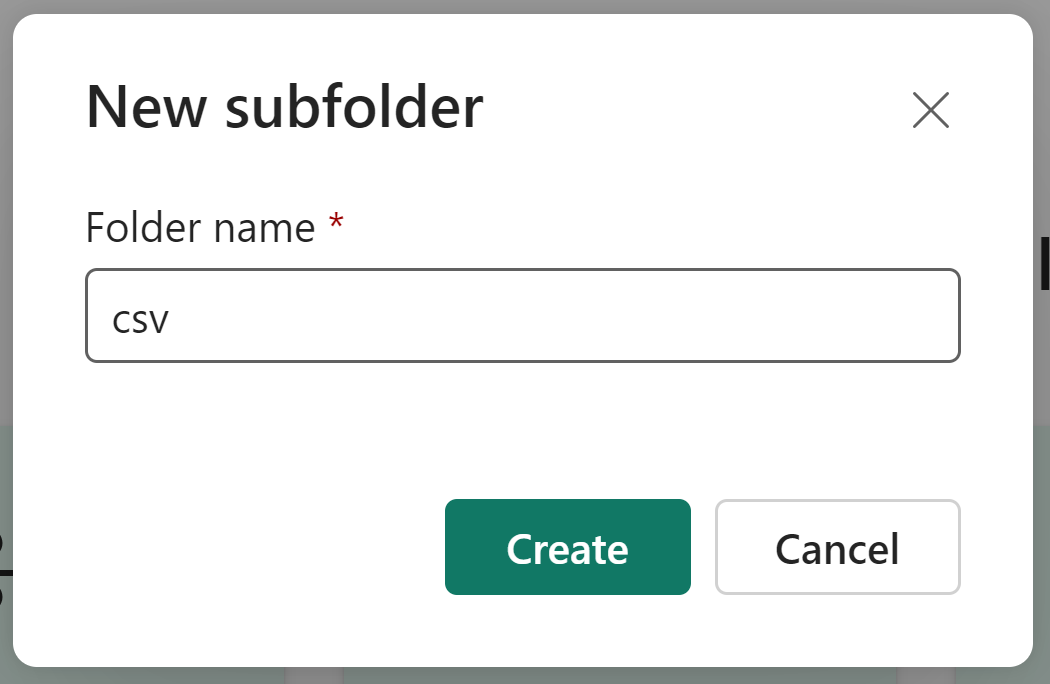
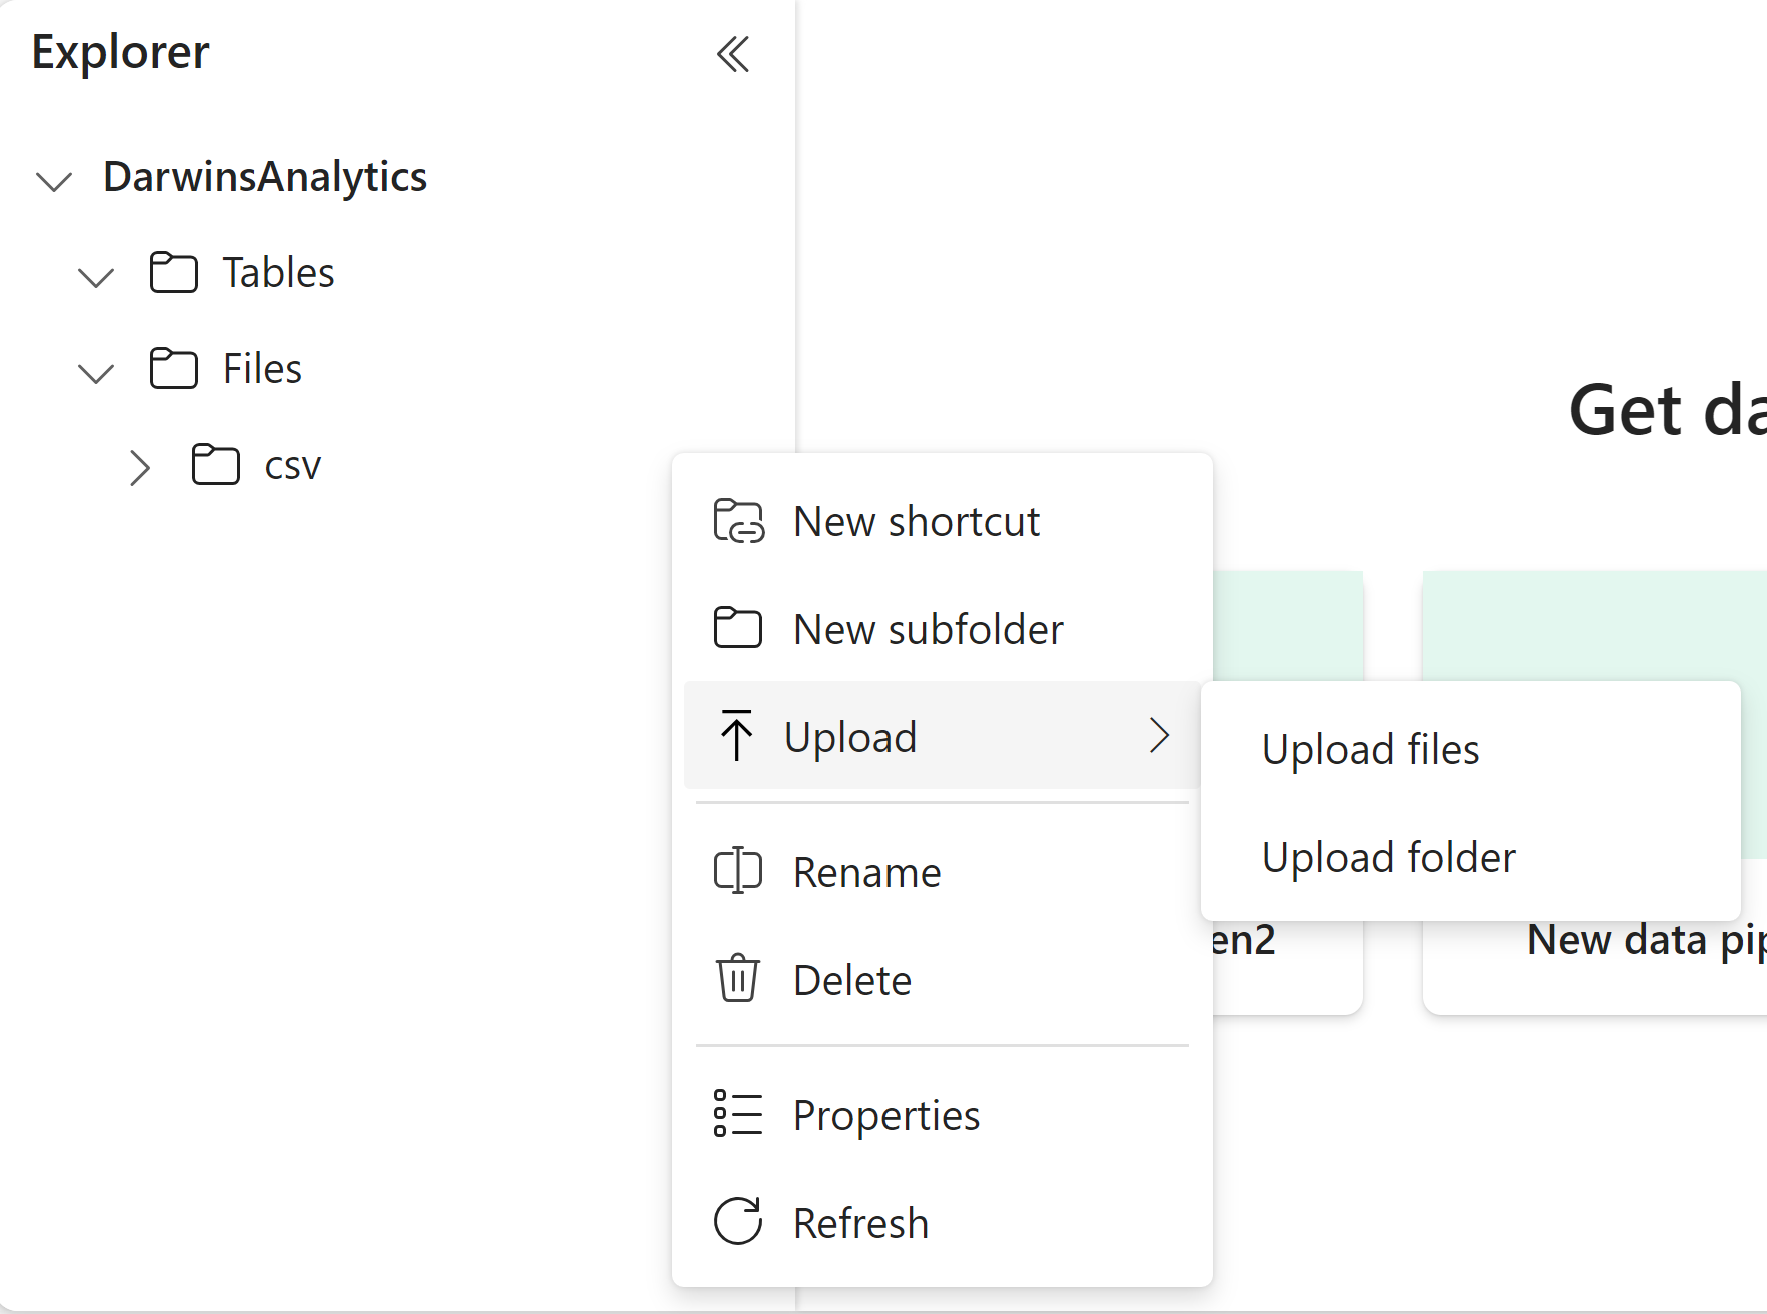
Click on the three dots next to Files and click New subfolder
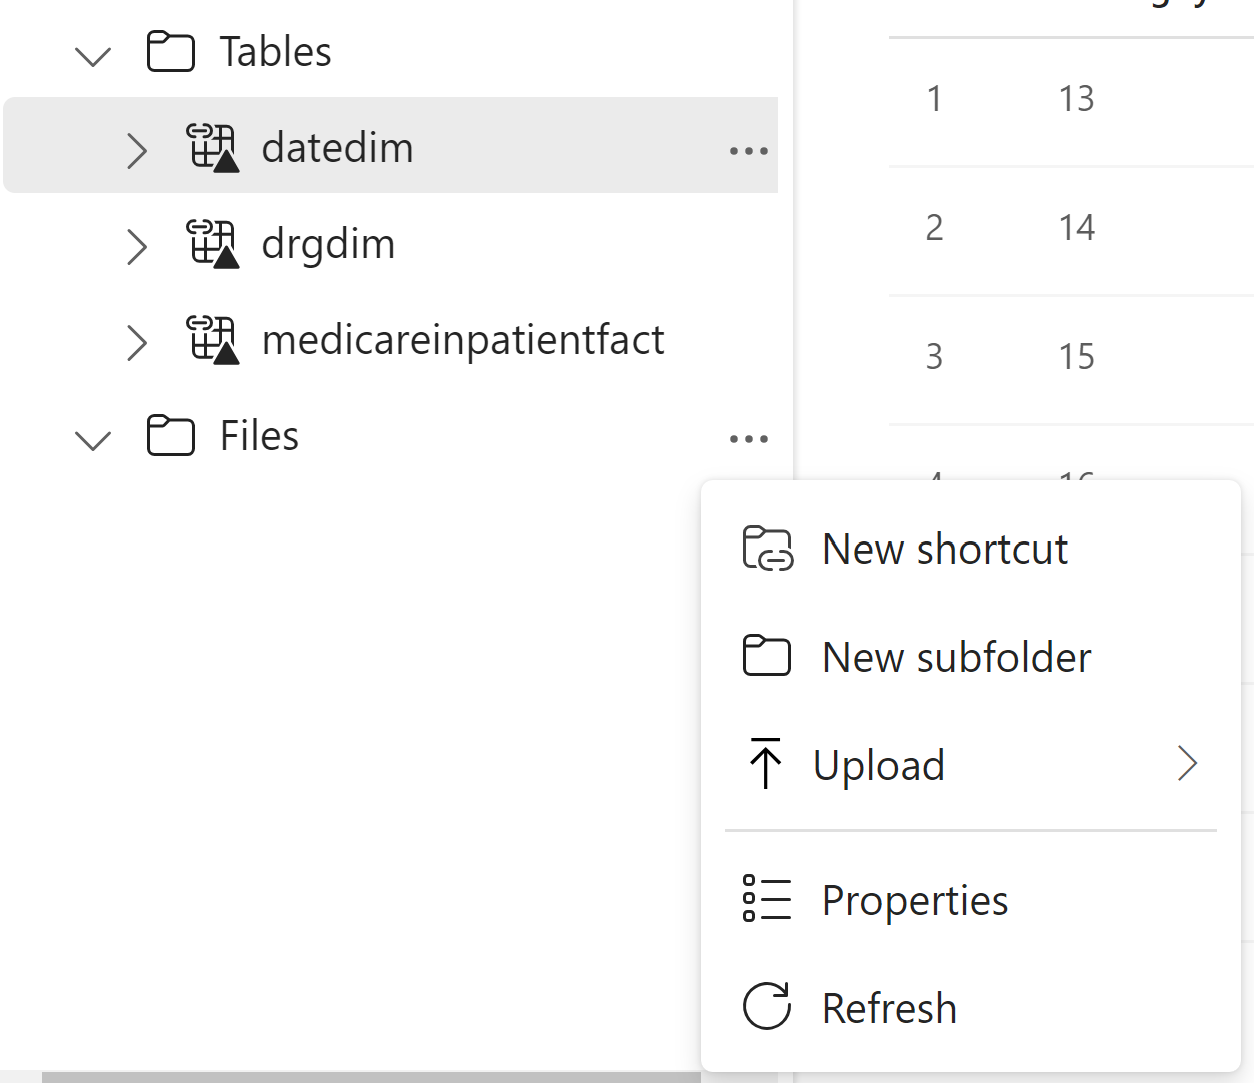
Name the Subfolder csv
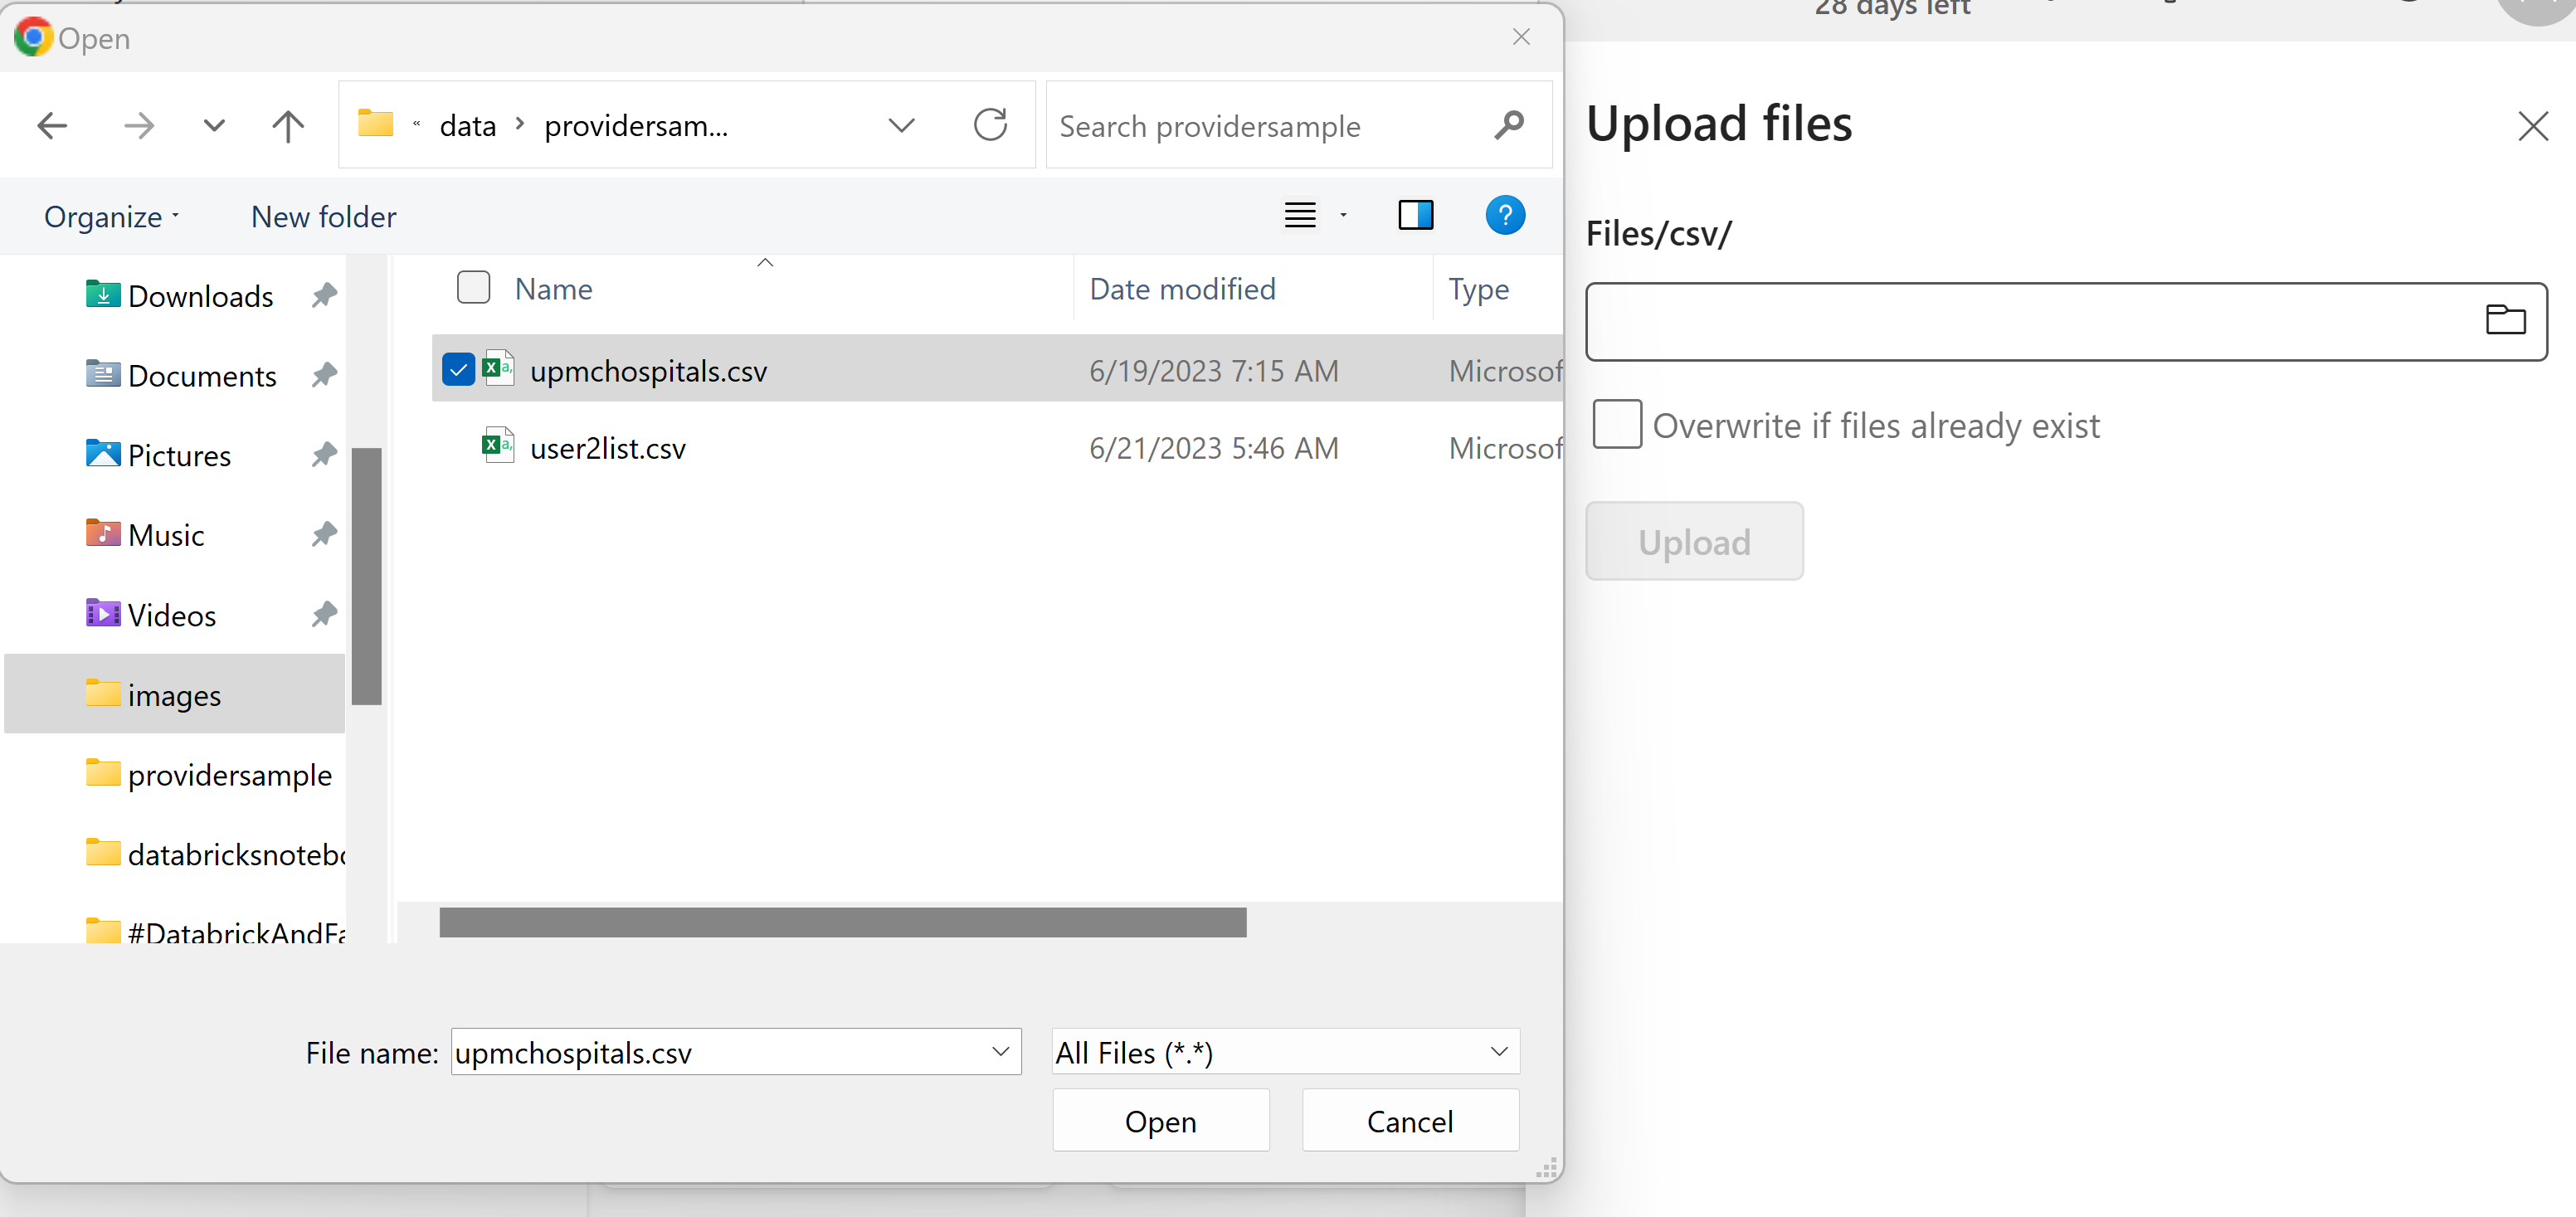
Click on the three dots next to the new csv subfolder you just created. Click Upload>Upload files.
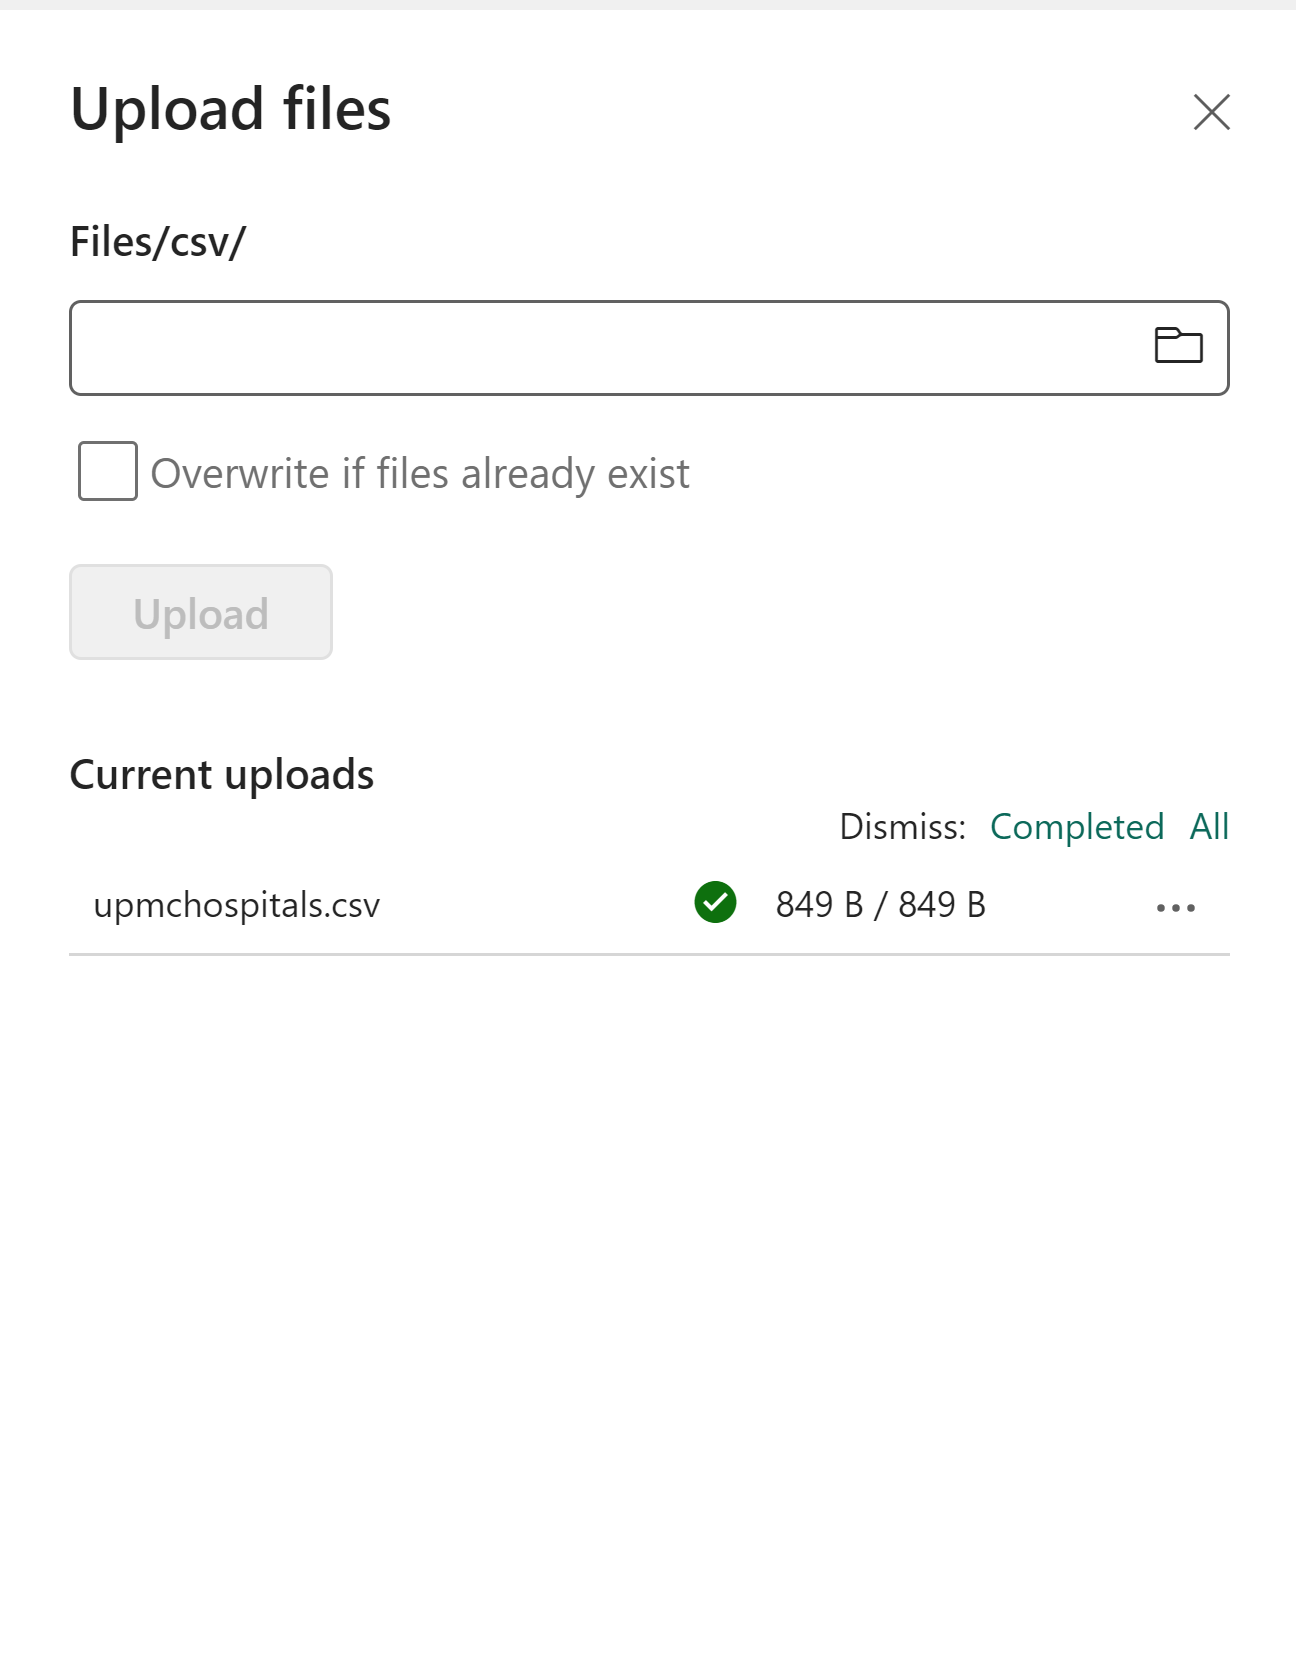
Click on the fold icon in the dropdown. Navigate to the upmchospitals.csv that was downloaded by your clone or download of this GitRepo. Click Open. Click Upload.
Click the x in the top right corner
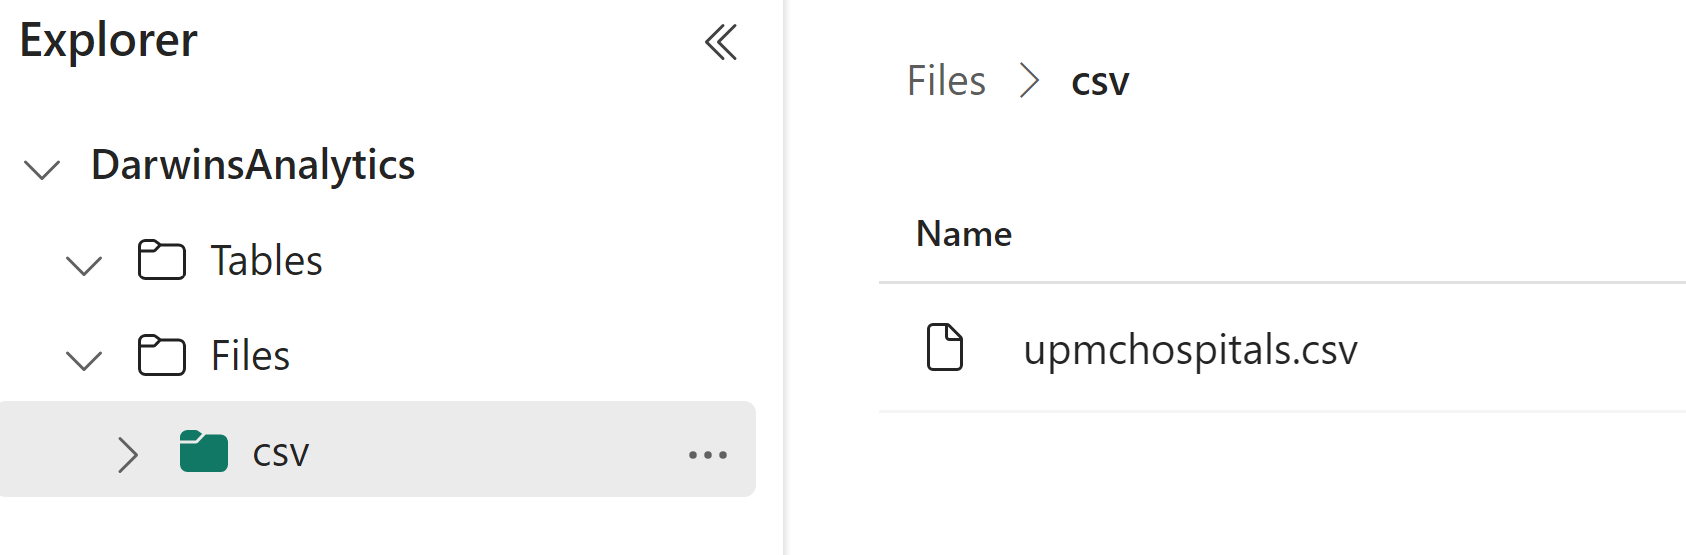
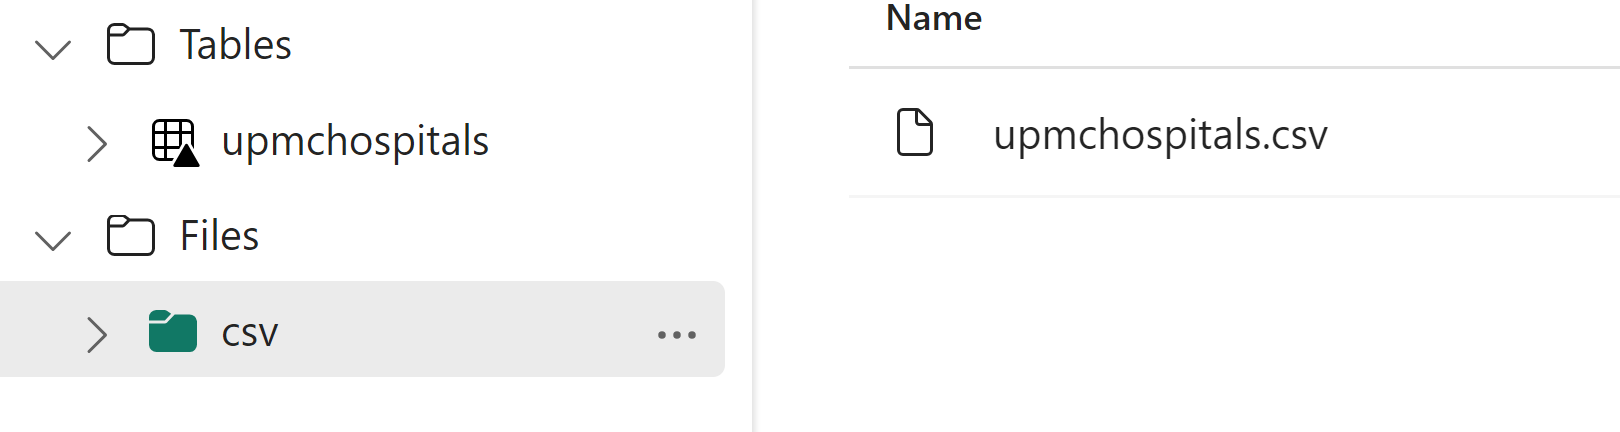
The uploaded csv should now be in the csv subfolder
Right click on the three dot by the csv file and select Load to Tables
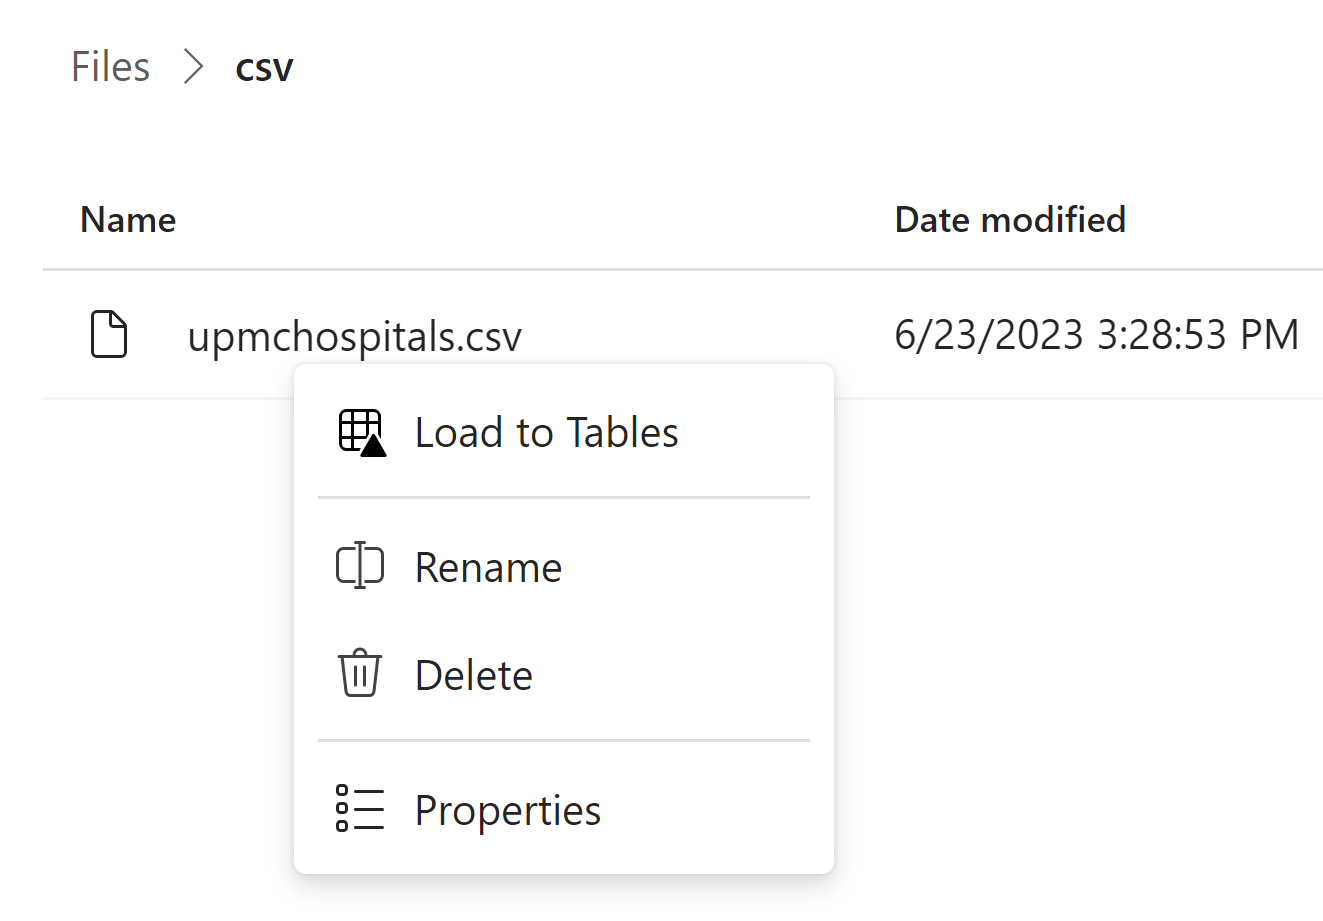
Go with the default name and click Confirm
This process creates a new Delta table in the Lakehouse from the csv in Files. This also works with Parquet files.
Go to the top right corner and switch to the SQL Endpoint
You now should be in the Home screen of the SQL Endpoint
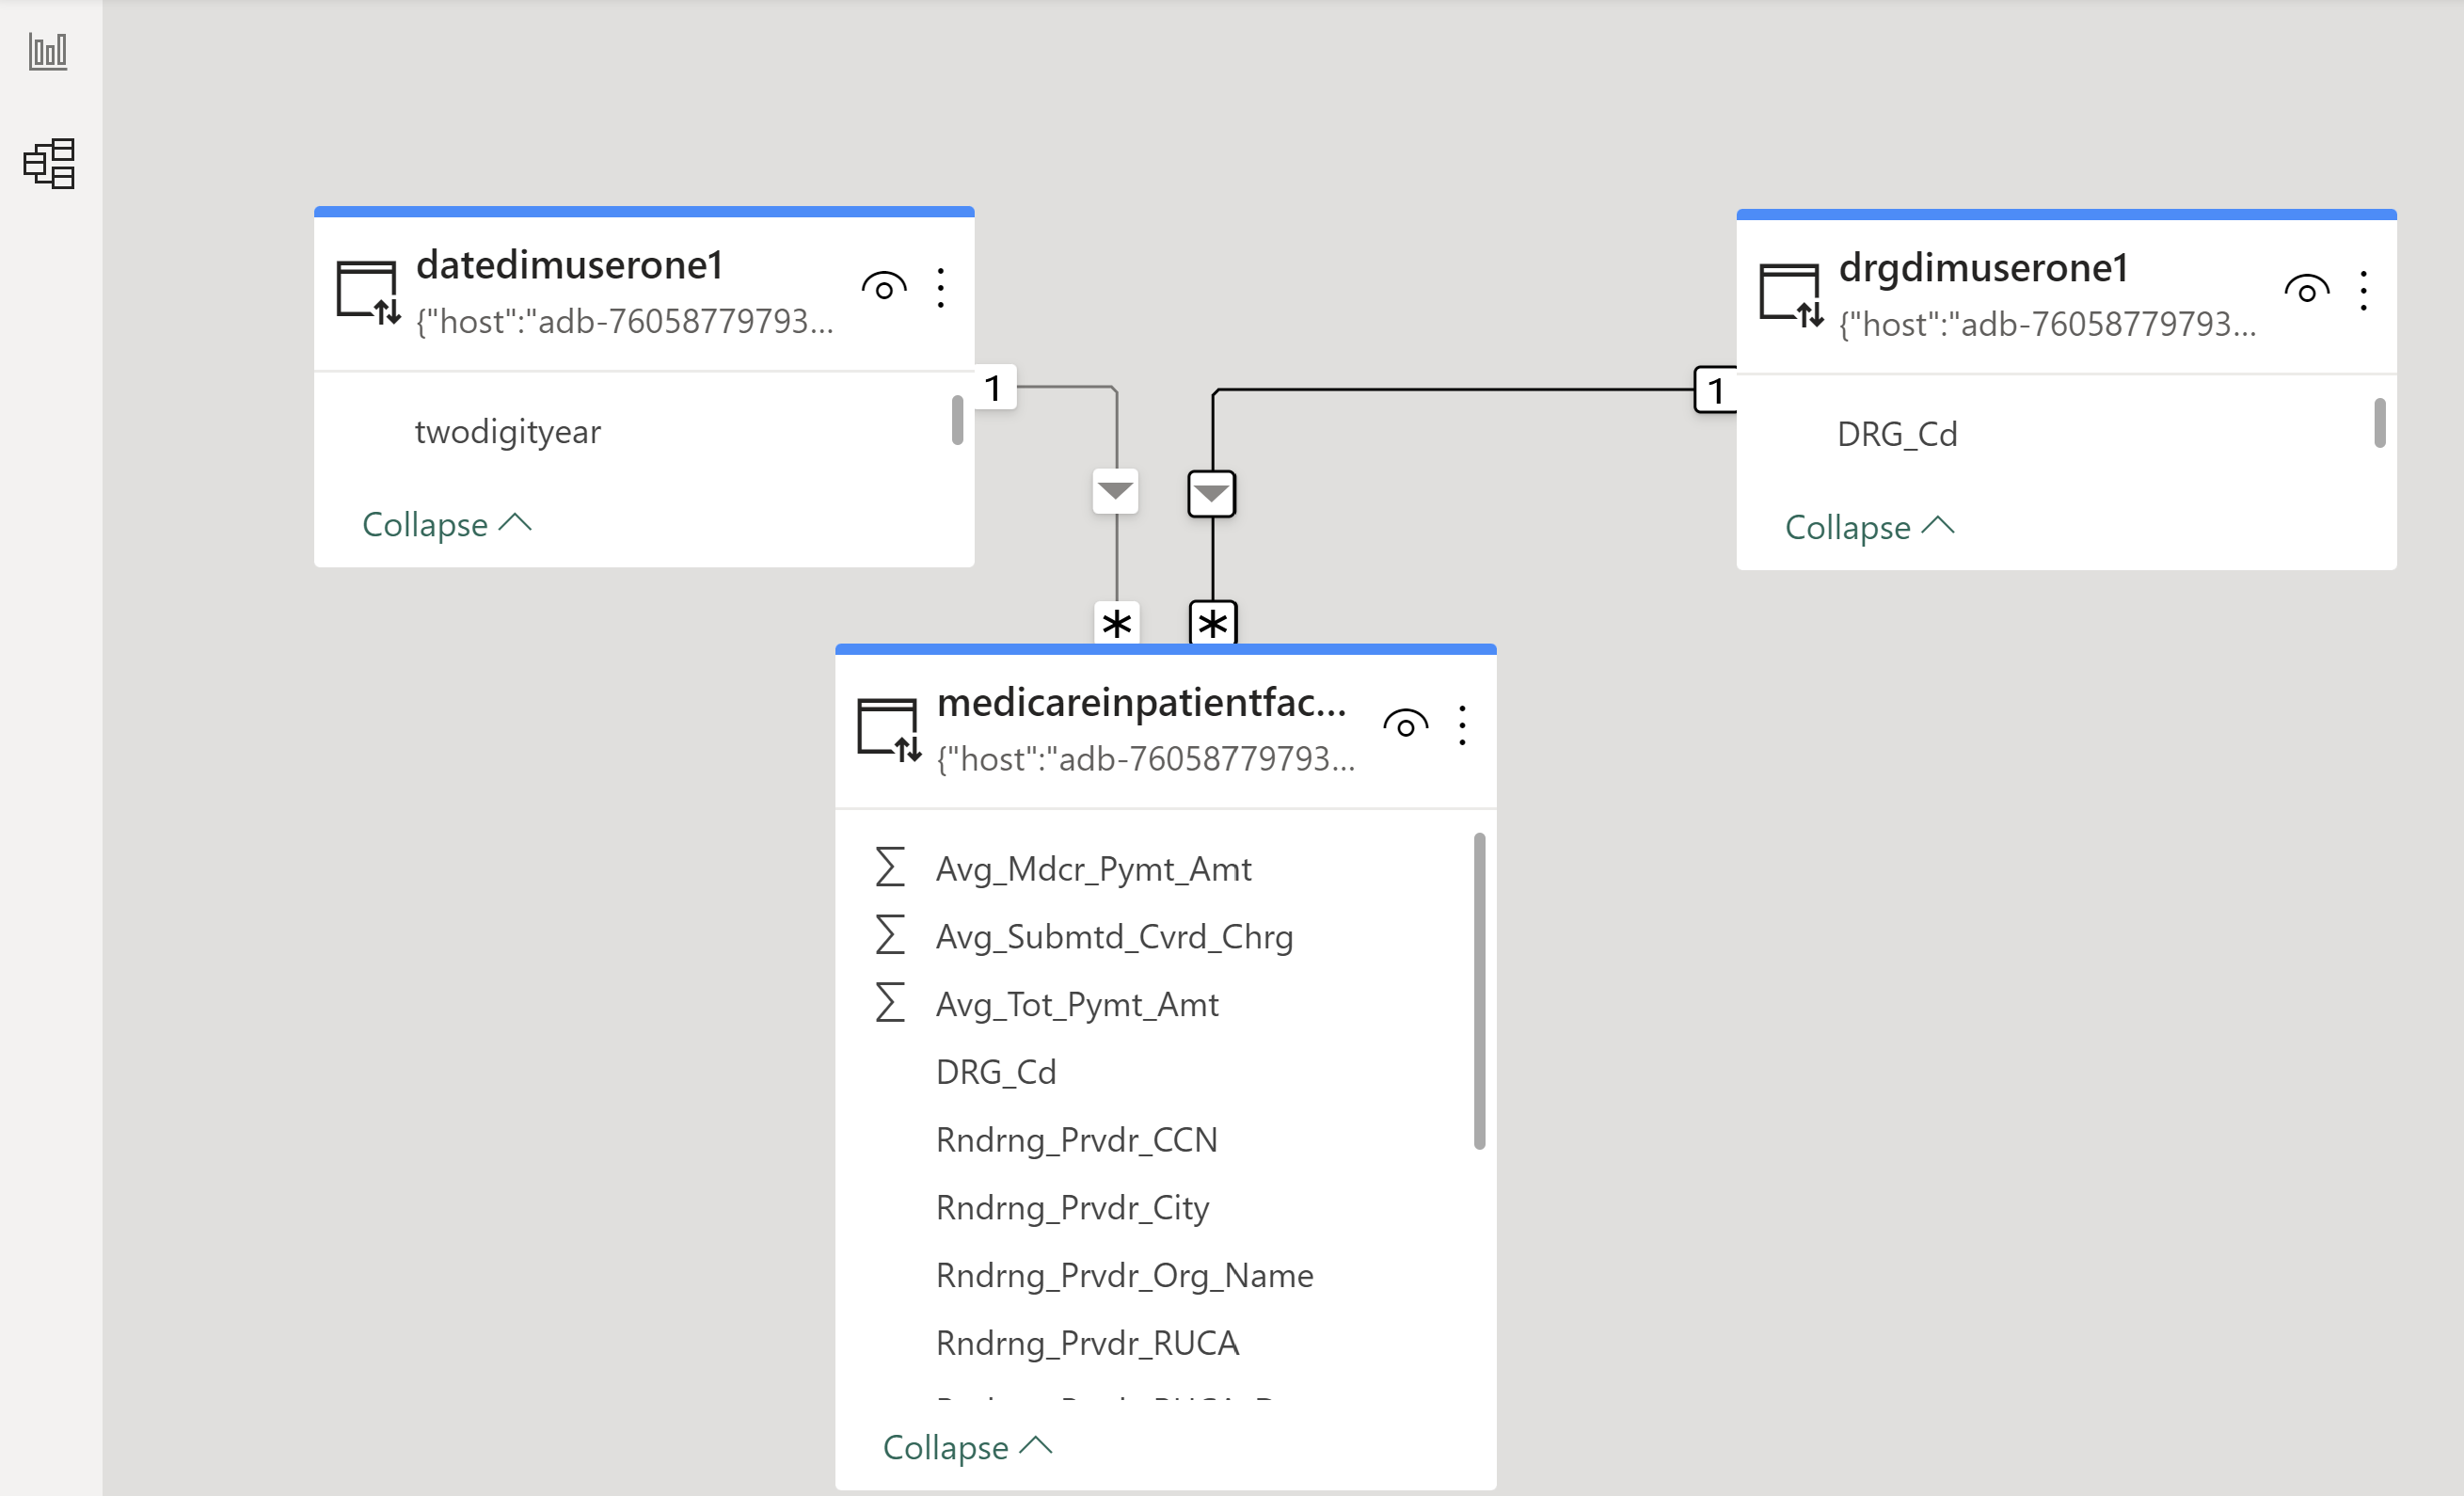
Click on Model on the bottom of the UI
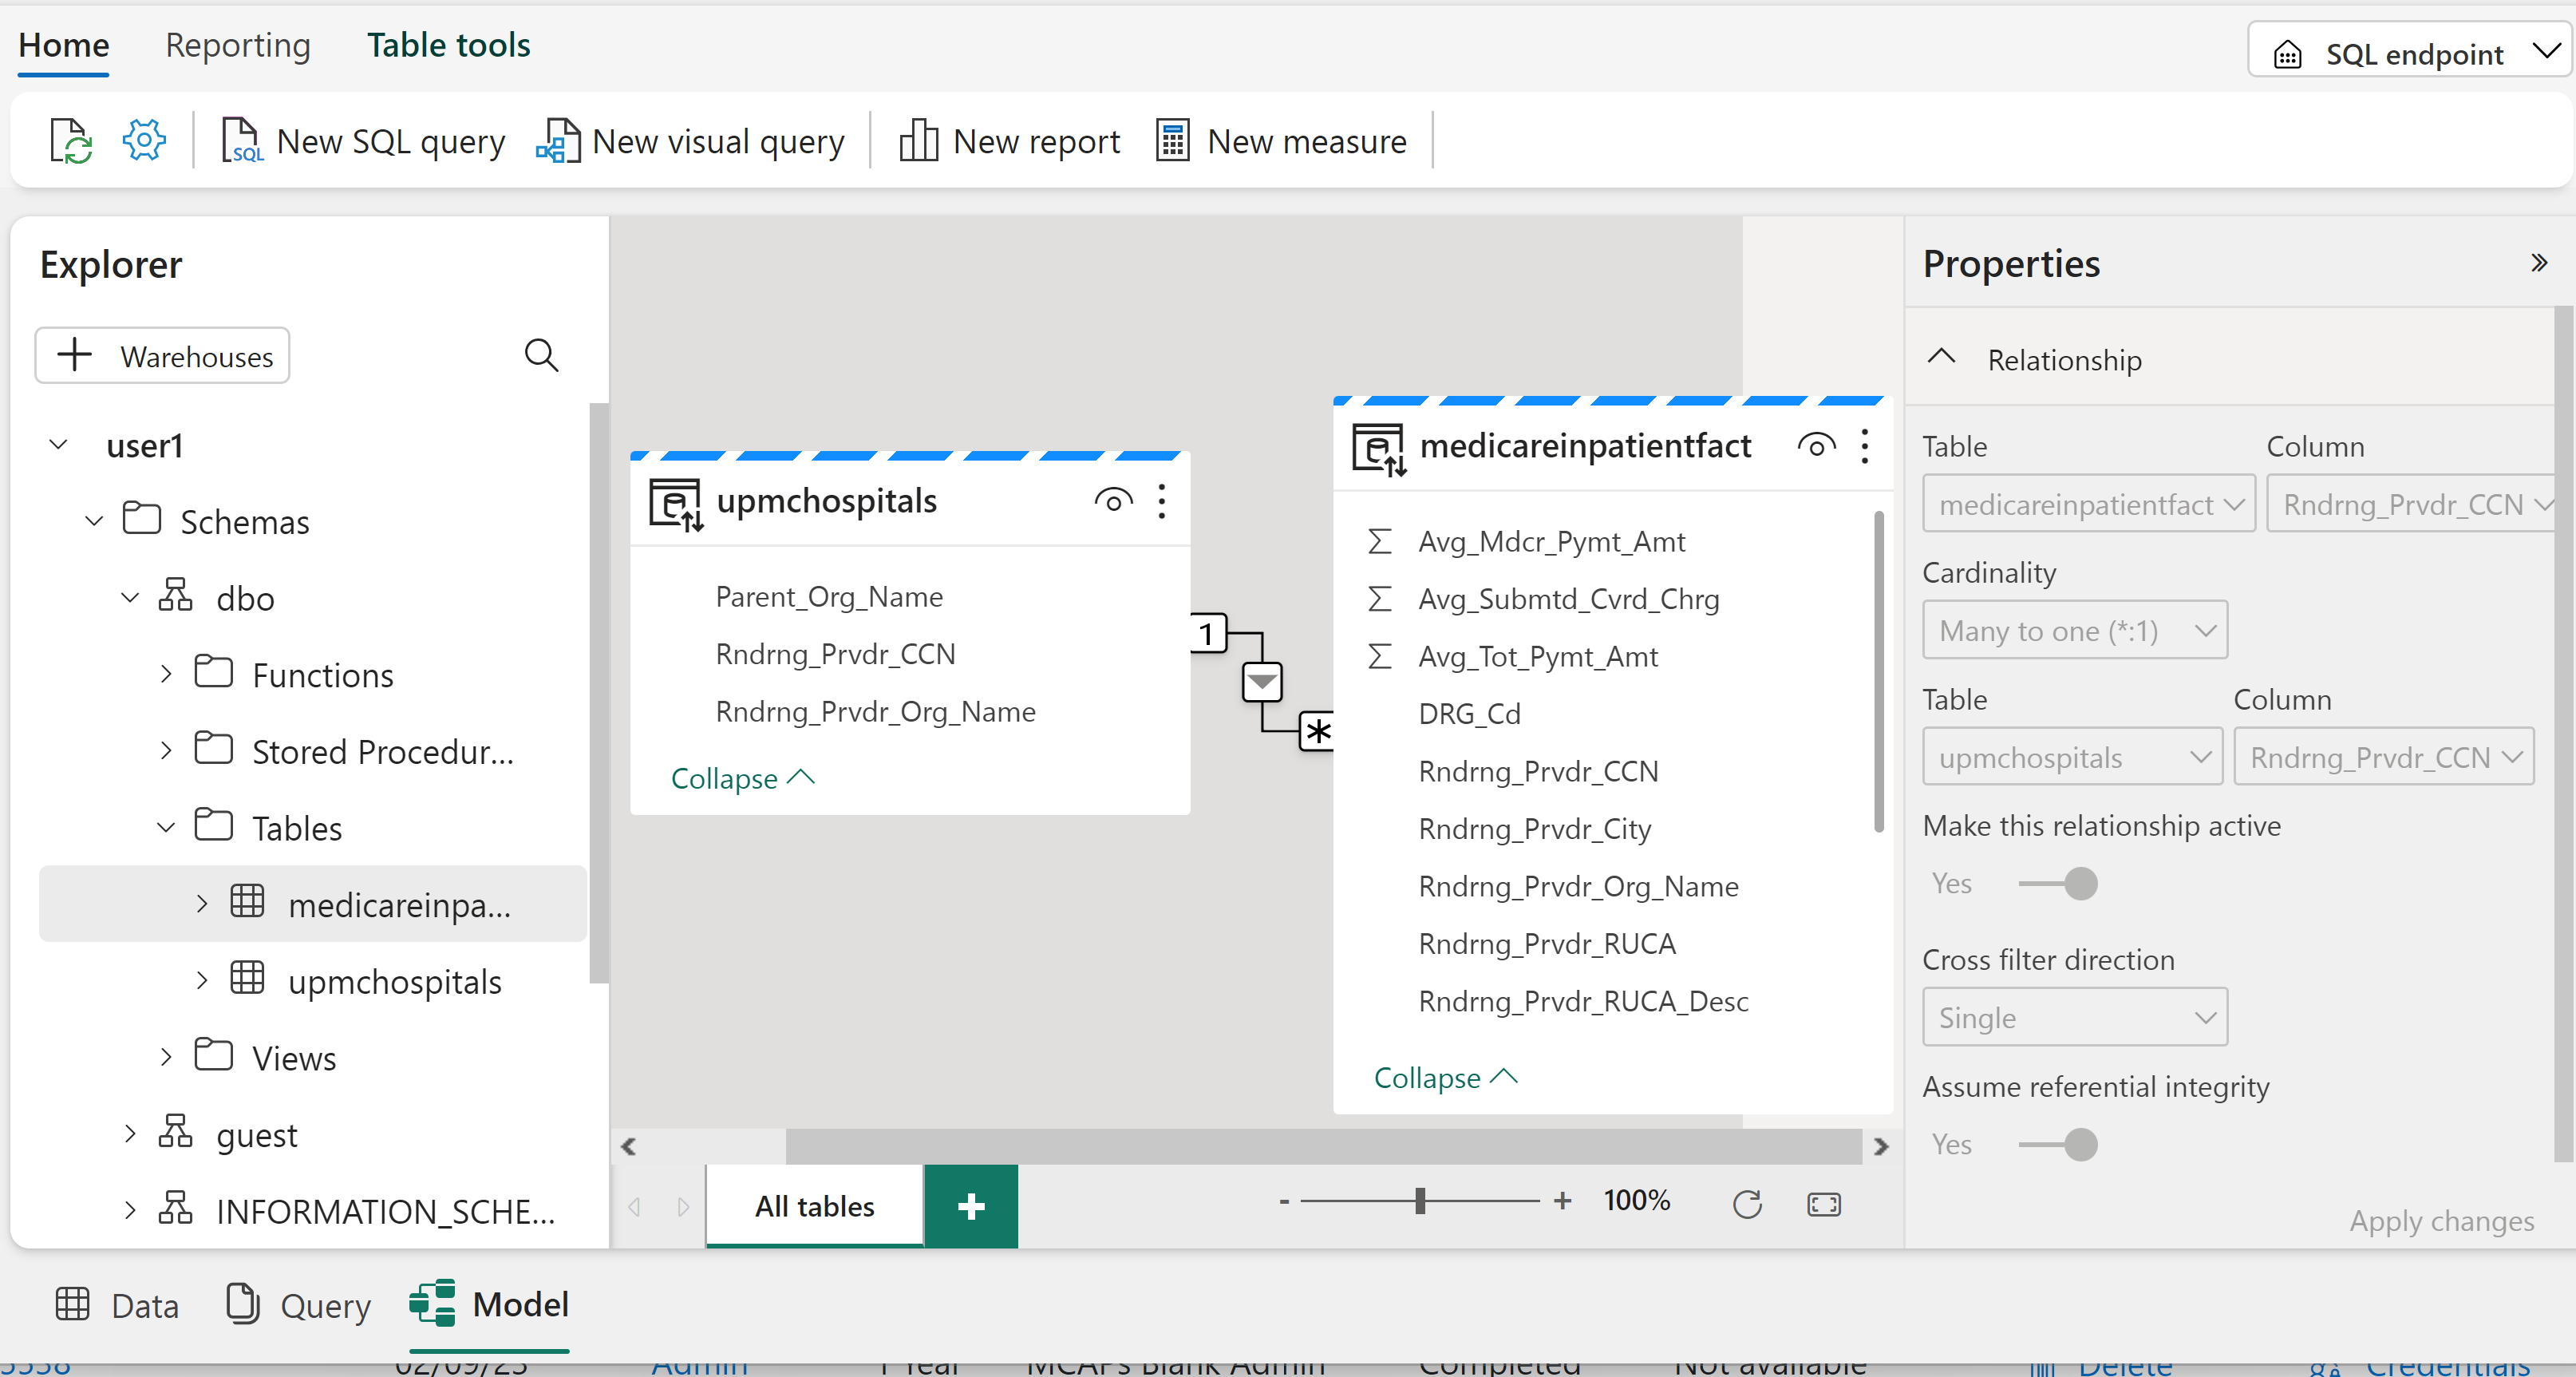
Create the joins between:
medicareinpatientfact Rndrng_Prvdr_CNN and the upmchospitals Rndrng_Prvdr_CNN
medicareinpatientfact DRG_Cd and the drgdim DRG_Cd
medicareinpatientfact twodigityear and the datedim twodigityear
You are now ready to build a Power BI report
Click New report on the top bar above the Model
Build a simple PBI report