![]()
- Automatic Reactions ✓
- Supports Multiple Chats ✓
- Customizable Reactions ✓
- Efficient Real-Time Processing ✓
- Serverless Architecture ✓
- Supports for Groups & Channels ✓
- Compliance with Telegram API Updates ✓
- Lightweight Code - Easy Setup ✓
- More Comming Soon...
Deploying this Telegram Auto-Reaction Bot on Cloudflare is straightforward thanks to the Deploy to Cloudflare button. Follow the steps below to get started:
-
Start the Deployment:
- Click the "Deploy to Cloudflare Workers" button below.
-
Set up your Cloudflare account:
- If you do not already have a Cloudflare account, you will be prompted to create one.
- Follow the on-screen instructions to set up your new Worker.
-
Configure and Deploy:
- Once logged in, authorize the deployment and configure the Worker with the environment variables described below.
- Review and adjust the Worker’s settings as needed before finalizing the deployment.
- You must add Repository secrets according to instructions before deployment.
- After Deploy you must Configure the Webhook
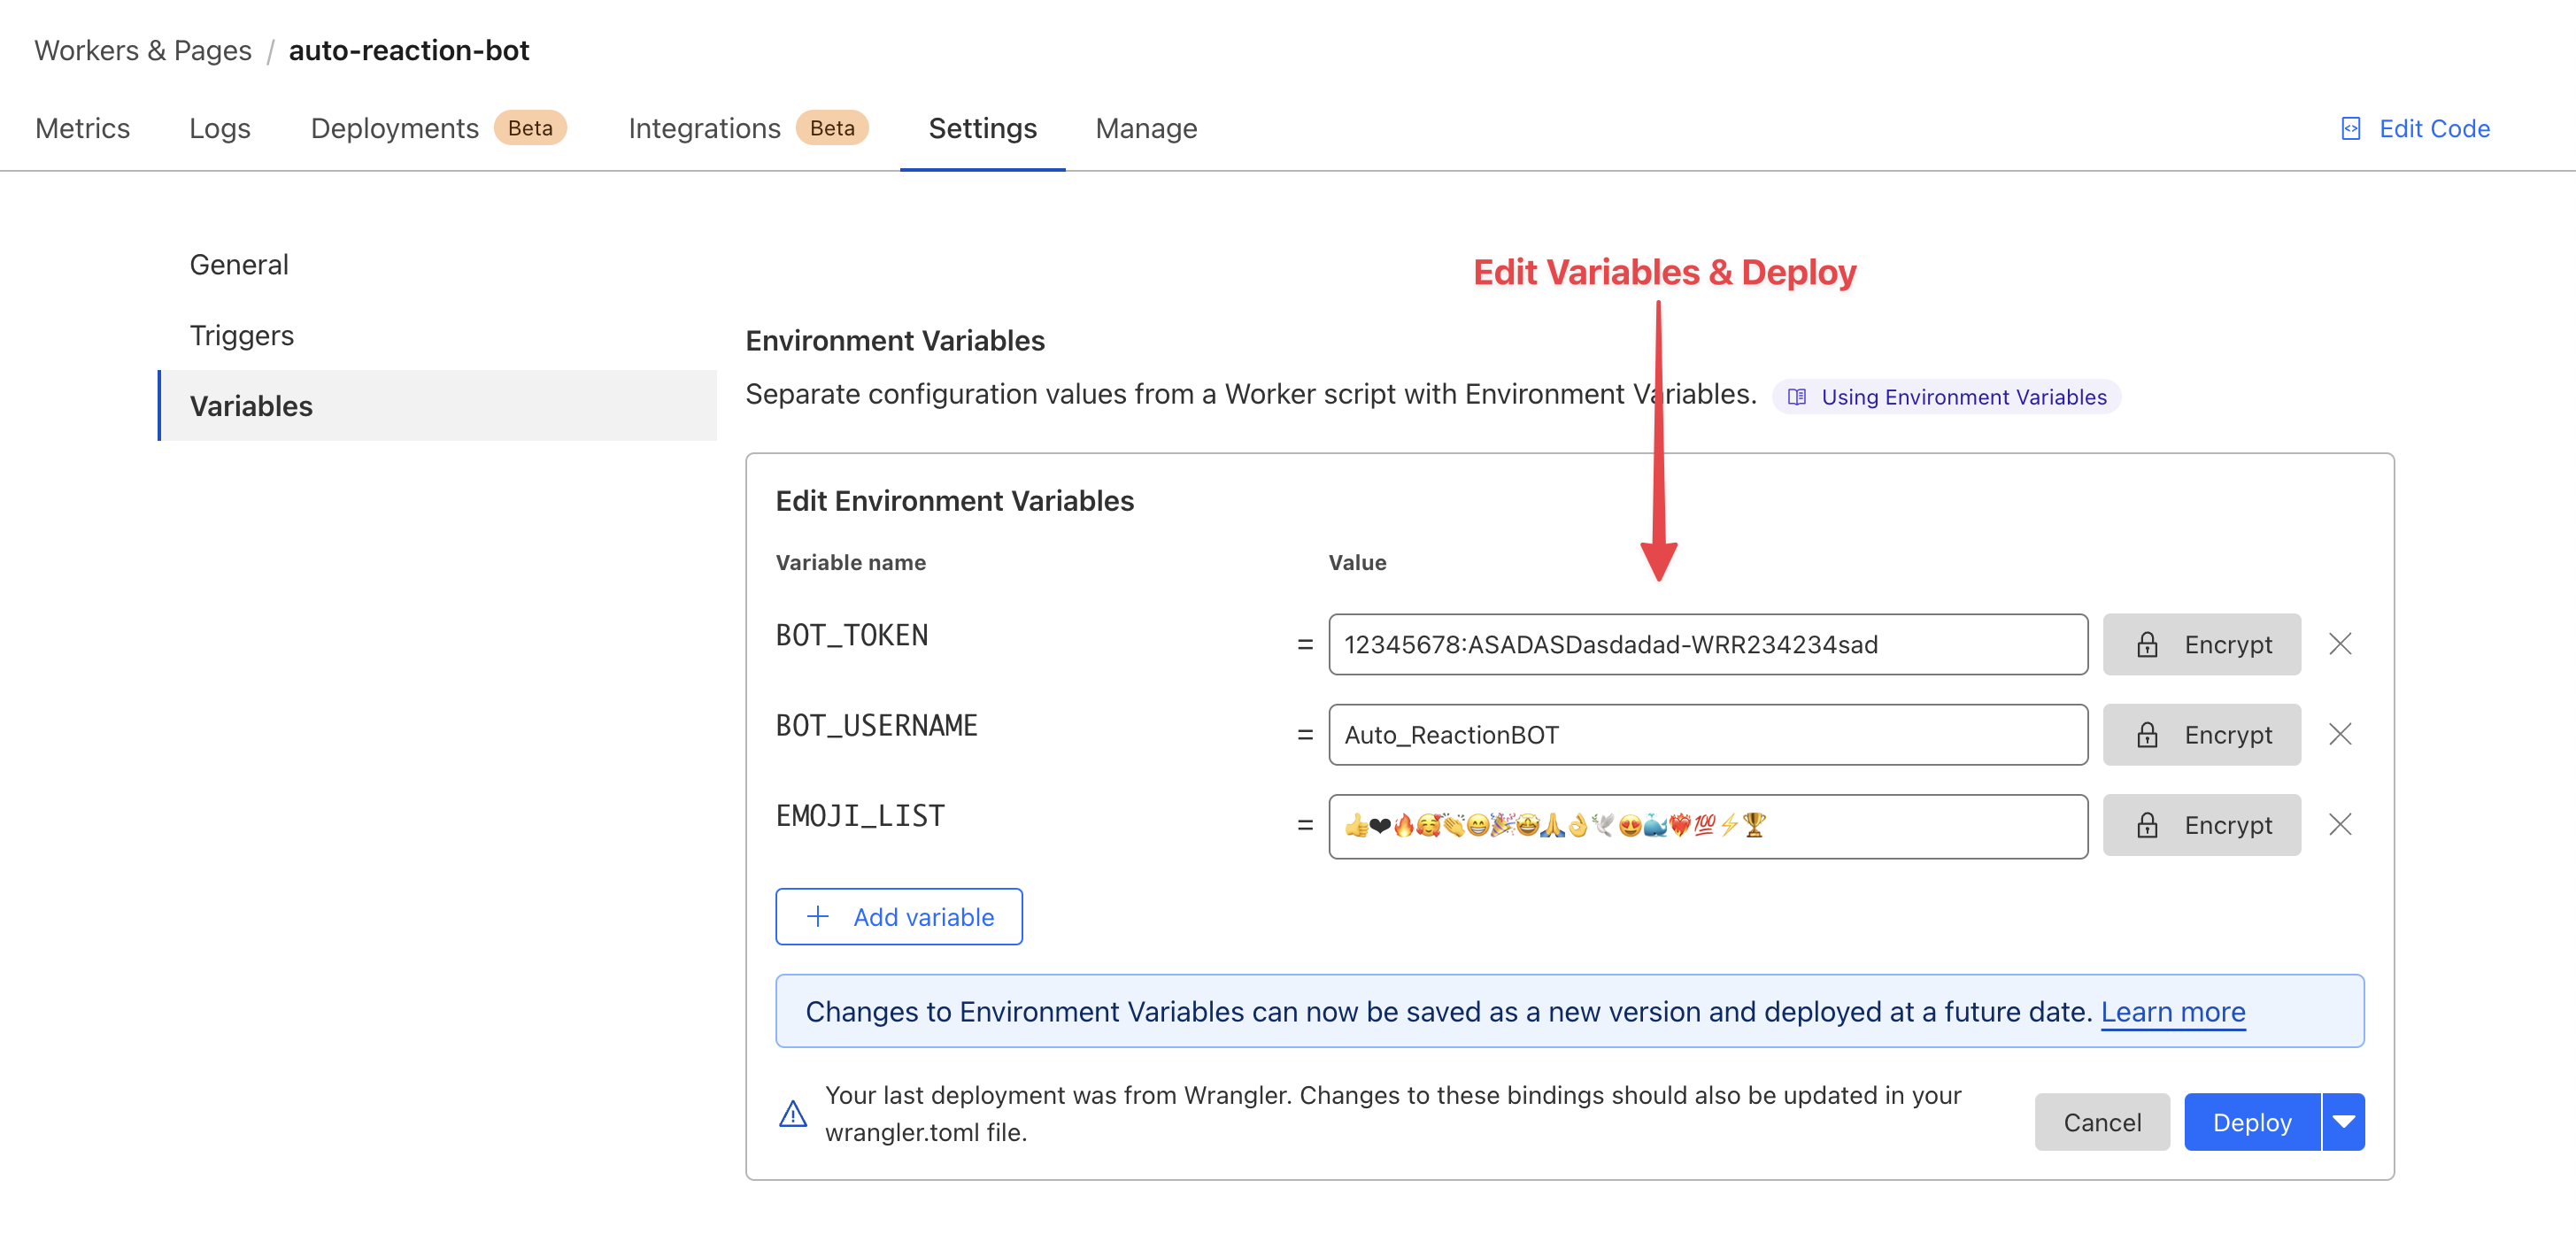
Cloudflare Worker Settings
✅ Demo: Experience the Auto Reaction Bot in demo: Auto Reaction Bot ✨.
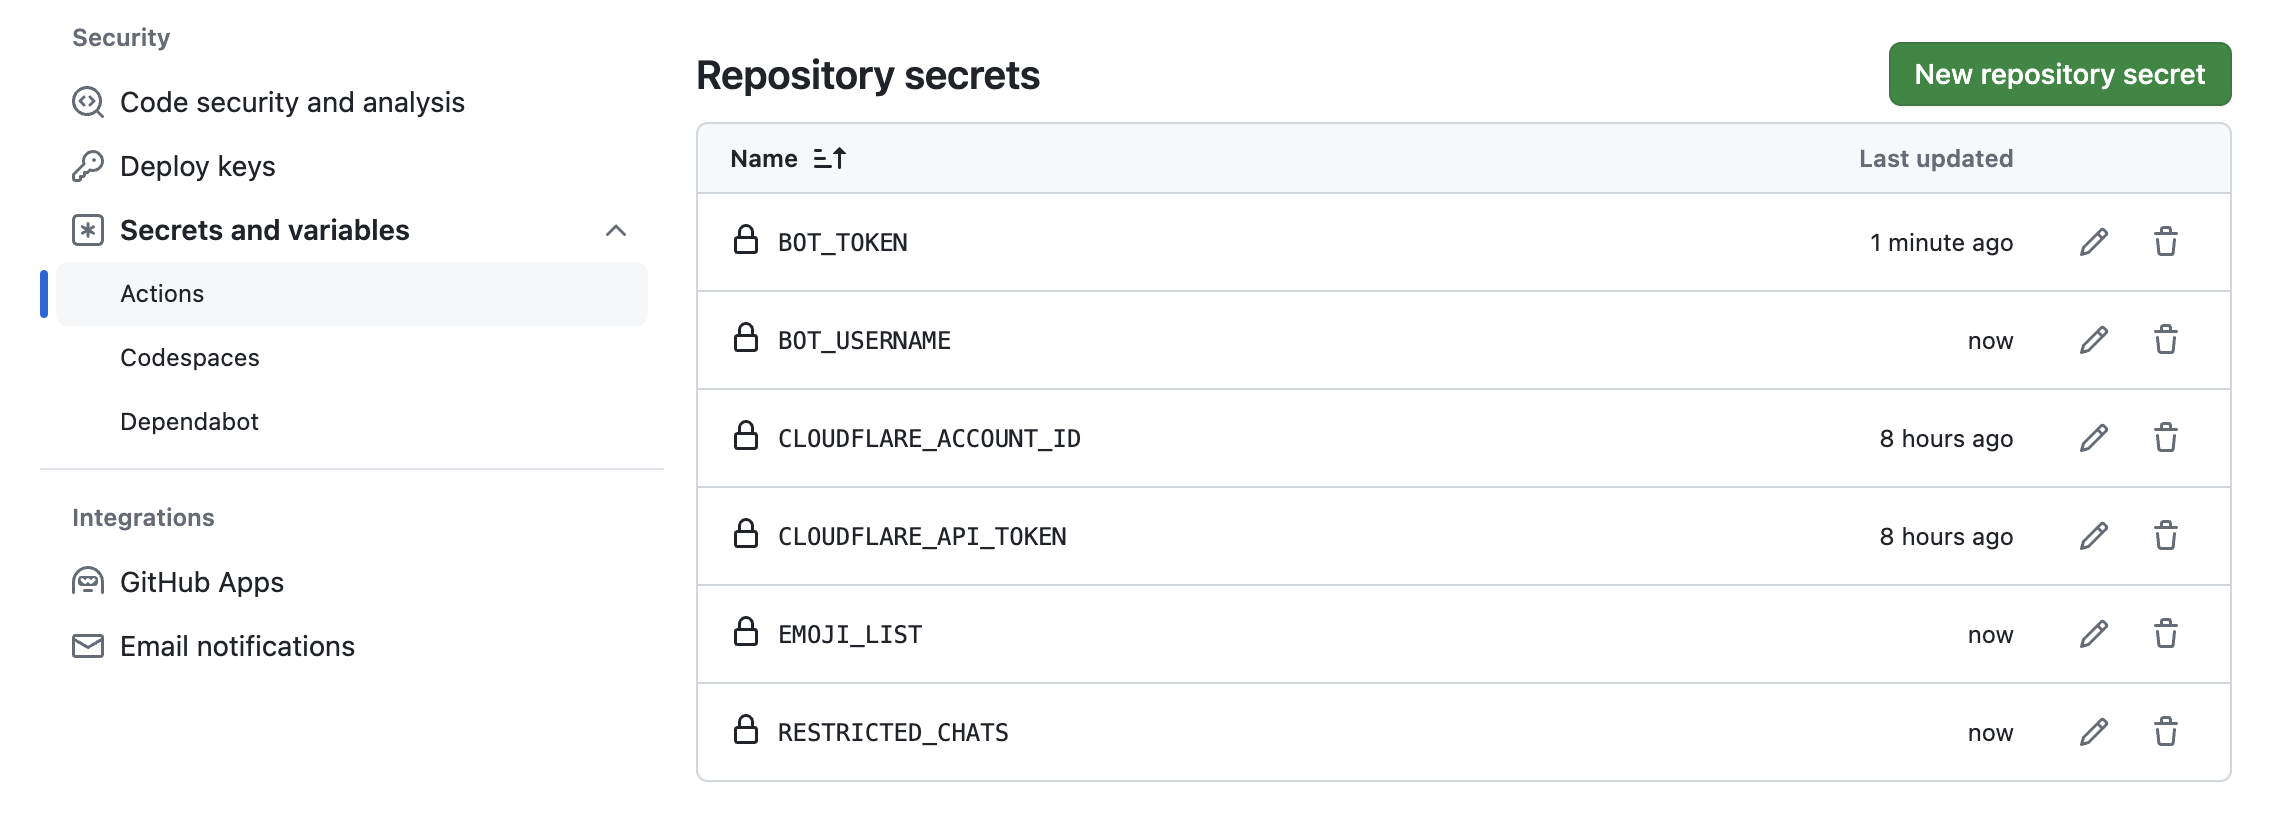
First you must Add Repository secrets as follows
Add Repository secrets
After that Click Here to Run Action.
To ensure that your Telegram Auto-Reaction Bot operates correctly, you will need to configure several environment variables in your Cloudflare Worker settings:
BOT_TOKEN: This is your bot's token, which you can generate from BotFather. This token allows your bot to authenticate and interact with the Telegram API.BOT_USERNAME: The username you have set for your bot. This is used within the script to identify messages intended for your bot.EMOJI_LIST: A string of emojis that the bot will use to react to messages. You can customize this list to include any emojis you prefer, such as 👍❤🔥🥰👏😁🎉🤩🙏👌🕊😍🐳❤🔥💯⚡🏆.RESTRICTED_CHATS: A list of chat IDs where the bot should not react to messages (Optional). Split each chat ID by " , ". Example :-1001233434,3434234
Open your web browser and enter the following URL (replace with your actual bot token and https://your.cloudflare.worker.url/ with your Cloudflare Worker URL):
https://api.telegram.org/bot<YourBotToken>/setWebhook?url=https://your.cloudflare.worker.url/
Verify the Webhook Configuration:
To check if the webhook is set up correctly, navigate to:
https://api.telegram.org/bot<YourBotToken>/getWebhookInfo
If you prefer to manually deploy the Auto Reaction Bot using Cloudflare Wrangler, follow these detailed steps to get started:
Before you begin, you will need to have git installed on your local machine to clone the repository.
Start by cloning the repository to your local machine. Open your terminal and run the following command:
git clone https://github.com/Malith-Rukshan/Auto-Reaction-Bot.git
cd Auto-Reaction-Bot
Edit the wrangler.toml file in your project directory to include your environment variables (like example.wrangler.toml). You will need to replace the placeholder values with your actual data : 🛠 Configuring Environments
To deploy using Cloudflare Wrangler, you must first install it. You can find the installation instructions and more information on the official Cloudflare Wrangler documentation.
Once Wrangler is installed and you've configured your wrangler.toml file, deploy your project to Cloudflare Workers by running the following command in your terminal:
wrangler publish
This command will deploy your bot to Cloudflare Workers, now you must Configure the Webhook. After All it will start reacting to messages in Telegram chats as configured.
- Based on Telegram BOT API
- 🧑💻 Built with 💖 by Single Developers </>
And of course:
