To develop a convolutional autoencoder for image denoising application.
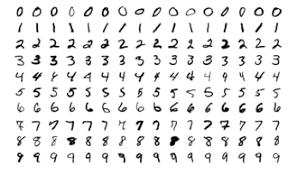
Autoencoder is an unsupervised artificial neural network that is trained to copy its input to output. An autoencoder will first encode the image into a lower-dimensional representation, then decodes the representation back to the image.The goal of an autoencoder is to get an output that is identical to the input. MNIST is a dataset of black and white handwritten images of size 28x28.Denoising is the process of removing noise. This can be an image, audio, or document.These noisy digits will serve as our input data to our encoder. Autoencoders uses MaxPooling, convolutional and upsampling layers to denoise the image.
Import the necessary libraries and dataset.
Load the dataset and scale the values for easier computation.
Add noise to the images randomly for both the train and test sets.
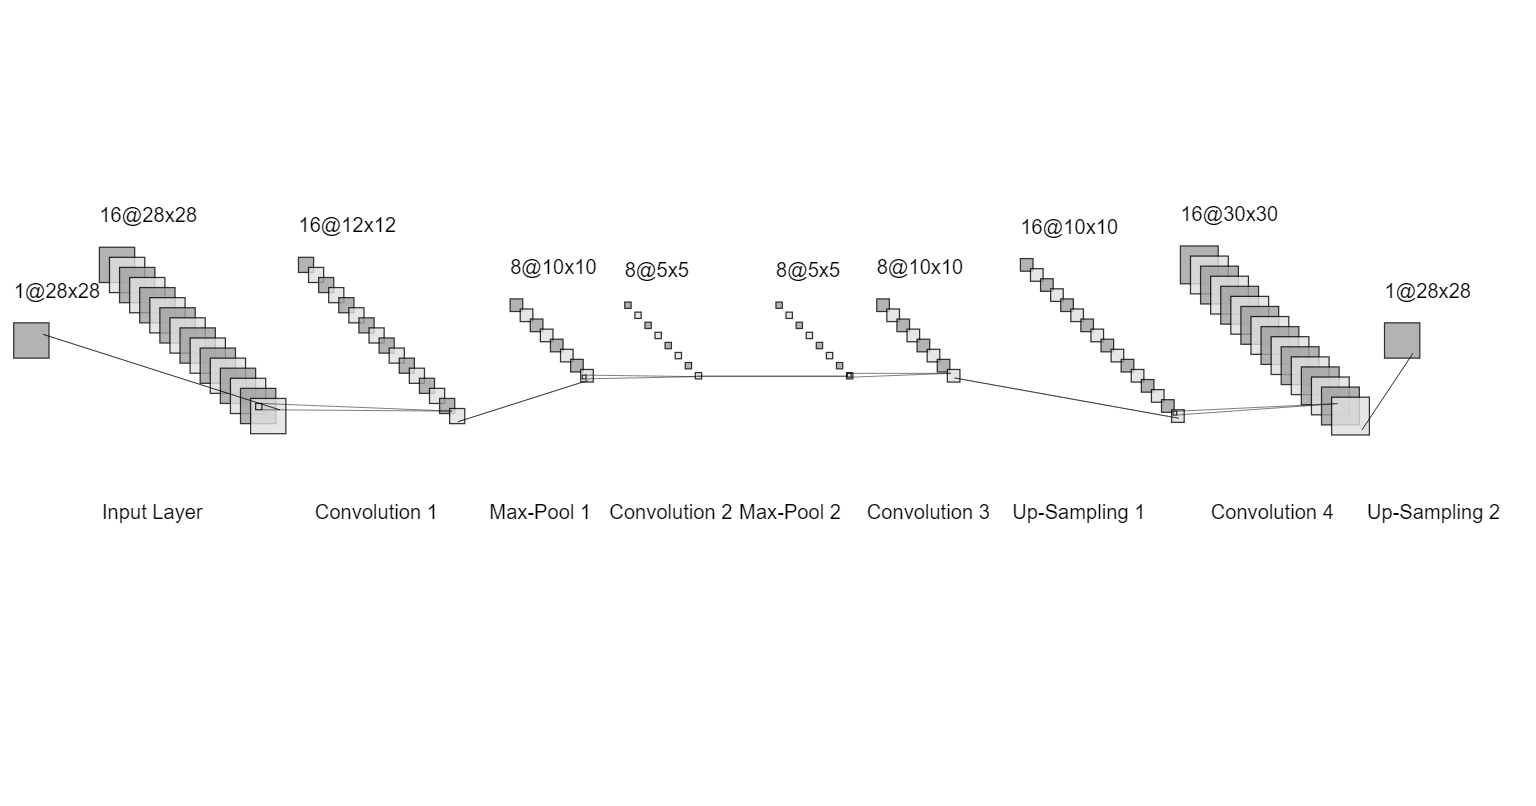
Build the Neural Model using Convolutional, Pooling and Up Sampling layers. Make sure the input shape and output shape of the model are identical.
Pass test data for validating manually.
Plot the predictions for visualization.
Developed by: A.Chopra Sai
Register no.: 212220040011
from tensorflow import keras
from tensorflow.keras import layers
from tensorflow.keras import utils
from tensorflow.keras import models
from tensorflow.keras.datasets import mnist
import numpy as np
import matplotlib.pyplot as plt
(x_train, _), (x_test, _) = mnist.load_data()
x_train.shape
x_train_scaled = x_train.astype('float32') / 255.
x_test_scaled = x_test.astype('float32') / 255.
x_train_scaled = np.reshape(x_train_scaled, (len(x_train_scaled), 28, 28, 1))
x_test_scaled = np.reshape(x_test_scaled, (len(x_test_scaled), 28, 28, 1))
noise_factor = 0.5
x_train_noisy = x_train_scaled + noise_factor * np.random.normal(loc=0.0, scale=1.0, size=x_train_scaled.shape)
x_test_noisy = x_test_scaled + noise_factor * np.random.normal(loc=0.0, scale=1.0, size=x_test_scaled.shape)
x_train_noisy = np.clip(x_train_noisy, 0., 1.)
x_test_noisy = np.clip(x_test_noisy, 0., 1.)
n = 10
plt.figure(figsize=(20, 2))
for i in range(1, n + 1):
ax = plt.subplot(1, n, i)
plt.imshow(x_test_noisy[i].reshape(28, 28))
plt.gray()
ax.get_xaxis().set_visible(False)
ax.get_yaxis().set_visible(False)
plt.show()
input_img = keras.Input(shape=(28, 28, 1))
## Write your encoder here
x=layers.Conv2D(32,(3,3),activation='relu',padding='same')(input_img)
x=layers.MaxPooling2D((2, 2), padding='same')(x)
x=layers.Conv2D(32,(3,3),activation='relu',padding='same')(x)
encoded = layers.MaxPooling2D((2, 2), padding='same')(x)
## Encoder output dimension is ## Mention the dimention ##
## Write your decoder here
x=layers.Conv2D(32,(3,3),activation='relu',padding='same')(encoded)
x=layers.UpSampling2D((2,2))(x)
x=layers.Conv2D(32,(3,3),activation='relu',padding='same')(x)
x=layers.UpSampling2D((2,2))(x)
decoded = layers.Conv2D(1, (3, 3), activation='sigmoid', padding='same')(x)
autoencoder = keras.Model(input_img, decoded)
autoencoder.summary()autoencoder.compile(optimizer='adam', loss='binary_crossentropy')
autoencoder.fit(x_train_noisy, x_train_scaled,
epochs=2,
batch_size=128,
shuffle=True,
validation_data=(x_test_noisy, x_test_scaled))
import pandas as pd
metrics = pd.DataFrame(autoencoder.history.history)
metrics[['loss','val_loss']].plot()
decoded_imgs = autoencoder.predict(x_test_noisy)
n = 10
plt.figure(figsize=(20, 4))
for i in range(1, n + 1):
## Display original
ax = plt.subplot(3, n, i)
plt.imshow(x_test_scaled[i].reshape(28, 28))
plt.gray()
ax.get_xaxis().set_visible(False)
ax.get_yaxis().set_visible(False)
## Display noisy
ax = plt.subplot(3, n, i+n)
plt.imshow(x_test_noisy[i].reshape(28, 28))
plt.gray()
ax.get_xaxis().set_visible(False)
ax.get_yaxis().set_visible(False)
## Display reconstruction
ax = plt.subplot(3, n, i + 2*n)
plt.imshow(decoded_imgs[i].reshape(28, 28))
plt.gray()
ax.get_xaxis().set_visible(False)
ax.get_yaxis().set_visible(False)
plt.show()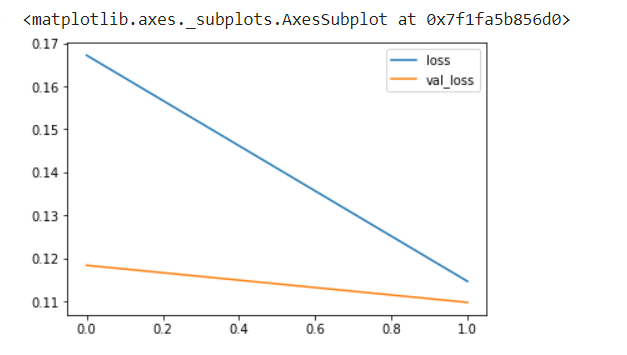
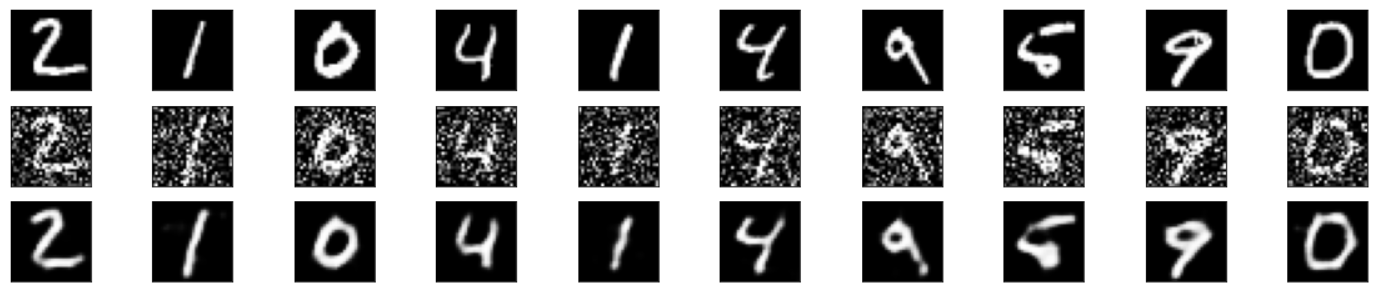
Thus, a Convolutional Auto Encoder for Denoising was sucessfully implemented.

