This Repository has now moved to an official Canonical repository which can be found here: cdk-rancher
This repository has now moved and is no longer maintained, please check it out here: https://github.com/CanonicalLtd/canonical-kubernetes-third-party-integrations/tree/master/cdk-rancher.
This repository explains how to deploy Rancher 2.0alpha on Canonical Kubernetes.
These steps are currently in alpha/testing phase and will most likely change.
Deploying Canonical Kubernetes is really easy, I assume you are running on an Ubuntu machine and you have an AWS account. Grab a new API key from AWS and put that into:
~/.aws/credentials
In this format:
[default]
aws_access_key_id=<access_id>
aws_secret_access_key=<secret_key>
Next install juju on your machine, we will use the snap:
sudo apt-get install snap
snap install juju
Next we bootstrap juju so it's ready to use aws:
juju bootstrap
We follow the steps here for bootstrapping our cloud for AWS:
calvinh@ubuntu-ws:~/.aws$ juju bootstrap
Clouds
aws
aws-china
aws-gov
azure
azure-china
cloudsigma
google
joyent
localhost
oracle
rackspace
salesmaas

Select a cloud [localhost]: aws

Regions in aws:
ap-northeast-1
ap-northeast-2
ap-south-1
ap-southeast-1
ap-southeast-2
ca-central-1
eu-central-1
eu-west-1
eu-west-2
sa-east-1
us-east-1
us-east-2
us-west-1
us-west-2

Select a region in aws [us-east-1]: eu-west-1

Enter a name for the Controller [aws-eu-west-1]: rancher-k8s

Creating Juju controller "rancher-k8s" on aws/eu-west-1
Looking for packaged Juju agent version 2.3.2 for amd64
Launching controller instance(s) on aws/eu-west-1...
 - i-08ce69142f943b5a4 (arch=amd64 mem=4G cores=2)eu-west-1a"
Installing Juju agent on bootstrap instance
Fetching Juju GUI 2.11.3
Waiting for address
Attempting to connect to 172.31.20.176:22
Attempting to connect to 34.244.155.220:22
Connected to 34.244.155.220
Running machine configuration script...


Bootstrap agent now started
Contacting Juju controller at 34.244.155.220 to verify accessibility...
Bootstrap complete, "rancher-k8s" controller now available
Controller machines are in the "controller" model
Initial model "default" added
Once the controller has been configured, we now deploy CDK:
calvinh@ubuntu-ws:~/.aws$ juju deploy canonical-kubernetes
Located bundle "cs:bundle/canonical-kubernetes-150"
Resolving charm: cs:~containers/easyrsa-27
Resolving charm: cs:~containers/etcd-63
Resolving charm: cs:~containers/flannel-40
Resolving charm: cs:~containers/kubeapi-load-balancer-43
Resolving charm: cs:~containers/kubernetes-master-78
Resolving charm: cs:~containers/kubernetes-worker-81
Executing changes:
- upload charm cs:~containers/easyrsa-27 for series xenial
- deploy application easyrsa on xenial using cs:~containers/easyrsa-27
  added resource easyrsa
- set annotations for easyrsa
- upload charm cs:~containers/etcd-63 for series xenial
- deploy application etcd on xenial using cs:~containers/etcd-63
  added resource etcd
  added resource snapshot
- set annotations for etcd
- upload charm cs:~containers/flannel-40 for series xenial
- deploy application flannel on xenial using cs:~containers/flannel-40
  added resource flannel-amd64
  added resource flannel-s390x
- set annotations for flannel
- upload charm cs:~containers/kubeapi-load-balancer-43 for series xenial
- deploy application kubeapi-load-balancer on xenial using cs:~containers/kubeapi-load-balancer-43
- expose kubeapi-load-balancer
- set annotations for kubeapi-load-balancer
- upload charm cs:~containers/kubernetes-master-78 for series xenial
- deploy application kubernetes-master on xenial using cs:~containers/kubernetes-master-78
  added resource cdk-addons
  added resource kube-apiserver
  added resource kube-controller-manager
  added resource kube-scheduler
  added resource kubectl
- set annotations for kubernetes-master
- upload charm cs:~containers/kubernetes-worker-81 for series xenial
- deploy application kubernetes-worker on xenial using cs:~containers/kubernetes-worker-81
  added resource cni-amd64
  added resource cni-s390x
  added resource kube-proxy
  added resource kubectl
  added resource kubelet
- expose kubernetes-worker
- set annotations for kubernetes-worker
- add relation kubernetes-master:kube-api-endpoint - kubeapi-load-balancer:apiserver
- add relation kubernetes-master:loadbalancer - kubeapi-load-balancer:loadbalancer
- add relation kubernetes-master:kube-control - kubernetes-worker:kube-control
- add relation kubernetes-master:certificates - easyrsa:client
- add relation etcd:certificates - easyrsa:client
- add relation kubernetes-master:etcd - etcd:db
- add relation kubernetes-worker:certificates - easyrsa:client
- add relation kubernetes-worker:kube-api-endpoint - kubeapi-load-balancer:website
- add relation kubeapi-load-balancer:certificates - easyrsa:client
- add relation flannel:etcd - etcd:db
- add relation flannel:cni - kubernetes-master:cni
- add relation flannel:cni - kubernetes-worker:cni
- add unit easyrsa/0 to new machine 0
- add unit etcd/0 to new machine 1
- add unit etcd/1 to new machine 2
- add unit etcd/2 to new machine 3
- add unit kubeapi-load-balancer/0 to new machine 4
- add unit kubernetes-master/0 to new machine 5
- add unit kubernetes-worker/0 to new machine 6
- add unit kubernetes-worker/1 to new machine 7
- add unit kubernetes-worker/2 to new machine 8
Deploy of bundle completed.
You can check the deployment status using the following command:
watch --color juju status --color
Note that this will give you the default bundle for CDK which is made up of 9 machines, flannel networking and no RBAC. This is based on the default bundle found here: https://jujucharms.com/canonical-kubernetes/.
For a more tailored build with Canal or Calico, you can use the bundle builder: https://github.com/juju-solutions/bundle-canonical-kubernetes. This will generate a bundle file, which is just a big piece of yaml which describes the configuration for the entire cluster, similar to an Ansible Playbook or Puppet Manifest.
If you have a custom bundle, you would deploy that using a command like this instead:
juju deploy bundle.yaml
Eventually the colours will all turn green and your cluster is good to go. To access the cluster, we need to install the kubectl command line client and copy the kubernetes configuration file over for it to use:
 # If this does not work, try adding the --classic option on the end.
 snap install kubectl --classic
Next we copy over the configuration file:
juju scp kubernetes-master/0:/home/ubuntu/config ~/.kube/config
Finally, using kubectl we can check that kubernetes cluster interaction is possible:
Kubernetes master is running at https://34.253.164.197:443

Heapster is running at https://34.253.164.197:443/api/v1/namespaces/kube-system/services/heapster/proxy
KubeDNS is running at https://34.253.164.197:443/api/v1/namespaces/kube-system/services/kube-dns/proxy
kubernetes-dashboard is running at https://34.253.164.197:443/api/v1/namespaces/kube-system/services/kubernetes-dashboard/proxy
Grafana is running at https://34.253.164.197:443/api/v1/namespaces/kube-system/services/monitoring-grafana/proxy
InfluxDB is running at https://34.253.164.197:443/api/v1/namespaces/kube-system/services/monitoring-influxdb/proxy

To further debug and diagnose cluster problems, use 'kubectl cluster-info dump'
Note: There are two other ways CDK would be deployed, either using Conjure-up or using the graphical juju-as-a-service tool provided at https://jujucharms.com/.
To deploy Rancher, we just need to run the Rancher container workload on-top of Kubernetes. Rancher provides their containers through dockerhub (https://hub.docker.com/r/rancher/server/tags/) and can be downloaded freely from the internet. If you're running your own registry or have an offline deployment, the container should be downloaded and pushed to the private registry.
The yaml file called cdk-rancher-nodeport.yaml inside this repository can be used to deploy Rancher with a nodeport for accessing the cluster. Once kubectl is running and working, run the following command to deploy Rancher:
kubectl apply -f cdk-rancher-nodeport.yaml
Now we need to open this nodeport so we can access it. For that, we can use juju. We need to run the open-port command for each of the worker nodes in our cluster. Inside the cdk-rancher-nodeport.yaml file, the nodeport has been set to 30443. Below shows how to open the port on each of the worker nodes:
   # repeat this for each kubernetes worker in the cluster.
   juju run --unit kubernetes-worker/0 "open-port 30443"
   juju run --unit kubernetes-worker/1 "open-port 30443"
   juju run --unit kubernetes-worker/2 "open-port 30443"
Rancher can now be accessed on this port through a worker IP or DNS entries if you have created them. It is generally recommended that you create a DNS entry for each of the worker nodes in your cluster. For example, if you have three worker nodes and you own the domain example.com, you could create three A records, one for each worker in the cluster.
As creating DNS entries is outside of the scope of this document, we will use the freely available xip.io service which can return A records for an IP address which is part of the domain name. For example, if you have the domain rancher.35.178.130.245.xip.io, the xip.io service will automatically return the IP address 35.178.130.245 as an A record which is useful for testing purposes. For your deployment, the IP address 35.178.130.245 should be replaced with one of your worker IP address, which can be found using Juju or AWS:
 calvinh@ubuntu-ws:~/Source/cdk-rancher$ juju status

# ... output omitted.

Unit                      Workload  Agent  Machine  Public address  Ports                     Message
easyrsa/0*                active    idle   0        35.178.118.232                            Certificate Authority connected.
etcd/0*                   active    idle   1        35.178.49.31    2379/tcp                  Healthy with 3 known peers
etcd/1                    active    idle   2        35.177.99.171   2379/tcp                  Healthy with 3 known peers
etcd/2                    active    idle   3        35.178.125.161  2379/tcp                  Healthy with 3 known peers
kubeapi-load-balancer/0*  active    idle   4        35.178.37.87    443/tcp                   Loadbalancer ready.
kubernetes-master/0*      active    idle   5        35.177.239.237  6443/tcp                  Kubernetes master running.
  flannel/0*              active    idle            35.177.239.237                            Flannel subnet 10.1.27.1/24
kubernetes-worker/0*      active    idle   6        35.178.130.245  80/tcp,443/tcp,30443/tcp  Kubernetes worker running.
  flannel/2               active    idle            35.178.130.245                            Flannel subnet 10.1.82.1/24
kubernetes-worker/1       active    idle   7        35.178.121.29   80/tcp,443/tcp,30443/tcp  Kubernetes worker running.
  flannel/3               active    idle            35.178.121.29                             Flannel subnet 10.1.66.1/24
kubernetes-worker/2       active    idle   8        35.177.144.76   80/tcp,443/tcp,30443/tcp  Kubernetes worker running.
  flannel/1               active    idle            35.177.144.76

# Note the IP addresses for the kubernetes-workers in the example above.  You should pick one of the public addresses.
Try opening up Rancher in your browser using the nodeport and the domain name or ip address:
  # replace the IP address with one of your Kubernetes worker, find this from juju status command.
  wget https://35.178.130.245.xip.io:30443 --no-check-certificate

  # this should also work
  wget https://35.178.130.245:30443 --no-check-certificate
If you need to make any changes to the kubernetes configuration file, edit the yaml file and then just use apply again:
kubectl apply -f cdk-rancher-nodeport.yaml
The cdk-rancher-ingress.yaml yaml file contains an example Kubernetes configuration for deploying Rancher with an ingress rule. If you use an ingress rule, you don't need to use the nodeport or open additional ports using juju.
It is generally recommended that you create a DNS entry for each of the worker nodes in your cluster. For example, if you have three worker nodes and you own the domain example.com, you could create three A records, one for each worker in the cluster.
As creating DNS entries is outside of the scope of this document, we will use the freely available xip.io service which can return A records for an IP address which is part of the domain name. For example, if you have the domain rancher.35.178.130.245.xip.io, the xip.io service will automatically return the IP address 35.178.130.245 as an A record which is useful for testing purposes. For your deployment, the IP address 35.178.130.245 should be replaced with one of your worker IP address, which can be found using Juju or AWS:
 calvinh@ubuntu-ws:~/Source/cdk-rancher$ juju status

# ... output omitted.

Unit                      Workload  Agent  Machine  Public address  Ports                     Message
easyrsa/0*                active    idle   0        35.178.118.232                            Certificate Authority connected.
etcd/0*                   active    idle   1        35.178.49.31    2379/tcp                  Healthy with 3 known peers
etcd/1                    active    idle   2        35.177.99.171   2379/tcp                  Healthy with 3 known peers
etcd/2                    active    idle   3        35.178.125.161  2379/tcp                  Healthy with 3 known peers
kubeapi-load-balancer/0*  active    idle   4        35.178.37.87    443/tcp                   Loadbalancer ready.
kubernetes-master/0*      active    idle   5        35.177.239.237  6443/tcp                  Kubernetes master running.
  flannel/0*              active    idle            35.177.239.237                            Flannel subnet 10.1.27.1/24
kubernetes-worker/0*      active    idle   6        35.178.130.245  80/tcp,443/tcp,30443/tcp  Kubernetes worker running.
  flannel/2               active    idle            35.178.130.245                            Flannel subnet 10.1.82.1/24
kubernetes-worker/1       active    idle   7        35.178.121.29   80/tcp,443/tcp,30443/tcp  Kubernetes worker running.
  flannel/3               active    idle            35.178.121.29                             Flannel subnet 10.1.66.1/24
kubernetes-worker/2       active    idle   8        35.177.144.76   80/tcp,443/tcp,30443/tcp  Kubernetes worker running.
  flannel/1               active    idle            35.177.144.76

# Note the IP addresses for the kubernetes-workers in the example above.  You should pick one of the public addresses.
Looking at the output from the juju status above, the Public Address (35.178.130.245) can be used to create a xip.io DNS entry (rancher.35.178.130.245.xip.io) whichs hould be placed into the cdk-rancher-ingress.yaml file. You could also create your own DNS entry as long as it resolves to each of the worker nodes or one of them it will work fine:
  # Edit this line inside the rancher ingress yaml file
  cat cdk-rancher-ingress.yaml | grep xip.io
  - host: rancher.35.178.130.245.xip.io
Once you've edited the ingress rule to reflect your DNS entries, run the kubectl apply -f cdk-rancher-ingress.yaml to deploy Kubernetes:
kubectl apply -f cdk-rancher-ingress.yaml
Rancher can now be accessed on the regular 443 through a worker IP or DNS entries if you have created them. Try opening it up in your browser:
  # replace the IP address with one of your Kubernetes worker, find this from juju status command.
  wget https://35.178.130.245.xip.io:443 --no-check-certificate
If you need to make any changes to the kubernetes configuration file, edit the yaml file and then just use apply again:
kubectl apply -f cdk-rancher-ingress.yaml
If you wish to remove rancher from the cluster, we can do it using kubectl. Deleting constructs in Kubernetes is as simple as creating them:
  # If you used the nodeport example change the yaml filename if you used the ingress example.
  kubectl delete -f cdk-rancher-nodeport.yaml
Rancher can be accessed using it's web interface but a CLI client is planned in the future.
The best resource for using Rancher is the official manual found here: http://rancher.com/docs/rancher/v2.0/en/quick-start-guide/.
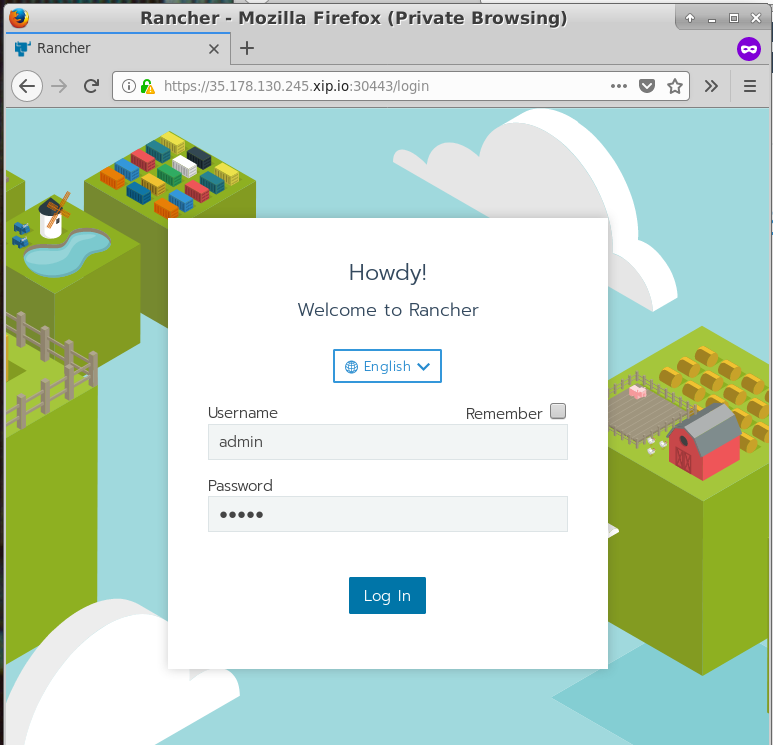
Hit the Rancher IP in your browser, you should see a login prompt:
The default username is admin and password is admin. You should be prompted to change them, it is recommended you use a strong password.
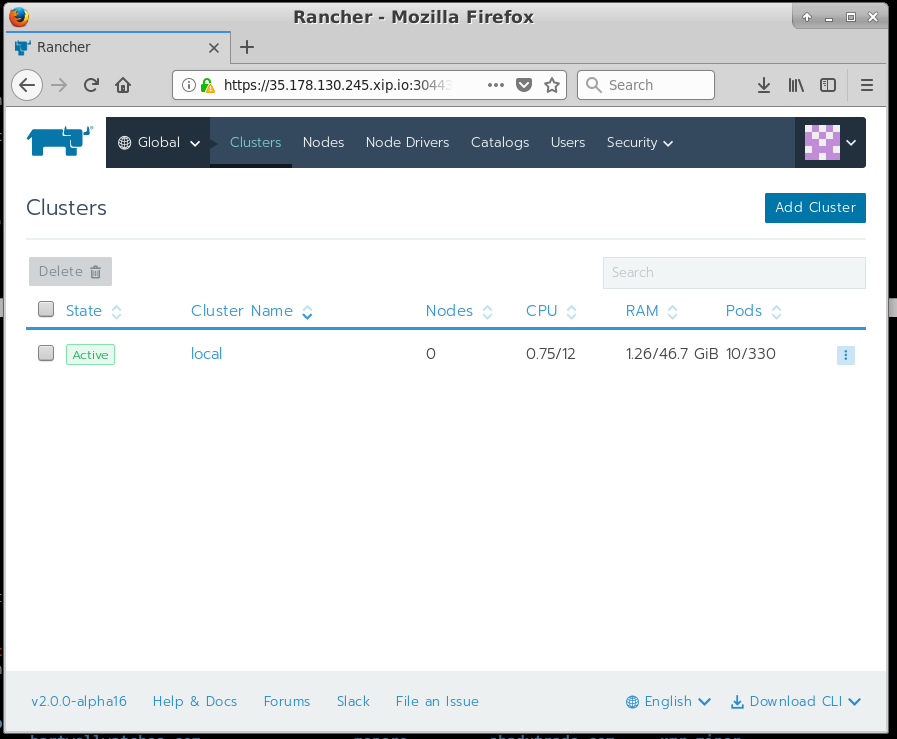
Once you've set the password, you should see a GUI like this:
The Rancher GUI has three main views, each of which has its own set of sub-menus.
These are the three main views which contain a set of sub-menus:
-
Global View: Provides a view of each of the Kubernetes clusters under Rancher's control. This provides a break down of Nodes, Node Drivers, Catalogs, Users and Security Settings.
-
Cluster: This provides a view of of an individual Kubernetes cluster. It allows you to download the kubeconfig file for a cluster, check basic cluster stats, namespaces, projects, nodes and users for a particular cluster.
-
Project: This provides a view for a project defined on a Kubernetes cluster. It allows you to configure workloads, DNS entries, ingress rules, volumes, secrets, registries, certificates and most importantly, the catalog.
Essentially each of these different views is a drill-down from the top level. The Global view provides a high-level overview for all of the clusters it has control over, where as the project view is the lowest level you can drill down into within a cluster.
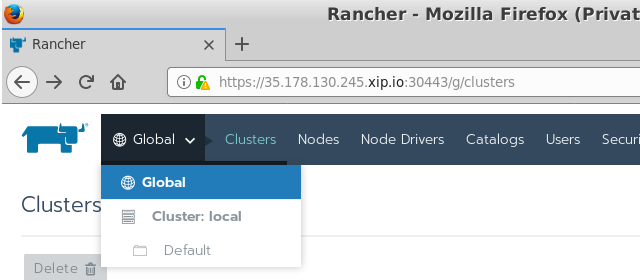
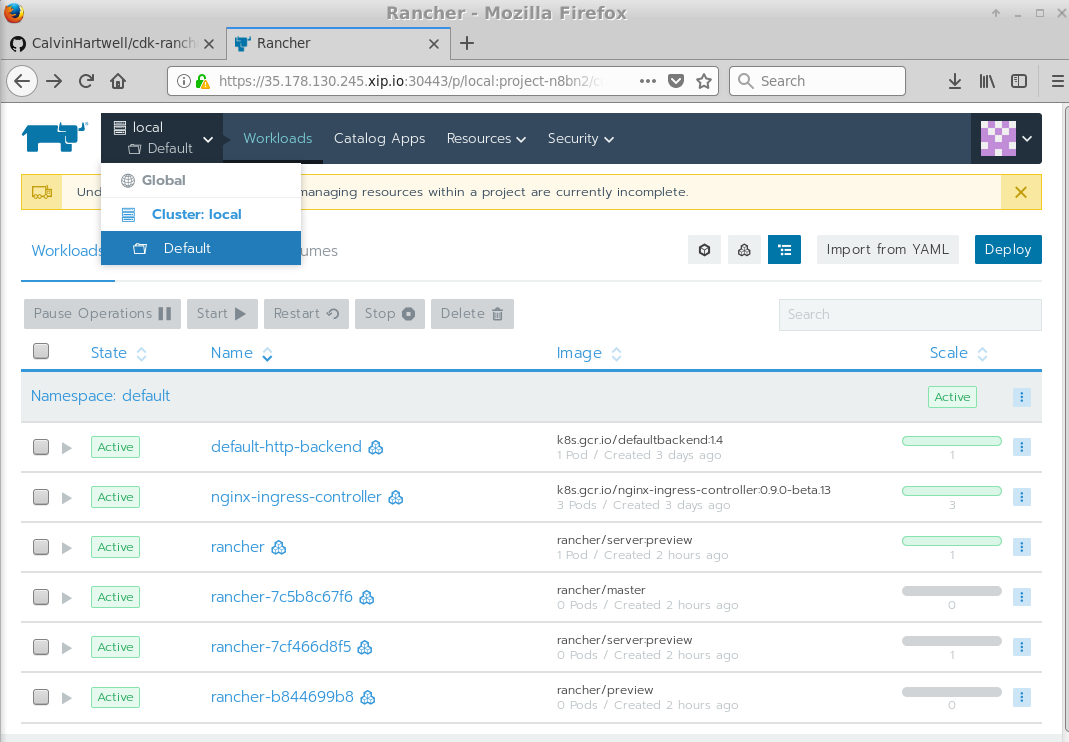
Once Rancher is up and running, we can launch a regular Kubernetes workload. First hover over the Global option in the top left-hand part of the menu. Once the menu appears, click Default at the bottom to select the Default project. Next, hit the Workloads Tab:
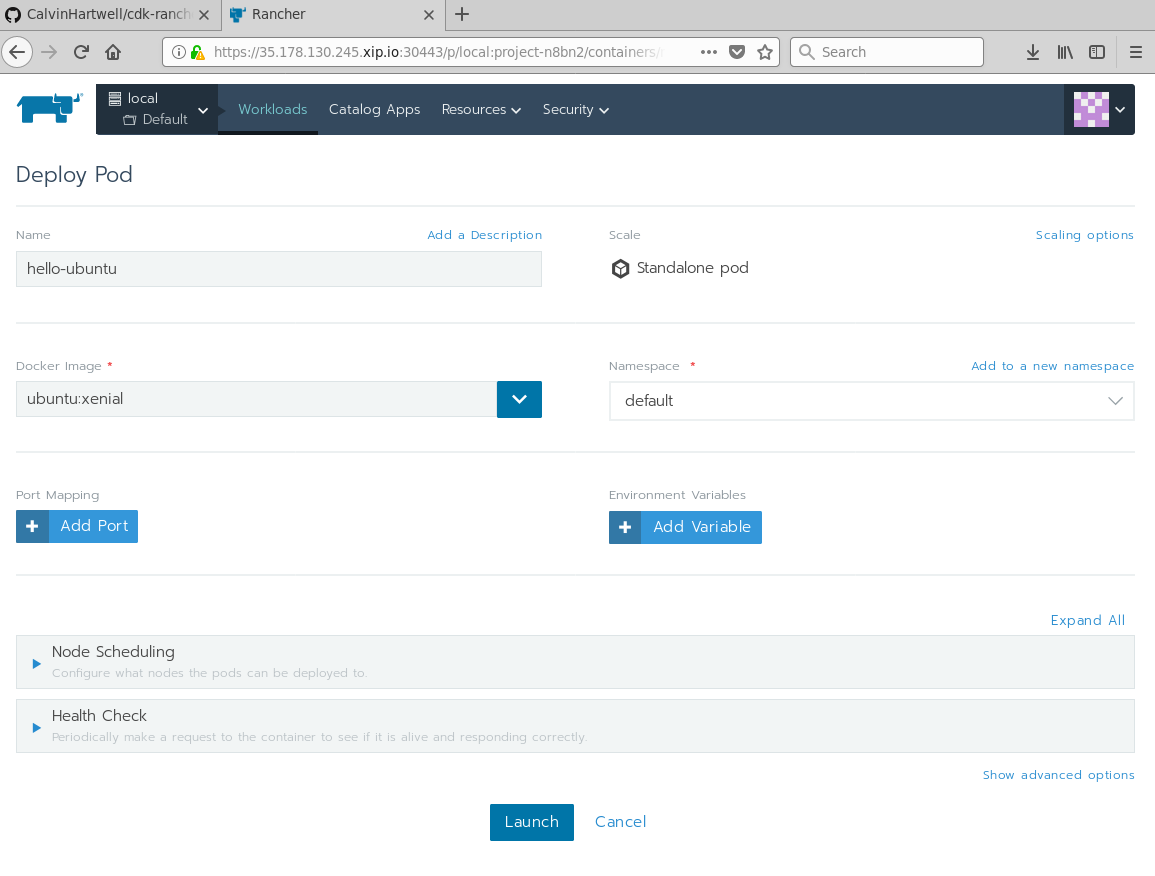
Hit the Deploy button at the Top Right and you should see an interface like this:
Fill in details and then hit the Launch button. Congratulations, you've just ran your first Ubuntu workload on CDK using Rancher.
To interact with the new container, you can enter an interactive session using the following command:
# My workstation.
calvinh@ubuntu-ws:~/Source/cdk-rancher$ uname -a
Linux ubuntu-ws 4.13.0-17-generic #20-Ubuntu SMP Mon Nov 6 10:04:08 UTC 2017 x86_64 x86_64 x86_64 GNU/Linux

# SSH into the Docker Container and check the container kernel version.
calvinh@ubuntu-ws:~/Source/cdk-rancher$ kubectl exec -it hello-ubuntu -- /bin/bash
root@hello-ubuntu:/# uname -a
Linux hello-ubuntu 4.4.0-1050-aws #59-Ubuntu SMP Tue Jan 30 19:57:10 UTC 2018 x86_64 x86_64 x86_64 GNU/Linux
The workloads interface can also be used to destroy, reprovision, clone and perform many other tasks on workloads running on Kubernetes.
Rancher can also launch a workload using the Rancher catalog. First hover over the Global option in the top left-hand part of the menu. Once the menu appears, click Default at the bottom to select the Default project.
First lets add an SSL certificate and private key for use within our default project. First generate your private key and certificate:
 calvinh@ubuntu-ws:~/Documents/Rancher$ openssl req -newkey rsa:4096 -nodes -keyout key.pem -x509 -days 365 -out certificate.pem
Generating a 4096 bit RSA private key
.....................................................................++
........................................................................................................++
writing new private key to 'key.pem'
-----
You are about to be asked to enter information that will be incorporated
into your certificate request.
What you are about to enter is what is called a Distinguished Name or a DN.
There are quite a few fields but you can leave some blank
For some fields there will be a default value,
If you enter '.', the field will be left blank.
-----
Country Name (2 letter code) [AU]:GB
State or Province Name (full name) [Some-State]:London
Locality Name (eg, city) []:London
Organization Name (eg, company) [Internet Widgits Pty Ltd]:Canonical LTD
Organizational Unit Name (eg, section) []:CPE
Common Name (e.g. server FQDN or YOUR name) []:35.178.130.245.xip.io
Email Address []:[email protected]
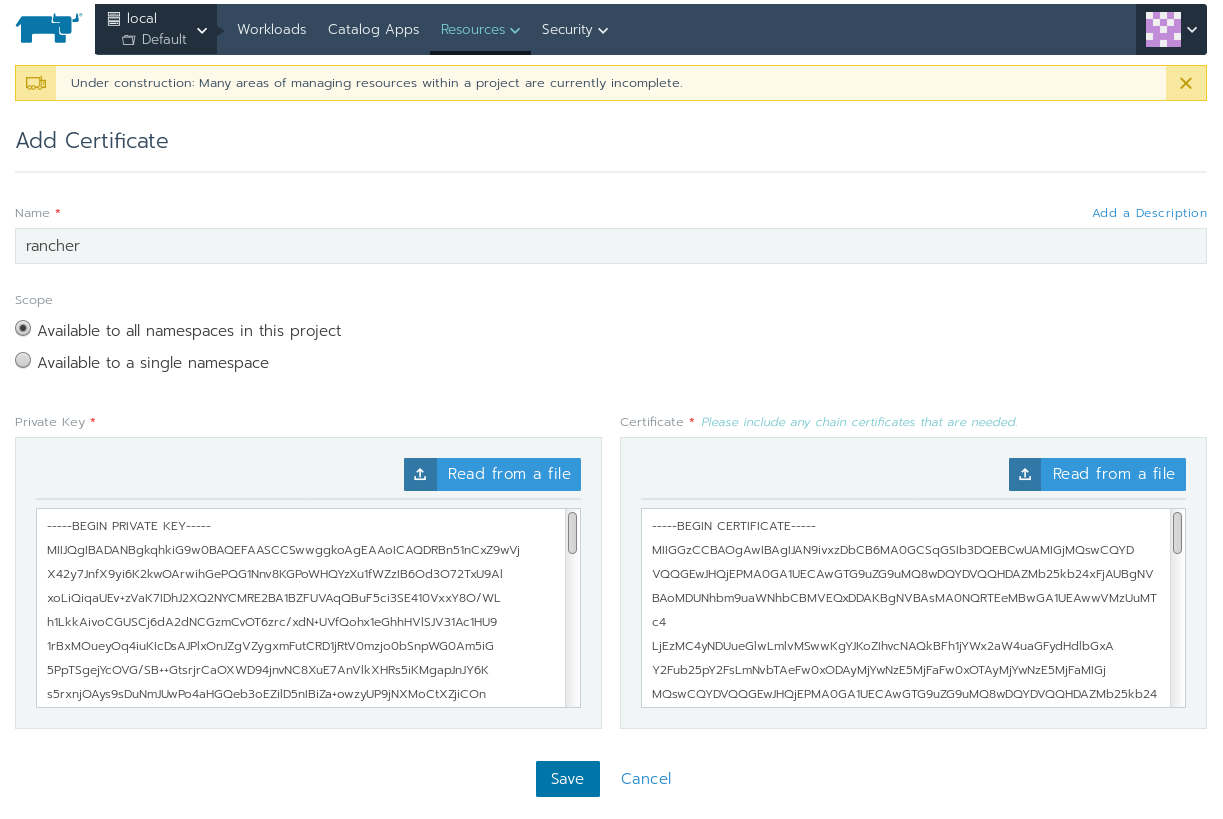
This will create two files, certificate.pem and key.pem. Back on the Rancher GUI, go to Resources -> and then Certificates. Give your certificate a name, and import your private key and certificate file either by selecting the files on Disk or by copying and pasting the content into the boxes manually. You can also choose which namespace it should be assigned. Hit the save button when you're done:
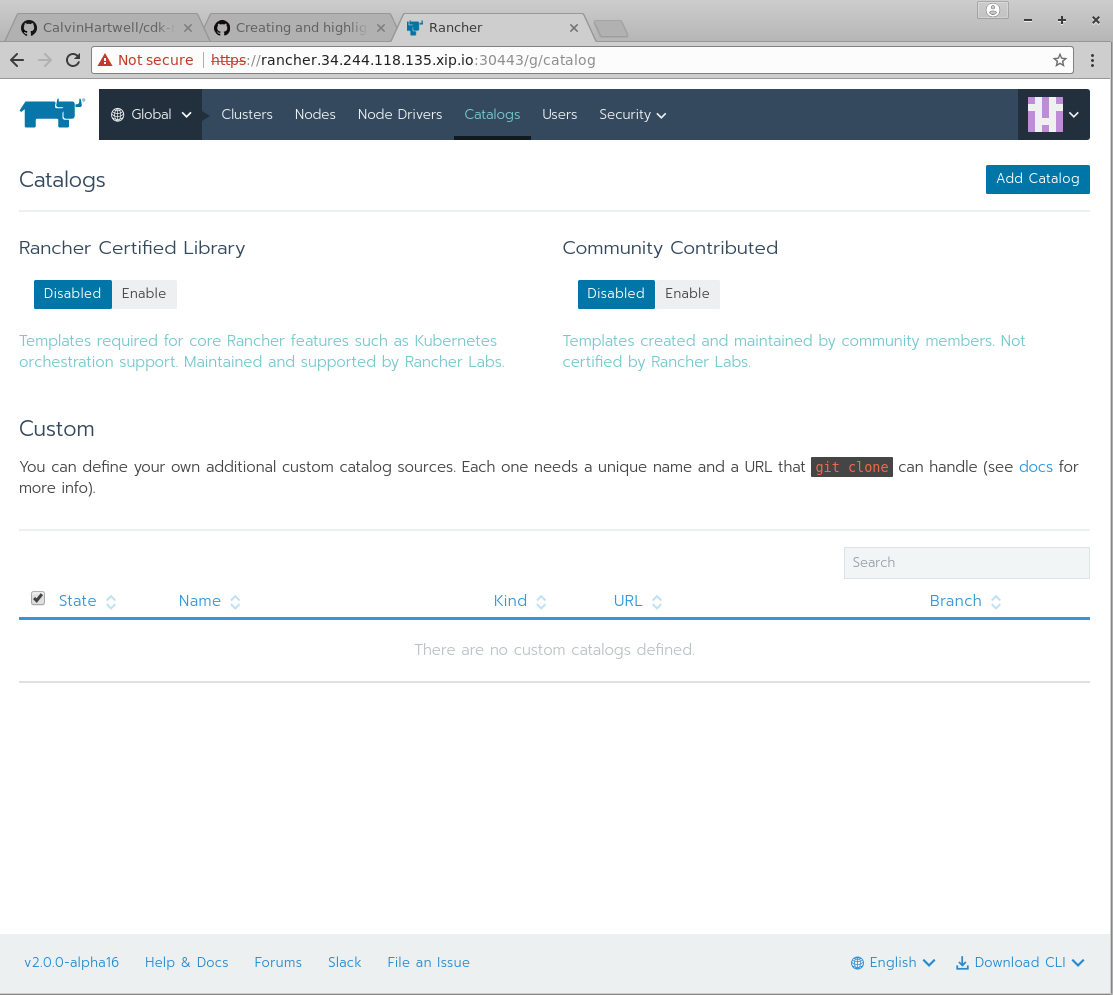
We also need to Enable the catalogs. To do this, go to the Global View and hit the Catalogs Button. You should see a screen like this:
There are two buttons which read Disabled, one for Rancher certified Library and one for Community Contributed. Press both of these to Enable to continue.
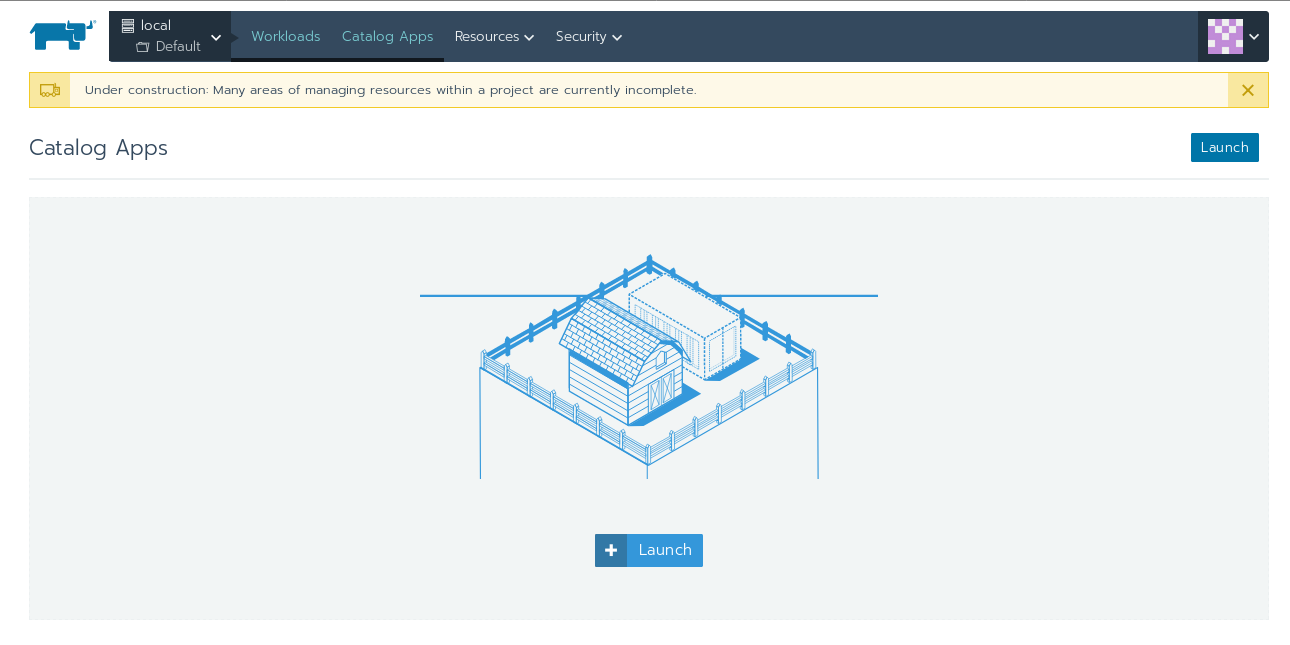
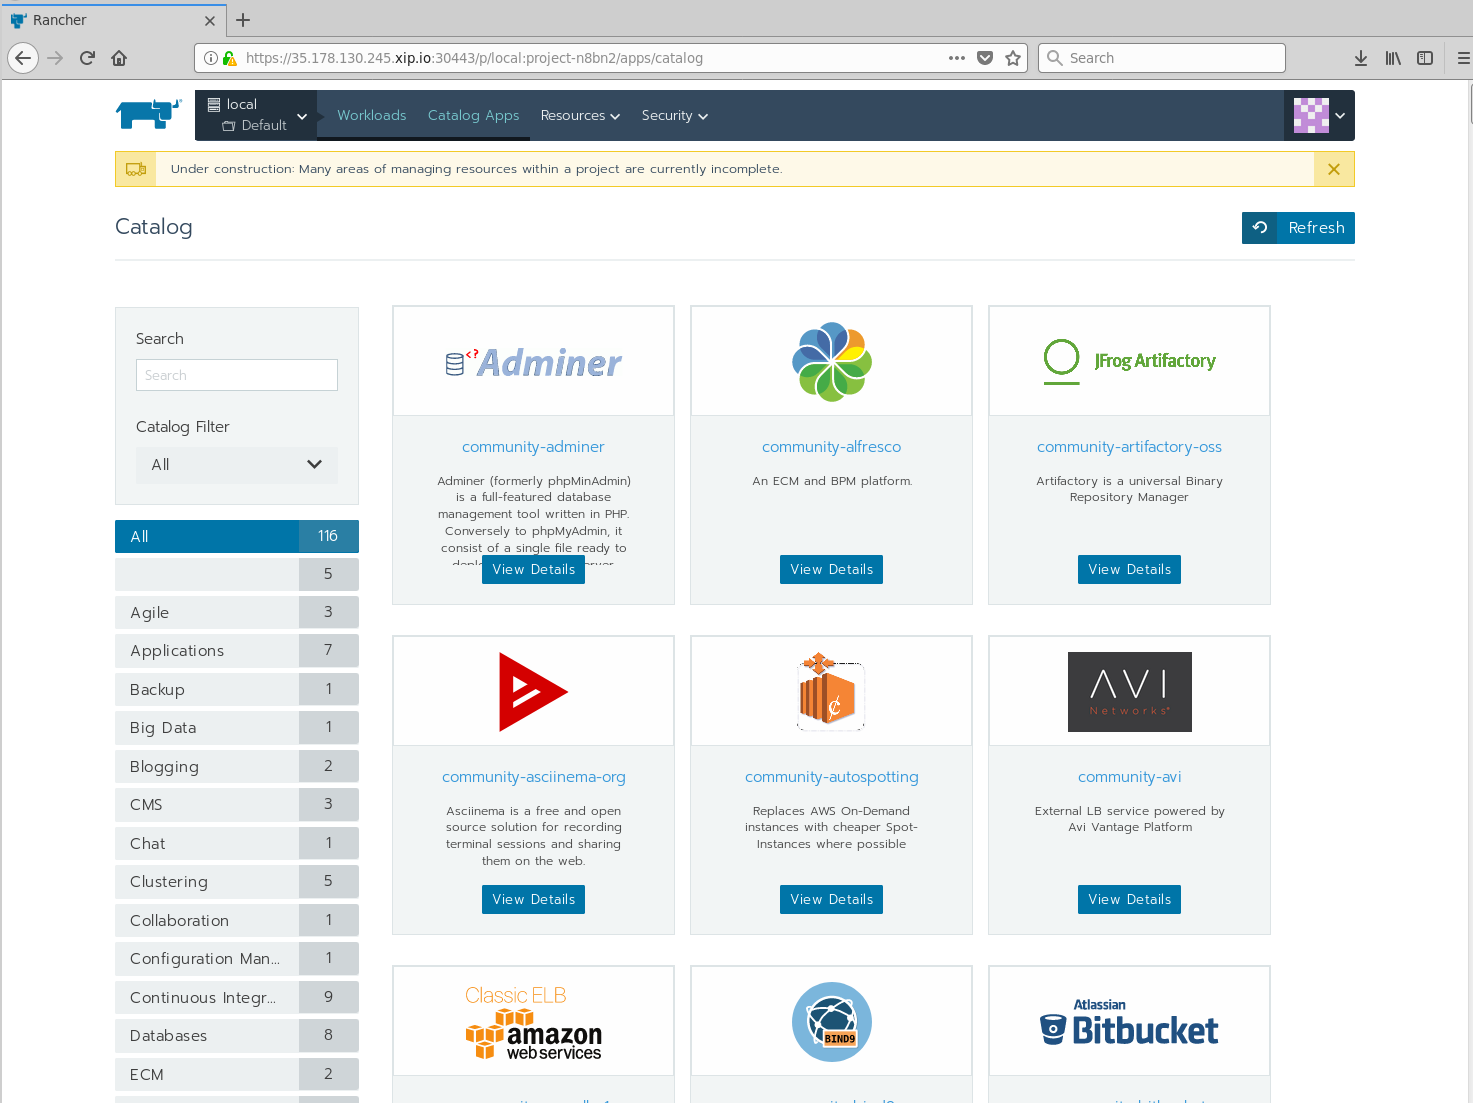
Next, hit the Catalog Apps button, you should see a screen like this:
Hit the Launch button and you should see the list of available app within the Catalogue, including Hadoop, Jenkins, Artifactory, F5 Load Balancer, Confluence, and many other applications. The default catalog is provided by Helm, but it is possible to create your own if required:
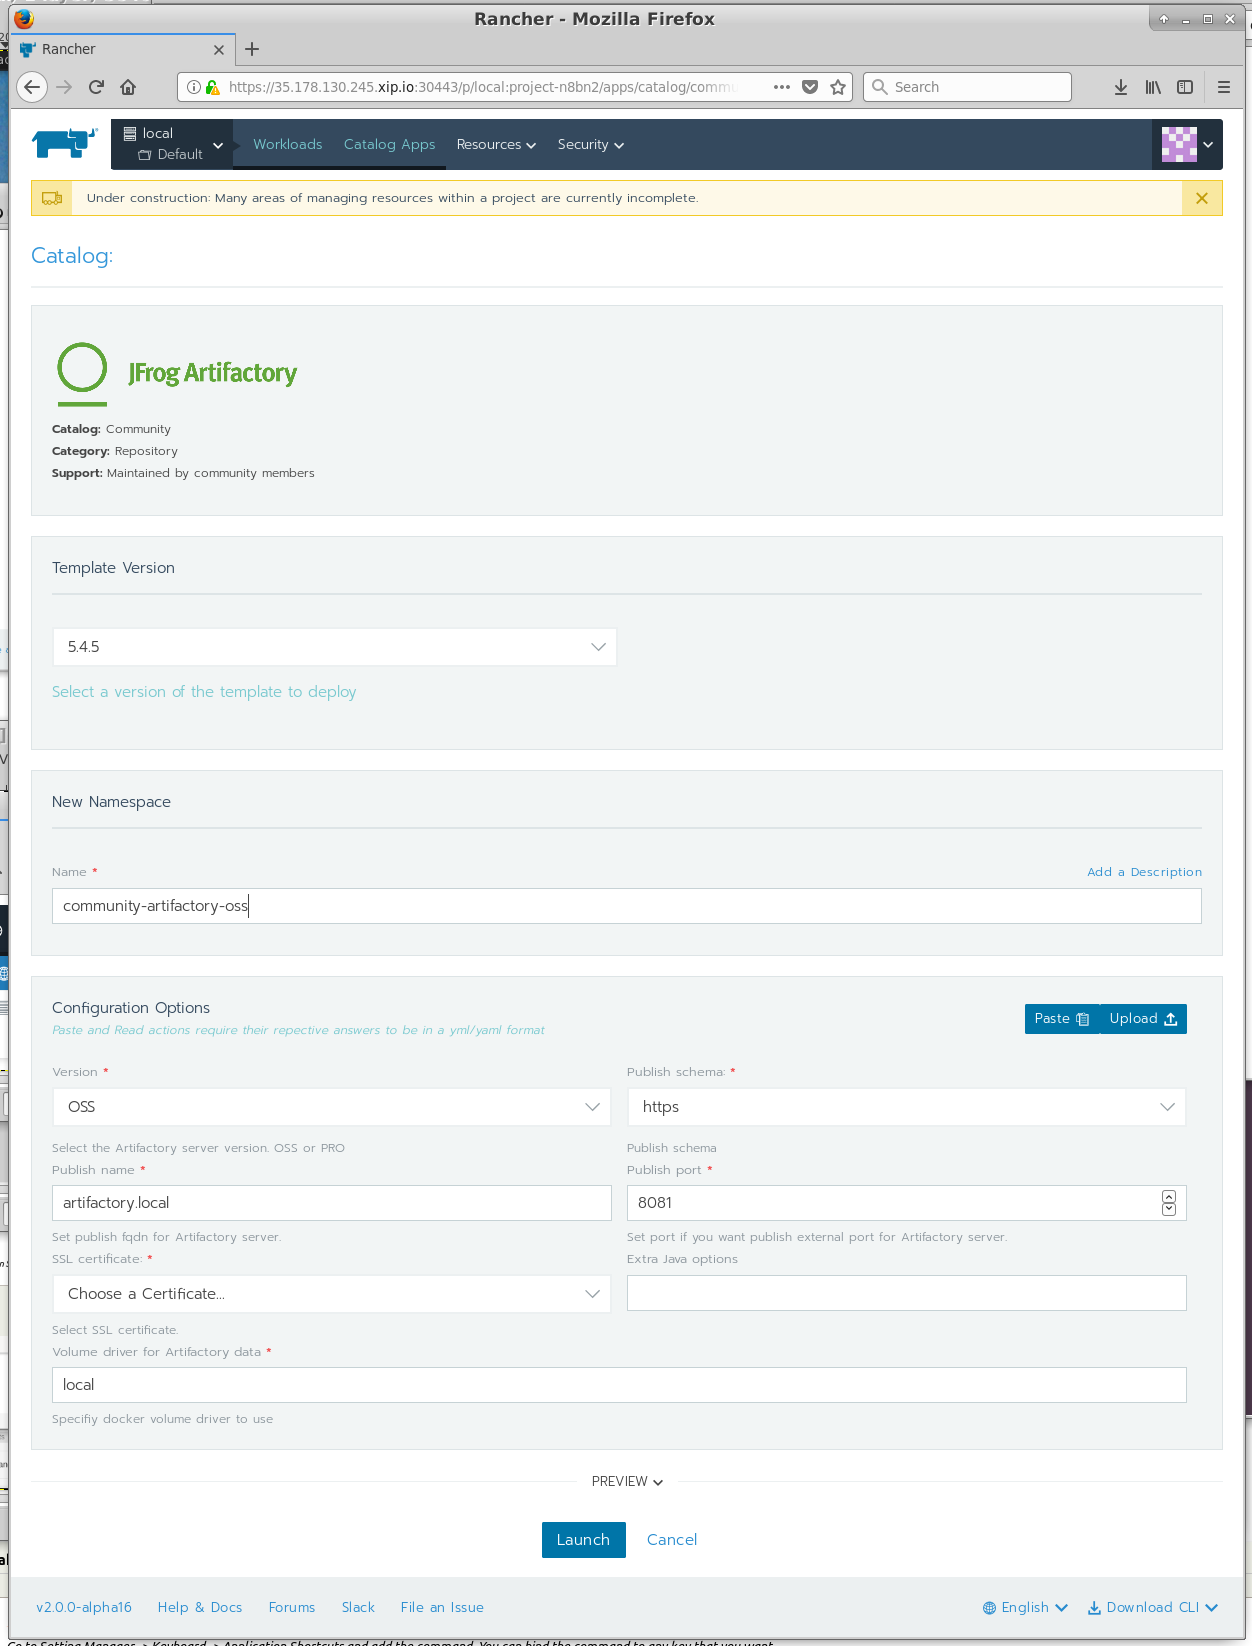
Let's try and launch Artifactory. Find JFrog Artifactory in the list of apps and hit View Details. Use the default values but make sure you change the SSL Certificate option to reflect the newly created SSL Certificate and then hit Launch at the bottom of the page:
Rancher will now attempt to deploy Artifactory from the Helm Catalogue automatically on-top of Kubernetes.
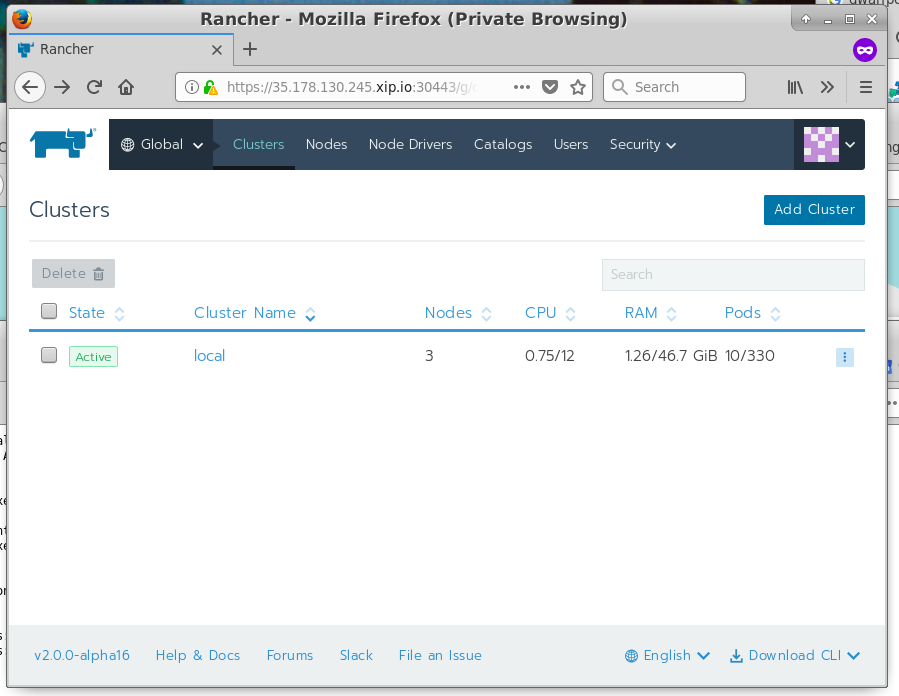
It is also possible to add additional clusters to Rancher. This is done by providing Rancher with the kubectl configuration file, which Rancher uses to take control of the additional clusters. Highlight the Global menu in the top-left and press it, and then go to Clusters. You should see a menu like this below:
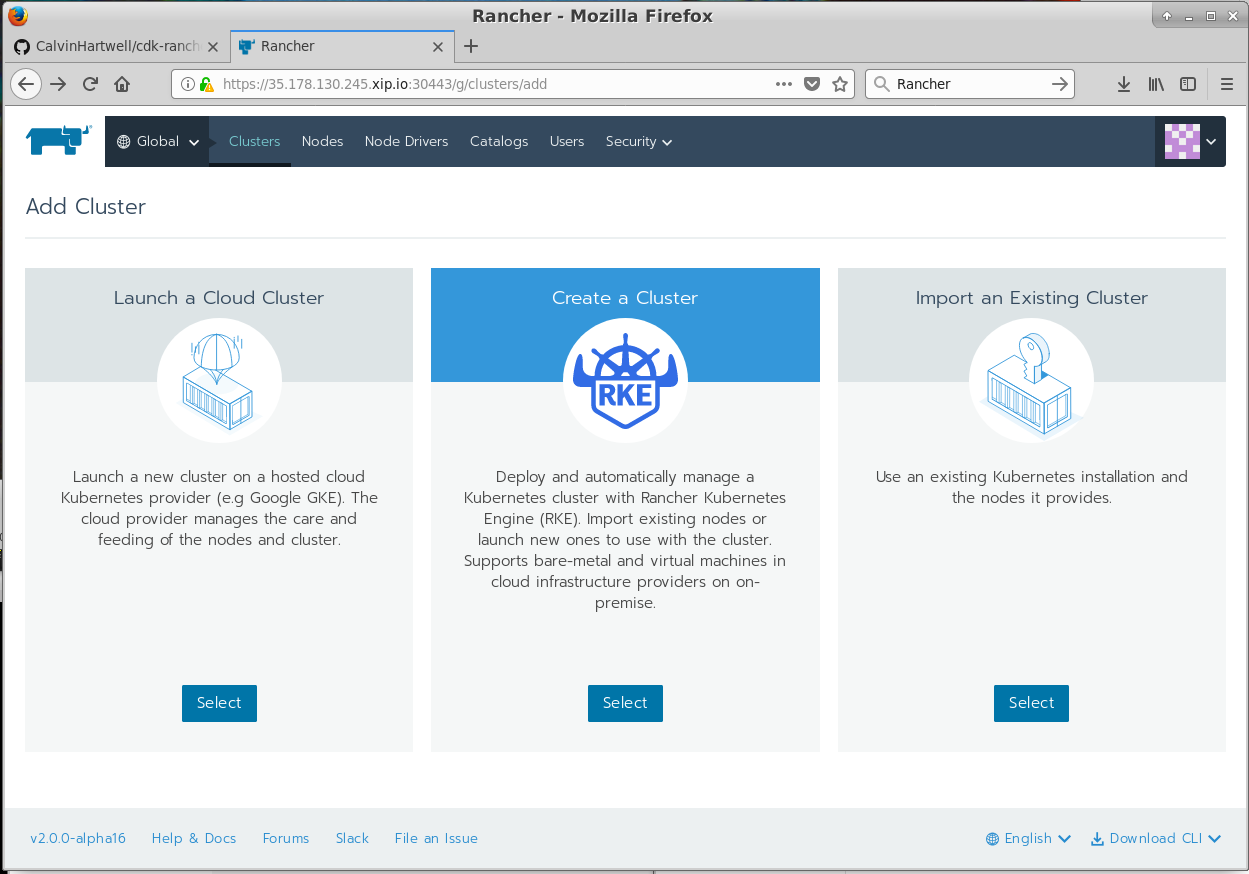
Hit the add Cluster button and you should be at another screen which asks you what kind of cluster you'd like to import:
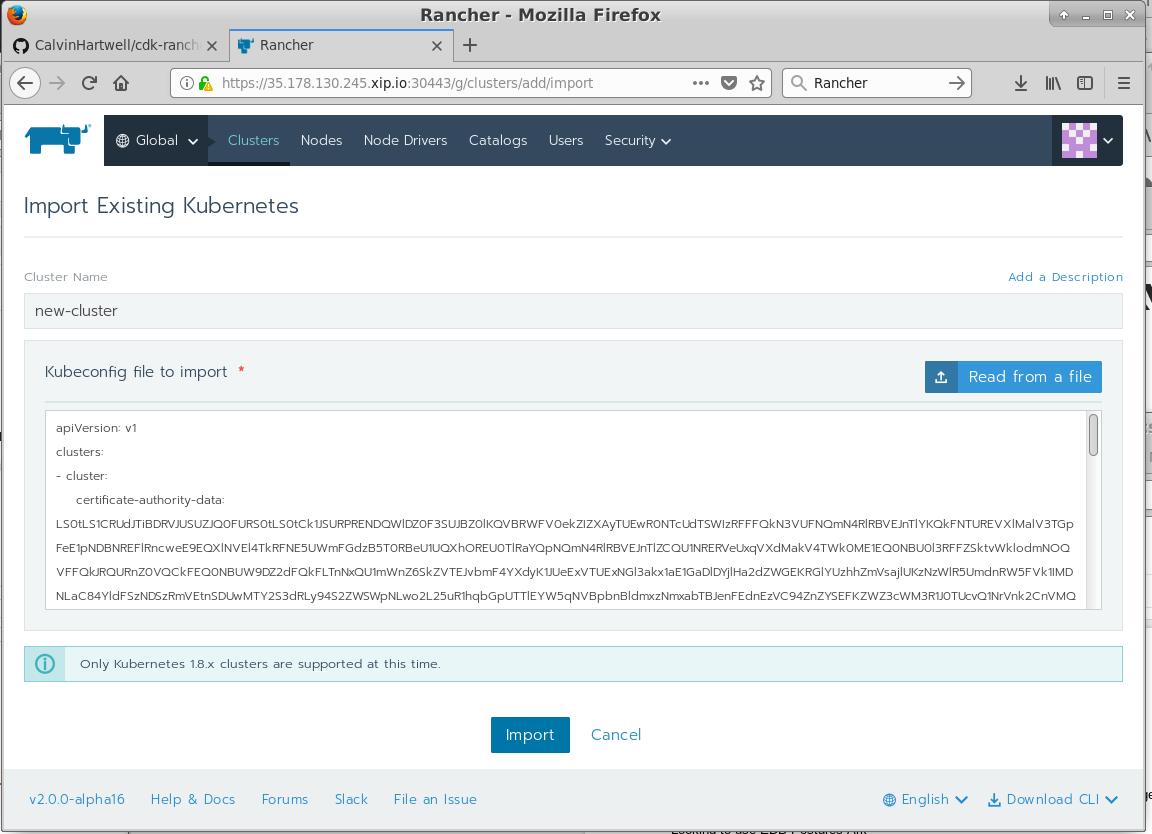
Hit the Import an Existing Cluster option and move onto the next screen:
This next screen allows you to specify a name for the cluster and provide the kubeconfig file (the same configuration file used for kubectl) which is used to control and authenticate with the cluster. Give the new cluster a name and hit the Read from a file button to import your kubeconfig file or manually copy and paste the contents of the kubeconfig from its file. Note you will nee to SCP this file from your newly provisioned CDK cluster.
If for any reason the Rancher pod becomes unresponsive, you can bounce the pod using the following command:
  # Replace the apply with your rancher yaml file.
  kubectl delete po $(kubectl get po | grep rancher | cut -d ' ' -f1) && kubectl apply -f cdk-rancher-nodeport.yaml
If is possible to check the Rancher logs using the following command:
kubectl logs -f $(kubectl get po | grep rancher | cut -d ' ' -f1)
This documentation has explained how to configure and deploy Canonical Kubernetes with Rancher running on top. It also provided a short introduction on how to use Rancher to control and manage Canonical Kubernetes. Note that this documentation was written at the time of the Rancher 2.0 alpha but a beta release is due out very soon which would be a better release candidate for a production environment.
The software versions used throughout this docunmentation are:
- Kubernetes 1.9.3
- Rancher v2.0.0-alpha16
This document was written by Calvin Hartwell, please feel to drop me an email on [email protected].
To open issues with CDK, please open an issue with the repository here https://github.com/juju-solutions/bundle-canonical-kubernetes. If you want professional support for Kubernetes please contact Canonical Sales https://www.ubuntu.com/kubernetes.
Rancher Provides support through Slack and by paid support https://rancher.com/support/. Please contact Rancher directly to get more help with their product.
- http://rancher.com/docs/rancher/latest/en/quick-start-guide/
- kubernetes/kubectl#276
- http://rancher.com/docs/rancher/v2.0/en/quick-start-guide/
- https://kubernetes.io/docs/getting-started-guides/ubuntu/installation/
- https://github.com/rancher/rancher
- https://hub.docker.com/r/rancher/server/tags/
- https://github.com/juju-solutions/bundle-canonical-kubernetes
- https://github.com/juju-solutions/bundle-canonical-kubernetes/wiki/Authorization-Mode-and-RBAC

