Unofficial implementation of "Prompt-to-Prompt Image Editing with Cross Attention Control" with Stable Diffusion, some modifications were made to the methods described in the paper in order to make them work with Stable Diffusion.
Paper: https://arxiv.org/abs/2208.01626
Official implementation: https://github.com/google/prompt-to-prompt
Large-scale language-image models (eg. Stable Diffusion) are usually hard to control just with editing the prompts alone and can be very unpredictable and unintuitive for users. Most existing methods require the user to input a mask which is cumbersome and might not yield good results if the mask has an inadequate shape. Cross Attention Control allows much finer control of the prompt by modifying the internal attention maps of the diffusion model during inference without the need for the user to input a mask and does so with minimal performance penalities (compared to clip guidance) and no additional training or fine-tuning of the diffusion model.
This notebook uses the following libraries: torch transformers diffusers numpy PIL tqdm difflib
The last known working version of diffusers for the notebook is diffusers==0.4.1. A different version of diffusers might cause errors as this notebook injects code into the model and any code change from the diffusers library is likely to break compatibility.
Simply install the required libraries using pip and run the jupyter notebook, some examples are given inside.
A description of the parameters are given at the end of the readme.
Alternatively there is this easy-to-follow colab demo by Lewington-pitsos:
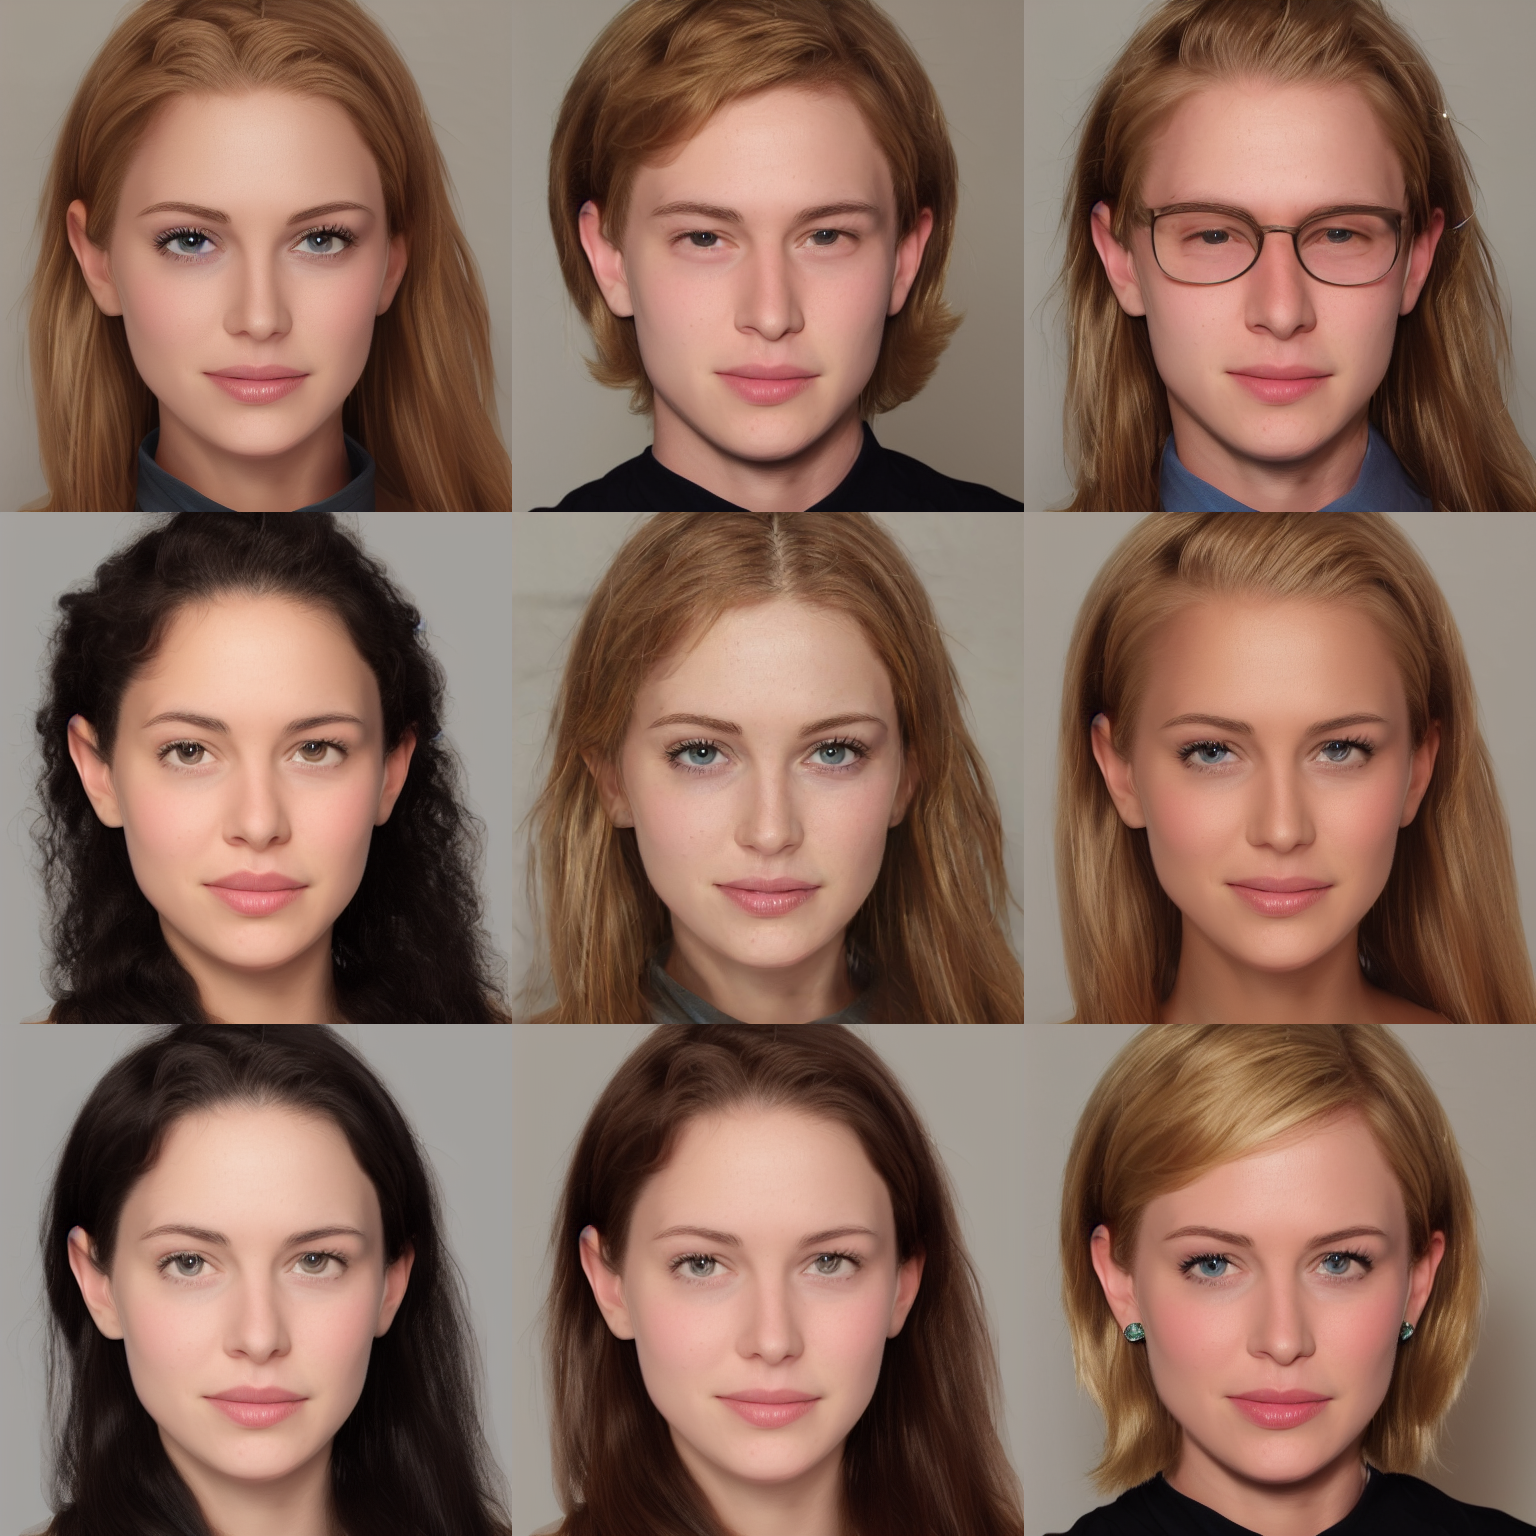
All images shown below are generated using the same seed. The initial and target images must be generated with the same seed for cross attention control to work.
This method takes an existing image and finds its corresponding gaussian latent vector using a modified inverse DDIM process that keeps compatibility with other ODE schedulers such as K-LMS, then edits using prompt to prompt editing with cross attention control. A finite difference gradient descent method that corrects for high CFG values is also provided. It allows inversion with higher CFG values (eg. 3.0-5.0), while without it only CFG values below 3.0 are usable.
Middle: Original image
Top left: Reconstructed image using the prompt a photo of a woman with blonde hair
Clockwise: See InverseCrossAttention_Release.ipynb for the prompts in order.
Note that some fine tuning on the prompts have been done to make these images consistent. For example, when changing the hair color, sometimes the person starts smiling, which can be removed by adding a smile token in the prompt and adjust its weight downwards using cross attention control.
Top left prompt: [a cat] sitting on a car
Clockwise: a smiling dog..., a hamster..., a tiger...
Note: different strength values for prompt_edit_spatial_start were used, clockwise: 0.7, 0.5, 1.0

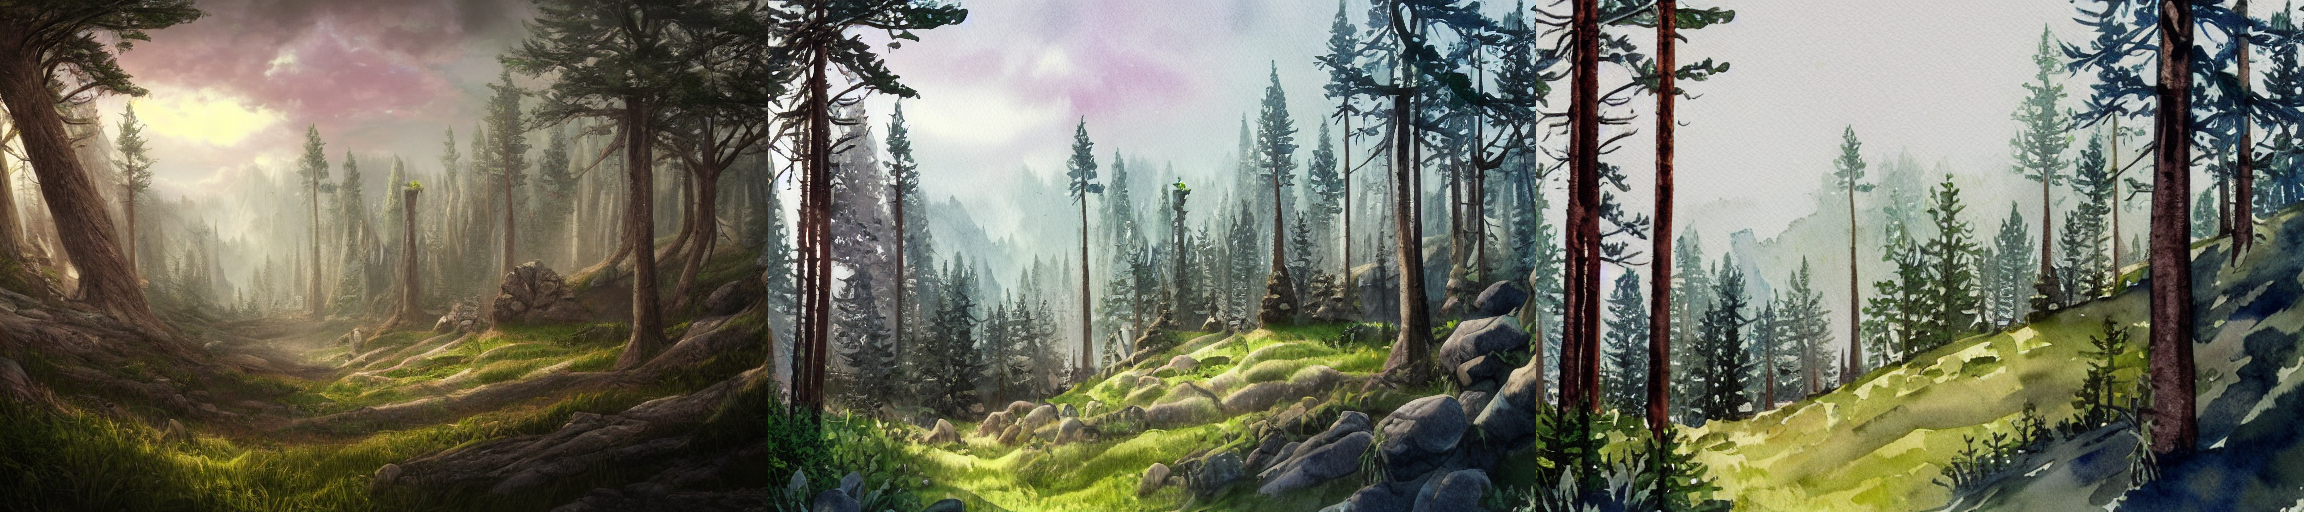
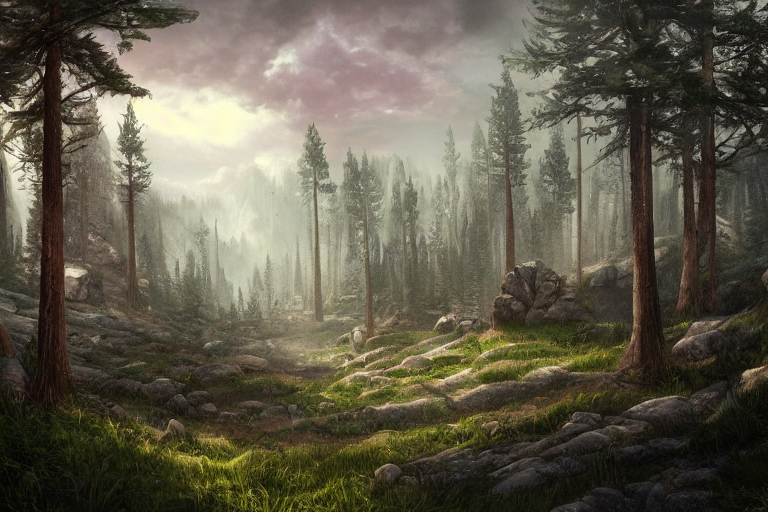
Top left prompt: a fantasy landscape with a maple forest
Clockwise: a watercolor painting of..., a van gogh painting of..., a charcoal pencil sketch of...

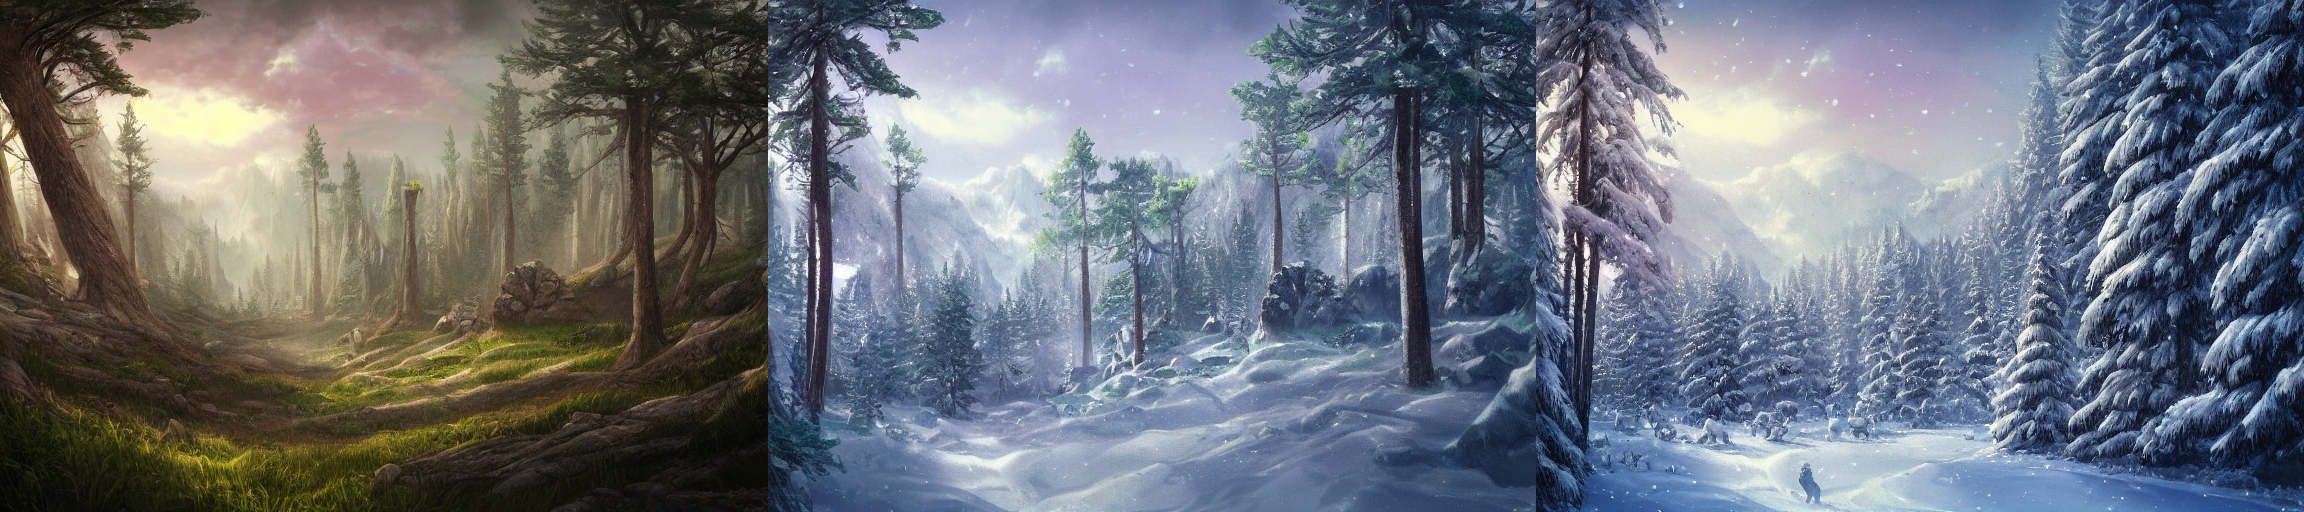
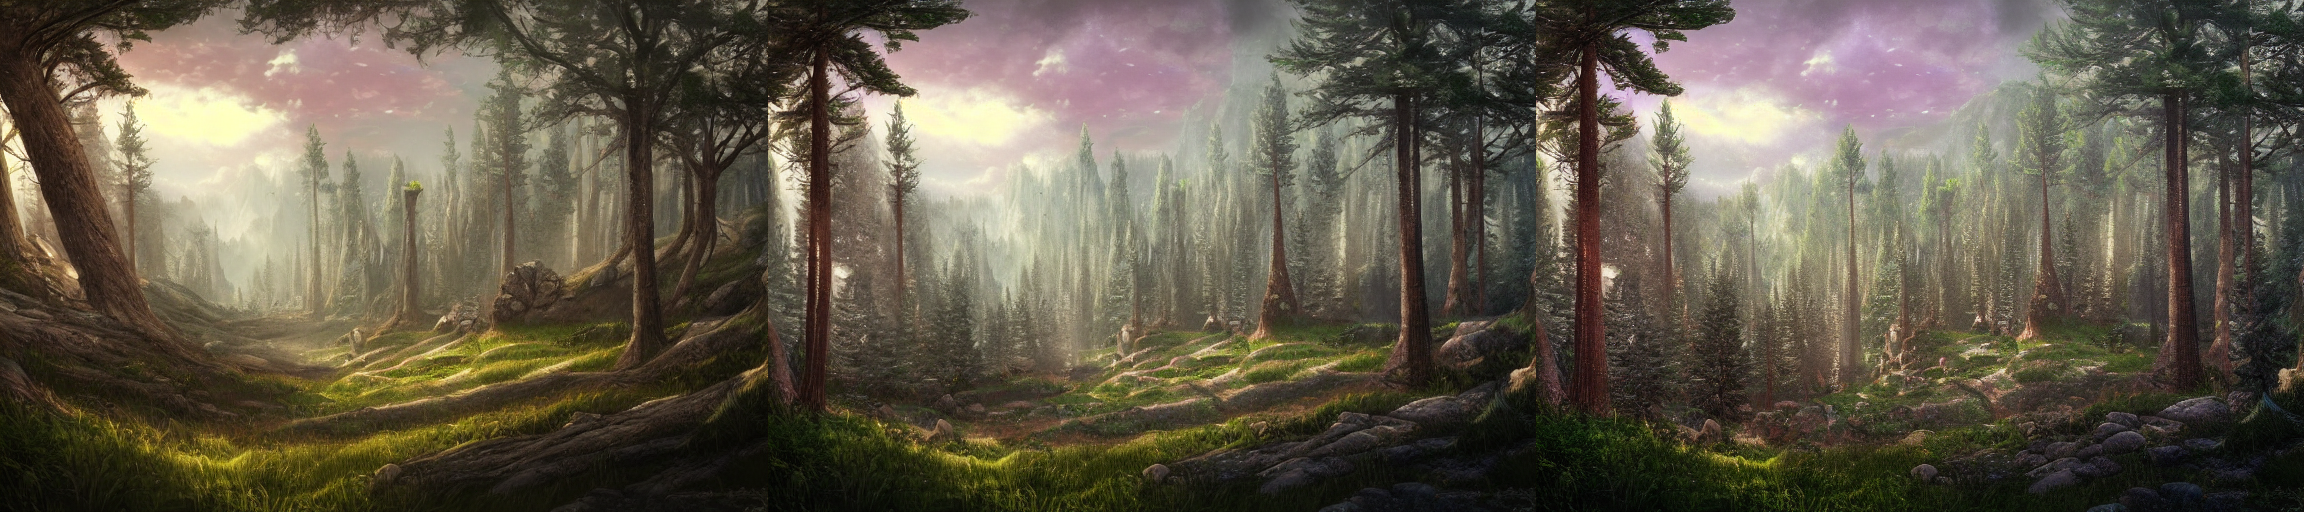
Top left prompt: a fantasy landscape with a pine forest
Clockwise: ..., autumn, ..., winter, ..., spring, green

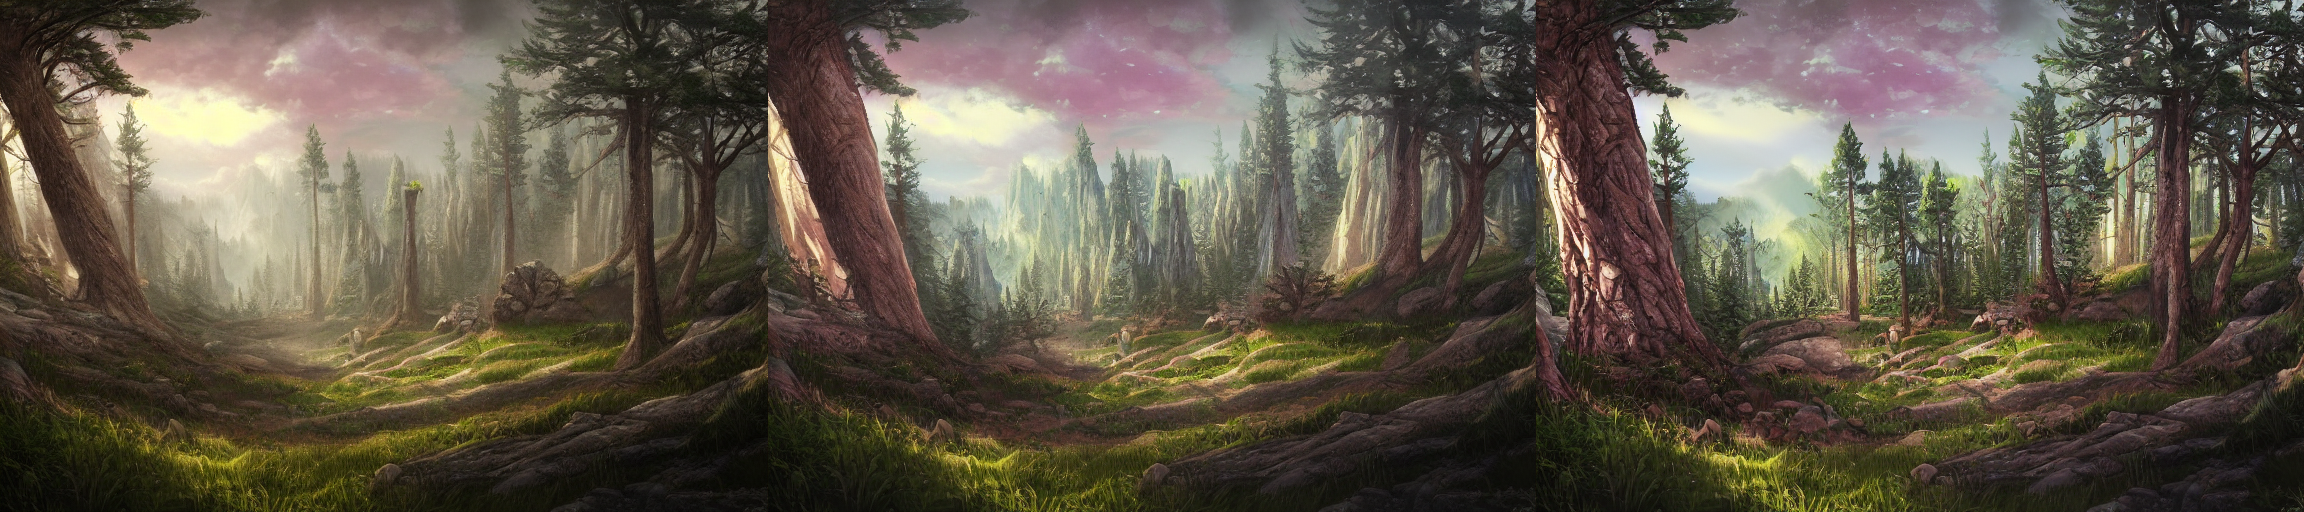
Left image prompt: a fantasy landscape with a pine forest
Right image prompt: a winter fantasy landscape with a pine forest
Middle image: Cross attention enabled prompt editing (left image -> right image)
Left image prompt: a fantasy landscape with a pine forest
Right image prompt: a watercolor painting of a landscape with a pine forest
Middle image: Cross attention enabled prompt editing (left image -> right image)
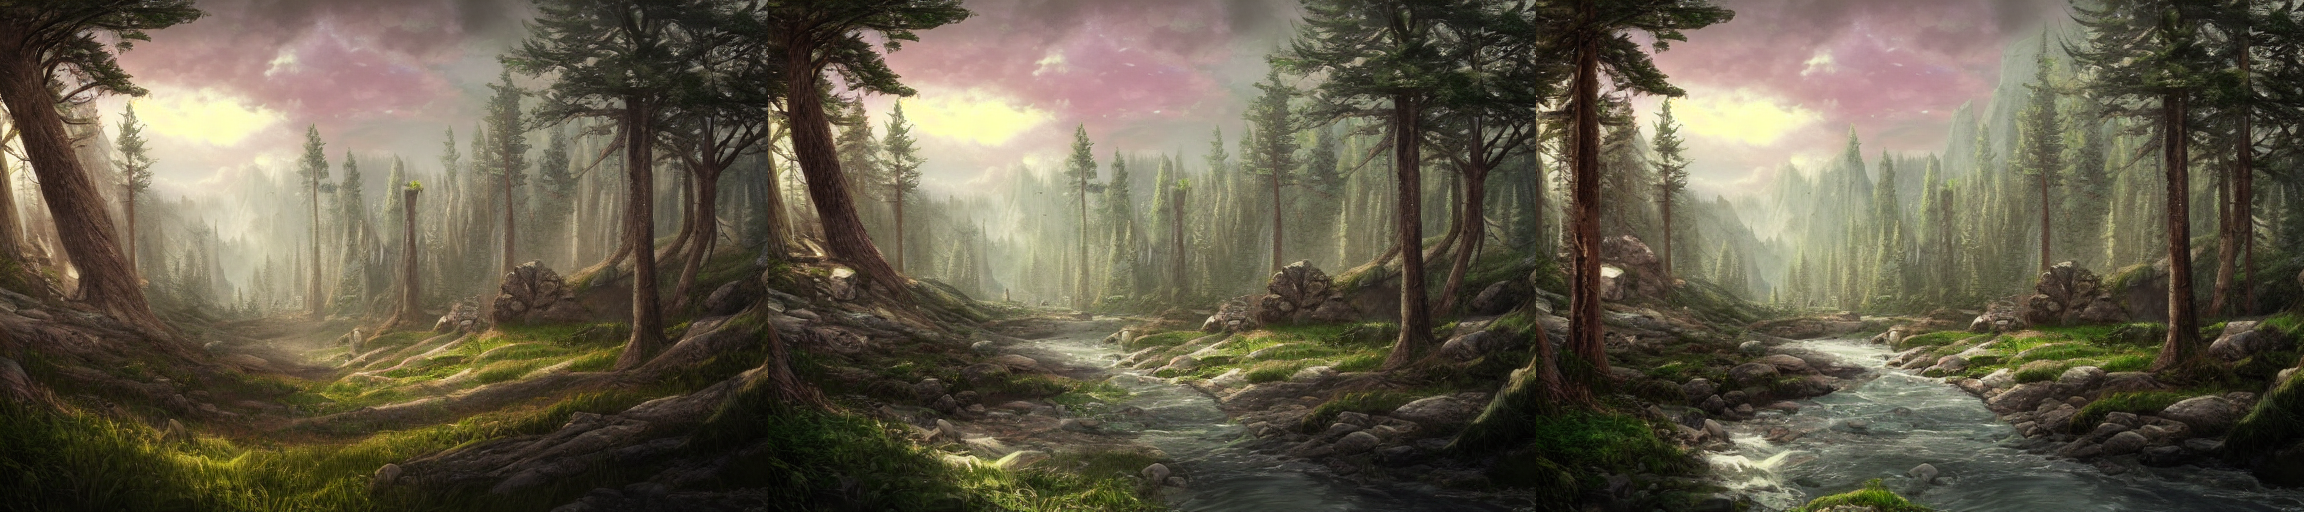
Left image prompt: a fantasy landscape with a pine forest
Right image prompt: a fantasy landscape with a pine forest and a river
Middle image: Cross attention enabled prompt editing (left image -> right image)
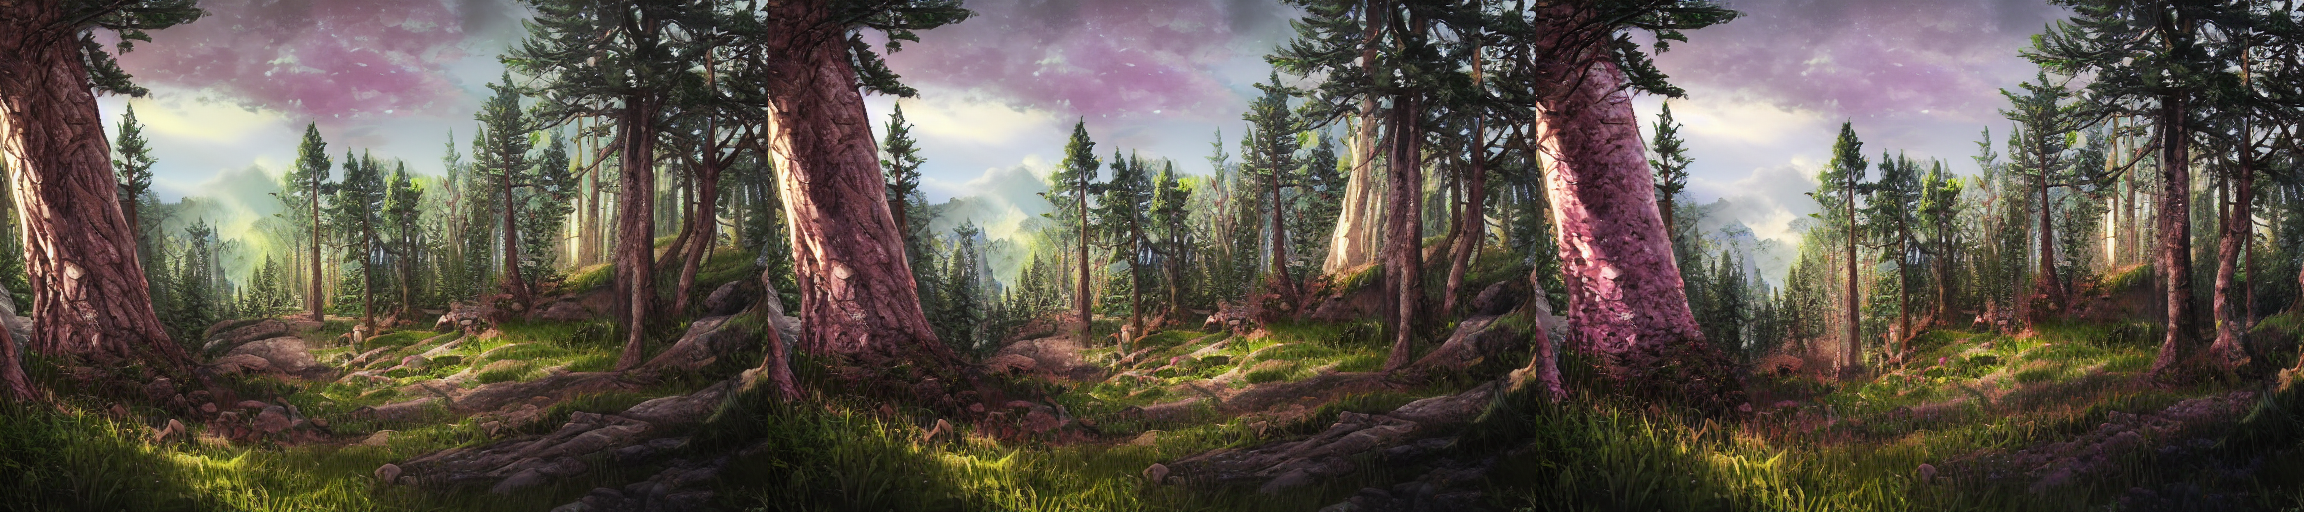
Left image prompt: a fantasy landscape with a pine forest
Towards the right: -fantasy

Left image prompt: a fantasy landscape with a pine forest
Towards the right: +fantasy and +forest
Left image prompt: a fantasy landscape with a pine forest
Towards the right: -fog
Left image: from previous example
Towards the right: -rocks
Let's compare our results above where we removed fog and rocks from our fantasy landscape using cross attention maps against what people usually do, by editing the prompt alone.
We can first try adding "without fog and without rocks" to our prompt.
Image prompt: A fantasy landscape with a pine forest without fog and without rocks
However, we still see fog and rocks.
We can try adding words like dry, sunny and grass.
Image prompt: A fantasy landscape with a pine forest without fog and rocks, dry sunny day, grass
There are less rocks and fog, but the image's composition and style is completely different from before and we still haven't obtained our desired fog and rock-free image...

Two functions are included, stablediffusion(...) which generates images and prompt_token(...) that is used to help the user find the token index for words in the prompt, which is used to tweak token weights in prompt_edit_token_weights.
Parameters of stabledifusion(...):
| Name = Default Value | Description | Example |
|---|---|---|
prompt="" |
the prompt as a string | "a cat riding a bicycle" |
prompt_edit=None |
the second prompt as a string, used to edit the first prompt using cross attention, set None to disable |
"a dog riding a bicycle" |
prompt_edit_token_weights=[] |
values to scale the importance of the tokens in cross attention layers, as a list of tuples representing (token id, strength), this is used to increase or decrease the importance of a word in the prompt, it is applied to prompt_edit when possible (if prompt_edit is None, weights are applied to prompt) |
[(2, 2.5), (6, -5.0)] |
prompt_edit_tokens_start=0.0 |
how strict is the generation with respect to the initial prompt, increasing this will let the network be more creative for smaller details/textures, should be smaller than prompt_edit_tokens_end |
0.0 |
prompt_edit_tokens_end=1.0 |
how strict is the generation with respect to the initial prompt, decreasing this will let the network be more creative for larger features/general scene composition, should be bigger than prompt_edit_tokens_start |
1.0 |
prompt_edit_spatial_start=0.0 |
how strict is the generation with respect to the initial image (generated from the first prompt, not from img2img), increasing this will let the network be more creative for smaller details/textures, should be smaller than prompt_edit_spatial_end |
0.0 |
prompt_edit_spatial_end=1.0 |
how strict is the generation with respect to the initial image (generated from the first prompt, not from img2img), decreasing this will let the network be more creative for larger features/general scene composition, should be bigger than prompt_edit_spatial_start |
1.0 |
guidance_scale=7.5 |
standard classifier-free guidance strength for stable diffusion | 7.5 |
steps=50 |
number of diffusion steps as an integer, higher usually produces better images but is slower | 50 |
seed=None |
random seed as an integer, set None to use a random seed |
126794873 |
width=512 |
image width | 512 |
height=512 |
image height | 512 |
init_image=None |
init image for image to image generation, as a PIL image, it will be resized to width x height |
PIL.Image() |
init_image_strength=0.5 |
strength of the noise added for image to image generation, higher will make the generation care less about the initial image | 0.5 |
Parameters of inversestabledifusion(...):
| Name = Default Value | Description | Example |
|---|---|---|
init_image |
the image to invert | PIL.Image("portrait.png") |
prompt="" |
the prompt as a string used for inversion | "portrait of a person" |
guidance_scale=3.0 |
standard classifier-free guidance strength for stable diffusion | 3.0 |
steps=50 |
number of diffusion steps used for inversion, as an integer | 50 |
refine_iterations=3 |
inversion refinement iterations for high CFG values, set to 0 to disable refinement when using lower CFG values, for higher CFG values, consider increasing it. Higher values slow down the algorithm significantly. | 3 |
refine_strength=0.9 |
initial strength value for the refinement steps, the internal strength is adaptive | 0.9 |
refine_skip=0.7 |
how many diffusion steps of refinement are skipped (value between 0.0 and 1.0), there is usually no need to refine earlier diffusion steps as CFG is not very important in lower time steps, higher values will skip even more steps |
0.7 |


