As you continue your journey into programming, you will learn to use many tools to make your work easier that you only sort of understand. Node packages, Ruby gems, libraries, command-line applications, frontend frameworks, etc... many of these tools are actually built out of other tools, things you may never have heard of. That is okay.
Thanks to the collective work of many programmers around the world, we're able to tap in to a diverse ecosystem of tools. We don't need to know how they all work together for them to be useful to us. You might one day know JavaScript well enough to build your own version of React, but you'll be able to use React long before you know how all the parts work. Many of these tools are designed to solve problems so we can focus our energy and time elsewhere.
We've already used a few tools to help us get started with programming. If you recall from the previous installation instructions, we've installed NVM, the Node Version Manager, which manages which version of Node you're using on your computer. We've been using NPM, Node Package Manager, to run local tests. We've also been using Git in the command line to interface remotely with GitHub.
In this lesson, we're going to introduce another tool that will help us going
forward, the learn-co gem.
So, if all these tools we use are meant to solve problems, what problems does
the learn-co gem solve?
In your assignments so far, after cloning a repository, you typically do a few things while working through the assignment:
-
Run
npm installorbundleto install any necessary dependencies for the repository (...tools others have built to make things easier for us) -
Run
npm testorrspecto run tests -
Git commit and push your work to your GitHub remote repo
Once you've pushed your solution up to GitHub, you then have to submit a link in Canvas.
The learn-co gem will take care of all of these steps using a single command,
learn test! Let's get the gem installed and configured so we can test it out.
Note: The instructions here assume you've successfully installed Ruby and Node in the previous environment setup instructions.
To install the gem, run the following in your terminal:
gem install learn-coBefore we can use the gem, we'll need to do a few things:
- Connect your Flatiron School Portal account to GitHub
- Connect the local gem to your Flatiron School Portal account
- Open the Flatiron School Student Portal webpage (https://portal.flatironschool.com) (Note: you need to be logged in to Flatiron School Student Portal.)
- Navigate to your Account Management page (https://learn.co/account) via the drop-down menu in the upper right corner of the page
- Open the Connected Apps tab (https://learn.co/account/github) (Note: you may be asked to log in. Use your Flatiron School Student Portal username and password here.)
- Connect your GitHub account to your Flatiron School Portal account
You should now see something similar to this:

This step will ask you to do work both in your browser and your terminal.
- Open the "Terminal" application (or "Ubuntu" for WSL users).
- Type
touch ~/.netrc && chmod 0600 ~/.netrcand press<Enter>. (Note: you may be asked to enter your password.) - Go to your Public Profile Management webpage (https://portal.flatironschool.com/account/profile) in your browser. (Note: if you’re not logged in, you will need to log in again.)
- Look for the "Username" heading and copy your username, but do not copy the
text
https://learn.co/. - Go to your Flatiron School Student Portal Profile page ("https://portal.flatironschool.com/" + your username).
- Scroll all the way to the bottom of the page to the heading "The information below is sensitive and unique to your account. Only you can view this information." with a red background.
- Copy the string of characters under the "OAuth token" header.
- Go back to the terminal, type
learn whoamiand press<Enter>. - Paste the string of characters at the prompt and press
<Enter>.
Type learn whoami in the terminal. If you see a message with your name,
username, and email, you've successfully configured the gem.
The learn-co gem replaces some steps in the assignment workflow you've learned
so far and alters others. Let's walk through the updated process. Use this
assignment to follow along:
-
On this assignment's Canvas page, click the Fork button in the upper right corner of the page:
You should notice a change in the button's behavior — rather than bringing you to the fork page in GitHub, you'll be redirected to your repository already in the process of being forked.
-
Once your fork is ready, click the Code button and copy the SSH repository info by clicking the clipboard button.

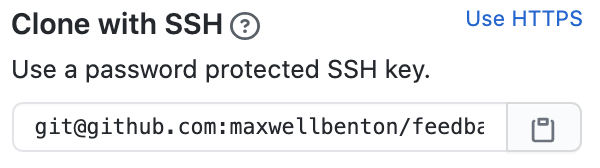
Note: Make sure you're choosing SSH and not HTTPS.
- In your terminal, navigate to where you'd like to put this repository locally, clone it down and navigate into the folder.
git clone [email protected]:<your-github-account-name>/macos-env-flatiron-student-portal.git
cd macos-env-flatiron-student-portal
- Instead of running
npm installandnpm test(orbundleandrspec), you can now run one command,learn test, to handle this step. This command will automatically run the installation and test commands. You should see a flurry of text as dependencies are installed, then the results of your test. This assignment has the same test as the previous Complete Your First Software Engineering Assignment. By cloning this assignment down, you've already passed the test!
This assignment
    ✓ has been correctly cloned to your local environment


  1 passing (5ms)
When all tests are passing, you can head back to the assignment on Canvas. Refresh the assignment page and you should see that Canvas now registers the assignment as both Submitted and Complete. A URL to your fork of the assignment has been submitted in Canvas, so you are ready to move on to the next lesson.
Each assignment will be different and will include instructions on what is
required to complete it. Some labs will have many tests. You can run learn test as many times as you'd like while working to solve these labs. You will
submit your work to Canvas each time you do, but the assignment will be marked
Incomplete until all tests are passing.
Every time you run learn test, all the changes you've made locally will be
stored on your GitHub fork of the repo. If you head back to your repo after
running learn test, you should see a message that a new branch, fis-wip, has
been created. This branch contains the work you've done so far. If you ever want
to go back to a previous solution, go to that repository on GitHub and switch to
the fis-wip branch.
You no longer need to commit and push your local work for these assignments.
Note: if you see the following message on your repo's page in GitHub, please disregard it:

For most assignments, you will go through the process we just walked through. In our curriculum, these assignments are often referred to as labs — coding lessons that include tests. There are a few other types of assignments, though, that require slightly different submission steps:
- Code-alongs: These also require code, but will guide you through what
needs to be written. There are no tests to pass, but you will still need to go
through forking, cloning, and running
learn test. You should see a message stating that no tests were found, but if you check the assignment in Canvas, you should see it is marked as Complete. - Portfolio Projects: For these assignments, you'll be building fully functional applications. Some guidelines and requirements will be provided, but it will be up to you to design and create your own app. These will eventually become the projects you showcase to potential employers! You will submit your projects in Canvas by submitting a link to your GitHub repo.
- Blog Submissions: Blogs are a required part of our Software Engineering courses. They help to develop your online presence and are a great way to reinforce the concepts you learn. You'll write your blog posts on a different platform, but submit links to them in Canvas.
For both portfolio projects and blog posts, you'll need to manually submit a link to your work on Canvas. While viewing the assignment, you should see a Submit Assignment button in the upper-right section of the page.

Clicking this button will bring you to the bottom of the page where you can submit a URL link to your work.

Upon submission you should see confetti appear, indicating that your submission has been accepted.
Note: It is possible to submit lab and code-along assignments manually this way. However, the assignment will only be marked as Submitted, not Complete.
You've completed your first assignment using the learn-co gem! You now know
how to work on and submit assignments going forward:
- Click the Fork button on the Canvas assignment
- Once the assignment is forked, clone it down to your local machine
- Complete any required work, then run
learn test - If all tests pass, the assignment will be submitted to Canvas and marked as Complete
- Your work will also be pushed to GitHub and will be available on the
fis-wipbranch
Equipped with this knowledge, you are now ready to tackle greater challenges!


