Code Monkey home page Code Monkey logo

auth0-cli's Introduction

Auth0 CLI

GoDoc Go Report Card Release Codecov License Build Status


Build, manage and test your Auth0 integrations from the command line.

demo

Highlights

  • 🧪 Test your universal login flow: Emulate your end users' login experience by running auth0 test login.
  • 🔍 Troubleshoot in real-time: Inspect the events of your Auth0 integration as they happen with the
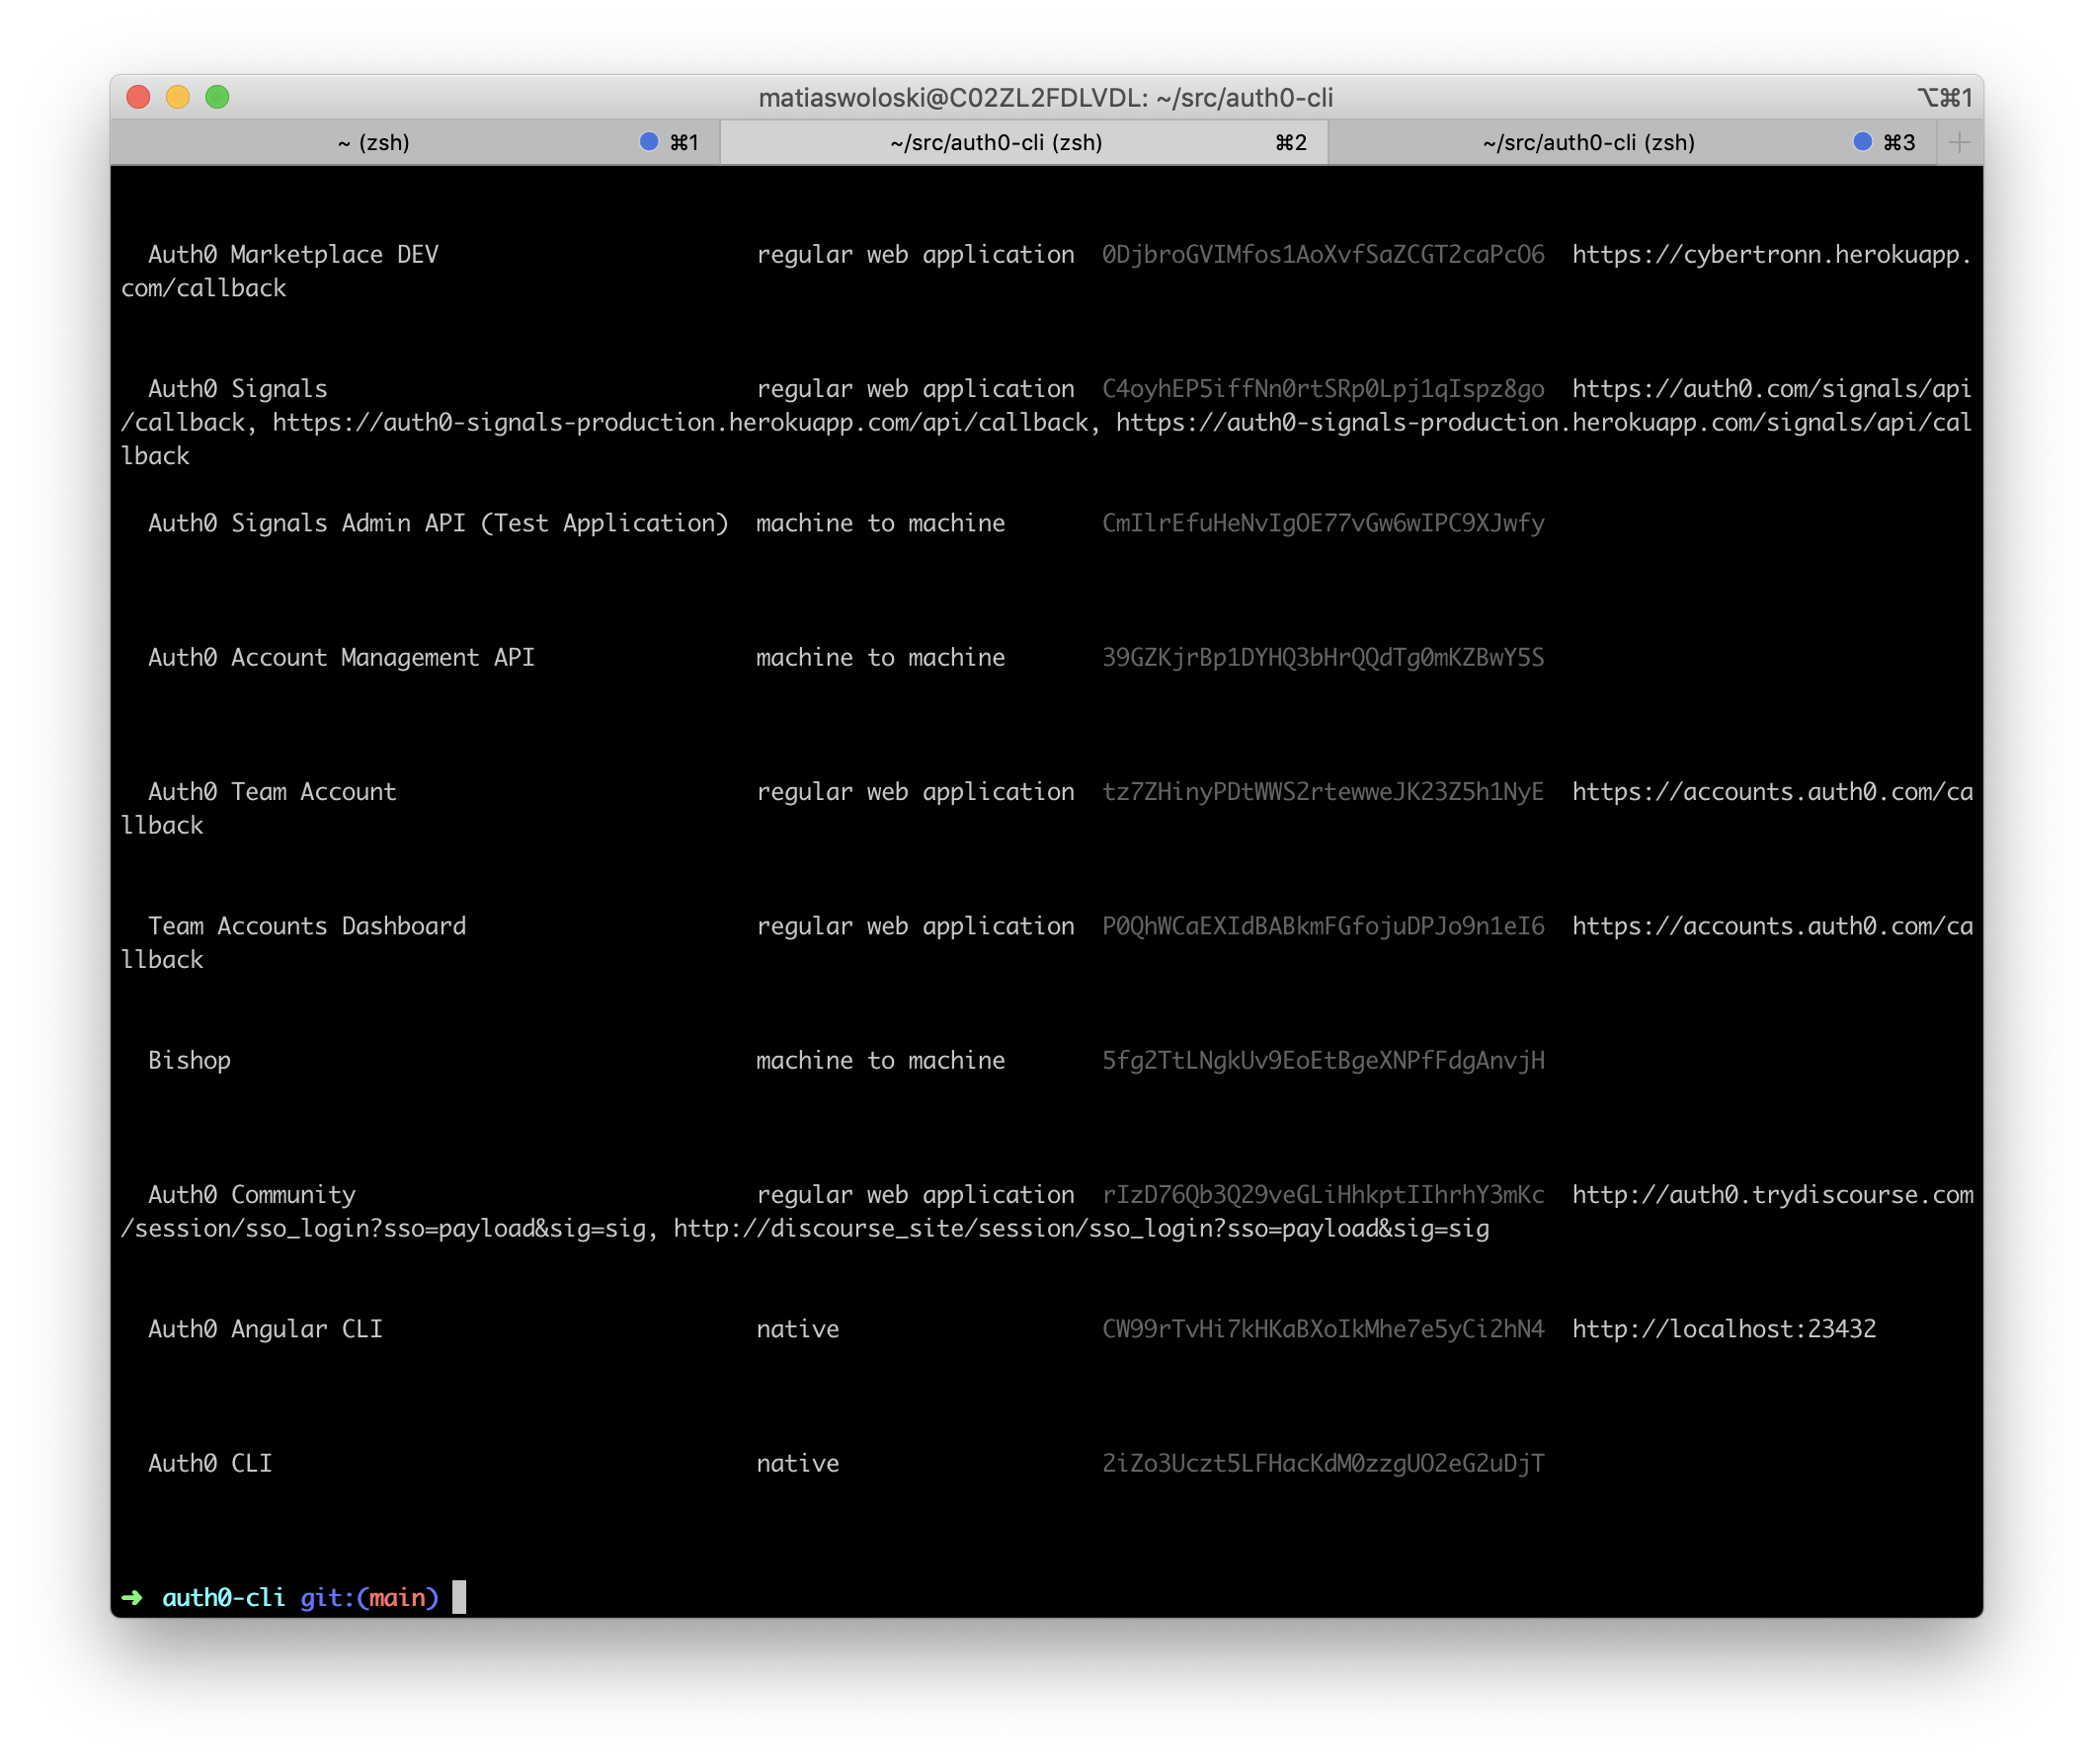
 auth0 logs tail command.
  • 🔁 Simplify repetitive tasks: Create, update, list and delete your Auth0 resources directly from the terminal.

Table of Contents

Installation

macOS

Install via Homebrew:

brew tap auth0/auth0-cli && brew install auth0

Windows

Install via Scoop:

scoop bucket add auth0 https://github.com/auth0/scoop-auth0-cli.git
scoop install auth0

Linux

Install via cURL:

# Binary will be downloaded to "./auth0".
curl -sSfL https://raw.githubusercontent.com/auth0/auth0-cli/main/install.sh | sh -s -- -b .

# To be able to run the binary from any directory
# make sure you move it to a place in your $PATH
# sudo mv ./auth0 /usr/local/bin

Go

Install via Go:

# Make sure your $GOPATH/bin is exported on your $PATH
# to be able to run the binary from any directory.
go install github.com/auth0/auth0-cli/cmd/auth0@latest

Manual

  1. Download the appropriate binary for your environment from the latest release
  2. Extract the archive
    • macOS: $ tar -xf auth0-cli_{version}_Darwin_{architecture}.tar.gz
    • Linux: $ tar -xf auth0-cli_{version}_Linux_{architecture}.tar.gz
    • Windows: Extract auth0-cli_{version}_Windows_{architecture}.zip using your preferred method of choice
  3. Make sure that the PATH and HOME environment variables include the folder where the binary was extracted.
  4. Run auth0

Note Autocompletion instructions for supported platforms available by running auth0 completion -h

Authenticating to Your Tenant

Authenticating to your Auth0 tenant is required for most functions of the CLI. It can be initiated by running:

auth0 login

There are two ways to authenticate:

  • As a user - Recommended when invoking on a personal machine or other interactive environment. Facilitated by device authorization flow.
  • As a machine - Recommended when running on a server or non-interactive environments (ex: CI). Facilitated by client credentials flow. Flags available for bypassing interactive shell.

Warning Authenticating as a user is not supported for private cloud tenants. Instead, those users should authenticate with client credentials.
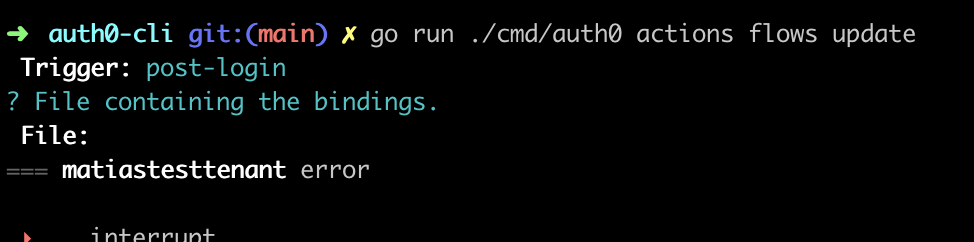
Available Commands

Customization

To change the text editor used for editing templates, rules, and actions, set the environment variable EDITOR to your preferred editor. If choosing a non-terminal editor, ensure that the command starts the editor and waits for the files to be closed before returning.

Examples:

# Uses vscode with the --wait flag.
export EDITOR="code --wait"

# Uses sublime text with the --wait flag.
export EDITOR="subl --wait"

# Uses nano, a terminal based editor.
export EDITOR="nano"

# Uses vim, a terminal based editor.
export EDITOR="vim"

Anonymized Analytics Disclosure

Anonymized data points are collected during the use of this CLI. This data includes the CLI version, operating system, timestamp, and other technical details that do not personally identify you.

Auth0 uses this data to better understand the usage of this tool to prioritize the features, enhancements and fixes that matter most to our users.

To opt-out of this collection, set the AUTH0_CLI_ANALYTICS environment variable to false.

Feedback

Contributing

We appreciate feedback and contribution to this repo! Before you get started, please see the following:

Raise an issue

To provide feedback or report a bug, please raise an issue on our issue tracker.

Vulnerability Reporting

Please do not report security vulnerabilities on the public GitHub issue tracker. The Responsible Disclosure Program details the procedure for disclosing security issues.


Auth0 Logo

Auth0 is an easy to implement, adaptable authentication and authorization platform. To learn more checkout Why Auth0?

This project is licensed under the MIT license. See the LICENSE file for more info.

auth0-cli's People

Contributors

alejofernandez avatar alexiskulash avatar as-herzog avatar bright-poku avatar chrisscott avatar copland avatar cyx avatar dependabot[bot] avatar evansims avatar ewanharris avatar iamjem avatar jfatta avatar jsoref avatar lj365 avatar m3talsmith avatar mhsu-auth0 avatar morganelle avatar rene00 avatar sergeybykov avatar sergiught avatar shushen avatar snyk-bot avatar sre-57-opslevel[bot] avatar turcottedanny avatar tylernix avatar vprasanth avatar wadenick avatar widcket avatar willvedd avatar yoshiji avatar

Stargazers

 avatar  avatar  avatar  avatar  avatar  avatar  avatar  avatar  avatar  avatar  avatar  avatar  avatar  avatar  avatar  avatar  avatar  avatar  avatar  avatar  avatar  avatar  avatar  avatar  avatar  avatar  avatar  avatar  avatar  avatar  avatar  avatar  avatar  avatar  avatar  avatar  avatar  avatar  avatar  avatar  avatar  avatar  avatar  avatar  avatar  avatar  avatar  avatar  avatar  avatar  avatar  avatar  avatar  avatar  avatar  avatar  avatar  avatar  avatar  avatar  avatar  avatar  avatar  avatar  avatar  avatar  avatar  avatar  avatar  avatar  avatar  avatar  avatar  avatar  avatar  avatar  avatar  avatar  avatar  avatar  avatar  avatar  avatar  avatar  avatar  avatar  avatar  avatar  avatar  avatar  avatar  avatar  avatar  avatar  avatar  avatar  avatar  avatar  avatar  avatar

Watchers

 avatar  avatar  avatar  avatar  avatar  avatar  avatar  avatar  avatar  avatar  avatar  avatar  avatar  avatar  avatar  avatar  avatar

auth0-cli's Issues

brew install is not working

Description

Provide a clear and concise description of the issue, including what you expected to happen.
I cannot install the cli with brew

Reproduction

brew install auth0/auth0-cli/auth0

==> Tapping auth0/auth0-cli
Cloning into '/opt/homebrew/Library/Taps/auth0/homebrew-auth0-cli'...
remote: Enumerating objects: 66, done.
remote: Counting objects: 100% (66/66), done.
remote: Compressing objects: 100% (64/64), done.
remote: Total 66 (delta 33), reused 5 (delta 0), pack-reused 0
Unpacking objects: 100% (66/66), done.
Error: Invalid formula: /opt/homebrew/Library/Taps/auth0/homebrew-auth0-cli/auth0.rb
formulae require at least a URL
Error: Cannot tap auth0/auth0-cli: invalid syntax in tap!
  • Version of this library used:
  • Homebrew 3.1.2
    Homebrew/homebrew-core (git revision 2c472c983b; last commit 2021-04-19)
    Homebrew/homebrew-cask (git revision b5fd8691ae; last commit 2021-04-20)

OS bigSur 11.2.3

Make it easier to copy a test token to the clipboard

Describe the problem you'd like to have solved

Having to select the access token is cumbersome. It should be easier to copy a test token to the clipboard.

Describe the ideal solution

auth0 test token | pbcopy

The CLI detects when stdout is not a TTY. When this is the case, it writes the access token to stdout. Any other messages are written to stderr. On macOS this should then allow me to automatically copy the access token to my clipboard, after which I can use it to make authenticated requests.

Alternatives and current work-arounds

Select the access token and copy it manually.

Color coding app type [CLI-38]

can we use different colors for the type of app so it's easy to parse? only for the app type, not the full row. eg native can be cyan. etc

actions create should create an action file by default

The default experience on auth0 actions create should be to create a "noop" action, write it to the file system and upload it.
Specifying an action file should be a special case (--file myaction.js)

After creating and upload the action we should tell the user

Edit the action code by opening action-name.js and deploy it using auth0 actions deploy {new-action-id}

Other option to authorize the client ?

Is there any other option to authorize the client? For example using config file or env variables? Just to use it inside some CI/CD workflow to modify a list of origins, logout-url etc. In that case Device Authorization Flow is not an option.

Allow configuring the signing algorithm for new APIs

Describe the problem you'd like to have solved

The create API HTTP documentation describes field signing_alg to allow configuring the signing algorithm of the access token for the API. This configuration does not appear to be available in the CLI.

Describe the ideal solution

Add a flag to allow specifying the signing-alg value, restricted to the allowed values of RS256 and HS256, for example create an API using the HS256 algorithm:

$ auth0 apis create --identifier ${ID} --signing-alg HS256

The response should include the secret on success:

=== {tenant}.us.auth0.com API created

  ID                                          {ID}                 
  NAME                                   {NAME}
  IDENTIFIER                          {AUDIENCE}
  TOKEN LIFETIME                3600                                      
  ALLOW OFFLINE ACCESS  ✗
  SIGNING SECRET                {SECRET PLAINTEXT}

Alternatives and current work-arounds

There is no alternative to this problem using the CLI. The signing algorithm cannot be changed once the API is created so the current behavior is all APIs created through the CLI will use RS256 algorithm.

auth0 cli ignores the --audience parameter when generating an access token

Description

--audience is not used in the resulting token from auth0 test login

Reproduction

I'm trying to run a command to get a user berare token to test with automatically:

auth0 test login MY_CLIENT_ID --no-input --force --domain MY_DOMAIN --audience myaudience

With this flow, I'm taken to my staging login page, I auth with a staging user, then I get a token successfully on my clipboard. However, when I paste this token into https://jwt.io/ it has the wrong audience:

"aud": "MY_CLIENT_ID",

For some reason it used the client ID instead of the audience passed in to the CLI for the bearer token returned

Environment

  • Version of this library used:
    auth0 --version
    auth0 version 0.6.0 b69b35a

  • Version of the platform or framework used, if applicable:
    Mac Big Sur, iTerm2

show all the details when on app show

when doing app show it should show stuff like allowed web origins

I see this now:

  NAME       test app
  TYPE       single page application
  CLIENT ID  ngKKhR5yy9fvIXnjRzEYdJZ7YGwjheQ8
  CALLBACKS  http://localhost:3000, https://jwt.io```

or is there a "verbose" option that shows everything?

Ability to Assign Users to Roles

Describe the problem you'd like to have solved

Creating users via the command line is terrific. My standard flow is to create a user and add them to an app-specific role. While the CLI has options to create/delete roles, I cannot find any commands to manage user/role membership.

Describe the ideal solution

Expand the user create subcommand to allow one or more roles to be specified for the user. Optionally expand the role command to allow memberships to be managed at the role level.

Alternatives and current work-arounds

Create users via the CLI and then assign users to roles via the management GUI. 😢

device activation fails during `auth0 login`

Description

auth0 login exits with "login error: User is not authorized".

During the login flow in the browser I get "Activation Denied - We are not able to activate your device.".

I am not sure if this is actually an issue in the CLI, but I have no clue where to look for further information on why it fails.

Reproduction

  1. Download latest auth0-cli release for Linux
  2. run auth0 login
  3. Press enter at "Press Enter to open the browser to log in or ^C to quit..."
  4. Confirm "Device Confirmation" in firefox browser window.
  5. Accept the "Authorize App" screen.

This leads to a screen with: Activation Denied - We are not able to activate your device.
And then the client of course says "User not authorized"

But it is unclear to me what to do, what I am missing, or what I have done wrong.

Detail the steps taken to reproduce this error, what was expected, and whether this issue can be reproduced consistently or if it is intermittent.

Where applicable, please include:

  • Code sample to reproduce the issue
  • Log files (redact/remove sensitive information)
  • Application settings (redact/remove sensitive information)
  • Screenshots

Environment

  • auth0 version 0.10.2 711dbbd
  • Linux
  • Firefox 90.0 (64-bit)

auth0 users create cant complete input

When trying to add a user via the auth0-cli I get the following error after I enter the password field.

macUser@iMac projectName % auth0 users create
json: cannot unmarshal string into Go struct field ConnectionList.connections of type []interface {}
Connection: google-oauth2
Name: Name
Email: [email protected]
Password: *********
json: cannot unmarshal string into Go struct field ConnectionList.connections of type []interface {}

!! Uh oh. Something went wrong.
!! If this problem keeps happening feel free to report an issue at
!!
!! https://github.com/auth0/auth0-cli/issues/new/choose

This happens every time.

using Next version 11.0.1
auth0 version 0.9.1 f9ab1c2
macOS Big Sur Terminal

updating callback urls [CLI-56]

If I do this, I expect to just add a callback URL to this app.
go run ./cmd/auth0 apps update ngKKhR5yy9fvIXnjRzEYdJZ7YGwjheQ8 -c http://localhost:3000

Instead it will prompt me also for name, description, etc.

Also, if I do go run ./cmd/auth0 apps update ngKKhR5yy9fvIXnjRzEYdJZ7YGwjheQ8 I would expect to get asked name, description, type AND callback URLs (right now it doesn't ask for that).

CLI doesn't support more than 50 applications

Please do not report security vulnerabilities here. The Responsible Disclosure Program details the procedure for disclosing security issues.

Thank you in advance for helping us to improve this library! Please read through the template below and answer all relevant questions. Your additional work here is greatly appreciated and will help us respond as quickly as possible. For general support or usage questions, use the Auth0 Community or Auth0 Support. Finally, to avoid duplicates, please search existing Issues before submitting one here.

By submitting an Issue to this repository, you agree to the terms within the Auth0 Code of Conduct.

Description

If I run auth0 apps list in a tenant with more than 50 apps, I only get the first 50 (looks like in the order they were created) returned.

Reproduction

Run auth0 apps list in a tenant with more than 50 apps.
Observe that only the first 50 apps are returned.

Environment

auth0 version 0.10.3 0f57d13
OSX zsh

Id should be Client ID

when doing auth0 apps show the prompt should be Client ID (to avoid confusion with some internal ID)
image

Feature Request: auth0 tenants create

Describe the problem you'd like to have solved

Allow to create Auth0 tenants programmatically / via API & CLI.
Right now, it's only possible via Auth0 UI/Dashboard.

Describe the ideal solution

auth0 tenants create

Parameters:
tenant name
tenant region

Alternatives and current work-arounds

Using RPA
https://github.com/mathiasconradt/auth0-tenant-creation-rpa

Additional context

This is useful for B2B2X scenarios and has been requested a few times in the past.

--force and --no-input have no effect

Description

--force and --no-input still prompt you to open a browser

Reproduction

I'm trying to run a command to get a token to test with automatically:

auth0 test login MY_CLIENT_ID --no-input --force --domain MY_DOMAIN

This outputs:

▸ A browser window will open to begin this client's login flow.
▸ Once login is complete, you can return to the CLI to view user profile information and tokens.

▸ The client you are using does not currently allow callbacks to localhost.
▸ To complete the login flow the CLI needs to redirect logins to a local server and record the result.

▸ The client will be modified to update the allowed callback URLs, we'll remove them when done.
▸ If you do not wish to modify the client, you can abort now.

Do you wish to proceed? (y/N)

According to the documentation from auth0 help test login:

      --force           Skip confirmation.
      --no-input        Disable interactivity.

This documentation isn't clear on what's supposed to happen, it is quite confusing. Either way, neither flag's supposed explanation is being followed, there is both a confirmation and it's interactive.

Environment

Please provide the following:

  • Version of this library used:
    auth0 --version
    auth0 version 0.6.0 b69b35a

  • Version of the platform or framework used, if applicable:
    Mac Big Sur, iTerm2

Deploy actions once created

Describe the problem you'd like to have solved

CLI allows to create an action and even specify a trigger, but it's not deployed (and there seems to be no command or flag to deploy via CLI at the moment). This means that customizing the actions still requires two manual actions on the Auth0 portal afterwards: deploying the action and then adding it to the flow.

Describe the ideal solution

In order to fully support CLI-based provisioning of the tenants, it would be great to support deploying the action from CLI and/or adding it to the flow (not sure if the latter is feasible, given that other actions might already be there and that the order probably matters).

Additional context

My main use case is provisioning the unified set of roles and permissions on multiple tenants corresponding to the deployment stages (dev, test, demo, production etc.). Our ideal goal would be to configure a tenant in a fully automated way: define API, permissions, standard roles, custom login actions - in essence, make tenant configuration reproducible, minimize manual work, and reduce human errors.

Are there any plans to support that or good reasons not to?

Technical considerations

From looking at the Management API, I can see that Deploy and action and Update trigger bindings methods would essentially allow to perform these steps, so it is at least theoretically possible.

rename env.local.template to env.local after downloading qs

Right now if after downloading the nextjs or node qs (auth0 quickstart download) and try to run it, it will fail. The reason is that env.local does not exist. There is env.local.template. If we could rename that to env.local after unzipping, the experience would be flawless

Uncertain if specifying api-id is just unclear or broken when adding permissions to a role

Description

When trying to add existing permissions to an existing role via CLI, I'm always getting back 404 Not Found: The resource server does not exist: '' error. The documentation is a bit unclear regarding which ID of the API needs to be passed (the system-generated one or the user-friendly one), but the command fails in both cases anyway.

Reproduction

$ auth0 roles permissions add rol_someroleid -a numeric_api_identifier -p "permission1,permission2"
OR
$ auth0 roles permissions add rol_someroleid -a user_friendly_api_identifier -p "permission1,permission2"

404 Not Found: The resource server does not exist: ''

Environment

  • auth0 version 0.10.2 711dbbd
  • Windows 10, CLI running in WSL2

When running auth0 roles permissions add in the interactive mode, selecting API, role and permission goes fine and the command successfully associates the specified permissions to role. My main question is, how to correctly specify the API identifier and what else could be causing the error? Tried this on different tenants - same result.

Thank you!

no idea what to do on actions flows update

image

What is a file containing the bindings? I suggest, if there is no bindings, offer generating one with a default content.

There are no action bindings for trigger. Do you want to generate one?
post-login-bindings.js generated

Default experience of `test login` should be to show the JSON output [CLI-73]

The default experience of test login should be to show the JSON output. This should include these properties: user_info, id_token_decoded, access_token_decoded, id_token, access_token

This is useful for troubleshooting which is the main goal of the CLI. As an example of this, I added an action that add an attribute to the id_token and when I did test login it didn't show up in the response
image

Hint after test login [CLI-72]

after running test login (for the first time) we can hint the dev at running quickstart download

Login flow is working! Next, try download and run a quickstart auth0 quickstarts download {client_id}

CLI should not require scope when creating an api

Description

https://auth0.com/docs/api/management/v2#!/Resource_Servers/post_resource_servers states that scopes is an optional field when creating APIs. The CLI, however, requires scopes using the auth0 apis create command. The command should not require scopes as is documented by the HTTP API.

Reproduction

$ auth0 apis create \
  --name ${NAME} \
  --identifier ${ID} \
  --token-lifetime 600 \
  --no-input 

=== {tenant}.us.auth0.com error

 ▸    required flag(s) "scopes" not set

Environment

Please provide the following:

  • Version of this library used:
$ auth0 --version
auth0 version 0.11.1 d5eaed2385480f3ce6acb21026c103c0b831f172
  • Version of the platform or framework used, if applicable:
  • Other relevant versions (language, server software, OS, browser):
  • Other modules/plugins/libraries that might be involved:

Add more user management capabilities in the CLI

Describe the problem you'd like to have solved

Please add ability to search and delete users using the CLI.

While developing an application, it is very useful to quickly search and delete users. I'd like to request the following functionality:

  • Search users by their email, Auth0 ID or their name
  • Delete a user with the given Auth0 ID

Describe the ideal solution

Search users:

auth0 users search --email [email protected]
auth0 users search auth0|123456
auth0 users search --name "John Doe"

Delete users:

auth0 users delete auth0|123456

Alternatives and current work-arounds

Use the Auth0 dashboard, which is much slower than using the CLI.

Additional context

None.

Hint after download qs [CLI-74]

After download qs let's hint with:

Quickstart sample sucessfully downloaded at ...
cd test-app/sample-01 and read README.md

Show app details by name

My organization has many apps, more than fit on one page of the auth0 dashboard, and more than the 50 that are listed by auth0 apps list. I often want to look up client id and secret by client name. I can think of two solutions that would work well for me:

  1. Override the default maximum list size, for example:
auth0 apps list --maxitems 500
auth0 apps show -r <client_id>
  1. Show app details by name, for example:
auth0 apps show -r --name <client_name>

Right now, I have to get this information from the Auth0 Dashboard by clicking through pages and using my browser's Find function.

Add support for JHipster

Describe the problem you'd like to have solved

JHipster is adding Auth0 support in its next release. It'd be cool if the steps to configure a JHipster app on Auth0 was automated by the Auth0 CLI.

Okta's CLI has support for it using okta apps create jhipster. You can see how it was added in okta/okta-cli#3. You can see how it works in https://youtu.be/ThytrcxL31s?t=90.

Describe the ideal solution

auth0 apps create jhipster

Alternatives and current work-arounds

Currently, we (the JHipster team) has the following docs for configuring a JHipster app.

Create an OIDC App using Auth0 Admin Dashboard

  • Create a free developer account at https://auth0.com/signup. After successful sign-up, your account shall be associated with a unique domain like dev-xxx.us.auth0.com
  • Create a new application of type Regular Web Applications. Switch to the Settings tab, and configure your application settings like:
    • Allowed Callback URLs: http://localhost:8080/login/oauth2/code/oidc
    • Allowed Logout URLs: http://localhost:8080/
    • NOTE: If you're using the JHipster Registry, add URLs for port 8761 too.
  • Navigate to User Management > Roles and create new roles named ROLE_ADMIN, and ROLE_USER.
  • Navigate to User Management > Users and create a new user account. Click on the Role tab to assign roles to the newly created user account.
  • Navigate to Auth Pipeline > Rules and create a new Rule. Choose Empty rule template. Provide a meaningful name like JHipster claims and replace Script content with the following and Save.
function (user, context, callback) {
  user.preferred_username = user.email;
  const roles = (context.authorization || {}).roles;

  function prepareCustomClaimKey(claim) {
    return `https://www.jhipster.tech/${claim}`;
  }
  const rolesClaim = prepareCustomClaimKey('roles');
  if (context.idToken) {
    context.idToken[rolesClaim] = roles;
  }
  if (context.accessToken) {
    context.accessToken[rolesClaim] = roles;
  }
  callback(null, user, context);
}

Configure JHipster Application to use Auth0 as OIDC Provider

In your JHipster application, modify src/main/resources/config/application.yml to use your Auth0 settings:

spring:
  ...
  security:
    oauth2:
      client:
        provider:
          oidc:
            # make sure to include the ending slash!
            issuer-uri: https://{your-auth0-domain}/
        registration:
          oidc:
            client-id: {clientId}
            client-secret: {clientSecret}
            scope: openid,profile,email
jhipster:
  ...
  security:
    oauth2:
      audience:
        - https://{your-auth0-domain}/api/v2/

If you have a doubt on the issuer-uri value, then, you can get the value from Applications > {Your Application} > Settings > Advanced Settings > Endpoints > OpenID Configuration. Remove .well-known/openid-configuration suffix since that will be added by the Spring Security.

You can use the default Auth0 Management API audience value from the Applications > API > API Audience field. You can also define your own custom API and use the identifier as the API audience.

Before running Cypress tests, specify Auth0 user details by overriding the CYPRESS_E2E_USERNAME and CYPRESS_E2E_PASSWORD environment variables. Refer to Cypress documentation for more details.

export CYPRESS_E2E_USERNAME=<your-username>
export CYPRESS_E2E_PASSWORD=<your-password>

Note: Auth0 requires a user to provide authorization consent on the first login. Consent flow is currently not handled in the Cypress test suite. To mitigate the issue, you can use a user account that has already granted consent to authorize application access via interactive login.

If you experience authentication issues with Cypress, see this guide for a workaround.

Using Environment Variables

You can also use environment variables to override the defaults. For example:

export SPRING_SECURITY_OAUTH2_CLIENT_PROVIDER_OIDC_ISSUER_URI="https://{your-auth0-domain}/"
export SPRING_SECURITY_OAUTH2_CLIENT_REGISTRATION_OIDC_CLIENT_ID="{client-id}"
export SPRING_SECURITY_OAUTH2_CLIENT_REGISTRATION_OIDC_CLIENT_SECRET="{client-secret}"
export JHIPSTER_SECURITY_OAUTH2_AUDIENCE="https://{your-auth0-domain}/api/v2/"

You can put this in an ~/.auth0.env file and run source ~/.auth0.env to override the default Keycloak settings with Auth0 and start your app with Maven or Gradle. You should be able to sign in with the credentials you registered with.

Note: If you're on Windows, you should install WSL so the source command will work.

macos -- auth0 opens finder rather than browser for authentication

Please do not report security vulnerabilities here. The Responsible Disclosure Program details the procedure for disclosing security issues.

Thank you in advance for helping us to improve this library! Please read through the template below and answer all relevant questions. Your additional work here is greatly appreciated and will help us respond as quickly as possible. For general support or usage questions, use the Auth0 Community or Auth0 Support. Finally, to avoid duplicates, please search existing Issues before submitting one here.

By submitting an Issue to this repository, you agree to the terms within the Auth0 Code of Conduct.

Description

Provide a clear and concise description of the issue, including what you expected to happen.

On MacOS when attempting to login, auth0 cli opens the macos Finder app rather than opening a browser, so login is not possible.

Reproduction

Installed auth0 cli from auth0 login on terminal command line using brew instructions from README.md
On command line: auth0 login and got the following output:

✪ Welcome to the Auth0 CLI 🎊

If you don't have an account, please go to https://auth0.com/signup

Your Device Confirmation code is:

 ▸    Press Enter to open the browser to log in or ^C to quit...

Waiting for login to complete in browser... ⣷ Waiting for login to complete in browser... failed

=== ffn-dev.us.auth0.com error

 ▸    login error: Unauthorized

I expected to have a browser window open in Chrome to login to auth0, but instead the Finder app opened to my current directory, so could not complete the login process.

Environment

  • Version of this library used:
    • auth0 version 0.10.3 0f57d1303347dd7bd7b8547ed81026b46b98089c
  • Version of the platform or framework used, if applicable:
    • macos 11.5.2
  • Other relevant versions (language, server software, OS, browser):
    • chrome `Version 93.0.4577.63 (Official Build) (x86_64)

print tenant context on output [CLI-35]

When running a command I would like to know which tenant I am running this into.

For eg. I used login to setup a tenant (I forgot I had one already configured). Then run apps list and got "token expired".

Loading apps... failed401 Unauthorized: Expired token received for JSON Web Token validation

Checked config.json and realized I had an old tenant configure whose token was expired already (btw we need to implement Refresh Token... will create another issue for that). In any case, if we include the tenant context in each run I would know which tenant I am running against.

login error: You are polling faster than the specified interval of 5 seconds

On a MacOS X environment, I installed the CLI with brew and, right after logging in, I got the following error:

 ▸    ✪ Welcome to the Auth0 CLI 🎊.
 ▸    To set it up, you will need to sign in to your Auth0 account and authorize the CLI to access the API.
 ▸    If you don't have an account, please go to https://auth0.com/signup, otherwise continue in the browser.


 ▸    Your pairing code is: MJKV-RJLB

 ▸    This pairing code verifies your authentication with Auth0.
 ▸    Press Enter to open the browser (^C to quit)


===  error

 ▸    login error: You are polling faster than the specified interval of 5 seconds.

Just to confirm that the login flow indeed has failed, I ran auth0 apps list. As expected, I got:

===  error

 ▸    Not logged in. Try 'auth0 login'.

Running the flow again (auth0 login) succeeded. So, feel free to close the issue if you can't reproduce, but I leave it here as a note in case you want to double check.

Recommend Projects

  • React photo React

    A declarative, efficient, and flexible JavaScript library for building user interfaces.

  • Vue.js photo Vue.js

    🖖 Vue.js is a progressive, incrementally-adoptable JavaScript framework for building UI on the web.

  • Typescript photo Typescript

    TypeScript is a superset of JavaScript that compiles to clean JavaScript output.

  • TensorFlow photo TensorFlow

    An Open Source Machine Learning Framework for Everyone

  • Django photo Django

    The Web framework for perfectionists with deadlines.

  • D3 photo D3

    Bring data to life with SVG, Canvas and HTML. 📊📈🎉

Recommend Topics

  • javascript

    JavaScript (JS) is a lightweight interpreted programming language with first-class functions.

  • web

    Some thing interesting about web. New door for the world.

  • server

    A server is a program made to process requests and deliver data to clients.

  • Machine learning

    Machine learning is a way of modeling and interpreting data that allows a piece of software to respond intelligently.

  • Game

    Some thing interesting about game, make everyone happy.

Recommend Org

  • Facebook photo Facebook

    We are working to build community through open source technology. NB: members must have two-factor auth.

  • Microsoft photo Microsoft

    Open source projects and samples from Microsoft.

  • Google photo Google

    Google ❤️ Open Source for everyone.

  • D3 photo D3

    Data-Driven Documents codes.