Build and tested for Xamarin.iOS. Builds upon work by Xamarin and Azure evanglist Brandon Minnick.
This Xamarin app uses a SQLite Database to save the metadata of the Photos (e.g. Url, Title) locally. The local database syncs, via an Azure Function, with an Azure SQL Database that contains the metadata of the Photos stored in Azure Blob Storage.
The Xamarin app also allows the user to take photos and save them to Azure Blob Storage. To do this, the Xamarin app uploads the image to an Azure Function, and the Azure Function saves the image in Azure Blob Storage, then adds the image metadata to the Azure SQL Database.
This app is extended by using Microsoft's AI software to analyze the photos both via Custom Vision and Computer Vision. It also uses the popular ZXing port to Xamarin to do barcode scanning. The app also uses Xamarin Essentials to keep track of the online/offline status and also geolocation (for lat/long and for actual location). The app is offline aware -- storing relevant data locally temporarily, and then sending data to Blob storage and Azure SQL once connectivity is re-established.
Also, app has been architected to use a MasterDetail control; menu items show photos grouped together by location, date, and whether or not it has captured barcode information.
This sample shows examples of using Customer Rendererers and Effects to extend Xamarin.Forms's controls.
- The Xamarin Show: Azure Blob Storage for Mobile
- Xamarin Blog: Add Cloud Storage to Xamarin Apps with Azure Blob Storage
- Azure Blob Storage
- How to use Blob Storage from Xamarin

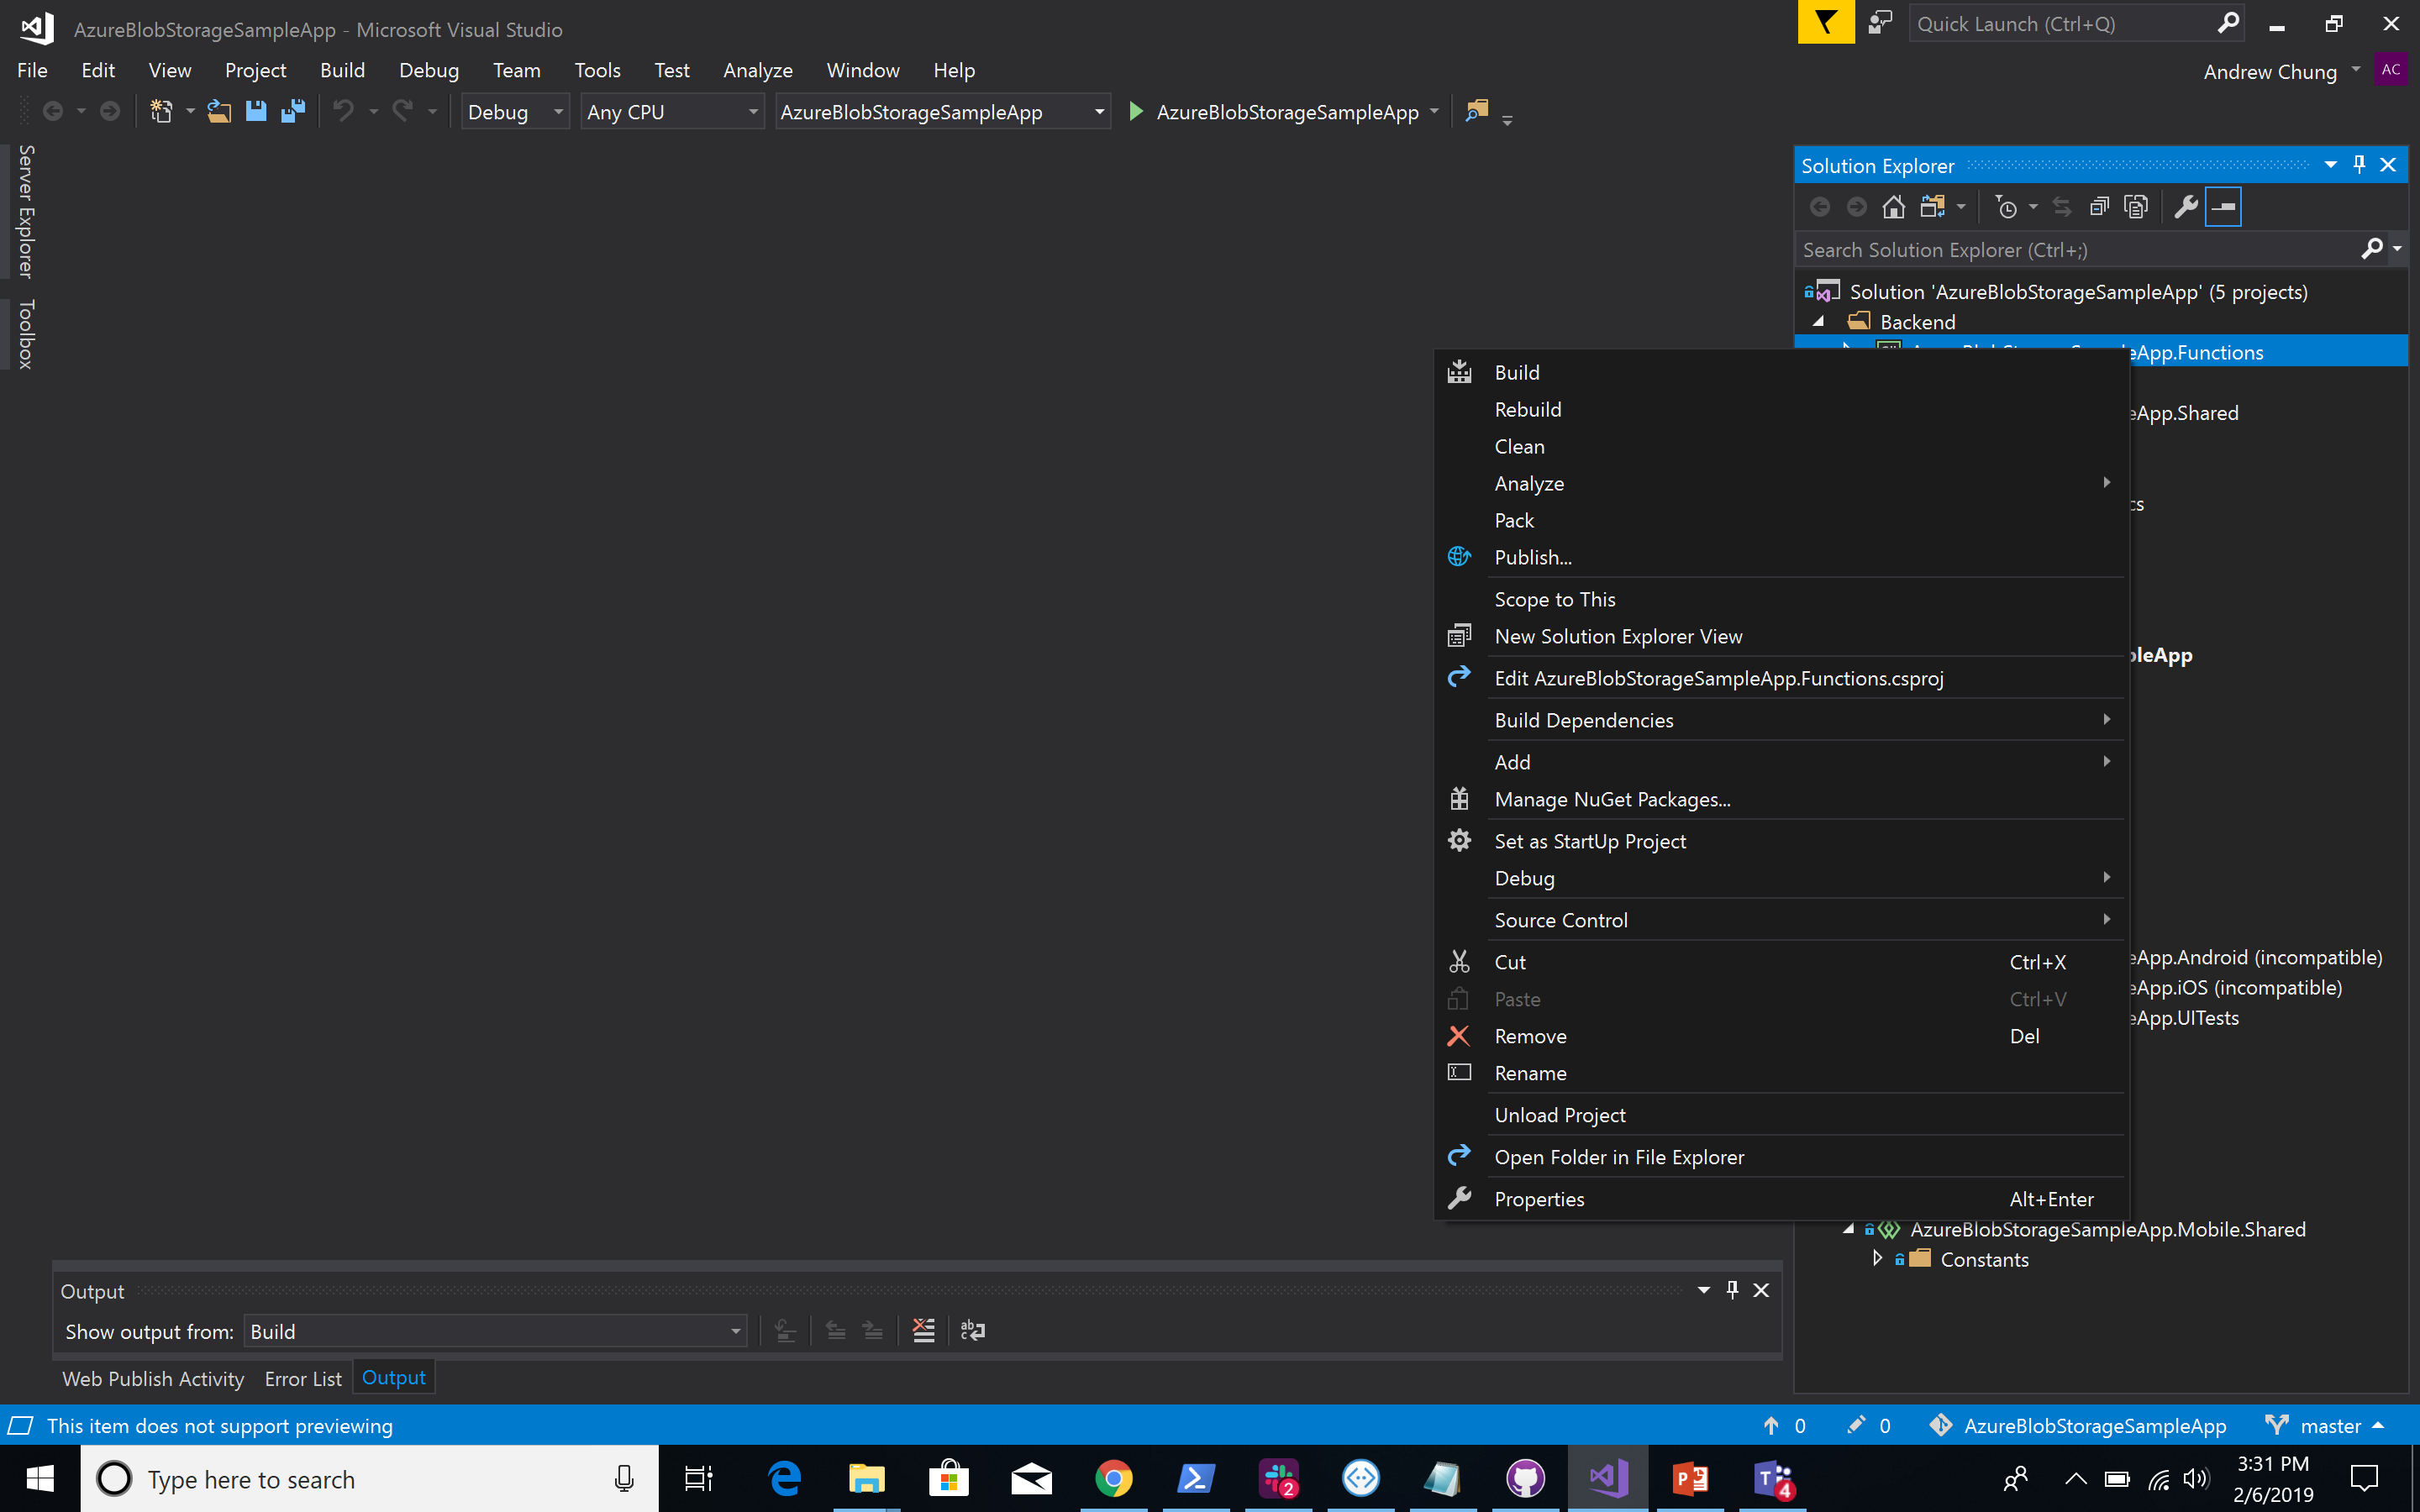
- In Visual Studio, right-click on AzureBlobStorageSampleApp.Functions and select Publish
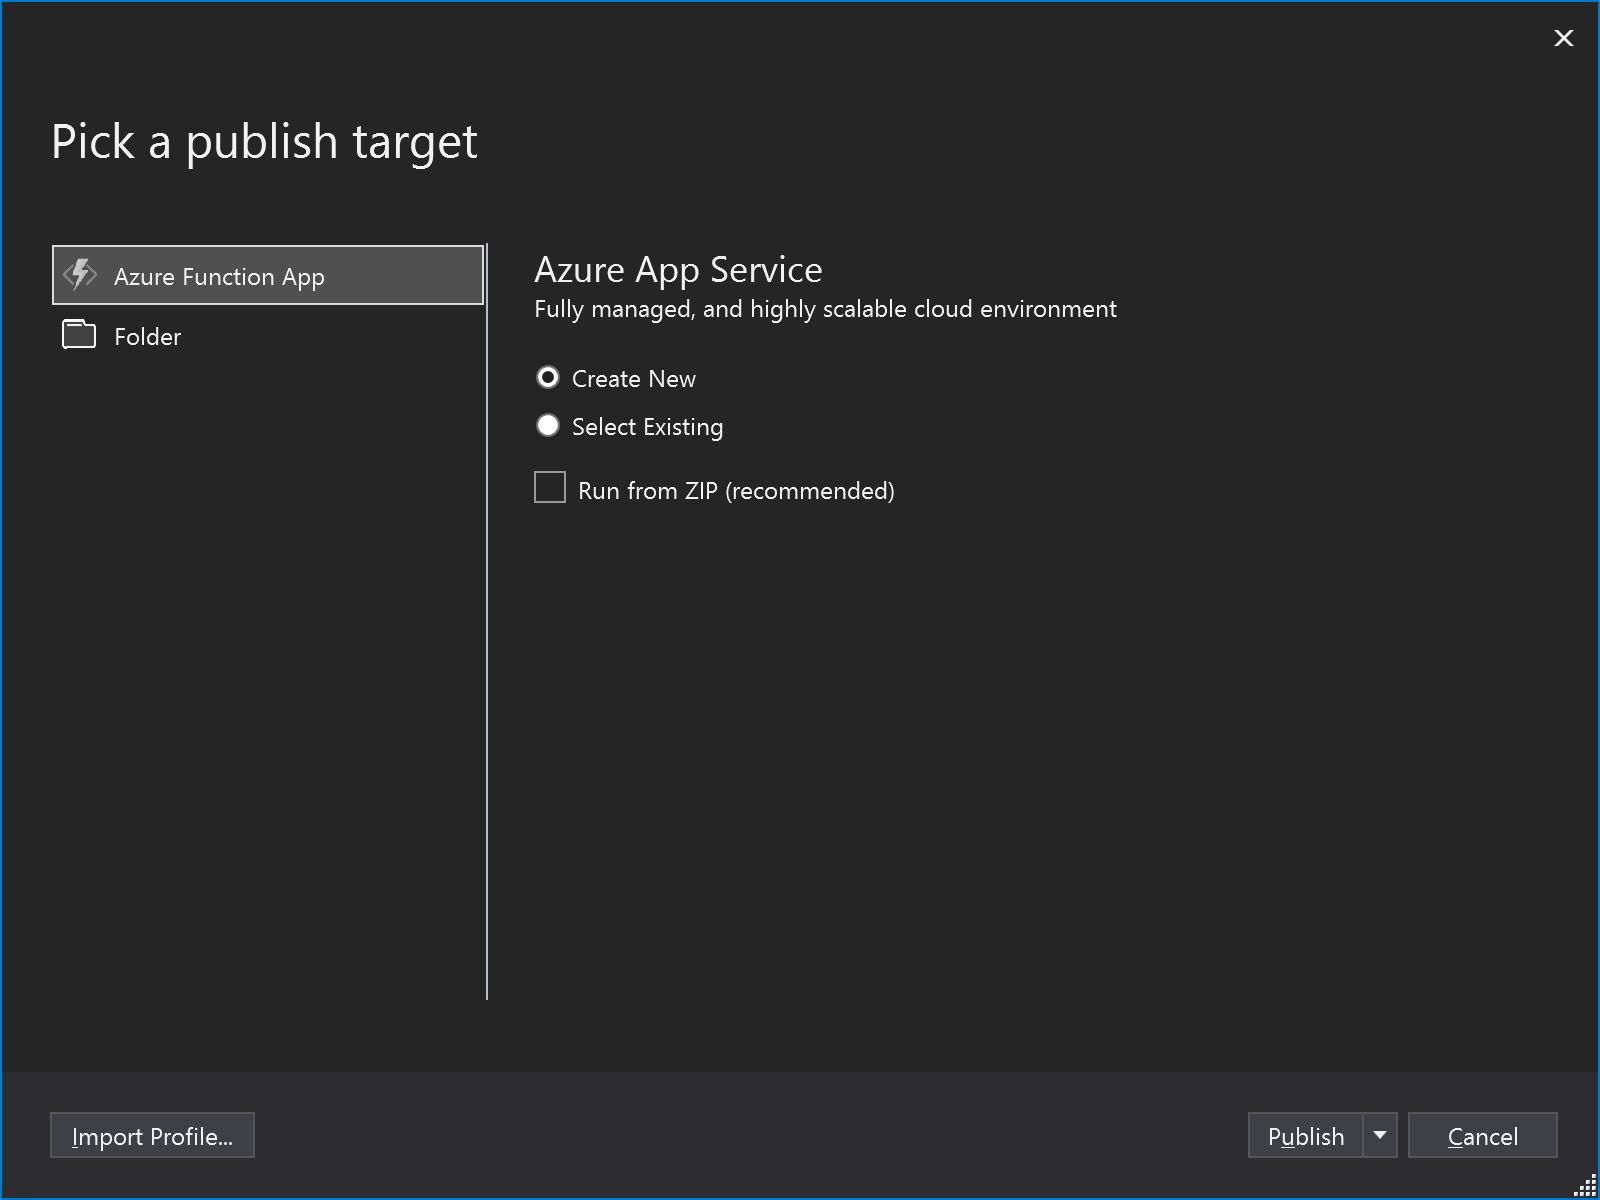
- Choose Azure Function App -> Create New -> Publish

- Fill out details:
- App Name: Pick a name for your app within Azure
- Subscription: Select your Azure subscription
- Resource Group: Pick a resource group or create a new one
- Hosting Plan: Pick a name, a region close to you, and for Size I chose Consumption
- Storage Account: Create a new one. Pick a name, for Account Type I chose: Standard - Locally Redudant Storage
-
Click Create
-
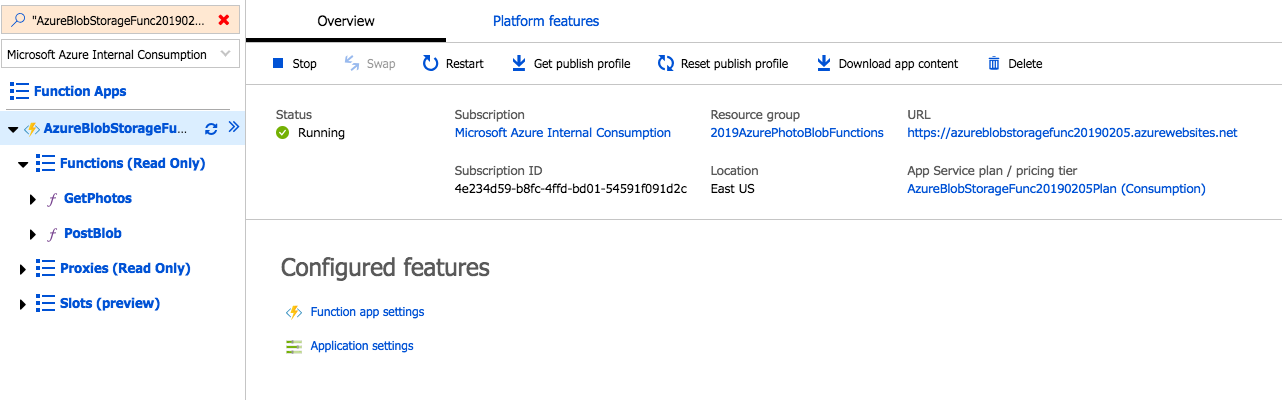
This will take a couple minutes to deploy; confirm its existance in the Azure portal. We're done with the Function for now, but we'll be back to grab a couple values and add a couple values to the Application Settings.

- In the Azure portal, click on New -> Enter
SQL Databaseinto the Search Bar -> SelectSQL Databasefrom the search results -> Click Create

- Name the SQL Database
- I named mine XamListDatabase
- Select the Subscription
- I selected my Visual Studio Enterprise subscription
- If you do not have a VS Enterprise Subscription, you will need to select a different option
- Select the Resource Group you published your Function in
- Select Blank Database
 6. Select Server
-
Select Create New Server
-
Enter the Server Name
-
Create a Server admin login
- Store this password somewhere safe, because we will need to use it for our database connection later!
-
Create a password
-
Select the closest location
-
Click "Select"
-
Select "Not Now" for the SQL Elastic Pool option
 14. Select Pricing Tier
- Select Basic
- Move the slider to maximum, 2GB
- Don't worry, it's the same price for 2GB as it is for 100MB.
- Click Apply
- Click Create
- In the Azure Portal, navigate to the SQL Database we created in a previous step

- Select Query editor (preview). Using Authorization type: SQL server Authentication, login with the server credentials we created in the previous step.

- In the query field, copy and paste the following. And then Click Run.
CREATE TABLE PhotoModels(
Id varchar(128) NOT NULL PRIMARY KEY,
CreatedAt datetimeoffset(7) NOT NULL,
UpdatedAt datetimeoffset(7) NOT NULL,
IsDeleted bit NOT NULL,
Url varchar(255) NOT NULL,
Title varchar(128) NOT NULL,

Lat float,
Long float,

City varchar(128),
LocationState varchar(128),
Country varchar(128),
CityState varchar(128);

Tag1 varchar(128),
Tag2 varchar(128),
Tag3 varchar(128),
Tag4 varchar(128),
Tag5 varchar(128),
Tag6 varchar(128),
Tag7 varchar(128),
Tag8 varchar(128),
Tag9 varchar(128),
Tag10 varchar(128),
TagsSeperatedWithSpaces varchar(255),

CustomTag1 varchar(128),
CustomTag2 varchar(128),
CustomTag3 varchar(128),
CustomTag4 varchar(128),
CustomTag5 varchar(128),
CustomTag6 varchar(128),
CustomTag7 varchar(128),
CustomTag8 varchar(128),
CustomTag9 varchar(128),
CustomTag10 varchar(128),
CustomTagsSeperatedWithSpaces varchar(255),

CreatedAtString varchar(255),

BarcodeString varchar(128),
);

- If successful, when you click Tables, you should see the above Table. If you don't see anything immediately, try refreshing the web page.

- On the Azure Portal, navigate to the SQL Database we created, above
- Click on "Connection Strings" -> "ADO.NET"
- Copy the entire Connection String into a text editor

- In the text editor, change "{your_username}" and "{your_password}" to match the SQL Database Username / Password created above
- Don't use my username / password because it won't work ;-)

- On the Azure Portal, navigate to the Functions App we published from Visual Studio
- Select "Application Settings"
- In the Application Settings, scroll down to the section "Application Settings"
- Create a new string
- Set the name as
PhotoDatabaseConnectionString - Make sure to use this exact name, otherwise the source code will not work
- Copy/paste the Azure SQL connection string from the text editor as the corresponding value
- Scroll up and click Save (Note! If you don't click Save - the change will not be reflected.)

- In the Azure portal, click on New -> Enter
Storage accountinto the Search Bar -> SelectStorage acountfrom the search results -> Click Create

- In the next screen, you'll enter a few values
- Select the Subscription and the Resource Group you have been working in
- Create a Storage account name (note: letters in the name need to be lowercase)
- Choose a location
- For Performance, I chose Standard
- For Account king, I chose StorageV2 (general purchase v2)
- For Access tier, chose Hot
- Click Review and Create
- Click into the Storage account you created.

-
On the left menu, under Blob service, click Blobs
-
Click the "+ Container" button to create a new container
-
Use "photos" for the Name, and for the purposes of this exercise, chose Public access level: Container (anonymous read access for containers and blob)
- In future apps, you'll likely want to increase the privacy of your blob containers

-
In the Storage Account, click Access Keys which are under Settings
-
You'll see key 1 and key 2 along with a Key and Connection String for each of those. Copy either of the Connection Strings.
-
On the Azure Portal, navigate to the Functions App we published from Visual Studio
-
Select "Application Settings"
-
In the Application Settings, scroll down to "Application Settings"
-
Create a new setting
- Set the name as
BlobStorageConnectionString - Make sure to use this exact name, otherwise the source code will not work
- Copy/paste the Connection setting
- Create another setting
- Set the name as
PhotoContainerName - Make sure to use this exact name, otherwise the source code will not work
- Type
photosas the corresponding value (This is the name of the container you created earlier.)
- Scroll up and click Save (Note! If you don't click Save - the change will not be reflected.)
- In BackendConstants.cs, you'll need to customize the value of
FunctionsAPIBaseUrlto match yours
- Notice the URL in the upper right of the photo. You'll only need to change the subdomain to match yours (ie. it is important that the URL in code retains the
/api).
- In BackendConstants.cs, change the value of
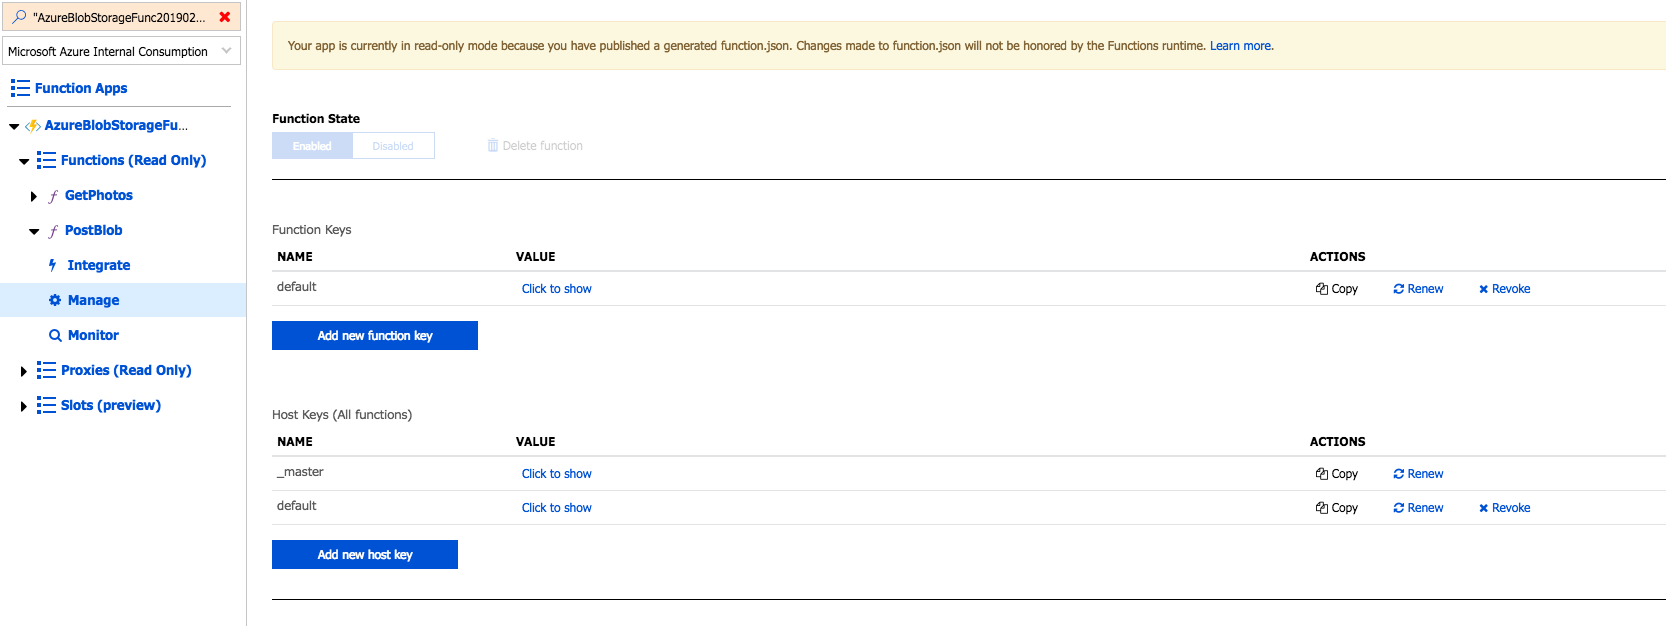
PostPhotoBlobFunctionKeyto match your Azure Function Key for PostBlob (Also, the URL should be updated to match your too!)
- As in the image above, click Manage under the PostBlob function. Then under the section
Function Keys, you'll see a function key with the namedefault, also you'll see another section below it also with the name 'default'. If we were only dealing with one function, you'd want the one from 'Function Keys'; however, since we now have a few functions, you want the lower one below the section 'Function Keys' still with the name 'default'. You canClick to showto see the value or simply click theCopyaction.
- You'll need to sign up for Cognitive Services and attach your keys here Custom Vision 1 and Custom Vision 2 and here Computer Vision 1.

