
- How to use
- How to compile on Linux
- How to compile on Windows
- How to train (Pascal VOC Data)
- How to train (to detect your custom objects)
- When should I stop training
- How to improve object detection
- How to mark bounded boxes of objects and create annotation files
- How to use Yolo as DLL
 |
 https://arxiv.org/abs/1612.08242 https://arxiv.org/abs/1612.08242 |
|---|
|
 https://arxiv.org/abs/1612.08242 https://arxiv.org/abs/1612.08242 |
|---|
A Yolo cross-platform Windows and Linux version (for object detection). Contributtors: https://github.com/pjreddie/darknet/graphs/contributors
This repository is forked from Linux-version: https://github.com/pjreddie/darknet
More details: http://pjreddie.com/darknet/yolo/
This repository supports:
- both Windows and Linux
- both OpenCV 3.x and OpenCV 2.4.13
- both cuDNN 5 and cuDNN 6
- CUDA >= 7.5
- also create SO-library on Linux and DLL-library on Windows
- Linux GCC>=4.9 or Windows MS Visual Studio 2015 (v140): https://go.microsoft.com/fwlink/?LinkId=532606&clcid=0x409 (or offline ISO image)
- CUDA 8.0: https://developer.nvidia.com/cuda-downloads
- OpenCV 3.x: https://sourceforge.net/projects/opencvlibrary/files/opencv-win/3.2.0/opencv-3.2.0-vc14.exe/download
- or OpenCV 2.4.13: https://sourceforge.net/projects/opencvlibrary/files/opencv-win/2.4.13/opencv-2.4.13.2-vc14.exe/download
- OpenCV allows to show image or video detection in the window and store result to file that specified in command line
-out_filename res.avi
- OpenCV allows to show image or video detection in the window and store result to file that specified in command line
- GPU with CC >= 2.0 if you use CUDA, or GPU CC >= 3.0 if you use cuDNN + CUDA: https://en.wikipedia.org/wiki/CUDA#GPUs_supported
Pre-trained models for different cfg-files can be downloaded from (smaller -> faster & lower quality):
yolo.cfg(194 MB COCO-model) - require 4 GB GPU-RAM: http://pjreddie.com/media/files/yolo.weightsyolo-voc.cfg(194 MB VOC-model) - require 4 GB GPU-RAM: http://pjreddie.com/media/files/yolo-voc.weightstiny-yolo.cfg(60 MB COCO-model) - require 1 GB GPU-RAM: http://pjreddie.com/media/files/tiny-yolo.weightstiny-yolo-voc.cfg(60 MB VOC-model) - require 1 GB GPU-RAM: http://pjreddie.com/media/files/tiny-yolo-voc.weightsyolo9000.cfg(186 MB Yolo9000-model) - require 4 GB GPU-RAM: http://pjreddie.com/media/files/yolo9000.weights
Put it near compiled: darknet.exe
You can get cfg-files by path: darknet/cfg/

Others: https://www.youtube.com/channel/UC7ev3hNVkx4DzZ3LO19oebg
darknet_voc.cmd- initialization with 194 MB VOC-model yolo-voc.weights & yolo-voc.cfg and waiting for entering the name of the image filedarknet_demo_voc.cmd- initialization with 194 MB VOC-model yolo-voc.weights & yolo-voc.cfg and play your video file which you must rename to: test.mp4darknet_demo_store.cmd- initialization with 194 MB VOC-model yolo-voc.weights & yolo-voc.cfg and play your video file which you must rename to: test.mp4, and store result to: res.avidarknet_net_cam_voc.cmd- initialization with 194 MB VOC-model, play video from network video-camera mjpeg-stream (also from you phone)darknet_web_cam_voc.cmd- initialization with 194 MB VOC-model, play video from Web-Camera number #0darknet_coco_9000.cmd- initialization with 186 MB Yolo9000 COCO-model, and show detection on the image: dog.jpgdarknet_coco_9000_demo.cmd- initialization with 186 MB Yolo9000 COCO-model, and show detection on the video (if it is present): street4k.mp4, and store result to: res.avi
On Linux use ./darknet instead of darknet.exe, like this:./darknet detector test ./cfg/coco.data ./cfg/yolo.cfg ./yolo.weights
- 194 MB COCO-model - image:
darknet.exe detector test data/coco.data yolo.cfg yolo.weights -i 0 -thresh 0.2 - Alternative method 194 MB COCO-model - image:
darknet.exe detect yolo.cfg yolo.weights -i 0 -thresh 0.2 - 194 MB VOC-model - image:
darknet.exe detector test data/voc.data yolo-voc.cfg yolo-voc.weights -i 0 - 194 MB COCO-model - video:
darknet.exe detector demo data/coco.data yolo.cfg yolo.weights test.mp4 -i 0 - 194 MB VOC-model - video:
darknet.exe detector demo data/voc.data yolo-voc.cfg yolo-voc.weights test.mp4 -i 0 - 194 MB COCO-model - save result to the file res.avi:
darknet.exe detector demo data/coco.data yolo.cfg yolo.weights test.mp4 -i 0 -out_filename res.avi - 194 MB VOC-model - save result to the file res.avi:
darknet.exe detector demo data/voc.data yolo-voc.cfg yolo-voc.weights test.mp4 -i 0 -out_filename res.avi - Alternative method 194 MB VOC-model - video:
darknet.exe yolo demo yolo-voc.cfg yolo-voc.weights test.mp4 -i 0 - 60 MB VOC-model for video:
darknet.exe detector demo data/voc.data tiny-yolo-voc.cfg tiny-yolo-voc.weights test.mp4 -i 0 - 194 MB COCO-model for net-videocam - Smart WebCam:
darknet.exe detector demo data/coco.data yolo.cfg yolo.weights http://192.168.0.80:8080/video?dummy=param.mjpg -i 0 - 194 MB VOC-model for net-videocam - Smart WebCam:
darknet.exe detector demo data/voc.data yolo-voc.cfg yolo-voc.weights http://192.168.0.80:8080/video?dummy=param.mjpg -i 0 - 194 MB VOC-model - WebCamera #0:
darknet.exe detector demo data/voc.data yolo-voc.cfg yolo-voc.weights -c 0 - 186 MB Yolo9000 - image:
darknet.exe detector test cfg/combine9k.data yolo9000.cfg yolo9000.weights - 186 MB Yolo9000 - video:
darknet.exe detector demo cfg/combine9k.data yolo9000.cfg yolo9000.weights test.mp4 - To process a list of images
image_list.txtand save results of detection toresult.txtuse:
darknet.exe detector test data/voc.data yolo-voc.cfg yolo-voc.weights < image_list.txt > result.txtYou can comment this line so that each image does not require pressing the button ESC: https://github.com/AlexeyAB/darknet/blob/6ccb41808caf753feea58ca9df79d6367dedc434/src/detector.c#L509
-
Download for Android phone mjpeg-stream soft: IP Webcam / Smart WebCam
- Smart WebCam - preferably: https://play.google.com/store/apps/details?id=com.acontech.android.SmartWebCam2
- IP Webcam: https://play.google.com/store/apps/details?id=com.pas.webcam
-
Connect your Android phone to computer by WiFi (through a WiFi-router) or USB
-
Start Smart WebCam on your phone
-
Replace the address below, on shown in the phone application (Smart WebCam) and launch:
- 194 MB COCO-model:
darknet.exe detector demo data/coco.data yolo.cfg yolo.weights http://192.168.0.80:8080/video?dummy=param.mjpg -i 0 - 194 MB VOC-model:
darknet.exe detector demo data/voc.data yolo-voc.cfg yolo-voc.weights http://192.168.0.80:8080/video?dummy=param.mjpg -i 0
Just do make in the darknet directory.
Before make, you can set such options in the Makefile: link
GPU=1to build with CUDA to accelerate by using GPU (CUDA should be in/use/local/cuda)CUDNN=1to build with cuDNN v5/v6 to accelerate training by using GPU (cuDNN should be in/usr/local/cudnn)OPENCV=1to build with OpenCV 3.x/2.4.x - allows to detect on video files and video streams from network cameras or web-camsDEBUG=1to bould debug version of YoloOPENMP=1to build with OpenMP support to accelerate Yolo by using multi-core CPULIBSO=1to build a librarydarknet.soand binary runable fileuselibthat uses this library. Or you can try to run soLD_LIBRARY_PATH=./:$LD_LIBRARY_PATH ./uselib test.mp4How to use this SO-library from your own code - you can look at C++ example: https://github.com/AlexeyAB/darknet/blob/master/src/yolo_console_dll.cpp
-
If you have MSVS 2015, CUDA 8.0 and OpenCV 3.0 (with paths:
C:\opencv_3.0\opencv\build\include&C:\opencv_3.0\opencv\build\x64\vc14\lib), then start MSVS, openbuild\darknet\darknet.sln, set x64 and Release, and do the: Build -> Build darknet1.1. Find files
opencv_world320.dllandopencv_ffmpeg320_64.dllinC:\opencv_3.0\opencv\build\x64\vc14\binand put it near withdarknet.exe -
If you have other version of CUDA (not 8.0) then open
build\darknet\darknet.vcxprojby using Notepad, find 2 places with "CUDA 8.0" and change it to your CUDA-version, then do step 1 -
If you don't have GPU, but have MSVS 2015 and OpenCV 3.0 (with paths:
C:\opencv_3.0\opencv\build\include&C:\opencv_3.0\opencv\build\x64\vc14\lib), then start MSVS, openbuild\darknet\darknet_no_gpu.sln, set x64 and Release, and do the: Build -> Build darknet -
If you have OpenCV 2.4.13 instead of 3.0 then you should change pathes after
\darknet.slnis opened4.1 (right click on project) -> properties -> C/C++ -> General -> Additional Include Directories:
C:\opencv_2.4.13\opencv\build\include4.2 (right click on project) -> properties -> Linker -> General -> Additional Library Directories:
C:\opencv_2.4.13\opencv\build\x64\vc14\lib -
If you want to build with CUDNN to speed up then:
-
download and install cuDNN 6.0 for CUDA 8.0: https://developer.nvidia.com/cudnn
-
add Windows system variable
cudnnwith path to CUDNN: https://hsto.org/files/a49/3dc/fc4/a493dcfc4bd34a1295fd15e0e2e01f26.jpg -
open
\darknet.sln-> (right click on project) -> properties -> C/C++ -> Preprocessor -> Preprocessor Definitions, and add at the beginning of line:CUDNN;
-
Also, you can to create your own darknet.sln & darknet.vcxproj, this example for CUDA 8.0 and OpenCV 3.0
Then add to your created project:
- (right click on project) -> properties -> C/C++ -> General -> Additional Include Directories, put here:
C:\opencv_3.0\opencv\build\include;..\..\3rdparty\include;%(AdditionalIncludeDirectories);$(CudaToolkitIncludeDir);$(cudnn)\include
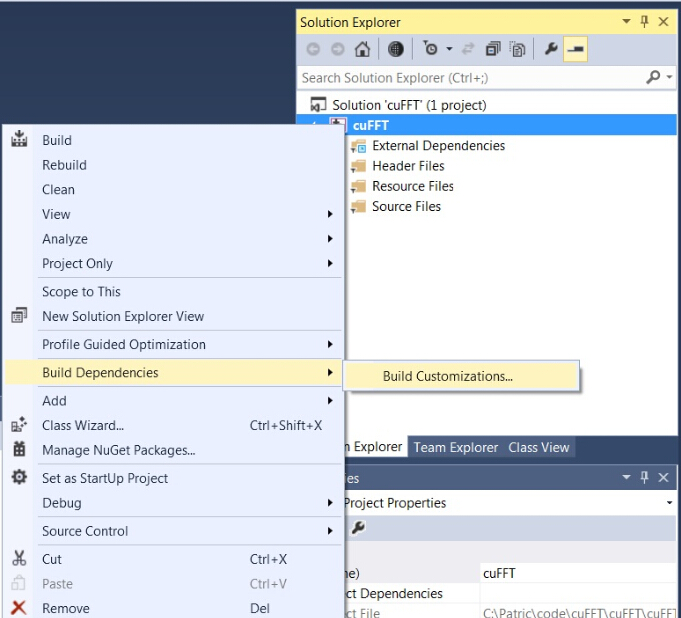
- (right click on project) -> Build dependecies -> Build Customizations -> set check on CUDA 8.0 or what version you have - for example as here: http://devblogs.nvidia.com/parallelforall/wp-content/uploads/2015/01/VS2013-R-5.jpg
- add to project all .c & .cu files from
\src - (right click on project) -> properties -> Linker -> General -> Additional Library Directories, put here:
C:\opencv_3.0\opencv\build\x64\vc14\lib;$(CUDA_PATH)lib\$(PlatformName);$(cudnn)\lib\x64;%(AdditionalLibraryDirectories)
- (right click on project) -> properties -> Linker -> Input -> Additional dependecies, put here:
..\..\3rdparty\lib\x64\pthreadVC2.lib;cublas.lib;curand.lib;cudart.lib;cudnn.lib;%(AdditionalDependencies)
- (right click on project) -> properties -> C/C++ -> Preprocessor -> Preprocessor Definitions
OPENCV;_TIMESPEC_DEFINED;_CRT_SECURE_NO_WARNINGS;_CRT_RAND_S;WIN32;NDEBUG;_CONSOLE;_LIB;%(PreprocessorDefinitions)
-
open file:
\src\detector.cand check lines#pragmaand#incluefor OpenCV. -
compile to .exe (X64 & Release) and put .dll-s near with .exe:
-
pthreadVC2.dll, pthreadGC2.dllfrom \3rdparty\dll\x64 -
cusolver64_80.dll, curand64_80.dll, cudart64_80.dll, cublas64_80.dll- 80 for CUDA 8.0 or your version, from C:\Program Files\NVIDIA GPU Computing Toolkit\CUDA\v8.0\bin -
For OpenCV 3.X:
opencv_world320.dllandopencv_ffmpeg320_64.dllfromC:\opencv_3.0\opencv\build\x64\vc14\bin -
For OpenCV 2.4.13:
opencv_core2413.dll,opencv_highgui2413.dllandopencv_ffmpeg2413_64.dllfromC:\opencv_2.4.13\opencv\build\x64\vc14\bin
-
-
Download pre-trained weights for the convolutional layers (76 MB): http://pjreddie.com/media/files/darknet19_448.conv.23 and put to the directory
build\darknet\x64 -
Download The Pascal VOC Data and unpack it to directory
build\darknet\x64\data\vocwill be created dirbuild\darknet\x64\data\voc\VOCdevkit\:- http://pjreddie.com/media/files/VOCtrainval_11-May-2012.tar
- http://pjreddie.com/media/files/VOCtrainval_06-Nov-2007.tar
- http://pjreddie.com/media/files/VOCtest_06-Nov-2007.tar
2.1 Download file
voc_label.pyto dirbuild\darknet\x64\data\voc: http://pjreddie.com/media/files/voc_label.py -
Download and install Python for Windows: https://www.python.org/ftp/python/3.5.2/python-3.5.2-amd64.exe
-
Run command:
python build\darknet\x64\data\voc\voc_label.py(to generate files: 2007_test.txt, 2007_train.txt, 2007_val.txt, 2012_train.txt, 2012_val.txt) -
Run command:
type 2007_train.txt 2007_val.txt 2012_*.txt > train.txt -
Set
batch=64andsubdivisions=8in the fileyolo-voc.2.0.cfg: link -
Start training by using
train_voc.cmdor by using the command line:darknet.exe detector train data/voc.data yolo-voc.2.0.cfg darknet19_448.conv.23
If required change pathes in the file build\darknet\x64\data\voc.data
More information about training by the link: http://pjreddie.com/darknet/yolo/#train-voc
-
Train it first on 1 GPU for like 1000 iterations:
darknet.exe detector train data/voc.data yolo-voc.2.0.cfg darknet19_448.conv.23 -
Then stop and by using partially-trained model
/backup/yolo-voc_1000.weightsrun training with multigpu (up to 4 GPUs):darknet.exe detector train data/voc.data yolo-voc.2.0.cfg /backup/yolo-voc_1000.weights -gpus 0,1,2,3
https://groups.google.com/d/msg/darknet/NbJqonJBTSY/Te5PfIpuCAAJ
- Create file
yolo-obj.cfgwith the same content as inyolo-voc.2.0.cfg(or copyyolo-voc.2.0.cfgtoyolo-obj.cfg)and:
- change line batch to
batch=64 - change line subdivisions to
subdivisions=8 - change line
classes=20to your number of objects - change line #237 from
filters=125to: filters=(classes + 5)*5
(Generally filters depends on the classes, num and coords, i.e. equal to (classes + coords + 1)*num)
So for example, for 2 objects, your file yolo-obj.cfg should differ from yolo-voc.2.0.cfg in such lines:
[convolutional]
filters=35

[region]
classes=2
-
Create file
obj.namesin the directorybuild\darknet\x64\data\, with objects names - each in new line -
Create file
obj.datain the directorybuild\darknet\x64\data\, containing (where classes = number of objects):
classes= 2
train  = data/train.txt
valid  = data/test.txt
names = data/obj.names
backup = backup/
-
Put image-files (.jpg) of your objects in the directory
build\darknet\x64\data\obj\ -
Create
.txt-file for each.jpg-image-file - in the same directory and with the same name, but with.txt-extension, and put to file: object number and object coordinates on this image, for each object in new line:<object-class> <x> <y> <width> <height>
Where:
<object-class>- integer number of object from0to(classes-1)<x> <y> <width> <height>- float values relative to width and height of image, it can be equal from 0.0 to 1.0- for example:
<x> = <absolute_x> / <image_width>or<height> = <absolute_height> / <image_height> - atention:
<x> <y>- are center of rectangle (are not top-left corner)
For example for img1.jpg you should create img1.txt containing:
1 0.716797 0.395833 0.216406 0.147222
0 0.687109 0.379167 0.255469 0.158333
1 0.420312 0.395833 0.140625 0.166667
- Create file
train.txtin directorybuild\darknet\x64\data\, with filenames of your images, each filename in new line, with path relative todarknet.exe, for example containing:
data/obj/img1.jpg
data/obj/img2.jpg
data/obj/img3.jpg
-
Download pre-trained weights for the convolutional layers (76 MB): http://pjreddie.com/media/files/darknet19_448.conv.23 and put to the directory
build\darknet\x64 -
Start training by using the command line:
darknet.exe detector train data/obj.data yolo-obj.cfg darknet19_448.conv.23(file
yolo-obj_xxx.weightswill be saved to thebuild\darknet\x64\backup\for each 100 iterations until 1000 iterations has been reached, and after for each 1000 iterations) -
After training is complete - get result
yolo-obj_final.weightsfrom pathbuild\darknet\x64\backup\
-
After each 1000 iterations you can stop and later start training from this point. For example, after 2000 iterations you can stop training, and later just copy
yolo-obj_2000.weightsfrombuild\darknet\x64\backup\tobuild\darknet\x64\and start training using:darknet.exe detector train data/obj.data yolo-obj.cfg yolo-obj_2000.weights -
Also you can get result earlier than all 45000 iterations.
Usually sufficient 2000 iterations for each class(object). But for a more precise definition when you should stop training, use the following manual:
- During training, you will see varying indicators of error, and you should stop when no longer decreases 0.060730 avg:
Region Avg IOU: 0.798363, Class: 0.893232, Obj: 0.700808, No Obj: 0.004567, Avg Recall: 1.000000, count: 8 Region Avg IOU: 0.800677, Class: 0.892181, Obj: 0.701590, No Obj: 0.004574, Avg Recall: 1.000000, count: 8
9002: 0.211667, 0.060730 avg, 0.001000 rate, 3.868000 seconds, 576128 images Loaded: 0.000000 seconds
- 9002 - iteration number (number of batch)
- 0.060730 avg - average loss (error) - the lower, the better
When you see that average loss 0.xxxxxx avg no longer decreases at many iterations then you should stop training.
- Once training is stopped, you should take some of last
.weights-files fromdarknet\build\darknet\x64\backupand choose the best of them:
For example, you stopped training after 9000 iterations, but the best result can give one of previous weights (7000, 8000, 9000). It can happen due to overfitting. Overfitting - is case when you can detect objects on images from training-dataset, but can't detect ojbects on any others images. You should get weights from Early Stopping Point:

To get weights from Early Stopping Point:
2.1. At first, in your file obj.data you must specify the path to the validation dataset valid = valid.txt (format of valid.txt as in train.txt), and if you haven't validation images, just copy data\train.txt to data\valid.txt.
2.2 If training is stopped after 9000 iterations, to validate some of previous weights use this commands:
darknet.exe detector recall data/obj.data yolo-obj.cfg backup\yolo-obj_7000.weightsdarknet.exe detector recall data/obj.data yolo-obj.cfg backup\yolo-obj_8000.weightsdarknet.exe detector recall data/obj.data yolo-obj.cfg backup\yolo-obj_9000.weights
And comapre last output lines for each weights (7000, 8000, 9000):
7586 7612 7689 RPs/Img: 68.23 IOU: 77.86% Recall:99.00%
- IOU - the bigger, the better (says about accuracy) - better to use
- Recall - the bigger, the better (says about accuracy) - actually Yolo calculates true positives, so it shouldn't be used
For example, bigger IOU gives weights yolo-obj_8000.weights - then use this weights for detection.

Example of custom object detection: darknet.exe detector test data/obj.data yolo-obj.cfg yolo-obj_8000.weights
 |
 |
|---|
- Before training:
-
set flag
random=1in your.cfg-file - it will increase precision by training Yolo for different resolutions: [link]https://github.com/AlexeyAB/darknet/blob/master/cfg/yolo-voc.2.0.cfg#L244) -
desirable that your training dataset include images with objects at diffrent: scales, rotations, lightings, from different sides
- After training - for detection:
-
Increase network-resolution by set in your
.cfg-file (height=608andwidth=608) or (height=832andwidth=832) or (any value multiple of 32) - this increases the precision and makes it possible to detect small objects: link- you do not need to train the network again, just use
.weights-file already trained for 416x416 resolution - if error
Out of memoryoccurs then in.cfg-file you should increasesubdivisions=16, 32 or 64: link
- you do not need to train the network again, just use
Here you can find repository with GUI-software for marking bounded boxes of objects and generating annotation files for Yolo v2: https://github.com/AlexeyAB/Yolo_mark
With example of: train.txt, obj.names, obj.data, yolo-obj.cfg, air1-6.txt, bird1-4.txt for 2 classes of objects (air, bird) and train_obj.cmd with example how to train this image-set with Yolo v2
-
To compile Yolo as C++ DLL-file
yolo_cpp_dll.dll- open in MSVS2015 filebuild\darknet\yolo_cpp_dll.sln, set x64 and Release, and do the: Build -> Build yolo_cpp_dll- You should have installed CUDA 8.0
- To use cuDNN do: (right click on project) -> properties -> C/C++ -> Preprocessor -> Preprocessor Definitions, and add at the beginning of line:
CUDNN;
-
To use Yolo as DLL-file in your C++ console application - open in MSVS2015 file
build\darknet\yolo_console_dll.sln, set x64 and Release, and do the: Build -> Build yolo_console_dll- you can run your console application from Windows Explorer
build\darknet\x64\yolo_console_dll.exe - or you can run from MSVS2015 (before this - you should copy 2 files
yolo-voc.cfgandyolo-voc.weightsto the directorybuild\darknet\) - after launching your console application and entering the image file name - you will see info for each object:
<obj_id> <left_x> <top_y> <width> <height> <probability> - to use simple OpenCV-GUI you should uncomment line
//#define OPENCVinyolo_console_dll.cpp-file: link - you can see source code of simple example for detection on the video file: link
- you can run your console application from Windows Explorer
yolo_cpp_dll.dll-API: link
class Detector {
public:
	Detector(std::string cfg_filename, std::string weight_filename, int gpu_id = 0);
	~Detector();

	std::vector<bbox_t> detect(std::string image_filename, float thresh = 0.2, bool use_mean = false);
	std::vector<bbox_t> detect(image_t img, float thresh = 0.2, bool use_mean = false);
	static image_t load_image(std::string image_filename);
	static void free_image(image_t m);

#ifdef OPENCV
	std::vector<bbox_t> detect(cv::Mat mat, float thresh = 0.2, bool use_mean = false);
#endif
};


