![]()


Unofficial OTRS 6 Free docker image. This repository contains the Dockerfiles and all other files needed to build and run the container.
We also include a MariaDB Dockerfile for a pre-configured image with the required database settings.
The OTRS image doesn't include a SMTP service, decoupling applications into multiple containers makes it much easier to scale horizontally and reuse containers. If you don't have access to a SMTP server, you can instead link against this SMTP relay postfix container.
These images are based on the official CentOS images and include the latest OTRS version. Older images will be tagged with the OTRS version they run.
Note:
- OTRS 5 image sources are still available in otrs-5_0_x branch.
- OTRS 4 image sources are still available in otrs-4_0_x branch.
If you want to follow the development of this project check out my blog.
We use docker-compose to build the images. Clone this repo and then:
cd docker-otrs
sudo docker-compose build
This command will build all the images and pull the missing ones like the SMTP relay. This SMTP relay container has its own configuration, you need to specify the environment variables for the SMTP account that will be used to send OTRS email notifications. Please take a look at the documentation.
By default, when the container is run it will load a default vanilla OTRS installation (OTRS_INSTALL=no) that is ready to be configured as you need. However, you can load a backup or run the installer by defining one of these environment variables:
OTRS_INSTALL=restoreWill restore the backup specified byOTRS_BACKUP_DATEenvironment variable. See bellow for more details on backup and restore procedures.OTRS_DROP_DATABASE=yesWill drop the otrs database it if already exists (by default the container will fail if the database already exists).
You need to mount that backups volume from somewhere, it can be from another volume (using --volumes-from) or mounting a host volume which contains the backup files.
-
OTRS_INSTALL=yesWill run the installer which you can access at:
If you are running the container remotely, replace localhost with the server's hostname.
There are also some other environment variables that can be set to customize the default install:
OTRS_HOSTNAMESets the container's hostname (auto-generated if not defined).OTRS_DB_NAMEName of database to use. Default isotrs.OTRS_DB_HOSTHostname or IP address of the database server. Default ismariadb.OTRS_DB_PORTPort of the database server. Default is3306.OTRS_DB_USERDatabase user. Default isotrs.OTRS_DB_PASSWORDotrs user database password. Default password ischangeme.OTRS_ROOT_PASSWORDroot@localhost user password. Default password ischangeme.MYSQL_ROOT_PASSWORDDatabase root password so it can be setup. Default password ischangeme.OTRS_LANGUAGESet the default language for both agent and customer interfaces (For example, "es" for spanish).OTRS_TIMEZONEto set the default timezone.OTRS_TICKET_COUNTERSets the starting point for the ticket counter.OTRS_NUMBER_GENERATORSets the ticket number generator, possible values are : DateChecksum, Date, AutoIncrement or Random.SHOW_OTRS_LOGOTo disable the OTRS ASCII logo at container startup.
Those environment variables is what you can configure by running the installer for a default install, plus other useful ones.
- The included docker-compose file uses
host mounted data containersto store the database and configuration contents outside the containers. Please take a look at thedocker-compose.ymlfile to see the directory mappings and adjust them to your needs. - Any setting set using the previous environment variables cannot be edited later through the web interface, if you need to change them then you need to update it in your docker-compose/env file and restart your container. The reason for this is that OTRS sets as read-only any setting set on
$OTRS_ROOT/Kernel/Config.pm. - For production use there's another
docker-composefile that points to the pre-built images.
Before starting the service you need to configure it: copy the example env file as .env on the same directory as the docker-compose file and configure it as you need (don't forget to configure the SMTP relay section at the end). You can then test the service with docker-compose:
sudo docker-compose -f docker-compose-prod.yml up
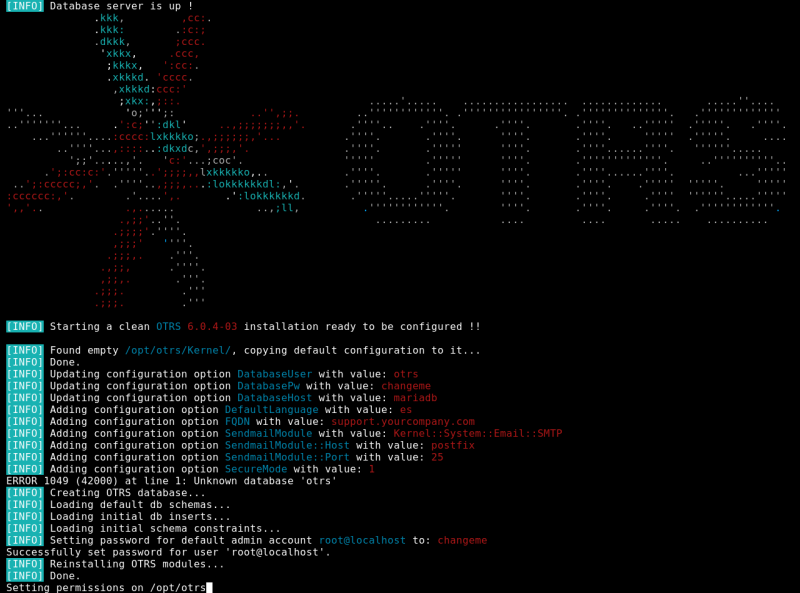
This will pull and bring up all needed containers, link them and mount volumes according
to the docker-compose-prod.yml configuration file. This is a sample output of the boot up process:
The default database password is changeme, to change it, edit the docker-compose.yml file and change the
MYSQL_ROOT_PASSWORD environment variable on the mariadb image definition before
running docker-compose.
To start the containers in production mode the the -d parameter to the previous command:
sudo docker-compose -f docker-compose-prod.yml -p companyotrs up -d
After the containers finish starting up you can access the OTRS system at the following addresses:
http://$OTRS_HOSTNAME/otrs/index.pl
http://$OTRS_HOSTNAME/otrs/customer.pl
If you have installed any additional module, the OTRS container will reinstall them after an upgrade or when a container is removed so they continue working.
The default skins and logos for the agent and customer interfaces can be controlled with the following environment variables:
To set the agent interface skin set OTRS_AGENT_SKIN environment variable, for example:
OTRS_AGENT_SKIN: "ivory"
To set the customer interface skin set OTRS_CUSTOMER_SKIN environment variable, for example:
OTRS_CUSTOMER_SKIN: "ivory"
If you are adding your own skins, the easiest way is create your own Dockerfile inherited from this image and then COPY the skin files there. Take a look at the official documentation on instructions on how to create one. You can also set all the environment variables in there too, for example:
FROM juanluisbaptiste/otrs:latest
MAINTAINER Foo Bar <[email protected]>
ENV OTRS_AGENT_SKIN mycompany
ENV OTRS_AGENT_LOGO skins/Agent/mycompany/img/logo.png
ENV OTRS_CUSTOMER_LOGO skins/Customer/default/img/logo_customer.png

COPY skins/ $SKINS_PATH/
RUN mkdir -p $OTRS_ROOT/Kernel/Config/Files/
COPY skins/Agent/MyCompanySkin.xml $OTRS_ROOT/Kernel/Config/Files/
By default, automated backups are done daily at 6:00 AM. Backups are compressed using gzip and are stored in /var/otrs/backups. If you mounted that directory as a host volume then you will have access to the backups files from the docker host server.
You can control the backup behavior with the following variables:
OTRS_BACKUP_TIME: Sets the backup excecution time, in cron format. If set to disable automated backups will be disabled.OTRS_BACKUP_TYPE: Sets the type of backup, it receives the same values as the OTRS backup script:- fullbackup: Saves the database and the whole OTRS home directory (except /var/tmp and cache directories). This is the default.
- nofullbackup: Saves the database and the whole OTRS home directory (except /var/tmp and cache directories).
- dbonly: Only the database will be saved.
OTRS_BACKUP_COMPRESSION: Sets the backup compression method to use, it receives the same values as the OTRS backup script (gzip|bzip2). The default is gzip.OTRS_BACKUP_ROTATION: Sets the number of days to keep the backup files. The default is 30 days.
For example, to change the backup time to database only backups, compress them using bzip2 and run twice each day set those variables like this:
OTRS_BACKUP_TYPE=dbonly
OTRS_BACKUP_TIME="0 12,12 * * *"
OTRS_BACKUP_COMPRESSION=bzip2
To restore an OTRS backup file (not necessarily created with this container) the following environment variables must be added:
OTRS_INSTALL=restoreWill restore the backup specified byOTRS_BACKUP_DATEenvironment variable.OTRS_BACKUP_DATEis the backup name to restore. It can have two values:- Uncompressed backup: A directory with its name in the same date_time format that the OTRS backup script uses, for example
OTRS_BACKUP_DATE="2015-05-26_00-32"with the backup files inside. A backup file created with this image or with any OTRS installation will work (the backup script creates the directory with that name). This is useful when migrating from another OTRS install to this container. - Compressed backup file: A gzip tarball of the previously described directory with the backup files. These tarballs are created by this container when doing a backup.
- Uncompressed backup: A directory with its name in the same date_time format that the OTRS backup script uses, for example
Backups must be inside the /var/otrs/backups directory (host mounted by default in the docker-compose file).
There are two types of upgrades When upgrading OTRS: minor and major version upgrades. This section describes how to upgrade on each case.
For example from 6.0.1 to 6.0.5, just pull the new image and restart your services:
sudo docker-compose -f docker-compose-prod.yml pull
sudo docker-compose -f docker-compose-prod.yml stop
sudo docker-compose -f docker-compose-prod.yml rm -f -v
sudo docker-compose -f docker-compose-prod.yml up
This upgrade option will do a major version upgrade of OTRS. For example from OTRS 5.0x to 6.0.x. The upgrade process will also upgrade installed packages only from the official repository.
To do a major version upgrade, follow these steps:
- Set the
OTRS_UPGRADE=yesenvironment variable in the docker-compose file - Replace the current image version tag with the new one on the image: configuration option. For example, change:
image: juanluisbaptiste/otrs:latest-5x
with:
image: juanluisbaptiste/otrs:latest
- Pull the release image you are upgrading to:
sudo docker-compose -f docker-compose-prod.yml pull
- Restart the containers:
    sudo docker-compose -f docker-compose-prod.yml stop
    sudo docker-compose -f docker-compose-prod.yml rm -f -v
    sudo docker-compose -f docker-compose-prod.yml up
The upgrade procedure will pause the boot process for 10 seconds to give the user the chance to cancel the upgrade.
The first thing done by the upgrade process is to do a backup of the current version before starting with the upgrade process. Then it will follow the official upgrade instructions (run db upgrade script and upgrade modules, software was updated when pulling the new image).
The upgrade process will upgrade official modules (FAQ, Survey, etc). If you have additional 3rd party modules you will need to manually update them in the Package Manager.
If you have custom skins or additional XML configuration files you will have to manually update them if needed.
- If after upgrade you can't login with any account, delete the cookies for your OTRS website and try again.
- If you get an 500 error after login it could mean that a module could not be automatically upgraded. Check the container output and look for the messages about modules upgrade.
Remember to remove the OTRS_UPGRADE variable from the docker-compose file afterwards.
If you are having issues starting up the containers you can set OTRS_DEBUG=yes to print a more verbose container startup output. It will also install some tools to aid with troubleshooting like telnet and dig.


