Code Monkey home page Code Monkey logo

pyboard's Introduction

Unix CI badge STM32 CI badge Docs CI badge codecov

The MicroPython project

MicroPython Logo

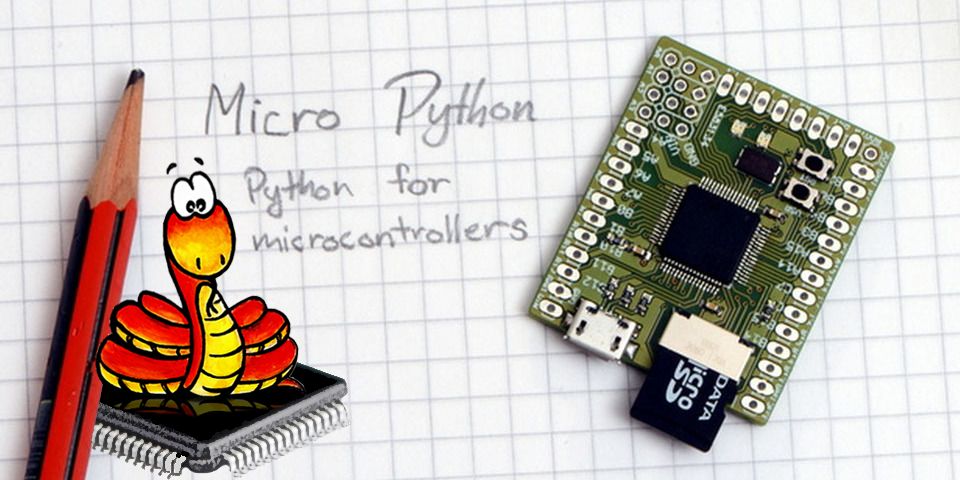
This is the MicroPython project, which aims to put an implementation of Python 3.x on microcontrollers and small embedded systems. You can find the official website at micropython.org.

WARNING: this project is in beta stage and is subject to changes of the code-base, including project-wide name changes and API changes.

MicroPython implements the entire Python 3.4 syntax (including exceptions, with, yield from, etc., and additionally async/await keywords from Python 3.5 and some select features from later versions). The following core datatypes are provided: str(including basic Unicode support), bytes, bytearray, tuple, list, dict, set, frozenset, array.array, collections.namedtuple, classes and instances. Builtin modules include os, sys, time, re, and struct, etc. Some ports have support for _thread module (multithreading), socket and ssl for networking, and asyncio. Note that only a subset of Python 3 functionality is implemented for the data types and modules.

MicroPython can execute scripts in textual source form (.py files) or from precompiled bytecode (.mpy files), in both cases either from an on-device filesystem or "frozen" into the MicroPython executable.

MicroPython also provides a set of MicroPython-specific modules to access hardware-specific functionality and peripherals such as GPIO, Timers, ADC, DAC, PWM, SPI, I2C, CAN, Bluetooth, and USB.

Getting started

See the online documentation for the API reference and information about using MicroPython and information about how it is implemented.

We use GitHub Discussions as our forum, and Discord for chat. These are great places to ask questions and advice from the community or to discuss your MicroPython-based projects.

For bugs and feature requests, please raise an issue and follow the templates there.

For information about the MicroPython pyboard, the officially supported board from the original Kickstarter campaign, see the schematics and pinouts and documentation.

Contributing

MicroPython is an open-source project and welcomes contributions. To be productive, please be sure to follow the Contributors' Guidelines and the Code Conventions. Note that MicroPython is licenced under the MIT license, and all contributions should follow this license.

About this repository

This repository contains the following components:

  • py/ -- the core Python implementation, including compiler, runtime, and core library.
  • mpy-cross/ -- the MicroPython cross-compiler which is used to turn scripts into precompiled bytecode.
  • ports/ -- platform-specific code for the various ports and architectures that MicroPython runs on.
  • lib/ -- submodules for external dependencies.
  • tests/ -- test framework and test scripts.
  • docs/ -- user documentation in Sphinx reStructuredText format. This is used to generate the online documentation.
  • extmod/ -- additional (non-core) modules implemented in C.
  • tools/ -- various tools, including the pyboard.py module.
  • examples/ -- a few example Python scripts.

"make" is used to build the components, or "gmake" on BSD-based systems. You will also need bash, gcc, and Python 3.3+ available as the command python3 (if your system only has Python 2.7 then invoke make with the additional option PYTHON=python2). Some ports (rp2 and esp32) additionally use CMake.

Supported platforms & architectures

MicroPython runs on a wide range of microcontrollers, as well as on Unix-like (including Linux, BSD, macOS, WSL) and Windows systems.

Microcontroller targets can be as small as 256kiB flash + 16kiB RAM, although devices with at least 512kiB flash + 128kiB RAM allow a much more full-featured experience.

The Unix and Windows ports allow both development and testing of MicroPython itself, as well as providing lightweight alternative to CPython on these platforms (in particular on embedded Linux systems).

The "minimal" port provides an example of a very basic MicroPython port and can be compiled as both a standalone Linux binary as well as for ARM Cortex M4. Start with this if you want to port MicroPython to another microcontroller. Additionally the "bare-arm" port is an example of the absolute minimum configuration, and is used to keep track of the code size of the core runtime and VM.

In addition, the following ports are provided in this repository:

  • cc3200 -- Texas Instruments CC3200 (including PyCom WiPy).
  • esp32 -- Espressif ESP32 SoC (including ESP32S2, ESP32S3, ESP32C3).
  • esp8266 -- Espressif ESP8266 SoC.
  • mimxrt -- NXP m.iMX RT (including Teensy 4.x).
  • nrf -- Nordic Semiconductor nRF51 and nRF52.
  • pic16bit -- Microchip PIC 16-bit.
  • powerpc -- IBM PowerPC (including Microwatt)
  • qemu-arm -- QEMU-based Arm emulated target (for testing)
  • qemu-riscv -- QEMU-based RISC-V emulated target (for testing)
  • renesas-ra -- Renesas RA family.
  • rp2 -- Raspberry Pi RP2040 (including Pico and Pico W).
  • samd -- Microchip (formerly Atmel) SAMD21 and SAMD51.
  • stm32 -- STMicroelectronics STM32 family (including F0, F4, F7, G0, G4, H7, L0, L4, WB)
  • webassembly -- Emscripten port targeting browsers and NodeJS.
  • zephyr -- Zephyr RTOS.

The MicroPython cross-compiler, mpy-cross

Most ports require the MicroPython cross-compiler to be built first. This program, called mpy-cross, is used to pre-compile Python scripts to .mpy files which can then be included (frozen) into the firmware/executable for a port. To build mpy-cross use:

$ cd mpy-cross
$ make

External dependencies

The core MicroPython VM and runtime has no external dependencies, but a given port might depend on third-party drivers or vendor HALs. This repository includes several submodules linking to these external dependencies. Before compiling a given port, use

$ cd ports/name
$ make submodules

to ensure that all required submodules are initialised.

pyboard's People

Contributors

dpgeorge avatar myrual avatar

Stargazers

 avatar  avatar  avatar  avatar  avatar  avatar  avatar  avatar  avatar  avatar  avatar  avatar  avatar  avatar  avatar  avatar  avatar  avatar  avatar  avatar  avatar  avatar  avatar  avatar  avatar  avatar  avatar  avatar  avatar  avatar  avatar  avatar  avatar  avatar  avatar  avatar  avatar  avatar  avatar  avatar  avatar  avatar  avatar  avatar  avatar  avatar  avatar  avatar  avatar  avatar  avatar  avatar  avatar  avatar  avatar  avatar  avatar  avatar  avatar  avatar  avatar  avatar  avatar  avatar  avatar  avatar  avatar  avatar  avatar  avatar  avatar  avatar  avatar  avatar  avatar  avatar  avatar  avatar  avatar  avatar  avatar  avatar  avatar  avatar  avatar  avatar  avatar  avatar  avatar  avatar  avatar  avatar  avatar  avatar  avatar  avatar  avatar  avatar  avatar  avatar

Watchers

 avatar  avatar  avatar  avatar  avatar  avatar  avatar  avatar  avatar  avatar  avatar  avatar  avatar  avatar  avatar  avatar  avatar  avatar  avatar  avatar  avatar  avatar  avatar  avatar  avatar  avatar  avatar  avatar  avatar  avatar  avatar  avatar  avatar  avatar  avatar  avatar  avatar  avatar  avatar  avatar  avatar  avatar  avatar  avatar  avatar  avatar  avatar  avatar  avatar  avatar  avatar  avatar  avatar  avatar  avatar  avatar  avatar  avatar  avatar  avatar  avatar  avatar  avatar  avatar  avatar  avatar  avatar  avatar  avatar  avatar  avatar  avatar  avatar  avatar  avatar  avatar  avatar  avatar  avatar  avatar  avatar  avatar  avatar

pyboard's Issues

Last minute changes to pyboard?

It's the eleventh hour (or perhaps the thirteenth!), but there are 2 small things that maybe should be changed before all the boards are made:

  1. Align mounting holes on a 0.1" grid. This requires moving them up/down and out a little bit. Apart from being consistent, it matters if you want to put 2 boards side-by-side and have the mounting holes line up.
  2. Change label of skin pins to start at 0 instead of 1 (eg X0, X1,... instead of X1, X2, ...). Starting at 1 makes sense if they label the physical pin. Starting at 0 makes sense if they label logical port numbers.

Any suggestions?

VIN is connected to VBUS without a diode

VBUS and VIN are both connected to the LDO input, but only VBUS has a diode, if VIN is connected to a lower voltage power supply, say a battery, while USB is connected, current will flow into the battery possibly damaging it, a second diode on VIN making an OR function, could prevent that.

uart using question

hi,i‘m using usart function:uart.write(input) to send message to another pyboard,but the input must be string.
Is there any other function available to send integer format data
thx very much!!!

I2C Pullup Resistors

One project I want to do with my PYB is to interface with DaisyLink bus boards, which are I2C with some frills. DaisyLink puts the pull-ups on the slave boards (switchable), so the pull-ups already fitted to the PYB are a problem (R8, 9, 11, 12). I cannot find a board layout to identify these to remove them - any chance of publishing a component layout?

In a future release, I think it would be better to omit these components as they may also interfere with other uses of these pins, for example as open drain drivers (or a user may want to drive the I2C at 5v.). Omitting R8 and 9 would be a problem for the MMA7660 which I would also prefer was omitted to free these pins and reduce BOM cost - it could be supplied optionally on a shield board. However, if this part is regarded as essential, at least omit R11 and 12.

Maybe when you go into production, you could offer a version with these five components not fitted?

Micropython Board

Hi all,

  1. I want to know how to include micropython in my unix terminal.
  2. Do i require pyboard or micropython board to run the micropython code.
  3. Cant i run the normal print micropython code or similar small kinds of code on terminal

MicroSD card switch connection

I made a copy of the pyboard from the schematic in github, but it would not boot from the SD card. I found an inconsistency between the github schematic and the actual micropython board I purchased.

The PYBv1.0 schematic has the MicroSD card switch connected to PA8 (pin41).
screen shot 2015-04-30 at 01 23 39

The schematic in Eagle has the MicroSD card switch connected to PC13 (pin2).
screen shot 2015-04-30 at 01 21 54

PA13 used as USR_SW conflicts with SW debug

Originally opened by @jevers76: When the software initializes PA13 as an input for USR_SW it's use as SWDIO ends. The chip must be erased before SW debbug can be used again. This makes debugging with a jtag or SW like the stlink 2 difficult. Can the PCB be changed? One alternative to changing the PCB would be to only init the pin when needed by calling some py function.

Images dir

re: micropython/micropython#652 (comment)

Create a images dir for images of the board, related textures, etc...

The mindmap I'm making for the board uses a couple of the images cleaned up from the pdf.
Also these textures could be used for 3D model renders, etc.
I also have a few .ico also for windows customization that would be placed in this dir(with a wiki tut I guess best housed here on how to do)

Please also upload some high res images(photos) of the actual released board also, not just the bland 3D topdown images.

Silkscreen for skin-board position

Hi,

in the present config, I really like the idea that two skin board can be added side-by-side. This allows to add a single board on the X pos, but keeps the access to buttons and LEDs open.
Since both areas are 180deg rotated I believe people might often confuse the correct position of the skin boards.

  1. One could change the pin positions to allow only one position to be valid. However, that would possibly disturb a general usage, where people expect a plain row of headers (e.g. using a bread board)
  2. One could add some silkscreen e.g. a big white area around Y8,Y7,Y6 and resp. around X6,X7,X8 right to the edges of the board and ask skin-board designers to do the same to indicate the right orientation.
  3. A totally different turn would be to use the rear side to add skin boards. If I understood correctly, the rear side is plain now (easier populating of components). Hence one could add skin-boards back to back with the pyboard. Esp., if the configuration is intended for long term usage, one could simply solder a skin board directly back to back to a pyboard. The silk screen area on the rear side should have enough space to indicate the right orientation (might be nice to think of what kind of infos could be squeezed into this side in addition). This method is different to compared to the existing "stack-up" methods. You loose a solid plain surface in case you use a skin, but then, the front side of the pyboard consist only of relatively slim SMD parts and makes already a rather slim front. LEDs and buttons can easily be accessed independently of any additional skin board. E.g. mounted in an enclosure front, LEDs and buttons can be easily access by openings in the enclosure front if needed.
    What would be saved is the relatively large space created by header pins if one decide to solder boards simply back to back together. One drawback however would be a unintended pressing of the buttons in case someone operates the board upside down (e.g. to access the skin board) on a table. However, that might depend on the final height of the USB connector, the SD card reader and other components which might keep the buttons away from the table surface.

Wiki Images Dir

re: micropython/micropython#652 (comment)

I have a few images relating to a tut and wiki images need a place to go.
Hence a wiki_images dir in this or maybe another repo, so that users can upload images for wiki use without cluttering up the main repo.

executable environment

Hi everyone,
Im new to micropython and want to convert python code to micropython. Can simple python script running on unix terminal could be converted to micropython? Also we specify !/usr/bin/env pyhton as executable environment for python to specify it to be python script. Is there a way same for micropython? Please give me guideliness how to convert python to micropython in simple way

PA10 should be low or high durying boot?

In datasheet of STM32F405xx 2.2.13:
The boot loader is located in system memory. It is used to reprogram the Flash memory by
using USART1 (PA9/PA10), USART3 (PC10/PC11 or PB10/PB11), CAN2 (PB5/PB13), USB
OTG FS in Device mode (PA11/PA12) through DFU (device firmware upgrade).

PA10: USART1_RX pull up by R21 100k
PB11: USART3_RX pull up by R12 4k7
PC11: USART3_RX pull up by R13 100k

PB5: CAN2_RX pull down by R20 100k
PB2: BOOT1 pull down by R14 100k

In PYBv10b.pdf
USB DFU requires stable levels on PA10, PB5, PB11 & PC11. PB2 must be low during boot.
R12, R13, R20 & R21 provide stable input levels for DFU.

Recommend Projects

  • React photo React

    A declarative, efficient, and flexible JavaScript library for building user interfaces.

  • Vue.js photo Vue.js

    🖖 Vue.js is a progressive, incrementally-adoptable JavaScript framework for building UI on the web.

  • Typescript photo Typescript

    TypeScript is a superset of JavaScript that compiles to clean JavaScript output.

  • TensorFlow photo TensorFlow

    An Open Source Machine Learning Framework for Everyone

  • Django photo Django

    The Web framework for perfectionists with deadlines.

  • D3 photo D3

    Bring data to life with SVG, Canvas and HTML. 📊📈🎉

Recommend Topics

  • javascript

    JavaScript (JS) is a lightweight interpreted programming language with first-class functions.

  • web

    Some thing interesting about web. New door for the world.

  • server

    A server is a program made to process requests and deliver data to clients.

  • Machine learning

    Machine learning is a way of modeling and interpreting data that allows a piece of software to respond intelligently.

  • Game

    Some thing interesting about game, make everyone happy.

Recommend Org

  • Facebook photo Facebook

    We are working to build community through open source technology. NB: members must have two-factor auth.

  • Microsoft photo Microsoft

    Open source projects and samples from Microsoft.

  • Google photo Google

    Google ❤️ Open Source for everyone.

  • D3 photo D3

    Data-Driven Documents codes.